background image

Instruction Manual

45

Ig]b[h\YAcXYa:YUhifY

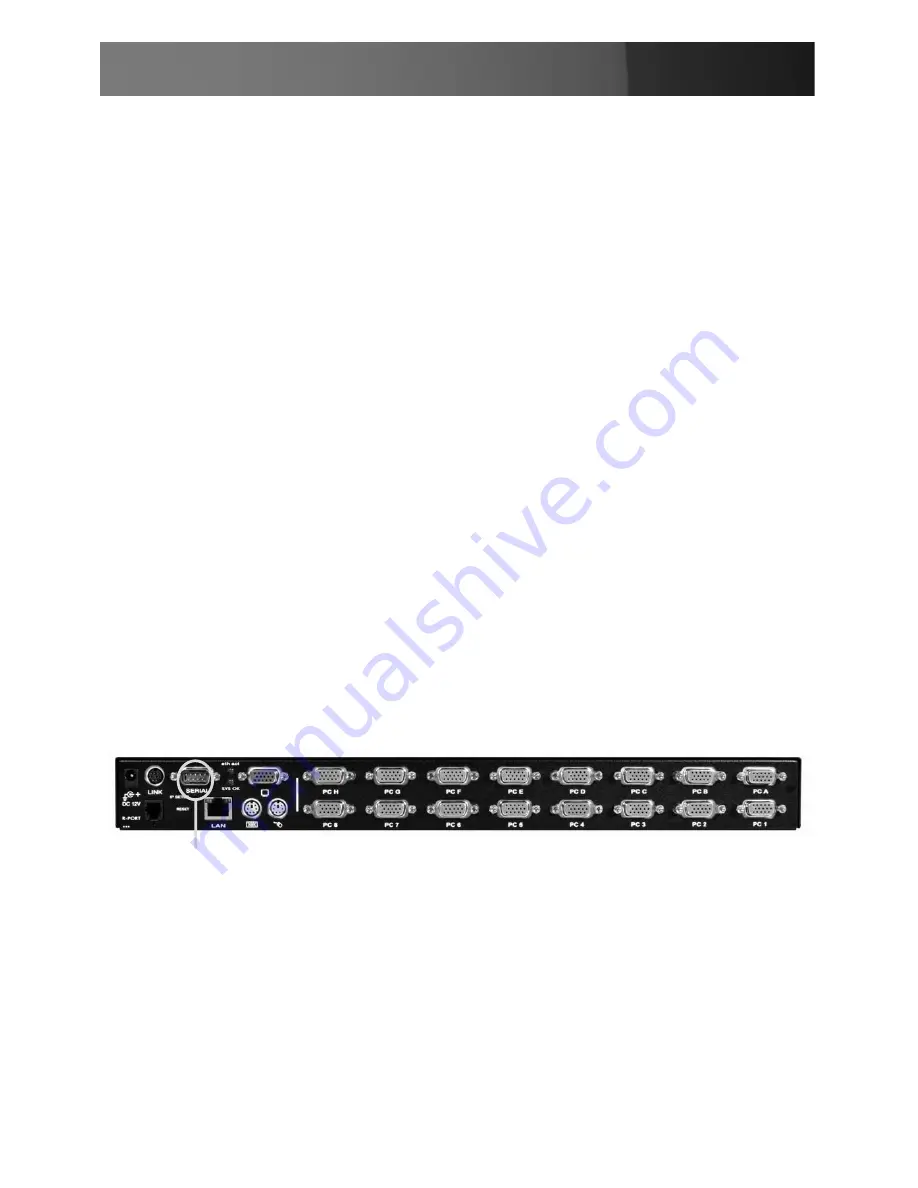
The Modem feature allows the CABCONS1716I to act as an Internet con-
nection server for increased security and flexibility in connecting with the 
host computer. 

Unlike the TCP/IP connection used with the standard Web configuration 
and VNC clients, the modem creates a one-to-one connection between 
the CABCONS1716I and the computer you are using, bypassing the 
public Internet completely. 

NOTE

: This feature requires both an external modem (most standard 

connection protocols are supported) and a dedicated phone line that can 
be connected to the modem for external access.  While it is possible to 
use the modem feature through some PBX systems, this increases the 
complexity and reduces the performance of the connection. For clarity, 
the instructions presented here assume that the modem is connected to a 
typical POTS (Plain Old Telephone System) line that is not routed through 
a phone management system or shared with other devices.

If you wish to use this feature through a PBX system, it may require some 
experimentation and additional support from your telecom services pro-
vider, and is not supported by StarTech.com.

Connecting a Modem

The CABCONS1716I will work with virtually any Hayes-compatible 
modem capable of recognizing the standard AT command set.  Some mo-
dem manufacturers offer “enterprise” grade modem products that include 
technology to improve the stability of connections; whether this type of 
product would be beneficial to your application depends on whether you 
consider the modem connection to be mission-critical, the quality of your 
telecom infrastructure, and your budget for implementing this solution.  
The model of modem attached is essentially transparent to the CAB-

Modem

Connection

Summary of Contents for CABCONS1716I

Page 1: ...Rackmount LCD Console with Integrated 16 Port IP KVM CABCONS1716I ...

Page 2: ......

Page 3: ...nna s Increase the separation between the equipment and receiver s Connect the equipment into an outlet on a circuit different from that to which the receiver s is connected Consult the dealer or an experienced radio TV technician for help s Use of Trademarks Registered Trademarks and other Protected Names and Symbols This manual may make reference to trademarks registered trademarks and other pro...

Page 4: ...Configuration Using the On Screen Display 11 Web Configuration Using DHCP 12 Web Configuration Using Static IP 14 Terminal Configuration Using a Serial Cable 14 Using the Web Interface 16 The Login Screen 16 Navigating the Web Interface 17 Main Menu selections 18 Using the Terminal Interface via Serial Port 25 The VNC Interface 25 Web Interface 25 Native VNC Client 26 Using the VNC Menu 28 Main Me...

Page 5: ...e Modem Feature 45 Connecting a Modem 45 Modem configuration 46 Configuring the Remote Connection 47 Accessing the Web Interface 48 Modem Troubleshooting Guide 50 Serial Remote Control operation 50 Advanced Configuration Using the Integrated SSH Shell 53 Remote Login via SSH 54 About Security Certificate Warnings 55 Troubleshooting 56 Keyboard Replacement 58 Touchpad Replacement 58 Specifications ...

Page 6: ...sers can reboot the system access the BIOS and have full control s over the connected keyboard and mouse as if they are on site Modular design s Web based control allows client access using a standard browser s eliminating licensing costs and simplifying usage Keep alive feature draws power from PC keyboard ports if power is s lost The Switch will continue to operate during power outage even it it...

Page 7: ...cket extension kit This kit contains two pieces of rear s brackets and two extensions Make sure you have the correct kit to fit the depth of your cabinet Note the following length is measured between front and rear poles inside the rack cabinet not the outside depth of a rack Front pole to rear pole distance Depth cm inch Minimum 59 23 2 Maximum 96 37 8 Front pole to rear pole distance Depth CABCO...

Page 8: ... be connected to a console or be used as a stand alone KVM Switch There are three major categories PS 2 USB and Sun Interfaces Please note You can only connect to a computer using the PS 2 port KVM Module Console Drawer KVM Module Console Drawer Depth Depth ...

Page 9: ... note that once the Safety Stopper is removed the drawer is free to slide out when the console is tilted Be cautious as this could cause injury Attach the extensions from the Rear bracket extension kit to both 2 sides of the KVM switch module Please note the length of the extensions and mount them as shown For a 2U module the extensions are mounted to the lower half of the module ...

Page 10: ...Instruction Manual 5 Fasten the console to the rack using the provided screws 3 Please note the orientation of the wide side of the extension ...

Page 11: ...nual 6 Slide the rear bracket into both sides of the unit ensuring the three 4 round screws are INSIDE the bracket track while sliding inward noting the arrows in the diagram below Attach both brackets to the rack 5 ...

Page 12: ...Instruction Manual 7 Push the KVM switch module evenly toward the drawer 6 Slide the console drawer out and fasten both units using the screws 7 provided ...

Page 13: ...Instruction Manual 8 Make sure the C 36 connectors are firmly connected 8 Connect the power supply to the power jack on the KVM module to 9 complete the assembly 8mm 5 16 C36 Connector ...

Page 14: ...conds to select port A Selected Computer Indicator 2 One of the indicators turns red when a corresponding computer is selected by pushbuttons hotkey or OSD menu Local Console in Operation 3 When a computer is accessed through the console this will illuminate green Remote Console in Operation 4 This will illuminate green when a computer is accessed by another set of keyboard mouse monitor connected...

Page 15: ...itch Rear Panel Functions 1 2 3 4 5 6 7 8 9 10 11 DC In 1 Link 2 Serial Port 3 VGA Out 4 R Port 5 IP Setup button 6 Pressing this button using a paperclip etc will automatically load the On Screen Display Reset button a 7 Power reset reboots power to the CABCONS1716I unit b Configuration reset During configuration resets values to default LAN 8 PS 2 Keyboard 9 PS 2 Mouse 10 Remote connections 11 x...

Page 16: ...l appear as follows The initial screen will display the IP address assigned by your existing DHCP server if present on your network If no DHCP server is detected a factory assigned IP address will be displayed in its place 10 0 0 15 by default Please make note of the assigned IP address as you will need to enter it into your web browser to access the Web Interface Assigned IP Address Please note C...

Page 17: ...vely you may press the Setup button on the front panel and you will not be asked to enter the admin password if you just press Enter At the main OSD menu pictured below you will be given several basic setup options To configure CABCONS1716I to your required network set tings use the Network Setup Wizard To select from the menus provided use the arrow keys on your keyboard KYV 7cbÏ ifUh cb Ig b 8 7...

Page 18: ...ails IP address MAC address and device or machine name for the computers and other devices connected to your network The values for the CABCONS1716I tested above are as follows IP Address 192 168 22 4 MAC Address 00 0E C5 00 08 1A Device Name none The easiest way to identify your CABCONS1716I on the network is by its MAC address a unique hardware identifier that is specific to your unit The MAC ad...

Page 19: ...ther IP address before continuing the installation NOTE Not all IP addresses are valid for a given subnet If you are re quired to change your subnet and therefore IP address to configure the unit be sure the IP address you choose is within the allowable range for the 255 255 255 0 subnet Once your computer is configured to the same subnet as the CAB CONS1716I you can use the IP address 192 168 1 1...

Page 20: ...require a null modem serial cable Connect a female end of a serial cable to the serial port used for serial access on the host computer Connect the opposite end to the CAB CONS1716I Configure the terminal software with 8N1 settings Connection speed 115200 bps No of bits 8 Parity None Stop bits 1 Sample HyperTerminal configuration ...

Page 21: ...dress will be either a The address assigned by your DHCP server as identified in the previous section or b 192 168 1 123 if your network uses static IP addressing The Login Screen Before you can access the Web configuration interface you must enter a user name and password The default username and password as shipped from the factory is username admin with a password of admin Whenever you are prom...

Page 22: ...terface Name At the top of the screen the name of the machine being controlled is displayed Main Menu At the left most side of each page the Main Menu is dis played allowing users to choose functions offered by the Web Interface Help area The right most column offers an optional help summary for each page If you don t wish to use this information it can be closed by clicking the small x at the top...

Page 23: ...esent based on assigned user privileges i e non admin users will not see any items under the Admin category Home The Home screen offers a Screen Thumbnail view of the controlled computer as well as basic file transfer functions Monitoring Information System Identification and VNC Client options Preferences The Preferences screen offers several configuration op tions pertaining to the functionality...

Page 24: ...stored in PNG format Logout Clicking on Logout will terminate your Web Interface section To re initiate the Web Interface you will be required to re enter your user name and password VNC To launch or disconnect a Virtual Network connection with the con trolled computer click on Connect or Disconnect as appropriate Network Config DHCP Automatic network configuration using DHCP is Enabled Disabled T...

Page 25: ...e until the next time the unit restarts Clicking Make changes effective now applies the changes and restarts CABCONS1716I so the new settings take effect immediately Ethernet Address MAC Address This is the Ethernet hardware address of this unit s LAN WAN port It is set at the factory and cannot be changed You may need this number to configure your DHCP server User Accounts This menu will allow yo...

Page 26: ...used in our configuration but is meant to store a user defined value that identifies the controlled machine on the network The official DNS name of the controlled machine is an obvious value to put here but you may use it for any purpose Description A user defined description for the controlled machine Security This menu allows you to configure a number of settings including the admin password rec...

Page 27: ...uthen tication is enabled the locally defined accounts on the Server Remote Control unit will not be used except for the SSH login However if a user name in the form name local is given at the RADIUS prompt the system will use name check the password locally and skip RADIUS authentica tion Delete all local accounts to avoid this behavior When connecting via VNC a login screen is generated that ask...

Page 28: ...sk and then manually upload it as described in the next section Purchase Options Certain firmware features may be offered separately from the base unit in order to reduce the initial cost for the Server Remote Control unit Look for a unique code such as 4 C80C B960 1 0 If you provide this code to the technical support department they can give you an unlock code that will open any feature you reque...

Page 29: ...the next time the CABCONS1716I restarts To force the unit to restart immediately click Restart Servers Help Menu Provides an FAQ Frequently Asked Questions listing to as sist you with the features and operation of the CABCONS1716I Site map Menu This menu provides a hyperlinked directory of each set ting available on the Web configurator NOTE Remember the following during the firmware upgrade Do NO...

Page 30: ...b interface The integrated Web server includes a Java based VNC client This allows easy browser based remote control Native VNC client There are several third party software programs that use the standard VNC protocol available in open source and commercial VNC clients SSH access By default there is a standard SSH server running on port 22 the standard SSH port Once connected via SSH the VNC traff...

Page 31: ...C client can be used There are several different VNC clients available all of which should work with this system as the system automatically detects and makes use of certain extensions to the basic RFB protocol as provided by the VNC clients The best client currently is TightVNC http www tightvnc com Binaries are available for Windows Linux MacOS and many versions of Unix Source code for all clien...

Page 32: ...ur s current system setting is provided in the on line help page This allows you to cut and paste the required commands accordingly You have 60 seconds to type the second command before the SSH s connection will be terminated The port number 15900 is arbitrary in the above example and can be s any number 1025 65535 It is the port number used on your client machine to connect your local SSH instanc...

Page 33: ...ryption algorithm was used and what key strength is currently in effect Click anywhere inside the window to clear it or wait ten seconds Bribar Feature Along the bottom of the VNC screen is a dark blue bar with various buttons known as the bribar Its purpose is to show a number of critical status values and to provide shortcuts to commonly used features Here is a snapshot of what it may look like ...

Page 34: ... enabled when you have configured the unit to expect a particular brand of KVM downstream It sends the key sequence to launch the KVM s on screen display OSD menu This button is only present when a KVM model is selected in the Web interface Menu Shows the main menu Video Shows the video tuning menu where the picture quality can be adjusted Keys Shows the VirtKeys menu which allows you to simulate ...

Page 35: ...Other functions require a response to a confirmation prompt first before performing the requested function Identification s Fixed text label that is defined by the user in the Web interface This does not affect the operation of the system and is intended to assist with administration Status s Current status of the attached system and the status of the unit B W Min Avg Max Auto s Bandwidth control ...

Page 36: ... button corresponds to a different sized image from half size to one sixteenth Logout s End the VNC login session and disconnect Video Tuning s Sub menu with video adjustments to be used when automatic picture adjustment does not provide a good quality picture VirtKeys s Virtual keyboard provides a menu with special keys that are often hard to generate but are needed by the remote system The most ...

Page 37: ... key at the same time Alternatively you may move the mouse outside this window press the regular key and then choose RESET to release all depressed keys The VirtKeys menu can be left open while using the host system You can then click the required button when suitable and still interact with the host in a normal fashion Examples Ctrl Alt F4 s Use L Ctrl then L Alt in the Toggles area Then click F4...

Page 38: ...Positioning affects the image position on your screen If you see a black line on either side of your screen or at the top or bottom you can use the arrow buttons to shift the image in that direction Pressing Auto does the same thing for you automatically Use Save to save the changes you have made manually Since this adjustment depends on the video mode separate values are stored for each video mod...

Page 39: ...sampling phase whenever the video mode changes This button does not require a test pattern but will perform optimally when used with our standard test pattern For your reference the sampling phase number is shown to the right of the Filtering button Noise Filter controls the advanced video filtering of our system Unlike other filtering algorithms our noise filter will only remove noise It does not...

Page 40: ...h are known as Slaves Once connected the units will automatically configure themselves as either Masters or Slaves You can only connect an equal or smaller KVM to the Master a 16 port master Server Remote Control switch can have both 16 port and 8 port KVM slaves an 8 port Master Server Remote Control switch can have 8 port and 4 port Slaves and so on For example the 16 port unit can support 136 c...

Page 41: ...d Use the s UP and DOWN arrow keys to highlight a computer and the ENTER key to select it Press s ESCAPE to exit the OSD menu and remove the OSD menu from the screen A triangle mark on the right side of the screen indicates the port is s cascaded to a Slave KVM the number at the left of the triangle mark shows the number of ports the Slave has With that port highlighted press ENTER to brings up a ...

Page 42: ...device a computer or a Slave from unauthorized access To lock a device use the UP and DOWN arrow keys to highlight it then press F3 Now enter up to 4 characters A to Z 0 to 9 dash followed by ENTER as a new password A Security enabled device is marked with a lock beside its channel number To permanently disable the security function from a locked device highlight it press F3 then enter the passwor...

Page 43: ...s computer and the down arrow key to select the next computer Press any other key to abort the Manual Scan mode Audio Stick A multimedia module can be LINKed to the back of each KVM for selecting microphone and stereo speaker signals There are two options for Audio Stick On and Off When set to On audio selection fol lows computer selection When set to Off audio selection stops following computer s...

Page 44: ...ry stores the Hotkey Menu setting CH Display Auto Off After you select a computer the channel address and name of the computer will appear on the screen for 3 seconds then disappear automatically Always On The channel address and name of a selected computer and or OSD status is are displayed on the screen all the time The non volatile memory stores the CH Display setting Position You can choose wh...

Page 45: ...witch the address is represented by the PC port number 1 8 or A H For example to access the PC plugged into port 7 of the Master KVM switch type left Ctrl left Ctrl 7 For a computer connected to a Slave KVM you need to know the channel address of the Slave unit 1 8 and then the channel address of the device 1 8 or A H Please note that only the Master s PC 1 to PC 8 ports can be connected to a Slav...

Page 46: ...matic rate given in characters sec This setting overrides the keyboard typematic rate of your BIOS and any operating system To activate key in left Ctrl left Ctrl F4 following which the unit will switch between rates of 10 15 20 and 30 characters sec Audio Stick A multimedia module can be LINKed to the back of the master KVM for selecting microphone and stereo speaker signals There are two options...

Page 47: ...rovide any additional information or benefit Noisy video cards A digital KVM works by converting the analog video signals emitted by your video card into digital data If there is noise on that signal then it must also be digitized and sent over the network Quality video cards in our experience offer better performance simply because they don t add analog noise Some external KVM switches generate v...

Page 48: ...of control over the settings if required The Presets section contains up to sixteen different settings plus the factory setting If a number is highlighted then that preset has been programmed with valid settings and may be used Please note that the Factory preset is always available and can be restored by simply clicking on the appropriate button To save settings to a preset click on the Save Pres...

Page 49: ...n making small changes to the video parameters sometimes these changes are not reflected in the displayed screen imme diately particularly if the noise filter is enabled Press this button to see the immediate effect of the changes Use the Show Diffs button to learn which parts of the screen are being sent over the Internet When you click this button the screen is cleared to a medium grey color All...

Page 50: ...the instructions presented here assume that the modem is connected to a typical POTS Plain Old Telephone System line that is not routed through a phone management system or shared with other devices If you wish to use this feature through a PBX system it may require some experimentation and additional support from your telecom services pro vider and is not supported by StarTech com Connecting a Mo...

Page 51: ...is connected It requires the use of a null modem serial cable Place the modem near the CABCONS1716I and an available telephone jack Connect the modem to the telephone jack data cable and power source according to the instructions in its documentation The opposite end of the modem s data cable should be a DB9 female serial connection Connect that end of the cable to the Serial connection on the rea...

Page 52: ...r the connection properties For instance you could commit the settings to the modem s non volatile memory NVRAM or allow the modem to adjust the connection speed for greater stability and so on To simplify the troubleshooting process you may wish to test the connec tion with the default init string first prior to making changes specific to your modem model or situation Click the Commit button to s...

Page 53: ...rd that corresponds with the username entered This screen also includes three checkboxes 12 Uncheck all 3 checkboxes Click 13 Next You may select to add a shortcut to the desktop for this connection 14 Click Finish PPP Point to Point Protocol must be used no other authentication s methods are supported TCP IP must be installed enabled on the computer making the s connection and must be used for th...

Page 54: ...requently as others s and animations or other auto updating areas of the screen may appear out of focus or blocky as a result Since the area around the mouse pointer is refreshed most frequently hold the pointer over an area to improve its clarity It may be beneficial to minimize any unnecessary icons backgrounds s or other clutter on the host computer s desktop to make the dial up connection as e...

Page 55: ...B CONS1716I You may need to change the init string or verify the cabling and modem status Modem init okay The modem has responded appropriately to the init string Saw PPP startup from client A PPP authentication has occurred and a session has started Phone line rings An incoming call has been detected by the modem Modem answers xxxxxxxxx The connection speed and protocol used for a connection as r...

Page 56: ...s to the DATA IN or similar port on the previous module in the chain Once the cabling is attached the module becomes active after a 15 second initialization period For specific information regarding cabling and status indicators for a specific serial console refer to the instructions that came with the product Configuring Viewing Serial Remote Control Modules through the Web Interface Once you hav...

Page 57: ...ty one stop bit 8N1 801 8E1 8M1 8S1 Eight bits none odd even mark space parity one stop bit 8N2 Eight bits no parity two stop bits Force DCD Forces the Carrier Detect signal to be active at all times Normally DCD becomes active when a new user connects and is dropped when the last user disconnects a response that is similar to many modems When active the device will logout and reset itself if the ...

Page 58: ...ollowing Baud rate 115200 bps 8N1 Connected to 1 none Press Ctrl Shift _ for menu You are now connected to the R Port module in a live terminal session Commands you type will be echoed on the terminal screen The module also offers a simple menu system that allows you to change configuration settings similar to the function of the menus in a terminal software pack age Press Ctrl Shift _ underscore ...

Page 59: ...ive devices Operating Notes If the power supply to the R Port modules you have connected be s comes faulty short overload then the R Port LED on the front panel of the CABCONS1716I will show red Under normal operations this light should remain green The R Port s connector on the rear panel also has an LED that mirrors the status of the light on the front panel Hardware handshaking CTS RTS is requi...

Page 60: ...r the VNC Java client for two different reasons First the CA that has issued the certificate on StarTech com s behalf may not yet be recognized as a trusted source by the computer you are using to access the CABCONS1716I Second since the unit could be configured in a number different ways it is impos sible to supply a generic certificate that will match your exact network settings Is my data safe ...

Page 61: ...sh A confirmation dialog will appear asking you if you wish to install the 5 certificate Click Yes A message should appear saying the import was successful Click 6 OK Troubleshooting Forgotten master password You can reset the master password using the serial interface on the unit Use the S command and type a new password The old password is not required for this procedure Remote mouse and local m...

Page 62: ...n t re issue this warning Certificate warning shown when connecting via HTTPS It is normal for a warning dialog to be shown when connecting via HTTPS The SSL certificate CABCONS1716I uses is created when the unit is first produced It does not contain the correct hostname subject name because you can change the hostname as required Also it is not signed by a recognized certificate authority CA but ...

Page 63: ...yboard flat inside the tray Please note There is a round hole under the drawer which can be used to pass one finger through allowing for easier removal of the keyboard pushing upwards Please note The triangular mark on the mini USB connector must face outwards HciW dUX FYd UWYaYbh The built on Touchpad offers wheel mouse functionality The area of the Touch Pad to the right side of the two small tr...

Page 64: ...n the figure below right side The Touchpad is attached by a piece of mini USB cable To install the Touchad extend just enough mini USB cable and slide the Touch Pad all the way in till you hear a click sound as it is locked in position Scroll Wheel Area Triangular Marker Left Mouse Button Right Mouse Button Triangular Marker ...

Page 65: ...B clients based on cable used Input Signal RGB analog H V separate LCD Size 17 TFT Maximum Local Resolution 1280 x 1024 Plug and Play VESA VESA DDC 1 2B Power Management VESA DPMS compliant Maximum Cascaded Computers 136 Maximum Number of Computers 16 Maximum Number of Users 1 Local 4 Remote On Screen Display Yes Instruction Manual 60 GdYW ÏWUh cbg ...

Page 66: ... with equivalent products at our discretion The warranty covers parts and labor costs only StarTech com does not warrant its products from defects or damages arising from misuse abuse alteration or normal wear and tear Limitation of Liability In no event shall the liability of StarTech com Ltd and StarTech com USA LLP or their officers directors employees or agents for any damages whether direct o...

Page 67: ......

Page 68: ...VM and Serv er Management solutions serving a worldwide market through our locations in the United States Canada the United Kingdom and Taiwan Visit www startech com today for complete information about all our products and to access exclusive interactive tools such as the Cable Finder Parts Finder and the KVM Reference Guide StarT ech com makes it easy to complete almost any IT or A V solution Fi...

Reviews: