background image


Overview 


  The 7” Digital Photo Frame enables you to view digital photos from different types of memory 

cards simply and quickly. There’s no need to use a computer or a printer. You can enjoy your 
photos anytime and anywhere. It’s very convenient and quick. 

  The Slide Show Mode is a convenient method to display all of your pictures in one continuous 

mode. It allows you to choose several pre-programmed transitions from slide to slide. 

  Most functions on this Digital Photo Frame can be controlled by the Remote Control device 

included. 

  The Digital Photo Frame does not require a direct connection to a computer. The built-in card 

reader and the bonus 8 in 1 card reader can read a wide assortment of the most popular memory 
cards. 

  The Digital Photo Frame can also be connected to a TV and pictures can be viewed on the TV 

screen. 

  Videos and  short  movies stored on the memory cards in MPEG4 format can also be played back 

on the unit as well as audio and MP3 music programs stored on the memory cards. 

  The Digital Photo frame supports MS, SD, MMC memory cards via the built-in card reader and by 

using the optional 8 in 1 card reader connected through the USB port you can also download from 
the following memory card types: CF(Type 1&2), SD, MMC, MS, MS Pro, SM and MD. 


Quick Start Guide 

1.  Plug the DC power adapter cable into the DC + 12V input and plug the AC end of the adapter into 

a normal AC outlet .  

2.  Insert  your compact flash memory card SD, MMC or MS card found in your digital camera into 

the appropriate card slot on the side of the Digital Photo Frame. 

3.  In order to view pictures  stored on CF(Type 1 & 2), MS Pro, SM or MD memory cards you can 

connect the optional card reader to the photo frame with the USB cable included and then insert 
the memory card for viewing on the photo frame. 

4.  Turn the On/Off switch to the On position, the Digital Photo Frame will initialize and display your 

media. 


Summary of Contents for 62903108

Page 1: ...7 Digital Photo Frame Item Number 62903108 User Manual All brand names and trademarks are the property of their respective owners Important Notice Please read this manual carefully...

Page 2: ...e to radio communication However there is no guarantee that interference will not occur in television reception which can be determined by turning the equipment on and off Interference may be correcte...

Page 3: ...ge Contents 7 7 Digital Photo Frame 7 Installation and Setup of Accessories 8 9 Menu Control Buttons 9 Remote Control Layout 10 On Screen Display OSD Setup Menu 11 13 Operating your Digital Photo Fram...

Page 4: ...of time 5 Unplug the unit from power outlet before cleaning 6 Do not attempt to service this product yourself as opening or removing the cover may expose you to potential electric shock Only a qualif...

Page 5: ...ovies stored on the memory cards in MPEG4 format can also be played back on the unit as well as audio and MP3 music programs stored on the memory cards The Digital Photo frame supports MS SD MMC memor...

Page 6: ...CD screen of the photo frame that may cause damage to the screen 2 Align the easel stand to the back of the photo frame so that the mounting hole lines up correctly Locate the securing screw packed wi...

Page 7: ...7 Digital Photo Frame 8 in 1 Card Reader Power Adapter Remote Control User s Manual Earphone Cable USB Cable Easel Stand with Knob Audio Cable 7 Digital Photo Frame LCD Screen Remote Control Receiver...

Page 8: ...gging in the Earphone cable to the Earphone outlet 4 To view your pictures on TV you can plug the AV cable into the AV port and connect to the proper input on your TV or DVD player 5 In order to view...

Page 9: ...us Press to navigate up or to view the previous photo Left Style Press to navigate to the left or to choose the style Right Rotate 90 Press to navigate to the right or to rotate the photo OK Enter Pre...

Page 10: ...11 PLAY PAUSE Play pause the media program 12 V Increases the volume 13 Left Moves the cursor to the left when making a selection 14 ENTER Access the function selected 15 Right Moves the cursor to the...

Page 11: ...Digest Allows you to turn the thumbnail viewer On or Off Transition Mode Allows you to select how fast the viewer will change from picture to picture Orientation Allows you to select if the picture wi...

Page 12: ...elect how the photos will be displayed on the screen Slideshow Mode Allows you to select if you will run the slideshow or have it run automatically Folder Repeat Allows you to select if the slide show...

Page 13: ...ing the A V signal to a TV you must select the screen format Video Output When sending the A V signal to a TV you must select the TV input type connection OSD Lang You may select the screen menu to ap...

Page 14: ...rge the picture up to 4 times Press the ZOOM button once the picture will be enlarged 2 times larger than the original press the ZOOM button a second time and it will enlarge the picture 3 times the o...

Page 15: ...of remote control to access the MUSIC LIBRARY provided your memory card has music files stored on it If there are no music files on your memory card this menu will not be accessible You can select th...

Page 16: ...page V INCREASE VOLUME Press the V button to increase the volume one level at a time V DECREASE VOLUME Press the V button to decrease the volume one level at a time FILE FILE Press the FILE button on...

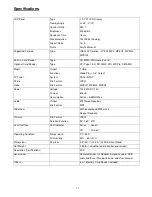
Page 17: ...V Output PAL or NTSC JPEG MPEG1 MPEG2 MPEG4 Power Voltage Current Consumption 100 240V DC 12V 800mA Active 9 6Watt Max Audio Output File Format 2W Stereo Speakers MP3 Slideshow With background MP3 mu...

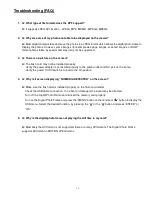
Page 18: ...he power outlet and DC port on the frame Verify the power On Off switch is turned to the On position 4 Q Why is it screen displaying NO MEDIA DETECTED on the screen A Make sure the flash card is insta...

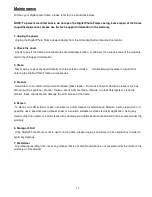
Page 19: ...ter or non ammonia non alcohol based glass cleaner Do not use harsh or abrasive cleaners such as ketene such as acetone ethanol toluene acetic acid methane chloride or other detergents to clean the mo...

Page 20: ...eceipt of the RA number Send the complete unit including power cord and adapter in the original carton to the address below Include a copy of the original receipt for proof of purchase within 90 days...

Page 21: ...s or revenues cost of temporary replacements loss of data loss of equipment or use of equipment or any claims by third parties After 14 days from purchasing the product please call the phone number me...

Reviews: