background image

15

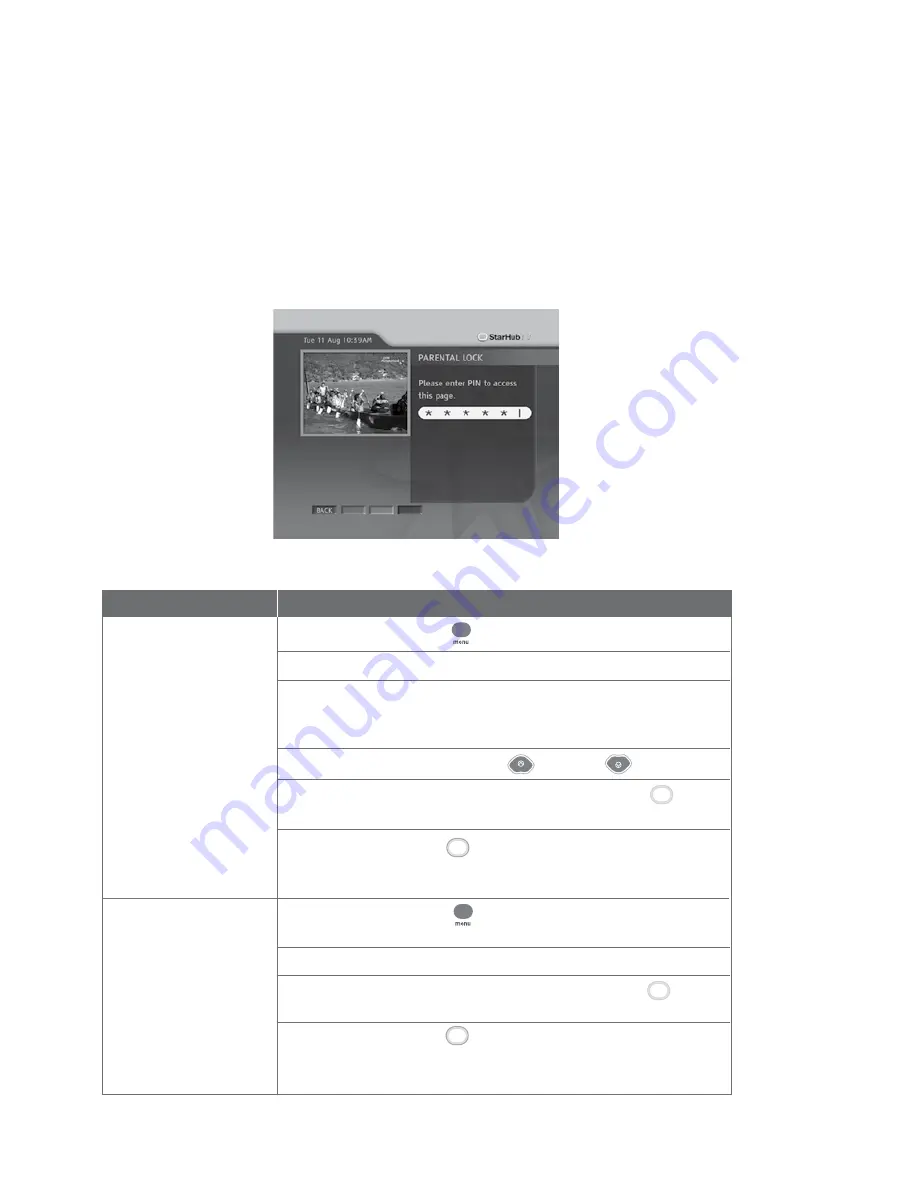
You may choose to lock a number of channels, after which they will only be accessible via a 
6-digit (numeric) Personal Identification Number (PIN). This feature allows parents to control 
what their children watch.

Guide To Digital Cable Applications

Parental Lock Setting

How To Use

Functions 

Directions

1. To lock a channel. 

Press the 

MENU

 button      on your remote control.


Select 

TV Guide

 followed by 

Parental Lock

 on the TV screen.


Enter your 6-digit numeric PIN to access the Channel Listing  


screen. (The default PIN is 000000). To set a new PIN, see   


CHANGE PIN 

section. 


Scroll to the channel using the 

UP

       or 

DOWN

       arrow button. 


In the Channel Listing screen, use the 

YELLOW 

button       to  


select the channels you wish to lock.


Press the 

BLUE

 button       to confirm and save your selection.  


The channels you have selected will now be accessible only by  


entering the correct 6-digit numeric PIN.

2. To unlock a channel. 

Press the 

MENU

 button       on your remote control. Select 

TV  


Guide

 followed by 

Parental Lock

 on the TV screen.


Enter your 6-digit numeric PIN to access the Channel Listing screen.


In the Channel Listing screen, use the 

YELLOW

 button       to


select the channels you wish to unlock.


Press the 

BLUE

 button       to confirm and save your selection.  


The channels you have selected are now unlocked and accessible  


by anyone.

Yellow

Blue

Yellow

Blue

010810

Summary of Contents for HubStation HD DCI82SHB

Page 1: ...HubStation HD DCI82SHB User Guide ...

Page 2: ...hinese 13 Programme Alert Set Reminder 13 Favourite Channel Setting 14 Last Channel Recall 14 Parental Lock Setting 15 Auto Tune Setting 16 Change PIN 17 Preference Settings 18 4 Guide To Smart TV Smart TV 19 Control live TV Live TV Progress Bar 20 Time Shift Functions 21 22 Record Programme Record As You Watch 23 Record By Show 24 25 Record a Whole Series 26 27 Record By Time 28 29 Recording Sche...

Page 3: ...osite Audio basic set up 59 Option 2 Connection via HDMI High Definition Multimedia Interface 60 Option 3 Connection with Home Theatre System Digital Audio SPDIF 61 Option 4 Connection with VCD DVD R 62 Option 5 Connection for PC Internet Broadband Access via Ethernet Port 63 Option 6 Connection for PC Internet Broadband Access via Wireless Router 64 Option 7 Connection for Digital Voice Home and ...

Page 4: ...tation HD does not change channels unplug it from the wall cable point and wait at least ten seconds before plugging it back again Press the ON OFF button to reactivate the HubStation HD and try again Do not dismantle the HubStation HD to attempt servicing it on your own Please call 1633 and have your 8 digit Customer Number ready Do not remove or deface the bar code label pasted on the HubStation...

Page 5: ...emote control do not attempt your own servcing Please call 1633 and have your 8 digit Customer Number ready Audio Video Selection Universal Remote Selection Select TV Select set top box Select DVD player Colour Function keys Info Bar On Off Navigation buttons Up Down Left Right Back one level in Menu system Mute On Off Audio Track Selection Channel Change Up Down Record Rewind Previous Pause Quick...

Page 6: ...r Smart Card is not inserted correctly an error message will appear on your TV screen IMPORTANT Please keep the Smart Card in its slot at all times Removal of Smart Card can lead to disruption of programmes or interruption of regular software updates from StarHub Should you suspect that your Smart Card is faulty do not attempt to service it yourself Please call 1633 and have your 8 digit Customer ...

Page 7: ... and HD programmes using the same box Here s how to enhance your TV viewing experience Widescreen Picture 16 9 Get a panoramic view of the action with 33 more of the picture to see True to life colours Be mesmerised by lifelike images with a display of millions more colours Crystal Clear Images You won t miss a single detail with 4x more sharpness than ever before Cinematic Sound Enjoy Dolby Digit...

Page 8: ...lution Note Please note that on some HD ready TV sets you may experience problems displaying video output on the 576i resolution If you see a black screen on TV please continue to press the HEX button on your remote control to change to the next higher video output resolution How To Use Functions Directions 1 To view the current video resolution Press the HEX button on your remote control of the H...

Page 9: ...put selection Guide To High Definition TV Applications Surround Sound How To Use Functions Directions 1 To enable Dolby Digital 5 1 Press the MENU button on your remote control audio output Select Settings followed by General Use the UP or DOWN arrow button to scroll to Dolby Digital Use the RIGHT or LEFT arrow button to change the selection to YES Press the OK button to confirm your selection Not...

Page 10: ... and upcoming Press the RIGHT arrow button on your remote programmes list control for Programme Listing The highlight and arrow buttons will move to the programme list on the right 3 To access programme schedules On the Programme Listing Page press the for today UP or DOWN arrow button to scroll 4 To access programme schedules Press the RIGHT arrow button on your remote for tomorrow control 5 To a...

Page 11: ...tton on your remote control On Screen TV Guide according The channels are arranged according to Channel to genre Number by default Press the YELLOW SORT button once to arrange the channels according to Channel Name Press the YELLOW SORT button again to display only the Favourites List Continue to press the YELLOW SORT button to search through the other genres in the sequence above Guide to Digital...

Page 12: ...ess the SEARCH button to launch Select either Titles or Persons and press the OK button Use the LEFT RIGHT UP and DOWN arrow buttons to highlight the alphabets and press OK to select them To backspace and correct a mistake select and press OK button to correct After the entry of the key words press the BLUE button to confirm Use the UP or DOWN arrow button to select the correct programme title or ...

Page 13: ...Digital Cable Features More Show Times Directions Press the GUIDE button on your remote control Press the RIGHT arrow button to select a programme Press the GREEN button and select More Show Times to list the alternative show times of the selected title How To Use Functions 1 To access more show times function Green ...

Page 14: ... 2 To select a channel Move the highlighted box to the selected channel and press the OK button on your remote control for a full screen view If you have not subscribed to the selected channels you will not be able to have a full screen view 3 To access the On Screen TV Guide Move the highlighted box to the channel for a channel you wish to select and press the GUIDE button 4 To return to Video Mo...

Page 15: ...nnel 3 To check the programmes within Press RIGHT arrow button to proceed to the next 24 hours programme Press LEFT arrow button to go back to the previous programme 4 To access more detailed Press the GREEN or INFO button programme information 5 To access additional programme Press the GREEN or INFO button information Info Page Note For more information refer to the Info Page on page 11 6 To sele...

Page 16: ...ess OK button to confirm Use the LEFT or RIGHT arrow button to select Bilingual or English as the Preferred Language Setting Note Chinese programme information is available only for Chinese programmes Directions Press the GUIDE button on your remote control Press the UP or DOWN arrow button to select the channel for programme you want to be alerted of Press the RIGHT arrow button followed by the U...

Page 17: ...ide to Digital Cable Features Favourite Channel Setting How To Use Option 1 Press the FAVOURITE button on your remote control to access your favourite channels Surf your favourite channels by pressing the FAVOURITE button Option 2 Press the GUIDE button while watching TV and your favourite channels will be listed in alphabetical order Select the channel you want to watch and press the OK button Pr...

Page 18: ...tion Scroll to the channel using the UP or DOWN arrow button In the Channel Listing screen use the YELLOW button to select the channels you wish to lock Press the BLUE button to confirm and save your selection The channels you have selected will now be accessible only by entering the correct 6 digit numeric PIN 2 To unlock a channel Press the MENU button on your remote control Select TV Guide foll...

Page 19: ...e the LEFT or RIGHT arrow button on your remote control to set the date for Auto Tune to activate e g Mon 05 Jan 5 To confirm Start Time Using the number buttons on your remote control enter the time you want the HubStation HD to switch to the channel of your choice The time is displayed in 12 hour format e g 01 30PM or 11 25AM Use the RIGHT arrow button to select AM or PM 6 To select the Channel ...

Page 20: ...ton on your remote control Select Settings followed by Change PIN on the TV screen Enter your current 6 digit numeric PIN The default PIN is set to 000000 Press the BLUE button to confirm your PIN and access the next screen On the next screen enter and confirm your new PIN Press the BLUE OK button to save the new PIN A message will appear on screen to inform you if the change has been successful P...

Page 21: ... wish the Info Bar to appear on the TV screen Press the OK button to confirm your selection Select Settings followed by General Use the LEFT or RIGHT arrow button to change the settings The default language is Bilingual This mode allows for programme information to be in Chinese text for Chinese channels and English text for all other channels Select Settings followed by General Use the LEFT or RI...

Page 22: ...d A Whole Series With this feature you just need to enter the recording once and Smart TV will remember to record all the episodes of a TV series There is no need for you to keep going back week after week to enter the recording again Record By Time Preset a programme to be recorded by specifying the date time and channel Watch one show and record another Watch a show on a channel while recording ...

Page 23: ...whenever the HubStation HD is powered on Duration of Buffer The buffer is set at a maximum of 2 hours of SD programmes or 30 minutes of HD programmes You are able to buffer up to 2 hours of SD programmes or up to 30 minutes of HD programmes at any time End of Buffer When the buffer reaches its maximum 2 hours of SD programmes or 30 minutes of HD programmes the HubStation HD will continue to record...

Page 24: ...ress the PLAY button to resume watching at normal speed Guide To Smart TV Control live TV How To Use Functions 1 To pause the programme 2 Rewind or fast forward the programme Time Shift Functions With the time shift function on Smart TV you ll never miss a minute of your favourite show The show you are watching on live TV is temporarily stored even as you are watching it So if the phone rings all ...

Page 25: ...kwards press LEFT arrow button on your remote control It will jump backwards by an interval of 30 secs as a default setting You can customise the interval under Smart TV settings Press and hold the PREV button to go to the beginning of buffer Press and hold the NEXT button to go to the end of buffer Press the STOP button on your remote control to return to the current programme in real time Functi...

Page 26: ...Recording and Press OK button to confirm Use LEFT or Right arrow button to select YES and OK button to confirm Guide To Smart TV Record Programme Record As You Watch Smart TV enables you to record a programme that you are currently watching So even if you are interrupted in the middle of the programme you can come back to finish it at a more convenient time Smart TV also enables you to record a pr...

Page 27: ... the BLUE button or the REC button on your remote control to set the programme for recording After you do so the Record by Show Page will appear on your TV screen How To Use Functions 1 To record from the On Screen TV Guide Blue Record By Show Smart TV is fully integrated with the On Screen TV Guide that offers you a simple and convenient way of recording your programmes in advance Simply select t...

Page 28: ...n on your remote control to select the desired time Press the LEFT or RIGHT arrow button on your remote control to select the desired folder Press the BLUE button to save the programme to the Recording Schedule Functions 2 To select the number of extra minutes you wish to record before the programme starts 3 To select the number of minutes you wish to record after the programme ends 4 To save the ...

Page 29: ...UE button or the REC button on your remote control to set the programme for recording After you do so the Record by Show Page will appear on your TV screen How To Use Functions 1 To record from the On Screen TV Guide Blue Record a Whole Series Smart TV s fully integrated On Screen TV Guide offers you a simple and convenient way of recording your serial programmes Simply select the programme you wo...

Page 30: ...amme to the Recording Schedule Functions 2 To select the number of extra minutes you wish to record before the programme starts 3 To select the number of minutes you wish to record after the programme ends 4 To save the programme to your favourite folder 5 To record a whole series 6 To save the programme to the Recording Schedule Blue Guide To Smart TV Record Programme Note Record by Series featur...

Page 31: ...mote control to enter the start time of the recording Press the RIGHT arrow button to select between AM or PM Press the NUMBER buttons on your remote control to enter the duration of the recording How To Use Functions 1 To record by time 2 To set the Start Date of the recording 3 To set the Start Time of the recording 4 To set the Duration of the recording Record By Time Smart TV also lets you rec...

Page 32: ... channel number using the NUMBER buttons on your remote control Press the LEFT or RIGHT arrow button on your remote control to select the desired folder Press the BLUE button to save your selection to the Recording Schedule Functions 5 To set the Frequency of the recording 6 To select the Channel 7 To save the programme to your favourite folder 8 To save the programme to the Recording Schedule Blu...

Page 33: ...Time Recording by Show or Recording by Series An icon will also indicate a missed scheduled recording that is conflicting or erroneous How To Use Functions 1 To access the Recording Schedule Page 2 To find out the status of your recordings R Recording Schedule The Recording Schedule Page allows you to schedule your recordings as well as edit your scheduled recordings It will display the programme ...

Page 34: ...onflict message is displayed you can either choose to amend your scheduled recordings or save the conflicting schedule and amend it later Use the LEFT or RIGHT arrow button to select your choice and press the OK button to confirm your selection If you choose to save the conflicting schedules will be highlighted with a yellow icon in the Recording Schedule Page Smart TV will record the scheduled re...

Page 35: ... to edit it In the Recording Schedule Page press the UP or DOWN arrow button until the desired scheduled recording is highlighted Press the BLUE button to bring up the MORE sub menu Select the Delete Schedule option and press the OK button This will bring up a warning message Press the OK button on your remote control to confirm that you wish to remove the desired scheduled recording Functions 5 T...

Page 36: ...ill bring you to the Record by Time Page and allow you to schedule a recording by time In the Recording Schedule Page press the UP or DOWN arrow button to highlight an active recording The number next to programme title indicates that the programme is currently being recorded Press the BLUE button to bring up the MORE sub menu Select the Go To Recording option and press the OK button This will bri...

Page 37: ...Title The name of the programme that was recorded Channel The channel from which the programme was recorded Episode The episode number and title of the programme that was recorded Recorded Date Time When the programme was recorded Duration The total duration of the recorded programme Parental Lock Whether the file has Parental Lock enabled How To Use Functions 1 To manage your recorded programmes ...

Page 38: ...pt you to enter the Parental Lock PIN When you enter the correct Parental Lock PIN selecting the OK button will enable parental lock for the selected programme Press the UP or DOWN arrow button on your remote control in the My Playlist section to highlight the desired programme Press the BLUE button to bring up the MORE sub menu Select the Lock option and press the OK button This will prompt you t...

Page 39: ...your new programme name use the LEFT RIGHT UP DOWN arrow buttons to highlight the SAVE option and press OK to select Use the UP or DOWN arrow button on your remote control in the My Playlist section to highlight the desired programme Press the BLUE button to bring up the more sub menu Select the MOVE option and press OK Use the UP or DOWN arrow button on your remote control in the Move pop up to s...

Page 40: ...K button Use the UP or DOWN arrow button your remote control in Folder List to select the desired folder When the folder is highlighted the following information is displayed Total shows The total number of recordings in the selected folder Total duration The total duration of all recordings in the selected folder How To Use Functions 1 To manage your recorded programmes 2 To view information abou...

Page 41: ...d press OK to select them To backspace and correct a mistake highlight the option and press OK button to correct To save your folder name use the LEFT RIGHT UP DOWN arrow buttons to highlight the SAVE option and press OK to select Press the BLUE button to bring up the MORE sub menu Use the UP or DOWN arrow button on your remote control to select the DELETE function and press OK This will prompt yo...

Page 42: ...the desired bookmark Press the YELLOW button to start playing from the selected bookmark Press the YELLOW button again to start playing from the selected bookmark Alternatively you can also press the PLAY button on your remote control to start playing from the selected bookmark Press the BLUE button to bring up the MORE sub menu Use the UP or DOWN arrow button on your remote control to select the ...

Page 43: ...s OK button This will prompt you to confirm whether you want to continue deleting the bookmark Use the LEFT arrow key to select YES Pressing the OK button will delete the bookmark Use the UP or DOWN arrow button on your remote control in the bookmark list to highlight the desired bookmark Press the BLUE button to bring up the MORE sub menu Select the RENAME option and press OK button Use the LEFT ...

Page 44: ...e been set Press YELLOW JUMP TO button on your remote control Use the NUMBER buttons to enter the time and press OK button to confirm Press the OK button to bring up the Playback progress bar Press the BLUE button to bring up the MORE sub menu Use the UP or DOWN arrow button on your remote control to select My Playlist and press OK button Press the OK button to bring up the Playback progress bar P...

Page 45: ...NFO button This will bring up the Playback Info Bar Press the INFO button a second time and you will see the programme title as well as a short synopsis Press the INFO button a third time and it will bring you to the Playback Info Page In the Playback Info Page you are able to view complete programme information Press the DOWN arrow button to view further programme information like cast and direct...

Page 46: ... of the scheduled recordings Use the LEFT or RIGHT arrow button to change the duration Eg 1 hour 2 hours 3 hours 4 hours 5 hours 6 hours Choose By Show to change your Instant Recording settings to record only by the current programme Use the LEFT or RIGHT arrow button to change values accordingly How To Use Functions 1 To access your Smart TV settings page 2 To change the default number of minutes...

Page 47: ...rammes whenever you schedule a recording Use the LEFT or RIGHT arrow button to select whether or not to optimise your hard disk Press the BLUE button to start the optimisation PLEASE TAKE NOTE THAT THIS OPTION WILL ERASE ALL RECORDED PROGRAMMES IN YOUR HUBSTATION DO NOT USE THIS OPTION IF YOU WISH TO KEEP ANY FILES Functions 6 Jump Interval 7 Preferred Folder 8 Optimise Hard Disk Blue Guide To Sma...

Page 48: ...anguage you like for series that come in dual sound On Demand Channel Can t wait for the next episode On Demand Channels let you watch the episodes or shows before they are shown on cable channels and catch up on the episode that you have missed on the channel giving you full control of your TV viewing To access the Demand TV catalogue press the VOD button on your remote control When you see the D...

Page 49: ...he BLUE OK button to view the titles available in the selected category Use the UP DOWN LEFT or RIGHT arrow buttons to select the title you wish to purchase Press the BLUE VIEW button to purchase the selected title If you have purchased the programme it will start to play In the Buy Options section use the UP or DOWN arrow buttons to select your buy option Press the BLUE BUY button to purchase the...

Page 50: ...title series Pricing details of the selected titles series You can enjoy unlimited viewing of the purchased title series before the indicated date and timing Directions Press the VOD button on your remote control to launch the Demand TV catalogue page Use the UP or DOWN arrow buttons to select a category Press the BLUE OK button to view the titles available in the selected category Use the UP or D...

Page 51: ...ed title series Directions Press the VOD button on your remote control to launch the Demand TV catalogue page Press the DOWN arrow button to select Buy list Press OK button to confirm In the Buy list page use the UP or DOWN arrow buttons to select the title or series you want When you have selected the title to watch use the RIGHT button to switch to the Title Panel Use the UP or DOWN arrow button...

Page 52: ...w button to select None 16 or 18 and press the OK button to confirm your selection How To Use Functions 1 To access the VOD Parental Lock page 2 To activate or deactivate Demand TV Lock Note This feature will lock the application and there will be a prompt to enter PIN before the loading of the Demand TV catalogue page 3 To activate or deactivate Purchase Lock Note This feature will prompt the use...

Page 53: ...s OK button to confirm Alternatively you can press the corresponding arrow button to go to the respective categories At the listings of songs select the song you wish to schedule and press OK button or the corresponding number The song title will be highlighted when it has been scheduled in the playlist Press button on your remote control Press CH UP or CH DOWN to go to the previous or next page P...

Page 54: ...licated in the playlist and will be repeated Select the song and press BLUE button to remove it from the playlist How To Use Functions 1 To launch the Playlist 2 To insert a song 3 To repeat a song 4 To delete a song KaraOK offers a similar experience as the commercial Karaoke outlets where you can schedule your favourite songs to be played out in a sequence The order of the songs can be changed a...

Page 55: ...n on your remote control Press PAUSE button on your remote control To resume the song press the PLAY button Select one of the Search feature from the main catalogue Search By Artistes Keyword Search By Artistes Pinyin Search By Songs Keyword Search By Songs Pinyin Use UP DOWN LEFT or RIGHT buttons and press OK button to select the alphabets For keyword searches key in a key word e g World and all ...

Page 56: ...lect a channel To view a short channel description press GREEN INFO button To preview a short video on the channel if available press YELLOW PREVIEW button and the video will play out instantly Press EXIT button Select YES and press OK button to confirm Press CH UP or DOWN button to tune to other channels How To Use Functions 1 To subscribe to channel Note This feature is not available to some cha...

Page 57: ...ck Press the OK button to confirm your selection Enter your 6 digit numeric PIN default PIN 000000 to activate Press the RIGHT arrow button to select YES Press OK button to activate the subscription lock Press the MENU button on your remote control Select TV Guide followed by Subscription Lock Press the OK button to confirm your selection Enter your 6 digit numeric PIN default PIN 000000 to activa...

Page 58: ...matically get to enjoy GV Movie Club membership from first purchase With more upcoming free content there will be no more toggling between mobile and the web as your television will have it all TV Games Playin TV is a round the clock games channel that offers easy to play and exciting interactive TV games your whole family will love There are five complimentary TV games and 19 paid games for your ...

Page 59: ...EEN button on the remote control when the eTV icon appears on the top of the screen Green Directions Use the LEFT RIGHT UP or DOWN arrow buttons to select the different tabs Select OK button to confirm Use the LEFT RIGHT UP or DOWN arrow buttons to select the different tabs Select OK button to confirm Press BACK LAST EXIT or YELLOW buttons How To Use Functions 1 To access the different tabs on eTV...

Page 60: ...ifferent recipient 3 To end the session with the current recipient You can now enjoy the ability to restart and watch it from the start Keep a look out for the on screen prompt for programmes that come with this feature and press the BLUE button on your remote control to start watching from the beginning Shows airing on Start Over channels can be restarted multiple times within their normal broadc...

Page 61: ...tion HD Actual bandwidth is dependent on hardware software internet traffic and destination server Voice Solutions HubStation HD supports the following Digital Voice services with its in built cable modem DOCSIS 2 0 Digital Voice Home Digital Voice is StarHub s Voice Over IP VoIP service available to our residential customers If you are currently already enjoying Digital Voice Home you can use the...

Page 62: ...o basic set up NOTICE ANY TAMPERING UNAUTHORIZED MODIFICATION OR INSTALLATION OF THIS DEVICE MAY SUBJECT YOU TO CIVIL OR CRIMINAL PENALTIES MODEL DCI82SHB made in France for DO NOT OPEN THE COVER USB CABLE IN TV OUT DO NOT REMOVE THIS LABEL 0 5 2 6 5 7 1 1 230V 50Hz 46W Max Pr Pb L L Y R R V I D E O V I D E O Digital Audio Coaxial Optical ETHERNET U S Patent Nos 4 631 603 4 819 098 4 907 093 5 315...

Page 63: ...ase connect HubStation HD to your HD ready TV using the Component Video as shown under Option 1 Viewing Procedure 1 Switch your TV to the HDMI channel to watch your programmes 2 Select the desired channel using the remote control of your HubStation HD 2 To TV HDMI input Connect RF cable from the cable TV point to the HubStation HD Cable In 4 DC from Power Adaptor 1 StarHub CableTV point HDMI DVI H...

Page 64: ...F IN Component Y Green Pb Blue Video Pr Red R Red L White Video STEREO AUDIO Video Yellow Video Yellow L White R Red Audio Option 3 Connection with Home Theatre System Digital Audio SPDIF To enjoy true cinematic surround sound experience you can connect the HubStation HD to a Dolby Digital 5 1 Surround Sound home theatre system according to the diagram below IMPORTANT For this connection you need ...

Page 65: ... the TV remote control to display Teletext Viewing Procedure 1 Switch your TV to the Component channel to watch your programmes 2 Select the desired channel using the remote control of your HubStation HD HubStation HDMI DVI HubStation HDMI DVI TV Back RF IN Component Component Y Green Pb Blue Video Video Pr Red R Red L White Video Video STEREO AUDIO STEREO AUDIO Video Yellow Video Yellow L White R...

Page 66: ...t Component R Red L White Video Video STEREO AUDIO STEREO AUDIO Video Yellow Video Yellow L White R Red Audio Audio Y Green Pb Blue Video Video Pr Red 6 3 2 4 DC from Power Adapter Composite Audio out to TV Component Y Pb Pr group audio input Composite Video out to a separate TV AV video input for Teletext optional To TV Component Y Pb Pr input StarHub CableTV point Connect RF cable from the cable...

Page 67: ...Video STEREO AUDIO STEREO AUDIO Video Yellow Video Yellow L White R Red Audio Audio Y Green Pb Blue Video Video Pr Red 6 3 4 DC from Power Adapter Composite Audio out to TV Component Y Pb Pr group audio input Composite Video out to a separate TV AV video input for Teletext optional StarHub CableTV point Connect RF cable from the cable TV point to the HubStation HD Cable In 1 TV Back RF IN Componen...

Page 68: ...USB CABLE IN TV OUT DO NOT REMOVE THIS LABEL 0 5 2 6 5 7 1 1 230V 50Hz 46W Max Pr Pb L L Y R R V I D E O V I D E O Digital Audio Coaxial Optical ETHERNET U S Patent Nos 4 631 603 4 819 098 4 907 093 5 315 448 6 381 747 6 516 132 Manufactured under licence from Dolby laboratories Dolby and the double D symbol are trademarks of Dolby laboratories Component Video TV VCR HDMI DVI HDMI DVI TV Back RF I...

Page 69: ...reen Check if TV brightness and contrast controls are adjusted sound ok Picture rolling Adjust vertical hold of TV unit No sound Adjust TV or HubStation HD volume control picture ok Check if either are in MUTE mode Washed out picture Adjust TV contrast control No picture Turn OFF and turn ON the main power to the HubStation HD Check all connections Check other channels Pixelised picture Check othe...

Page 70: ...akage or the cabling in your home call StarHub s Public Hotline at 6873 2828 IMPORTANT Causing signal leakage is a very serious offence as it disrupts the communication services of legitimate users Infocomm Development Authority of Singapore IDA manages and polices the airwaves When the need arises StarHub may have to enter your home to test for signal leakage The penalties for creating communicat...

Reviews: