background image

-


18


-

3-7-2.  Pairing using PIN code 

Enter the following information in the master device if it does not support SSP, or when otherwise necessary.

           PIN:   

1234 (default)

           Device name:  Star Micronics (default)

It is recommended that you change the PIN code for greater security.
For details regard changing the PIN code, please see the “Software Manual -Star Bluetooth Utility- ”. 

3-7-3.  Auto Connection Function (iOS only)

Each time the wireless connection is disconnected while communicating with upper-level iOS devices including iPad over 
Bluetooth, it is necessary to move back to the Bluetooth setting screen in the upper-level iOS device and tap the desired 
printer name again to build a connection. This is an iOS specification. 
In order to save this labor, this printer is equipped with the Auto Connection function that automatically requests a con-
nection from an upper-level iOS device that was connected to the printer last time.
The default setting of this function may differ according to the printer model you are using. 

Confirm the default settings for your printer, as well as the use examples for ON/OFF settings, and then make the settings 
to match your purpose.
You can also check the current ON/OFF setting by performing self-printing.

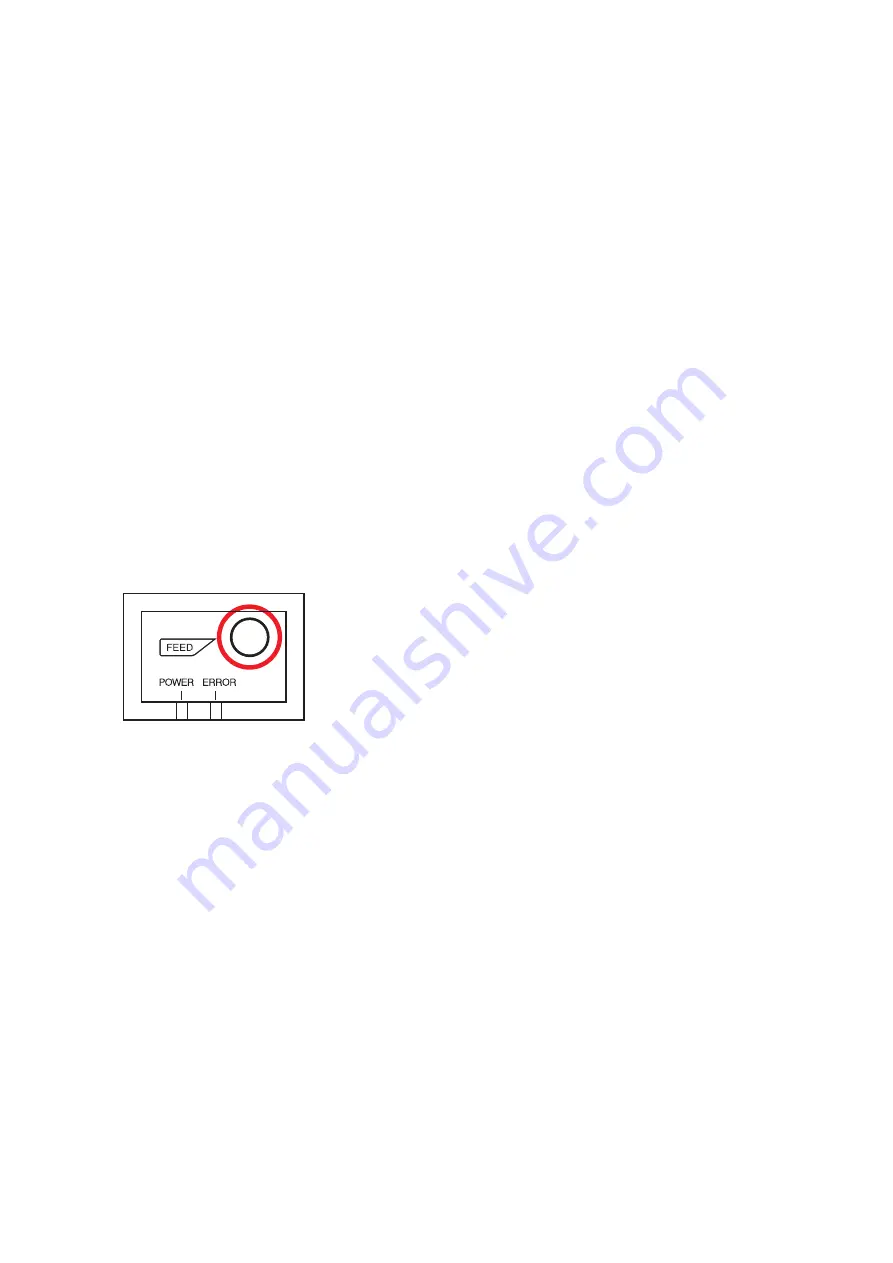
< Confirmation procedure by self-printing >

(1)  While the printer cover is closed, hold down the FEED button on 

the operation panel, and then turn on the power switch.

(2)  Self-printing starts and the settings for F/W version, DIP switch, 

memory switch, and so on are printed.

  Subsequently the interface information is printed and finally the 

current ON/OFF settings are printed. 

Caution: If "Auto Connection function" is set to ON when using devices other than iOS, a Bluetooth communi-

cation with the printer may fail.  To use devices other than iOS, such as the Android/Windows devices, 
make sure you turn off the "Auto Connection" function before using the printer. 


  For information on how to set up this function, see "3-7-4. Setting up Auto Connection".

Summary of Contents for TSP743II Series

Page 1: ...THERMAL PRINTER TSP700IISERIES Hardware Manual...

Page 2: ...ated in a commercial environment This equipment generates uses and can radiate radio frequency energy and if not installed and used in accordance with the instruction manual may cause harmful interfer...

Page 3: ...istered trademarks of Microsoft Corporation Bluetooth wordmark and logo are registered trademarks owned by Bluetooth SIG Inc Copyright 2007 2017 Star Micronics Co Ltd Caution Symbol These symbols are...

Page 4: ...oading a Paper Roll 13 3 7 Bluetooth Settings For Bluetooth Interface Models only 17 3 8 Setup Precautions 22 4 Attaching the Accessories 24 4 1 Attaching the Holder Plate 24 4 2 Attaching the Cable 2...

Page 5: ...from heaters and other sources of extreme heat 6 Do not locate the printer in a badly ventilated or dusty environment 7 Make sure that the room where you are using the printer is not too humid 8 This...

Page 6: ...per Cover open lever Push this lever in the direction of the ar row to open the printer cover Power switch Used to turn on off power to the printer Control panel Features LED indicators to indi cate p...

Page 7: ...t the parallel cable to a parallel port on your PC 3 1 2 RS 232C Cable Connect the RS 232C cable to a RS 232C port on your PC 3 1 3 USB Cable Connect the USB cable to a USB port on your PC 3 1 4 Ether...

Page 8: ...an interface cable be sure to disconnect the AC adapter s power cord from the outlet 3 2 1 Parallel Interface Cable To connect a parallel cable follow the procedure given below 1 Make sure the printe...

Page 9: ...the printer 3 Tighten the connector screws 3 2 3 USB Cable To connect a USB cable follow the procedure given below 1 Make sure that the AC adapter s power cord is not connected to the outlet 2 Connect...

Page 10: ...ble is not connected to it the POWER and ERROR lamps are simul taneously turned on and off at 4 second intervals to indicate the disconnection Be sure to connect the Ethernet cable from a PC or hub to...

Page 11: ...nnector Pulling the cable excessively could cause damage to the connector Note We recommend that you use the standard AC adapter and power cord If you are not using the optional AC adapter PS60A 24B1...

Page 12: ...Follow the procedure given below 1 Make sure that the AC adapter s power cord is not connected to the outlet 2 Connect the modular jack plug to the peripheral drive connector on the rear panel of the...

Page 13: ...the thickness of the paper is 100 to 150 m it is not necessary to install the tension bar Note A tension bar cannot be installed when a roll paper guide is installed in a printer Please remove the ro...

Page 14: ...your fingers caught when opening or closing the printer cover 4 After the printer cover is closed the printer performs initial operations from paper feeding to paper cutting Do not open the printer co...

Page 15: ...cs com support 1 1 1 3 6 2 Removing the Tension Bar When using thermal paper roll the tension bar unit may or may not be necessary depending on the paper thickness paper width or the installation layo...

Page 16: ...ss between 105 m and 150 m Position 1 Paper thickness between 65 m and 105 m 3 6 4 Removing the Roll Paper Guide When using a paper roll with an 82 5 mm width remove the roll paper guide as shown When...

Page 17: ...ecting to or disconnecting from a master device Please wait approximately 0 1 seconds after connecting and approximately 0 5 seconds after disconnect ing before beginning communications with the print...

Page 18: ...s connected to the printer last time The default setting of this function may differ according to the printer model you are using Confirm the default settings for your printer as well as the use examp...

Page 19: ...e Changing the connected master device Disconnect the Bluetooth connec tion in such a way as to turn OFF the power to the upper level de vice automatically connected Then establish a pairing with a de...

Page 20: ...on again to set Auto Con nection to OFF 4 To make sure Auto Connection is set to OFF correctly perform self printing as described in 3 7 3 Confirmation procedure by self printing Note Only Bluetooth F...

Page 21: ...tep 1 4 Turn off the printer s power switch and delete the pairing setup with the higher ranked device Note1 In step 2 if you do not hold down the RST button for long enough initialization will not co...

Page 22: ...r bar There is a cutter or tear bar inside the paper outlet slot Never put your hand in the slot regardless of whether or not the printer is in operation You must open the printer cover to replace pap...

Page 23: ...K orC1 maydrasticallyreducetheservicelifeofthethermalprinthead We recommend that you use paper with the following maximum ion densities 500 ppm of Na 150 ppm of K and 300 ppm of Cl For details on reco...

Page 24: ...y available screws 4 mm diameter that are suitable for the wall material wood steel beam concrete etc n The printer s weight is approximately 2 4 kg when the largest diameter roll paper is loaded Use...

Page 25: ...ide it downward to set it in place 5 Push the cover open lever and open the printer cover 6 Insert the paper roll as shown 7 To change the Paper Near End Sensor setting from Horizontal to Vertical cha...

Page 26: ...sure that the printer is securely installed to the wall If the printer is not installed securely and falls personal injury or damage to the printer may result Make sure that the mounting surface and...

Page 27: ...essary for you By installing the switch blind the following become possible Preventing the power switch from being operated by mistake Ensuring that other people can not easily operate the power switc...

Page 28: ...rn the printer off check the recovery conditions and then turn the printer back on If the same error occurs after you turn the printer back on the printer needs to be repaired Error description POWER...

Page 29: ...er to the printer 2 Push the lever toward you to open the printer cover 3 Remove the jammed paper Note 1 To prevent parts such as the thermal head or the rubber roller from damage or deformation do no...

Page 30: ...soft cloth wipe off the dirt from the rubber roller Clean the entire rubber roller by rotating it 7 3 Sensors and the Surrounding Areas Clean the sensors mainly the reflector type sensors of debris du...

Page 31: ...uetele ja nimetatud direktiivist tulenevatele teistele asjakohastele s tetele Greek STAR MICRONICS CO LTD Wireless Device 1999 5 EK Slovensky Slovak STAR MICRONICS CO LTD t mto vyhlasuje e Wireless De...

Page 32: ...HP13 7DL U K Type of Equipment Thermal Printer Model Name TSP700 Ref Radio Report No F161591E1 F161591E2 Ref EMC Report No F111592E1 92 151 EMC 91 112 EMC 91 002 15 EMC 90 049 EMC Ref Safety Cert No...

Page 33: ...URL http www star m jp eng Rev 1 8...

Reviews: