O R I G I N A L I N S T R U C T I O N
22
END
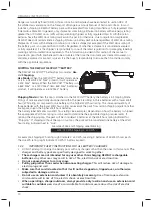
LOCKING
SCREW
ADJUSTING
SCREW
MANDREL
STOP
SPRING
CARTRIDGE
BODY
JAW
TURRET
Note: this is a cross-section view of the tail jaw cartridge
5.4 MANDREL
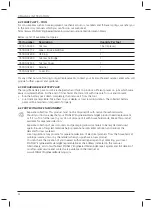
WARNING:
While a small amount of wear and marking will naturally occur through the normal
and correct use of mandrels, they must be regularly examined for excessive wear and marking,
with particular attention to the head diameter, the tail jaw gripping area of the shank or heavy
pitting of the shank and any mandrel distortion. Mandrels that fail during use could forcibly
exit the tool. It is the customer‘s responsibility to ensure that mandrels are replaced before any
excessive levels or wear and always before the maximum recommended number of placings.
Contact your STANLEY Engineered Fastening representative who will let you know what that
fi gure is by measuring the broach load of your application with a calibrated test tool.
5.4.1
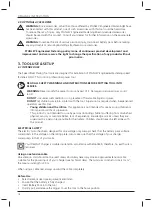
LOADING A MANDREL
•
Insert a mandrel into the tail end of the fasteners through the paper pod.
•
Slide the Mandrel follower spring onto the mandrel ensuring correct orientation as shown below
•
Gripping the tail end of the mandrel, tear off the paper pod from around the fasteners.
FOLLOWER
SPRING
FASTENERS
MANDREL
HEAD
MANDREL
TAIL
END
5.4.2
ADJUSTING THE MANDREL STOP
•
Remove the mandrel from tool and ensure tool is in home position.
•
Remove tail jaw cartridge
•
Referring to fi gure in section 5.3.2, remove fully the locking screw which is accessible from end cap
face
•
Using 3mm hex key, adjust adjusting screw as necessary.
•
Replace locking screw after setting adjusting screw.


