


10
ENGLISH
(Original instructions)
u
The completion of charge will be indicated by the green
charging light (7a) remaining ON continuously.
The battery pack (6) is fully charged and may be removed
and used at this time or left in the charger (7).
u
Charge discharged batteries within 1 week. Battery life will
be greatly diminished if stored in a discharged state.
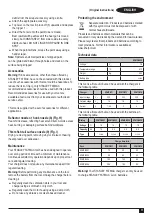
Charger LED Modes
Charging:
Green LED Intermittent
Fully Charged:
Green LED Solid
Hot/Cold Pack Delay:
Green LED Intermittent
Red LED Solid
Note: The compatible charger(s) will not charge a faulty
battery pack. The charger will indicate a faulty battery pack by
refusing to light.
Note: This could also mean a problem with a charger. If the
charger indicates a problem, take the charger and battery
pack to be tested at an authorized service centre.
Leaving the battery in the charger
The charger and battery pack can be left connected with the
LED glowing indefinitely. The charger will keep the battery
pack fresh and fully charged.
Hot/Cold Pack Delay
When the charger detects a battery that is too hot or too cold,
it automatically starts a Hot/Cold Pack Delay, the green LED
(7a) will flash intermittently, while the red LED (7b) will remain
on continuously, suspending charging until the battery has
reached an appropriate temperature. The charger then
automatically switches to the pack charging mode. This
feature ensures maximum battery life.
Battery state of charge indicator (Fig. B)
The battery includes a state of charge indicator to quickly
determine the extent of battery life as shown in figure B. By
pressing the state of charge button (6a) you can easily view
the charge remaining in the battery as illustrated in figure B.
Installing and Removing the Battery Pack (Not
Supplied) from the tool
To install battery pack (Fig. C)
u
Insert battery pack (6) firmly into tool until an audible click
is heard as shown in figure C. Ensure battery pack is fully
seated and fully latched into position.
To remove battery pack (Fig. D)
u
Depress the battery release button (6b) as shown in figure
D and pull battery pack (6) out of tool.
Prior to Operation
Warning! Make sure the nozzle always points away
from you and any bystanders.
Warning! DO NOT drop anything into the nozzle.
Warning! DO NOT exceed 60 minutes "ON" in a
2 hour period.
Switching on and off (Fig. E, F)
u
To power on the tool, flip lock-off (5) upwards and
depress the trigger (1).
u
To turn the unit off release the trigger.
Note: Disconnect the tool from the power source and let
the tool cool down before moving or storing it.
Correct hand position (Fig. F)
Warning! To reduce the risk of serious personal
injury, ALWAYS use proper hand position as shown.
Warning! To reduce the risk of serious personal
injury, ALWAYS hold securely in anticipation of a
sudden reaction.
Proper hand position requires one hand on the main
handle as illustrated in figure F.
Cool down period (Fig. G)
The nozzle and accessory becomes very hot during use.
Turn heat gun off, disconnect from the power source, place
in position shown in Fig.G, and let the tool cool down for at
least 30 minutes before moving or storing it.
Removing paint
Warning! Refer to Important Notice under Additional Safety
Information before using the tool to remove paint.
Warning! Do not strip metal window frames as the
heat may crack the glass.
u
When striping other window frames, use a glass protection
nozzle.
u
To prevent igniting the surface, do not keep the
tool directed at one spot too long.
u
Avoid collecting paint on the scraper accessory, as
it may ignite. If necessary, carefully remove paint


