background image

LOCATION OF OVEN GRID SHELVES

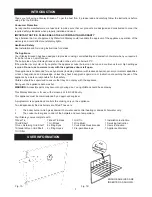
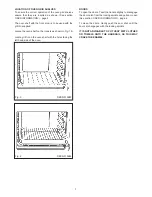
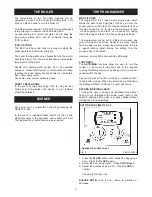
To ensure the correct operation of the oven grid shelves
ensure that they are inserted as shown. (See section
‘USER INFORMATION’) - page 3.

The oven shelf with the front stop, is to be used with the
grill tin supplied.

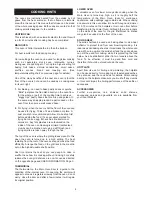
Locate the oven shelf on the runners as shown in Fig. 1B.

Locate grill tin on the oven shelf with the holes facing the
left hand side of the oven.

DOORS

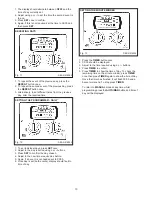
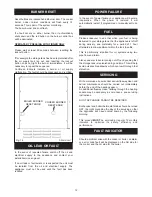
To open the doors. Twist the handle slightly to disengage
the door catch from the locking spindle and pull door open
(See section ‘USER INFORMATION’) - page 4.

To close the doors. Gently push the door shut until the
door catch engages with the locking spindle.

IT IS NOT ADVISABLE TO PUT VERY WET CLOTHES
OR TOWELS ONTO THE HANDRAIL, AS THIS MAY
CRAZE THE ENAMEL.

Fig. 4

Fig. 3

7

DESN 515983

DESN 515984

Summary of Contents for Brandon OCD

Page 1: ...05 10 EOPI 515882 DESN 515980 PLEASE READ THESE INSTRUCTIONS BEFORE USING THIS APPLIANCE Brandon OCD Users Instructions ...

Page 2: ...INTRODUCTION USER INFORMATION 3 CONTROLS 4 THE COOKER 5 COOKING HINTS 6 7 THE BOILER 8 THE PROGRAMMER 8 10 CLEANING AND CARE FOR YOUR STANLEY APPLIANCE 11 BURNER RESET OIL LEAK OR FAULT POWER FAILURE 12 FUEL AND SERVICING 2 ...

Page 3: ...not intended for use by persons including children with reduced physical sensory or mental capabilities or lack of experience and knowledge unless they have been given supervision or instruction concerning the use of the appliance by a person responsible for their safety Children should be supervised to ensure that they do not play with the appliance During use the appliance becomes hot WARNING Ac...

Page 4: ...C 120ºC 1 2 3 4 5 6 7 8 9 HIGH Fig 2 DESN 516005 THE THERMODIAL ON THE MAIN OVEN DOOR IS A GUIDE TO THE CENTRE OVEN TEMPERATURE WHEN COOKING SEE COOKING CHART ON PAGE 5 AND COOKING HINTS ON PAGE 6 FOR FURTHER INFORMATION THERMODIAL GUIDE SIMMER 120ºC 150ºC BAKE 160ºC 200ºC ROAST 220ºC 250ºC ...

Page 5: ...temperature is also variable depending upon the setting used the higher the setting then the higher the hotplate temperature Made of thick cast iron the hotplate is machined flat In order to ensure perfect contact and even heat distribution it is recommended that all pans and kettles have thick machined flat bases Pans should also have tight fitting lids for greatest efficiency Keep the insulated ...

Page 6: ... of the oven seals and cooks the food efficiently Arrange the food on the grill rack in the meat tin set on the highest usable shelf position Cast iron retains the heat so you can peep at a cake or souffle to see how it is cooking without it sinking For safety reasons the oven grid shelves are non tilt use as directed on the opposite page and USER INFORMATION Page 3 THERMODIAL The thermodial on th...

Page 7: ...Fig 1B Locate grill tin on the oven shelf with the holes facing the left hand side of the oven DOORS To open the doors Twist the handle slightly to disengage the door catch from the locking spindle and pull door open See section USER INFORMATION page 4 To close the doors Gently push the door shut until the door catch engages with the locking spindle IT IS NOT ADVISABLE TO PUT VERY WET CLOTHES OR T...

Page 8: ...llows the user to set 2 periods of the day in which the cooker will turn on and then off A typical example of how this may be used is on for use in the morning and then off when going out and then on if needed for cooking later in the day and then off when cooking is finished The programmer can be set for different time each day e g morning and evening However as many people have a similar routine...

Page 9: ...ce to confirm time 1 The display should alternate between OFF 1 and the time of day currently set 2 Adjust using or to set the time the cooker is to turn off 3 Press SET once to confirm 1 The display should alternate between ON2 and time of day currently set 2 Adjust using or to set the time the second event is to begin evening 3 Press SET once to confirm 4 If the second event is not required set ...

Page 10: ... day chosen 4 Adjust to the new times required as before 5 Again if an event is not needed set to 00 00 6 Once day is set both events display should fault to time of day 1 Press the TIMER button once 2 00 00 should be displayed 3 Adjust to the time required using or buttons 4 Press TIMER to confirm 5 Press TIMER to show the time of day To check the remaining time on the minute minder press TIMER o...

Page 11: ...hrome and stainless steel components including the hand rails and their brackets The insulating covers should be cleaned regularly with a NON ABRASIVE mild detergent applied with a soft coarse free cloth and lightly polished up afterwards with a soft coarse free duster or tissue to bring it back to its original lustre DO NOT USE ABRASIVE PADS THAT ARE NOT VEA APPROVED OVEN CLEANER OR CLEANERS CONT...

Page 12: ...set to do so Please endeavour to see that when your fuel is being delivered to your storage tank that the appliance is left off during delivery and preferably for a period of 1 hour afterwards to allow sediment within the tank to settle This is particularly important for oil systems using two pipe flow and return Also endeavour to avoid running out of fuel by seeing that the storage tank is replen...

Page 13: ...13 ...

Page 14: ...14 ...

Page 15: ...15 ...

Page 16: ...licy of continuous product improvement the Company reserves the right to change specifications and make modifications to the appliance described at any time Supplied by Waterford Stanley Ltd Units 210 IDA Industrial Estate Cork Road Waterford Ireland Tel 051 302300 Fax 051 30 2315 www waterfordstanley com ...

Reviews: