7
6
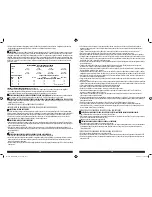
loss of power and overheating. The following table shows the correct size to use depending on cord length and nameplate
ampere rating. If in doubt, use the next heavier gage. The smaller the gage number, the heavier the cord.
MINIMUM GAGE FOR CORD SETS
Volts
Total Length of Cord in Feet
120V
0-25 26-50 51-100 101-150
(0-7.6m) (7.6-15.2m) (15.2-30.4m) (30.4-45.7m)
240V
0-50
51-100
101-200
201-300
(0-15.2m) (15.2-30.4m) (30.4-60.9m) (60.9-91.4m)
Ampere Rating
Extension Cord Length
More
Not more
0’-25’
26’-50’
51 ’-100 ’
101’ -150 ’
Than
Than
American Wire Gage (AWG)
0 -
6
18
16
16
14
6 -
10
18
16
14
12
10 -
12
16
16
14
12
12 -
16
14
12
Not Recommended
When an extension cord is used,
make sure that:
• a) the pins of extension cord are the same number, size and shape as those in the charger,
• b) the extension cord is properly wired and in good electrical condition,
• c) the wire size is large enough for the AC rating of the charger.
CAUTION: TO REDUCE THE RISK OF INJURY OR PROPERTY DAMAGE:
Pull the extension cord by the plug rather than the cord
when disconnecting from the built-in 120 volt AC charger or the AC outlet.
SPECIFIC SAFETY INSTRUCTIONS FOR JUMP STARTERS
WARNING: BURST HAZARD
Do not use the unit for charging dry-cell batteries that are commonly used with home appliances. These batteries may burst
and cause injury to persons and damage property. Use the unit for charging/boosting a lead-acid battery only. It is not intended
to supply power to a low-voltage electrical system other than in a starter-motor application.
• Use of an attachment not supplied, recommended or sold by manufacturer specifically for use with this unit may result in a
risk of electrical shock and injury to persons.
WARNING: RISK OF EXPLOSIVE GASES
• Working in the vicinity of a lead acid battery is dangerous. Batteries generate explosive gases during normal battery
operation. For this reason, it is of the utmost importance that each time before using the jump-starter you read this manual
and follow instructions exactly.
• To reduce the risk of battery explosion, follow these instructions and those published by the battery manufacturer and
manufacturer of any equipment you intend to use in the vicinity of the battery. Review cautionary markings on these products
and on the engine.
CAUTION: TO REDUCE THE RISK OF INJURY OR PROPERTY DAMAGE:
• NEVER ATTEMPT TO JUMP-START OR CHARGE A FROZEN BATTERY.
• Vehicles that have on-board computerized systems may be damaged if vehicle battery is jump-started. Before jump-starting,
read the vehicle’s owner’s manual to confirm that external-starting assistance is suitable.
• When working with lead acid batteries, always make sure immediate assistance is available in case of accident or emergency.
• Always have protective eyewear when using this product: contact with battery acid may cause blindness and/or severe burns.
Be aware of first aid procedures in case of accidental contact with battery acid.
• Have plenty of fresh water and soap nearby in case battery acid contacts skin.
• Never smoke or allow a spark or flame in vicinity of vehicle battery, engine or power station
• Stay clear of fan blades, belts, pulleys, and other parts that can cause injury to persons.
• Remove personal metal items such as rings, bracelets, necklaces and watches when working with a lead acid battery. A
lead acid battery can produce a short circuit current high enough to weld a ring, or similar metal object, to skin, causing a
severe burn.
• Do not wear vinyl clothing when jump-starting a vehicle. Friction can cause dangerous static-electrical sparks.
• Be extra careful to avoid dropping a metal tool onto the battery. It might spark or short-circuit the battery or another
electrical part and could cause an explosion.
• Jump-start procedures should only be performed in a safe, dry, well-ventilated area.
• Always store battery clamps when not in use. Never touch battery clamps together. This can cause dangerous sparks, power
arcing and/or explosion.
• When using this unit close to the vehicle’s battery and engine, stand the unit on a flat, stable surface, and be sure to keep all
clamps, cords, clothing and body parts away from moving vehicle parts.
• Never allow red and black clamps to touch each other or another common metal conductor — this could cause damage to the
unit and/or create a sparking/explosion hazard.
• Make sure to connect the clamps with correct polarity. Damage caused by improper connection is not covered by the
Warranty.
• Do not expose battery to fire or intense heat since it may explode. Before disposing of the battery, protect exposed terminals
with heavy-duty electrical tape to prevent shorting (shorting can result in injury or fire).
• Place this unit as far away from the battery as cables permit.
• Never allow battery acid to come in contact with this unit.
• Do not operate this unit in a closed area or restrict ventilation in any way.
• This system is designed to be used only on vehicles with a 12 volt DC battery system. Do not connect to a 6 volt or 24 volt
battery system.
• This system is not designed to be used as a replacement for a vehicular battery. Do not attempt to operate a vehicle that does
not have a battery installed.
• Excessive engine cranking can damage a vehicle’s starter motor. If the engine fails to start after the recommended number of
attempts, discontinue jump-start procedures and look for other problems that may need to be corrected.
• Do not use this jump starter on a watercraft. It is not qualified for marine applications.
• Although this unit contains a non-spillable battery, it is recommended that unit be kept upright during storage, use and
recharging. To avoid possible damage that may shorten the unit’s working life, protect it from direct sunlight, direct heat and/
or moisture.
SPECIFIC SAFETY INSTRUCTIONS FOR COMPRESSORS
WARNING: BURST HAZARD: Bursting articles can cause serious injury.
• Carefully follow instructions on articles to be inflated.
• Never exceed the recommended pressure listed in instructions on articles to be inflated. If no pressure is given, contact article
manufacturer before inflating.
• Always monitor the pressure on the LCD screen.
CAUTION: TO REDUCE THE RISK OF PROPERTY DAMAGE:
• Never leave the compressor unattended while in use.
• Do not operate compressor continuously for longer than approximately 10 minutes, depending on ambient temperatures. This
could damage the compressor. Follow the instructions in the "Portable Compressor" section.
SPECIFIC SAFETY INSTRUCTIONS FOR THE USB POWER PORTS
• Do not insert foreign objects into the USB Power Ports.
• Do not attach USB hubs or more than one personal electronic device to each USB Power Port.
• Do not use this unit to operate appliances that require more than 6.2 amps in total to operate from the USB power ports
FIRST AID
•
Skin:
If battery acid comes in contact with skin, rinse immediately with water, then wash thoroughly with soap and water. If
redness, pain, or irritation occurs, seek immediate medical attention.
•
Eyes:
If battery acid comes in contact with eyes, flush eyes immediately, for a minimum of 15 minutes and seek immediate
medical attention.
•
LCD liquid crystal display:
If liquid crystal comes in contact with your skin: Wash area off completely with plenty of water.
Remove contaminated clothing. If liquid crystal gets into your eye: Flush the affected eye with clean water and then seek
medical attention. If liquid crystal is swallowed: Flush your mouth thoroughly with water. Drink large quantities of water and
induce vomiting. Then seek medical attention.
SAVE THESE INSTRUCTIONS
INTRODUCTION
Congratulations on purchasing your new
Stanley
®
FatMax
®
Professional Digital Power Station.
Read this Instruction Manual and
follow the instructions carefully before using this unit.
PP1DCS_ManualENSP_072116.indd 6-7
7/27/2016 10:20:07 AM

