background image

Instrucciones

IMPORTANTE

PARA COMENZAR

# Serie:

# Combinación Electrónica

NOTA: Usted puede almacenar su Numero de Llave y 

su Nymero de Combinacion en el web site SEGURO 

de - stack-on.com bajo la opcion que dice Customer 

Servicio 

Al almacenar su Numero de Llave y Numero de 

Combinacion en este web site le proporcionara acceso 

instantanio ha esta informacion importante en caso de 

que usted pierda sus llaves o numero de combinacion.  

Nadamas usted tendra acceso ha esta informacion 

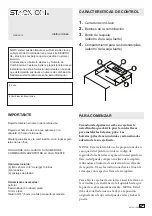
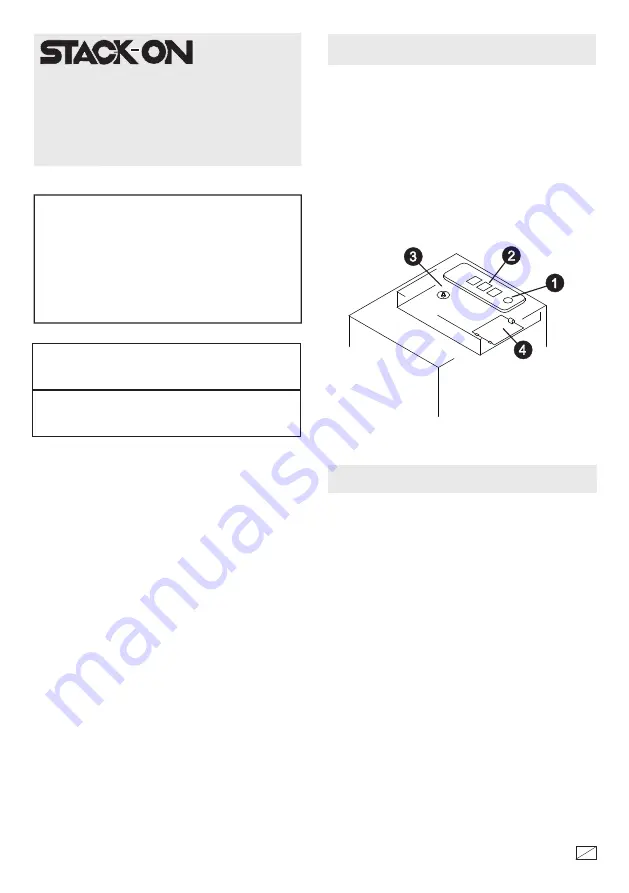
CARACTERISTICAS DE CONTROL

1.

  Cerradura con Llave

2.

  Botones de la combinación

3.

  Botón de reajuste 

      (adentro de la caja fuerte)

4.

  Compartimiento para las baterías/pilas      

      (adentro de la caja fuerte)

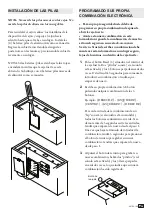
Cuando usted primero reciba su caja fuerte 

usted tendra que abrir la puerta con las llaves 

para instalar las baterías/pilas.  Las 

baterías/pilas vienen incluidas y están situadas 

adentro de la su caja fuerte.

NOTA:  Esta tecla también se ha proporcionado en 

caso que usted pierde u olvida su código de 

seguridad o las baterías se agotan. Si usted pierde su 

llave, usted puede comprar una llave de reemplazo 

refiriéndose al número de serie situado en el frente 

de la puerta.  Vease las instruciones hacia el final de 

estas ojas con respecto a llaves de reemplazo.

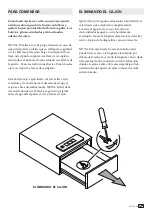
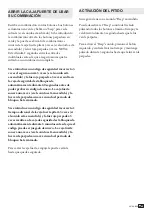
Para abrir la caja fuerte con la llave inserte la llave en 

la cerradura y de vuelta hacia la izquierda hasta que 

la puerta se abra automáticamente.  NOTA: Usted 

debe dar vuelta de nuevo a la llave a la posición 

original antes de que usted pueda cerrar y trabar la 

puerta. 

Registre tambien el número de combinación.

Registre el número de serie que aparece en la 

etiqueta en frente de la puerta.

Mantenga las llaves y la combinación en un lugar seguro 

lejos de los niños.

NO GUARDE LAS LLAVES O SU NUMERO DE 

COMBINACIÓN ADENTRO DE LA CAJA FUERTE.

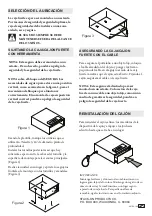
Herramientas necesarias:

perforar

Destornillador de cabeza plana

10 mm Llave

Taladro 3/16 "(5 mm) de bits para perforar madera

Hardware incluido:

(4) M6 x 20 mm (3/4 "de largo) Tornillos

(4) Arandelas

(4) anclajes de plástico

®

QAS-1510

40706-1608

8 14

Summary of Contents for QAS-1510

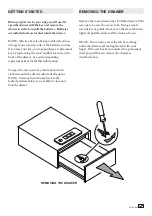
Page 1: ...bination Only you will have access to this information CONTROL FEATURES 1 Key lock 2 Combination buttons 3 Reset button inside safe 4 Battery Compartment inside safe Record the serial number from the...

Page 2: ...provided if you lose or forget your security code or the batteries run low If you lose your key you may purchase a replacement key by referencing the serial number located on the front of the drawer S...

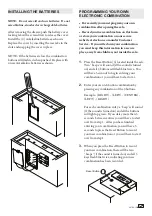
Page 3: ...ren not inside the safe PROGRAMMING YOUR OWN ELECTRONIC COMBINATION 1 2 Press the Reset Button 3 located inside the safe Two beeps will sound if the sound is turned on and all 3 buttons will flash blu...

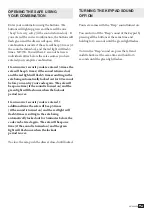
Page 4: ...ntil the green light flashes To turn the Beep sound on press the left and middle button at the same time and hold for 3 seconds until the green light flashes If an incorrect security code is entered 3...

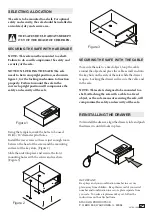
Page 5: ...the template mark the holes to be used Drill 3 16 diameter pilot holes Install the rear screws so there is just enough room between the head of the screw and the mounting surface for the key slots Fi...

Page 6: ...Purchased___ ___ ____ Owner s Address ___________________________ Unit or Apt Number _________________ City ___________________________ State _______________ Zip Code________________ Telephone Number...

Page 7: ...Y PRODUCT OR ANY PART OF ANY PRODUCT WHICH HAS BEEN SUBJECT TO EXCESSIVE USE ACCIDENT NEGLIGENCE ABUSE OR MISUSE INCORRECT MAINTENANCE ALTERATION OR REPAIR BY ANYONE OTHER THAN STACK ON IN ADDITION TH...

Page 8: ...ha proporcionado en caso que usted pierde u olvida su c digo de seguridad o las bater as se agotan Si usted pierde su llave usted puede comprar una llave de reemplazo refiri ndose al n mero de serie...

Page 9: ...ridad o si las bater as pilas estan bajas Si usted pierde su llave usted puede comprar una llave de reemplazo refiri ndose al n mero de serie situado en el frente de la puerta Vease las instruciones h...

Page 10: ...n en un lugar seguro lejos de los ni os no dentro de la caja fuerte PROGRAMADO SUS PROPIA COMBINACI N ELECTR NICA Ejemplo DERECHO IZQUIERDO CENTRO IZQUIERDO DERECHO Bot n de reajuste 1 2 Pulse el bot...

Page 11: ...ierdo y central al mismo tiempo y mantenga pulsado durante 3 segundos hasta que la luz verde parpadea ACTIVACI N DEL PITIDO Si se introduce un c digo de seguridad incorrecto 3 veces el seguro sonar 5...

Page 12: ...s que se utilizar n Taladre 3 16 de di metro piloto de profundidad Instalar los tornillos posteriores as que hay suficiente espacio entre la cabeza del tornillo y la superficie de montaje para las ran...

Page 13: ...recci n propietario _____________________________ No Interior _________________ Ciudad ________________________ Estado _______________ C P ________________ No Tel fono ____ ___________________ No Fax...

Page 14: ...NTE NEGLIGENCIA ABUSO O MAL USO MANTENIMIENTO INCORRECTO ALTERACI N O REPARACI N POR CUALQUIER TERCERO QUE NO SEA STACK ON ADICIONALMENTE ESTA GARANT A NO CUBRE ACCESORIOS O PIEZAS USADAS CON O DENTRO...

Reviews: