background image

3

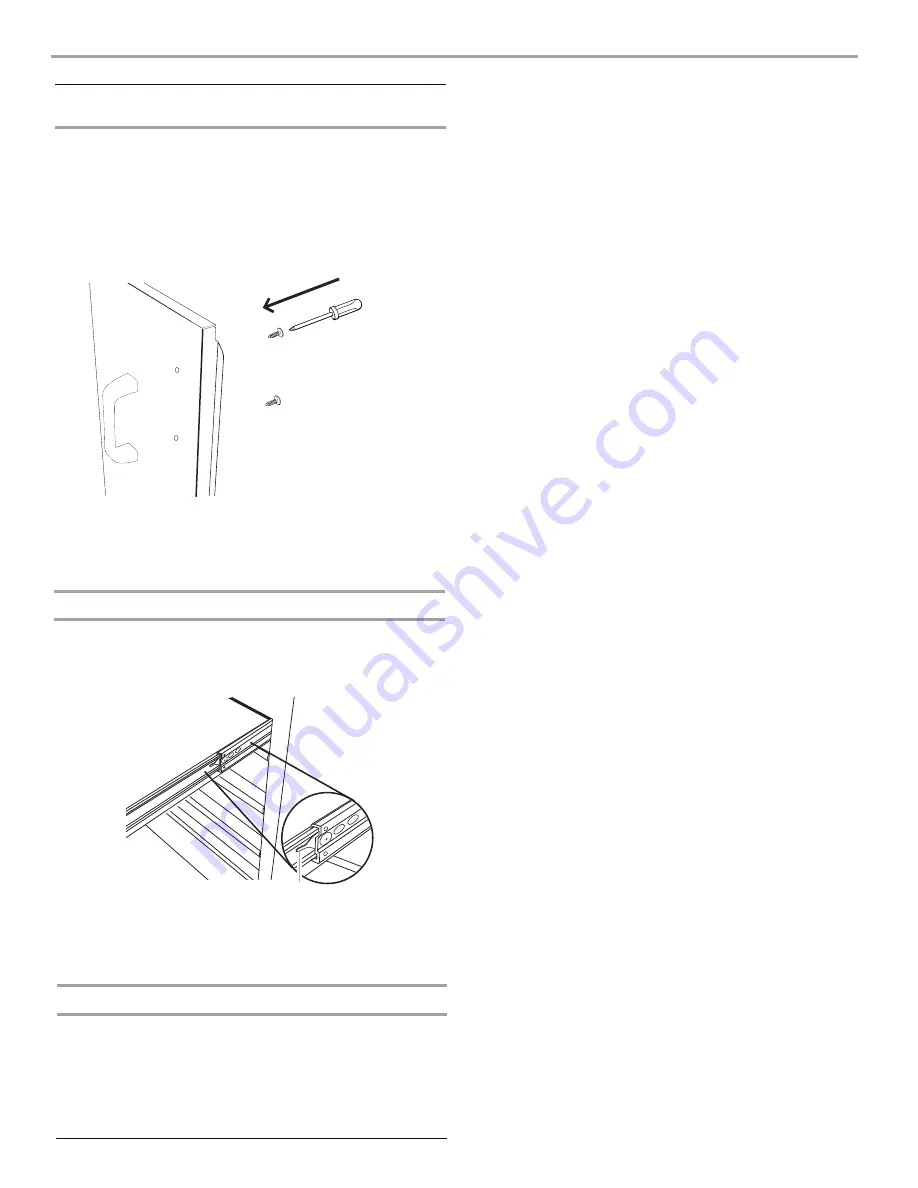
Install the Door Handles

1. Open the doors.
2. Insert Phillips head screws through pre-drilled holes in door.
3. Align door handles with screws and tighten. 

(Do not overtighten)

4. Repeat this procedure for the other door handle.

Removing/Installing the Drawers

(select models only)

Removing the Drawer

1. Unload the contents from the drawer.

2. Slide the drawer out as far as it will go.

3. Press the lever down on the right-hand track and lift the lever up

on the left track to release the drawer.

A. Lever

A

........

..

........

..

.......

...

........

..

Replacing the Drawer

1. Align the drawer guides with the receiving

glides.

2. Hold the receiving glides firmly and insert the drawer guide.

NOTE: It is normal for the convertible tray or drawer to close

tightly the first time after it has been removed.

3. Push the drawer in completely.

Summary of Contents for GCB-2SF-BB

Page 1: ...have provided many important safety messages in this manual Always read all safety messages This is the safety alert symbol This symbol alerts you to potential hazards that can kill or hurt you and ot...

Page 2: ...caster 7 Hold the casters in place making sure the bolts are seated in the narrow ends of the keyhole slots Tighten the self locking nuts with a wrench 8 To attach the two swivel casters to the rear...

Page 3: ...Drawer 1 Unload the contents from the drawer 2 Slide the drawer out as far as it will go 3 Press the lever down on the right hand track and lift the lever up on the left track to release the drawer A...

Page 4: ...seated in the narrow ends of the keyhole slots Tighten the self locking nuts with a wrench Do not overtighten 7 To attach the two swivel casters to the rear caster location repeat steps 2 and 3 8 Retu...

Page 5: ...instructions provide a general guideline for hanging the cabinet Fastening hardware is included for wood frame wall construction The cabinet should be mounted flush and level on the wall You must use...

Page 6: ...retailer for fastening hardware for your particular mounting surfaces Drill 2 pilot holes into the wall studs lining up with the top 2 mounting holes in the back of the cabinet Secure the cabinet to...

Page 7: ...ABUSE OR MISUSE INCOR RECT MAINTENANCE ALTERATION OR REPAIR BY ANYONE OTHER THAN STACK ON IN ADDI TION THIS WARRANTY DOES NOT COVER ANY ACCESSORIES OR PARTS USED WITH OR IN THE PRODUCT WHICH ARE NOT...

Reviews: