


7.
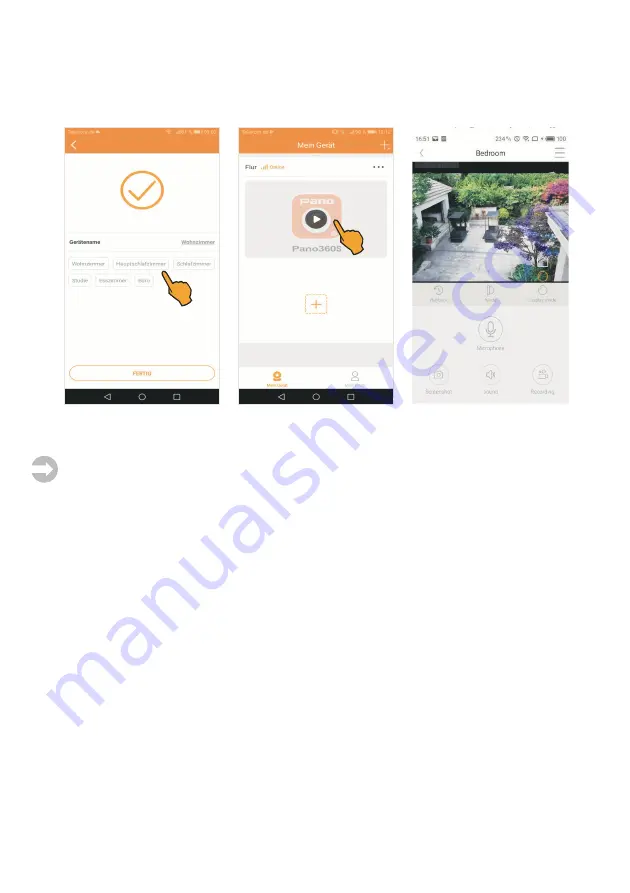
After successful installation, a device name can be assigned to the camera. Now tap on one
of the default names or enter a name in the device name field. Afterwards tap
Fertig
(Done).
The connection between app and camera is established. Afterwards the camera switches on-line.
For displaying the cameras live image, tap the
Pano360S icon
.
Mounting and connecting the camera
Important information:
Consider the following when selecting the camera position:
Range:
Check whether the connection between the camera and your WLAN network is stable
at the intended position.
Lighting conditions:
The camera should not be orientated towards direct, strong light sour-
ces/sunlight, since overexposed images may result.
Power supply:
The camera's power supply unit must not be exposed to the weather in the open!
Mounting:
The camera support is suitable for ceiling and wall mounting.
Make sure that the mounting surface is stable and does not give rise to strong vibrations and/or
falls.
First, install the camera only provisionally and check whether the desired monitored area is
completely covered prior to drilling the holes for the camera support! Make sure that no cables
or conducts are placed in the wall which may be damaged when drilling!
Mark the desired position for the drilling holes of the fixing screws and use the camera mount as
drilling jig.
Drill the mounting holes and fix the camera using screws which are suitable for the respective
base material.
For adjusting the horizontal and vertical camera position, loosen the three hexagon socket screws
with the supplied hex-wrench to release the camera base.
Now adjust the camera to the desired position and angle. Then tighten the hexagon socket screws
to fix the position.
Plug the power supply unit into a socket (230 V) and connect the plug to the DC IN socket of the
camera. If the power LED lights green, the camera is operable.
36
Summary of Contents for 51096
Page 58: ...58 Notizen Notes...


