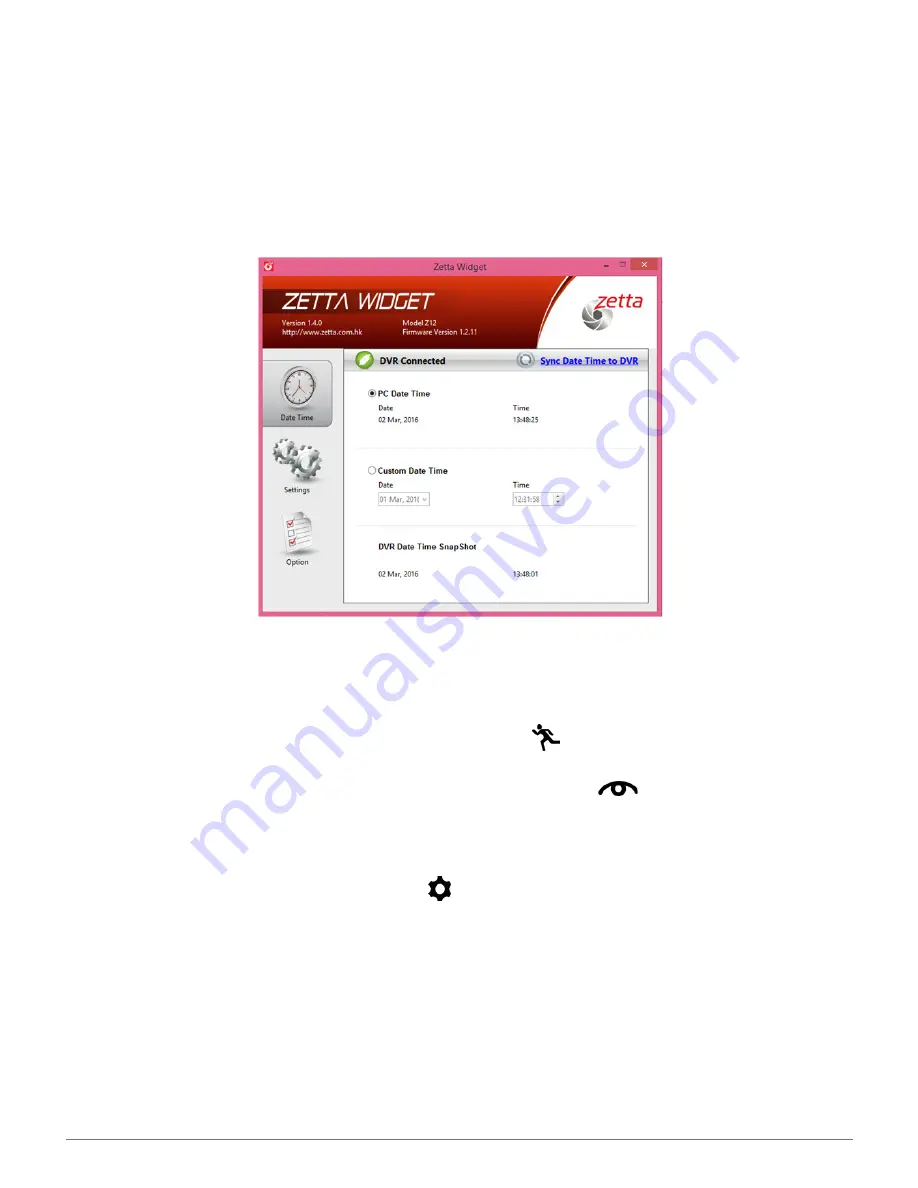
background image

to the camera. By default, the date and time are superimposed on the bottom-right 
corner of the video as it’s being recorded. See the Time stamp (pg. 8) section if you 
want to record videos without the date and time.

Note:

 Remember to connect the camera to your computer to adjust the time when 

the clock springs ahead or falls back an hour.

Setting the Mode

To get the highest resolution during manual recording, move the three-position 
switch to the middle position, the On-the-go mode      . For less resolution but longer 
recording time before running out of memory or overwriting previous video in a 
circular recording, move the switch to Surveillance mode          .The frame rate is the 
same for both modes. Neither mode supports the automated triggers or unattended 
recording times you can set using the Zetta widget. If you’ve set the camera from the 
Zetta widget to start recording on its own from a trigger or designated time, you must 
leave the slider in the Custom position      .

Recording a Video

To start a recording manually, make sure the mode is set for Surveillance or On-the-
go and press and hold the Power button until the green LED lights up. It will shine 
steadily, then after a few seconds flash continually to indicate that a recording is in 
progress. To end a recording, hold the Power button for two seconds. The LED will 
turn orange, then turn off to indicate recording has stopped. 

SPYTEC Z12 INTELLIGENT SECURITY CAMCORDER USER GUIDE

5

Summary of Contents for Zetta Z12

Page 1: ...olutions and can be set for loop recording Recordings can be triggered automatically by motion vibration or voice and videos are date time stamped The camera s microSD slot accommodates a card containing up to 200GB of memory With a vibration standby time of up to 90 days and the capability to power recordings for up to 8 hours from its internal battery the camera is extremely flexible to place an...

Page 2: ...icon Hold down the power button until the LED turns green When you see the green LED continually flashing the camera is recording Make sure the front of the camera and its pinhole lens are pointed at your subject Charging the Battery The LED flashes red while charging and turns off when the battery is fully charged The fastest way to charge the Z12 is by plugging the AC adapter into a wall outlet ...

Page 3: ...recording session If you re unsure how much power is left in the battery keep the camera plugged into a power source Handling and Formatting the Memory Card Because a MicroSD card not included is fragile and about one quarter the size of an SD card it s easy to damage or lose Keep your eye on the card as you insert the edge with the eight metal contacts pointed up into the slot while the camera s ...

Page 4: ...s are stored and one is the camera s internal memory The latter has a small amount of on board flash for settings and firmware It s not sufficient to store video The camera must be plugged into your computer to use the software If the camera is not connected you ll see an unplugged icon in red next to DVR disconnected at the top of the screen When the camera is connected using the included USB cab...

Page 5: ...e the switch to Surveillance mode The frame rate is the same for both modes Neither mode supports the automated triggers or unattended recording times you can set using the Zetta widget If you ve set the camera from the Zetta widget to start recording on its own from a trigger or designated time you must leave the slider in the Custom position Recording a Video To start a recording manually make s...

Page 6: ... your instructions downloaded to the camera from the Zetta widget computer software To see the Custom selection screens change the Setting Mode from Express to Custom then click on the Save Option button A check mark in a green circle will appear on the left side of the screen confirming Option Saved Now when you click on Settings in the left column you ll be greeted with a laundry list of capabil...

Page 7: ...tion recordings The Zetta Widget default frame rate is High Indoor Lighting Condition The camera can be set to match the frequency of electricity in various countries to provide the most pleasing video under indoor lighting For use in North America the software should be set to 60 Hz though you re unlikely to see much difference The default is 50 Hz Day Night Mode Set to Day mode if the camera s l...

Page 8: ... loop recording circular recording means that the camera will automatically overwrite the oldest video file with the newest video That way you don t have to keep changing memory cards or transferring files to your computer The setting assumes you don t need to archive days old video but simply want the ability to retrieve recent footage when a surveillance situation or vehicular accident warrant f...

Page 9: ... in Surveillance mode every 30 minutes On the go every 15 minutes The Custom default for Split File Time is 15 minutes To choose when the camera automatically saves recordings at one of the three intervals click on the 10 15 or 30 minute button then click on Sync Settings to DVR Make sure to leave the camera s three position switch on Custom mode Mic In some situations audio in a video recording i...

Page 10: ...ty to High Medium or Low If the goal is to trigger a recording from people yelling or shouting set the sensitivity to Low If it makes more sense to trigger a recording from people whispering set the sensitivity to High If you re not sure set it to Medium You should experiment to see which setting is best in the intended environment Once triggered a recording will continue for 5 minutes then return...

Page 11: ... Motion Trigger Sensitivity The most useful automatic trigger to cause a video to start recording from a fixed position camera typically is motion Someone darts into view and the camera begins to record You can set the trigger s sensitivity level to High Medium or Low If you re expecting a lot of motion in the camera frame such as shadows cast by tree limbs swaying in a breeze in front of an outdo...

Page 12: ...is turned on Car Stop Recording for when the engine is turned off Car Activate Car Stop Recording for both SPYTEC Z12 INTELLIGENT SECURITY CAMCORDER USER GUIDE 12 Tip Keep in mind that the motion trigger cannot distinguish between a cat and a cat burglar If a guard dog is typically active for instance you may want to aim the camera so that the floor is out of frame ...

Page 13: ... flowing into the socket In the case of a vehicle with an always on powered socket recordings must be manually started and stopped Auto On Off Like using the On Off alarm setting on a clock radio clicking on Scheduled Recording will activate recordings at the times you ve set Clicking on Disable will cause the camera to ignore scheduled recordings Remember to click on the Sync Settings to DVR butt...

Page 14: ...a 3 hour block or click and hold the mouse to extend the time in multiples of 3 hours Upon highlighting a time block the Create Task box appears The default is to Always Record during the designated time block To instead set triggers during the time block click on Triggering Record and check off up to three ways for the camera to start recording Voice Trigger Vibration Trigger and Motion Trigger T...

Page 15: ...ck OK on the Schedule Settings screen Then in the Settings screen make sure to click on the Sync Settings to DVR button LEDs at a Glance It s important to pay attention to the Z12 s multi color light emitting diode in order to know the status of the camera Here s a quick guide While Powered from Camera s Battery Green steady camcorder is booted up Red steady no card card fail battery low or card f...

Page 16: ...ht 1 6 oz 46 g TROUBLESHOOTING AND FAQS 64 to 200GB microSD Card Support If one of these high capacity cards is not recognized by the Z12 you ll need to properly format it If the card has not been used before formatting it won t wipe out any data But if the card has been in use keep in mind that any data stored on the card will be lost during formatting Fully insert the up to 200GB microSD card in...

Page 17: ...D card with capacity 59 63 128GB listed Choose Erase Choose MS DOS FAT under the Format Press Erase at the lower right corner Then press Erase in the new pop up windows Wait for a while making sure and that the power supply and cable connec tion are stable Formatting should be complete For more help formatting cards greater than 32GB see http support spytec com help article link 64gb sd card forma...

Page 18: ... seconds it turns orange and shuts off the camera has shut down and will not wake up on its own Press the LED until the green LED comes on flashes for a few seconds then turns off The camera is set for standby It s important to recognize the state in which you leave the camera if you expect it to recognize the Schedule Settings How Can I Make the Camera More Secure You can purchase the optional ad...

Page 19: ...s storage devices etc unauthorized modifications to the device negligence or from any environmental or natural disasters or from loss or theft This warranty requires proof of sale of the device from STI or from approved resellers only Devices that are covered will be repaired or replaced at STI s discretion Devices requiring replacement will be fulfilled with a new or refurbished unit or a similar...

Reviews: