background image

18

MEMORY CARD

Using a memory card is required to record videos and photos. The camera 

is compatible with microSD memory card, up to 32 GB capacity (Class 4 or 

higher). Sold separately, see AVAILABLE ACCESSORIES section.

Before inserting or removing a card, turn off the camera to prevent damage 

to the files. 

The screen displays "no card" when there is no SD card in the camera and 

"Card Ful" when it is full. In addition, when the memory card is full, the 

screen displays "0000" in PHOTO and TIMELAPSE mode and "00:00:00" in 

VIDEO mode for the remaining number of photos and the remaining video 

recording time. If a video is being recorded, the camera automatically stops 

recording and the video will be saved. 

The following data shows the approximate quantity of photos or video length 

that can be taken by the camera depending on the memory card capacity.

16 GB

32 GB

Photo
1 MP

50900

101800

3 MP

15100

30200

5 MP (XCEL

MC

 HD)

9400

18800

5 MP (XCEL

MC

 HD2)

6500

13000

8 MP

4950

9900

12 MP

3900

7800

Video
480p @ 60 fps

5h45

11h15

720p @ 30 fps (XCEL HD)

4h45

9h45

720p @ 60 fps (XCEL HD2)

1h55

3h50

1080p @ 30 fps

3h45

7h30

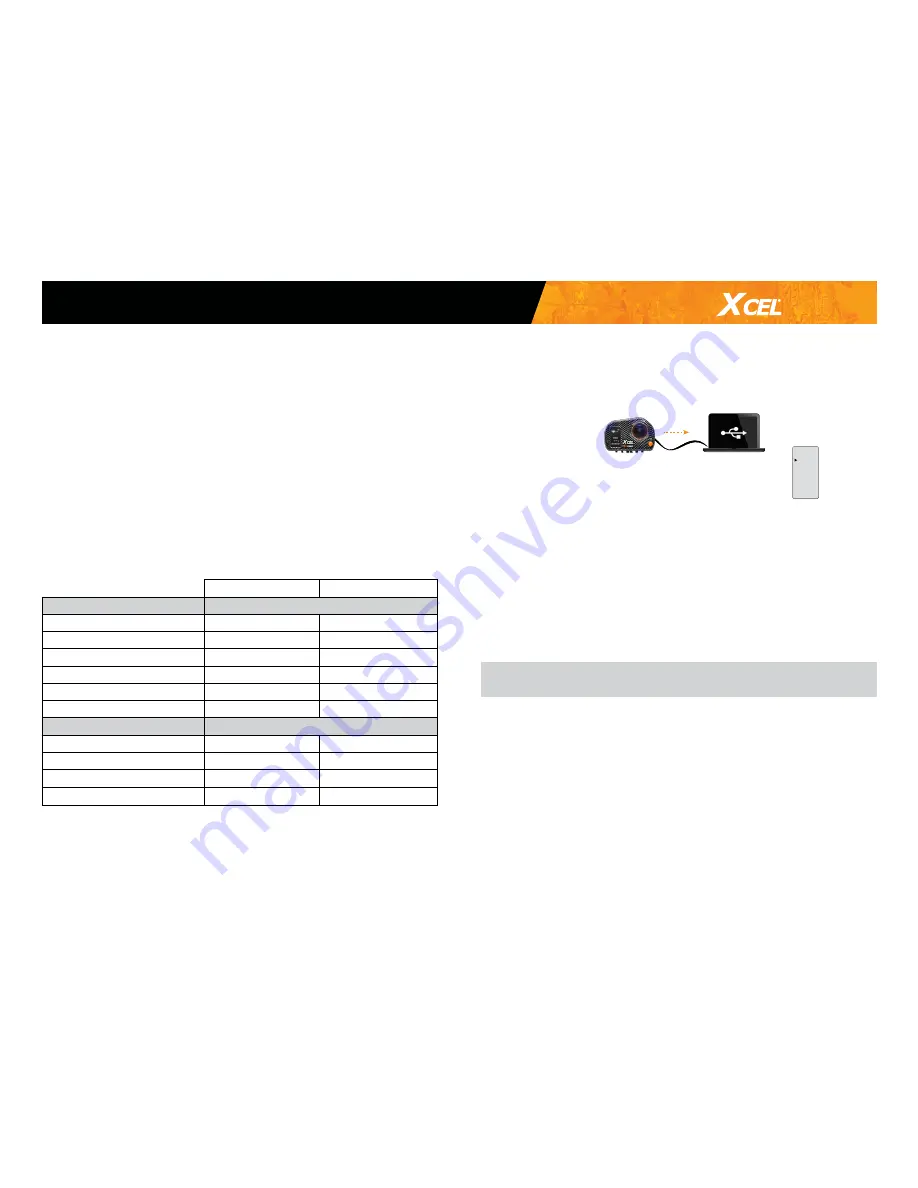
TRANSFERRING FILES TO A COMPUTER

Allows to transfer or to view videos/photos using a computer. 

1.  Connecting the camera to a computer using the USB cable included.

2.  Select "USB TRANSFER" by pressing the OK button. 

3. 

The USB icon appears on the screen to indicate that the file transfer is 

in progress and the battery icon appears on the top right of the screen 

to indicate the battery is charging.

4.  The computer will recognize the camera and install the driver auto-

matically. Click on "My Computer" and select "Removable Disk". Then 

click on "DCIM" and "100MEDIA" in order to find the videos and photos 

stored.

5.  Drag or save the files to the desired location. 

Taking the memory card out of the camera and inserting it into the computer 

slot will achieve the same results (a SD adapter may be required). 

CHARGE

ONLY

USB 

TRANSFER

Note

: Videos in .MP4 format require the use of a compatible video player 

software such as VLC, Windows Media Player or QuickTime.

HDMI

USB

TV

LAPTOP

PORTABLE

HDMI

USB

LAPTOP

PORTABLE

Memory card/ Transferring files to a computer

Summary of Contents for XCEL HD

Page 1: ...P INT SPY INT P SPY XCEL ACTION CAMERAS v2 5 USER MANUAL Models XCEL HD XCEL HD2 1 888 779 7646 support spypoint com tech spypoint com ...

Page 2: ...and the involvement of our employees in all stages of development manufacturing and product promotion Our priority is to provide outstanding multilin gual customer service Prosperous and respected GG Telecom is a company that keeps abreast of new technologies and listens to its customers Our XCEL products are constantly being developed Our research and development team works tirelessly to offer hi...

Page 3: ...s and screen depending on selected options 12 Remote control XCEL HD 14 XCEL HD2 15 Charging the battery 17 Memory card 18 Transferring files to a computer 18 Maintenance of the camera 19 Troubleshooting 20 Error messages 20 Available accessories 21 Specifications XCEL HD 23 XCEL HD2 24 Regulation 25 Limited warranty 26 Repair service 26 Table of contents ...

Page 4: ...e mount Flat adhesive mount Lens cleaning cloth Carrying case HDMI and USB cables Lens protector Wrist strap XCEL stickers 3 Camera with slide adaptor XCEL HD Quick release stands with safety ring 2 1 button remote control XCEL HD Lithium ion Polymer battery 2 way remote control XCEL HD2 Camera with slide adaptor XCEL HD2 MOUNTING ACCESSORIES INCLUDED Package contents ...

Page 5: ... BOTTOM VIEW MODE BUTTON ON OFF START STOP BUTTON BACK BUTTON MICRO HDMI PORT WIDE ANGLE LENS MICRO USB PORT MIC IN SLIDE ADAPTOR ANCHORAGE MICROSD SLOT OK BUTTON MIC MICROSD SLOT HEAT SINK MOUNT SYSTEM Components ...

Page 6: ...water use The housing is waterproof up to 160 ft image camera with XHD OHT housing An access screw for the microphone is located at the back of the housing Remove the screw completely to improve sound recording Note that the housing is no longer waterproof if the screw is loosened or removed the water will infiltrate into the housing USING THE CAMERA WITHOUT THE WATERPROOF HOUSING To use the camer...

Page 7: ...N 360 ROLL BAR MOUNT 90 STRAIGHT EXTENDERS CURVED FLAT ADHESIVE MOUNTS HUNTING EDITION BOW MOUNT SCOPE MOUNT HEAD STRAP MOUNT WATERPROOF HOUSING QUICK RELEASE STAND WITH SAFETY RING Included accessories installation ...

Page 8: ...ecording See OPERATION OF THE LED LIGHTS AND SCREEN DEPENDING ON SELECTED OPTIONS section To increase the zoom XCEL HD2 only press OK and to decrease press BACK Refer to the subject distance table in the REMOTE CONTROL sec tion to find which zoom level to use The zoom adjustment can be done while recording a video To stop recording press the button The camera beeps if the sound signal option is en...

Page 9: ...ws to take photos at predefined regular intervals Allows you to see the current configuration of the TIME LAPSE mode 1 Battery level 2 Time lapse mode 3 Time interval between each photo 4 Photo resolution 5 Remote control wireless 6 Zoom 1x to 4x only XCEL HD2 7 Sound signal 8 LED lights 9 Estimated number of photos that can be taken before the card is full To start taking photos press the button ...

Page 10: ...e 3 Number of recorded photos 4 Number of recorded videos VIEWING ON A TELEVISION Allows the user to view videos and photos directly on a television 1 Connect the HDMI cable included to the HDMI port of the TV and to the camera 2 Turn on the camera by pressing the button 3 Navigate on the interface to VIEW mode by pressing the M button 4 Select the VIEW mode by pressing the OK button The last vide...

Page 11: ...a is waiting for the signal from the remote control and flash rapidly during record videos photos See OPERATION OF THE LED LIGHTS AND SCREEN DEPENDING ON SELECTED OPTIONS section for more details Erase Allows the user to erase the last file or all files Allows the user to set the camera options Navigating in the menu The M button to move among the choices The OK button to select an option The BACK...

Page 12: ...s waiting for the signal from the remote control when the video photo or time lapse mode is shown on the screen The screen turns off after 1 minute of inactivity ENERGY SAVING To return to the screen press the OK button Video Time lapse The LED light on the back flashes rapidly The screen turns off after 5 seconds ENERGY SAVING Photo The LED light on the back flash twice DISABLED Enabled The camer...

Page 13: ...the camera goes into sleep after 2 minutes of inactivity to maximize battery life To wake the camera from sleep do one of the following actions 1 Press the RECORD button on the remote control 2 Hold down the ON OFF button on the camera for 3 seconds Configuration modes ...

Page 14: ...s are on the remote control automatically synchro nizes to each camera when the START STOP button is used to take a video or photo This means that the remote control will start recording or taking photos simultaneously on each of these cameras LITHIUM BUTTON BATTERY The light turns on to indicate that the batteries are drained The remote control must be powered by 2 lithium but ton batteries CR203...

Page 15: ...rve battery life 1 Selected mode 2 Zoom selected 3 Recording status 4 Keypad lock Note During a change of mode or zoom the camera screen will be up dated only when the recording starts sync sync ok ok 3 4 1 2 REMOTE CONTROL UTILIZATION Button Allows the user to change the recording mode Video photo or Time Lapse Button Allows the user to start and stop the video and photo recording When a video or...

Page 16: ...Unscrew the 6 screws 3 Open the cover and take out the battery Dispose of properly 4 Install the new battery in as indicated Battery polarity must be respected 5 Close the cover put the screws and the foams back The camera and the remote control will remain synchronized ATTACHING THE REMOTE CONTROL To attach the remote control using the strap included just insert the strap into the slots on each s...

Page 17: ...g recorded and the battery level reaches 0 the camera saves the file before shutting down TO CHARGE THE BATTERY 1 Using the USB cable included connect the camera to a USB power source a computer a booster pack a car charger XHD CUSB a USB adaptor XHD A sold separately sold separately 2 Select CHARGE ONLY with the M button and press the OK button 3 The battery icon displays the loading progress unt...

Page 18: ... MP 3900 7800 Video 480p 60 fps 5h45 11h15 720p 30 fps XCEL HD 4h45 9h45 720p 60 fps XCEL HD2 1h55 3h50 1080p 30 fps 3h45 7h30 TRANSFERRING FILES TO A COMPUTER Allows to transfer or to view videos photos using a computer 1 Connecting the camera to a computer using the USB cable included 2 Select USB TRANSFER by pressing the OK button 3 The USB icon appears on the screen to indicate that the file t...

Page 19: ...tons may rust Note It is important to follow these tips because the warranty does not cover any GG Telecom products which has been subjected to water damage due to user error WARNINGS Never place the camera or the battery inside or above a heating device such as a microwave oven a stove or a radiator This could lead to over heating or the deformity of materials or even cause a fire or explosion Pr...

Page 20: ...rns off in order to preserve the battery while still recording To return to the screen press the OK button The camera turns off Charge the battery When the remote control option is disabled the camera turns off after 2 minutes of inacti vity Press and hold the button a few seconds to turn on the camera The camera does not respond Remove the battery and reinstall it Impossible to take videos photos...

Page 21: ...HD A USB power adaptor XHD CHG Dual battery charger XHD CUSB Dual USB car charger MOUNTING ACCESSORIES XHD CM Cap mount XHD NVG NVG helmet mount XHD BJM Ball joint mount and low quick release stand kit XHD DOG Dog mount XHD PM Pole mount XHD SGM Shotgun mount XHD DM Decoy mount Available accessories XHD HK Helmet kit XHD AM Adhesive mount XHD CHM Chest mount XHD BM Bow mount XHD HSM Head strap mou...

Page 22: ...ICROSD 16GB 32GB PROTECTION AND OTHERS ACCESSORIES XHD LP Lens protector XHD MIC External microphone XHD FOG Anti fog inserts XHD TL Tether leash Available accessories XHD SM Suction mount XHD SSM Sling stud mount MA 360 Camera mount XHD TPM Tripod mount XHD 360RBM Roll bar mount ...

Page 23: ...ne input 2 5 mm input for external microphone optional Memory storage Support Internal memory none External memory microSD card up to 32 GB class 4 or higher not included Viewing TV output Micro HDMI Computer output Micro USB Power source Lithium ion polymer battery Rechargeable lithium ion polymer battery Dimensions 2 4 W x 1 7 H x 1 6 D Weight 2 9 oz camera with battery 5 7 oz camera with batter...

Page 24: ... AAC codec Microphone input 2 5 mm input for external microphone optional Memory storage Support Internal memory no External memory microSD card up to 32 GB class 4 or higher not included Viewing TV output Micro HDMI Computer output Micro USB Power source Lithium ion polymer battery Rechargeable lithium ion polymer battery Dimensions 2 4 W x 1 7 H x 1 6 D Weight 2 9 oz camera with battery 5 7 oz c...

Page 25: ...ed Consult the dealer or an experienced radio TV technician for help Changes or modifications to this equipment not expressly approved by the party responsible for compliance could void the user s authority to operate the equipment This device complies with Part 15 of the FCC rules Opera tion is subject to the following two conditions 1 this device may not cause harmful interference and 2 this dev...

Page 26: ...y We will pay the shipping costs only for the return of the products covered by the warranty The shipping costs for an item sent to us will be assumed by the customer Repairs for damages not covered by the warranty will be subject to a reaso nable charge The customer will pay all shipping costs 1 BEFORE sending a product for repair please contact our technical support team at 1 888 779 7646 or tec...

Reviews: