

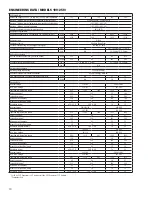

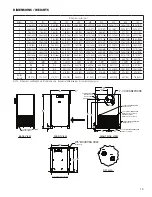
4
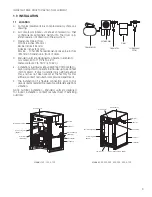
1.2 Mounting
Mount the dryer on a level solid surface. Holes are provided
in the dryer base to permanently mount the dryer to the
floor.
1.3 Piping connections
A.
Air Inlet
- Connect compressed air line from air source
to air inlet. (Reference markings on dryer for air inlet/
outlet connection locations.)
Refer to Serial Number Tag for maximum working
pressure. Do not exceed dryer’s Maximum Working Pressure.
NOTE: Install dryer in air system at highest pressure possible
(e.g. before pressure reducing valves).
NOTE: Install dryer at coolest compressed air temperature
possible. Maximum inlet compressed air temperature: 120°F
(49°C). If inlet air exceeds this temperature, precool the air
with an aftercooler.
B.
Air Outlet
– Connect air outlet to downstream air lines.
C.
Bypass piping
– If servicing the dryer without
interrupting the air supply is desired, piping should
include inlet and outlet valves and an air bypass valve.
D.
Water cooled models
– cooling water inlet and outlet
1. Connect cooling water supply to cooling water inlet.
2. Connect cooling water return line to cooling water
outlet connection.
NOTE: Strainer and water regulating valve are supplied on
water cooled models.
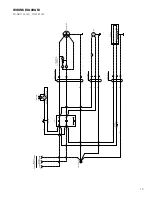
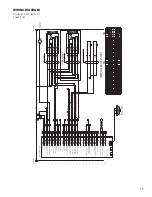
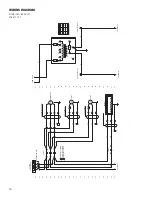
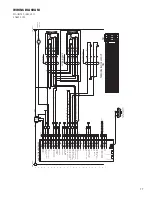
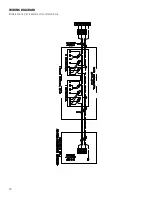
1.4 Electrical connections
IMPORTANT: Use copper supply wires only.
A.
Dryer is designed to operate on the
voltage, phase, and frequency listed on
the serial number tag.
B. If dryer is supplied with a cord and plug,
install in a receptacle of proper voltage.
C. Electrical entry on larger dryers is through a hole in
the cabinet. It is located on the right side panel when
facing the front of the unit. Connect power source to
terminal strip in electrical enclosure as shown on the
wiring diagram included with the dryer.
NOTE: Refrigeration condensing unit is designed to run
continuously and should NOT be wired to cycle on/off with
the air compressor.
NOTE: ON MODELS 500, 600, and 750, CHECK FOR CORRECT
PHASING OF UNIT. After starting the dryer, if an unusual
noise is heard, or if the discharge line does not get hot, the
refrigeration compressor may be running in the reverse
direction. Immediately stop the dryer, reverse two of the
power leads, restart the dryer, and verify the unusual noise is
corrected and the refrigerant discharge line is hot. FAILURE
TO DO SO MAY DAMAGE THE COMPRESSOR AND VOID THE
WARRANTY.
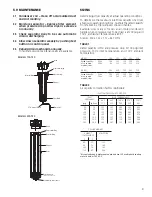
1.5 Moisture separator
A.
Models 100-150:
Separator (and Oil Removal Filter where
applicable) has an internal drain which
automatically discharges condensate.
Models 200-750:
Separator (and Oil Removal Filter where applicable) has
an electronic demand drain (EDD) which automatically
discharges condensate.
NOTE: It may be desirable to pipe the condensate from the
Automatic Drain outlet to a suitable drain.
B.
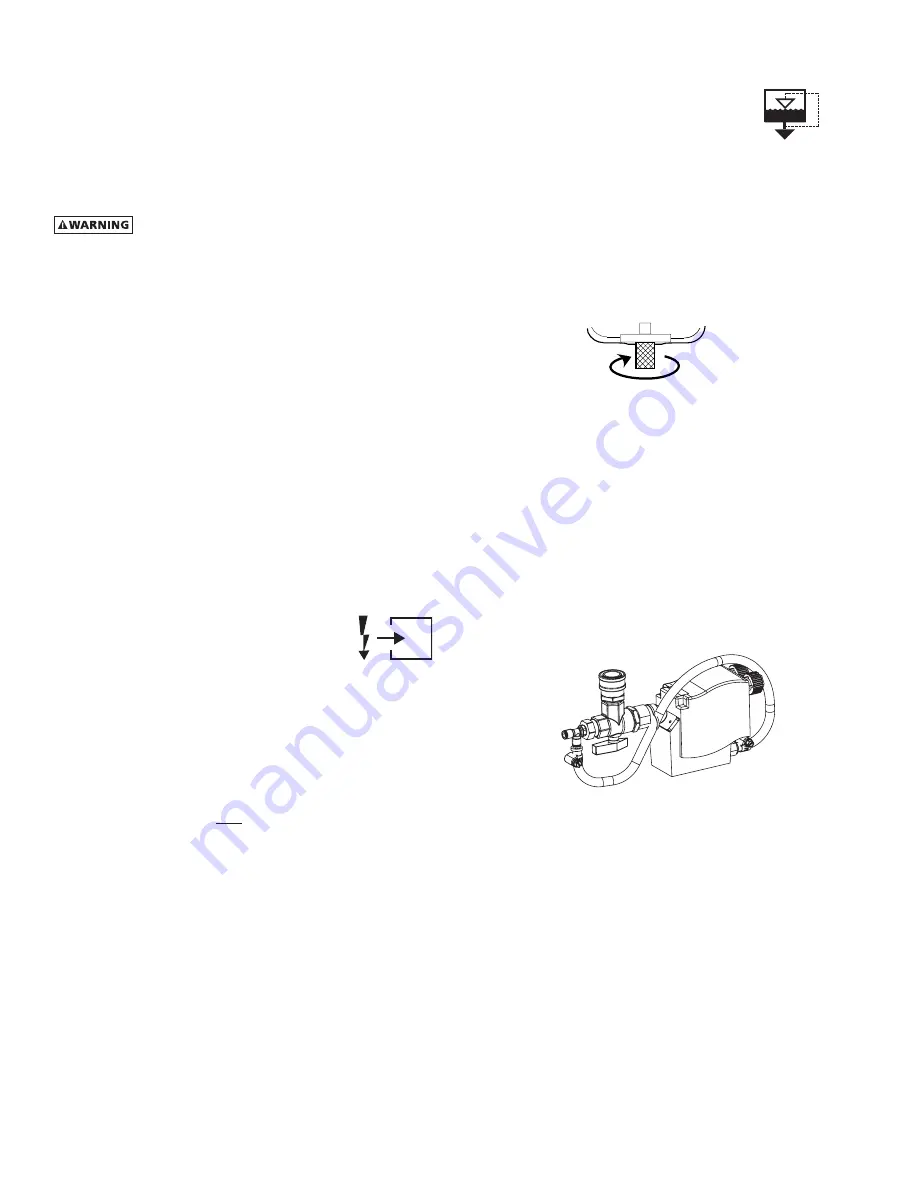
Models 100-150:
Separator has a knurled fitting with flexible drain tubing
attached. Be sure knurled fitting is tightened by turning
counter-clockwise before operating dryer.
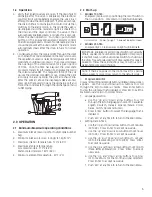
TO CLOSE
TURN COUNTERCLOCKWISE
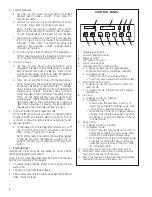
C.
Models 200-750
For manual draining, convenient dryer depressurization,
and EDD service, a three-way valve assembly has been
installed at the bottom of the moisture separator (and
cold coalescing filter where applicable). Review the
following for proper drain function:
• Automatic Draining - Valve handle should be
positioned parallel to the valve body (as shown),
with the arrow on the handle pointing toward the
EDD. In this position, condensate will flow from the
bowl to the EDD.
• Drain Isolation (Shutdown) - Valve handle shall be
turned perpendicular to the valve body (rotate 90°).
In this position, condensate flow is shutoff.
• Manual Draining - Drain valve handle shall be rotated
slightly past the drain isolation position to allow
throttling through the valve for manual discharge
and depressuruzation.
•
NOTE: The quick disconnect fitting allows removal
of the entire drain assembly.
However, the unit
must be depressurized prior to disassembly or
serious injury may occur.
NOTE
:
Discharge is at system pressure. Drain line should be
anchored.
NOTE
:
Condensate may contain oil. Comply with applicable
laws concerning proper disposal.


