


Questions? Call (800)-589-5592
14
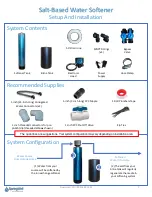
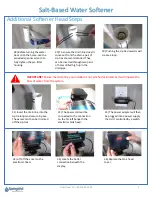
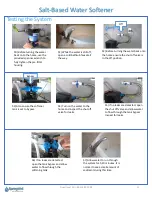
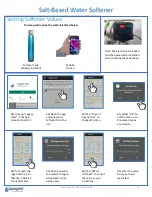
Setting Softener Values
66) Select the menu
icon in the upper
left-hand corner.
67
) Select “Advanced
Settings.”
68) Tap
“Regeneration Day
Override.”
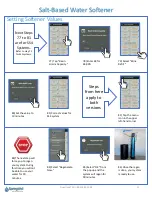
69) Change the
value to 14 days.
70
) Tap “Reserve
Capacity.”
71) Change the value to
10%.
72
) Tap “Resin
Grains Capacity.”
73) Change the
value to 32 for
32,000.
74
) Select “Brine Refill.”
75) Change the
value to 8 min.
76) Recap of settings
for SS1 system.
Next Steps
72 to 76
are for SS1
Systems.
Skip to step 77
for SS4 systems.
Salt-Based Water Softener


