


Getting Started
Procedure 8: Set the Chassis IP Address
46
|
Getting Started with Spirent TestCenter
admin> gwaddress ––> shows the current gateway address.
New: 192.168.0.1 Current: 192.168.0.1
admin> gwaddress 192.168.1.1 ––> sets the gateway address.
admin> activate ––> activates your new settings
Note:
If you are connected using SSH, you will lose connectivity when you use the
activate
command. You must log back in to the appliance using the new IP address.
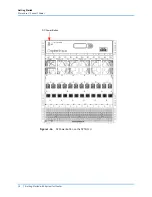
When the SPT-C50 appliance restores after the power cycle, it is ready for use with the
Spirent TestCenter GUI, or an automation script (if supported in your current release).
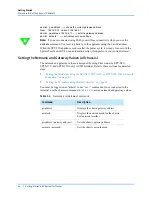
Setting the Netmask and Gateway Values (all chassis)
The netmask and gateway values are assigned by using direct console (SPT-N4U,
SPT-N11U, and SPT-N12U only) or SSH terminal. Refer to these sections for detailed
steps:
•
•
“Setting the IP Address using SSH (all chassis)” on page 43
You must be logged on as “admin” to use “set...” commands. Once connected to the
terminal, use the chassis commands in
to assign netmask and gateway values.
Table 1-3.
Netmask and Gateway Commands
Command
Description
gwaddress
Displays the chassis gateway address
netmask
Displays the network mask for the chassis
host network interface
gwaddress <gateway address>
Sets the chassis gateway address
netmask <netmask>
Sets the chassis network mask


