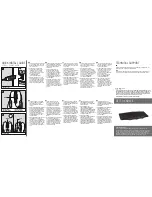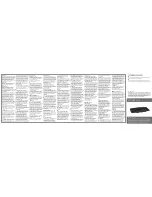
LAMIA Gaming Keyboard
Prepare to be blown away by the LAMIA Gaming Keyboard’s stunning design and
incredible gaming comfort. Enjoy quick access to Windows-control and media-playback
functions thanks to the Fn and hotkeys: just press a button and control the media player
or change the volume level. This gives you total control of your PC, even beyond your
campaigns on the digital front. Gaming in dimly-lit rooms is also a treat for the eyes, with
the LAMIA Gaming Keyboard heightening the drama with its mythical red glow.
GET TO KNOW IT:
© 2016 Jöllenbeck GmbH. All rights reserved. SPEEDLINK, the SPEEDLINK word mark and
the SPEEDLINK swoosh are registered trademarks of Jöllenbeck GmbH. All trademarks are
the property of their respective owner. Jöllenbeck GmbH shall not be made liable for any
errors that may appear in this manual. Information contained herein is subject to change
without prior notice. Please keep this information for later reference.
JÖLLENBECK GmbH, Kreuzberg 2, 27404 Weertzen, GERMANY
TECHNICAL SUPPORT
EN
Having technical problems with this product? Get in touch with our Support team – the
quickest way is via our website: www.speedlink.com
DE
Bei technischen Schwierigkeiten mit diesem Produkt wenden Sie sich bitte an unseren
Support, den Sie am schnellsten über unsere Webseite www.speedlink.com erreichen.
EN
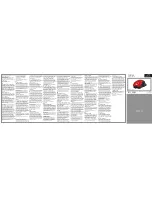
1. Plug the mouse into any free USB port
on your computer. The mouse is Plug
& Play ready and will be ready to use
after a few seconds.
2. Dpi switch: Press the dpi switch
to toggle between the four sensor
resolutions. The mouse will glow
in a specific colour for 2 seconds,
indicating the dpi level: 800 (Volcano
Red), 1,200 (Cobalt Green),
2,000 (Midnight Blue),
3,200 dpi (Venerable White).
3. Enabling autofire mode: Press and
hold the dpi button for 3 second. Now
press and hold the left mouse button
to activate autofire, which performs
approx. 50 clicks/s. Press the dpi
button again to disable autofire mode.
DE
1. Verbinden Sie die Maus mit einer freien
USB-Schnittstelle Ihres Computers.
Die Maus verfügt über Plug-and-play
und ist nach wenigen Sekunden
einsatzbereit.
2. Dpi-Wechseltaste: Durch das
Betätigen der dpi-Wechseltaste
wechseln Sie zwischen den vier
durchschaltbaren Sensorauflösungen.
Die Beleuchtungsfarbe zeigt für 2
Sekunden die dpi-Stufe an: 800
(Volcano Red), 1.200 (Cobalt Green),
2.000 (Midnight Blue), 3.200 dpi
(Venerable White).
3. Autofeuer-Modus aktivieren: Halten
Sie die dpi-Taste 3 Sekunden lang
gedrückt. Anschließend halten Sie
die linke Maustaste gedrückt, um
das Autofeuer mit ca. 50 Klicks/s zu
aktivieren. Drücken Sie erneut kurz die
dpi-Taste, um den Autofeuer-Modus zu
beenden.
IT
1. Collegare il mouse ad una porta USB
libera del computer. Il mouse è dotato
di Plug & Play ed è pronto per l‘uso in
pochi secondi.
2. Tasto di commutazione dpi:
Azionamento del tasto dpi:
commutazione tra quattro risoluzioni
di sensore attivabili. Il colore
dell‘illuminazione indica per 2 secondi
il livello dpi: 800 (Volcano Red), 1.200
(Cobalt Green), 2.000 (Midnight Blue),
3.200 dpi (Venerable White).
3. Attivare la modalità fuoco automatico:
tenere premuto il tasto per circa 3
secondi. Quindi tenere premuto il
tasto sinistro del mouse per attivare il
fuoco automatico con circa 50 clic/sec.
Premere ancora brevemente il tasto
dpi per terminare la modalità di fuoco
automatico.
FR
1. Reliez la souris à une prise USB libre
de votre ordinateur. La souris est
Plug & Play et utilisable en quelques
secondes seulement.
2. Bouton dpi de changement
de la résolution : le bouton dpi vous
permet de basculer entre les quatre
résolutions disponibles pour le capteur.
La couleur de la lumière indique durant
2 secondes la résolution sélectionnée :
800 (Volcano Red), 1 200 (Cobalt
Green), 2 000 (Midnight Blue),
3 200 dpi (Venerable White).
3. Activation du mode de tir automatique
: appuyez sur le bouton dpi et
maintenez-le enfoncé 3 secondes.
Maintenez ensuite le bouton gauche
de la souris enfoncé pour activer le
mode de tir automatique et exécuter
une cinquantaine de clics par
seconde. Pour quitter le mode de
tir automatique, appuyez à nouveau
brièvement sur le bouton dpi.
ES
1. Conecta el ratón a un puerto USB que
esté libre en tu ordenador. Este ratón
incorpora Plug &Play y a los pocos
segundos está operativo.
2. Tecla de cambio de dpi: Pulsando la
tecla de cambio de dpi se conmuta
entre las cuatro resoluciones del
sensor disponibles. Durante 2
segundos el color de la iluminación
muestra el nivel de dpi:
800 (Volcano Red), 1.200 (Cobalt
Green), 2.000 (Midnight Blue),
3.200dpi (Venerable White).
3. Cómo activar el modo de disparo
automático: Mantén pulsado el
botón de dpi durante 3 segundos.
A continuación, mantém pulsado el
botón izquierdo del ratón para activar
el disparo automático com unos 50
clics/s. Pulsa de nuevo el botón dpi
para finalizar el modo de disparo
automático.
RU
1. Соедините мышку со свободным
USB-портом компьютера. Мышка
имеет Plug & Play и готова к
использованию через несколько
секунд.
2. Кнопка изменения dpi: При нажатии
кнопки изменения dpi происходит
последовательный переход между
четырьмя разрешениями сенсора.
Цвет подсветки в течение 2 секунд
указывает на режим dpi: 800
(Volcano Red), 1.200 (Cobalt Green),
2.000 (Midnight Blue), 3.200 dpi
(Venerable White).
3. Включение режима автоматического
огня: Нажмите кнопку dpi на 3
секунды. После этого удерживайте
нажатой левую кнопку мыши, чтобы
активировать автоматический огонь
частотой около 50 кликов в секунду.
Снова нажмите кнопку dpi, чтобы
выключить режим автоматического
огня.
NL
1. Sluit de muis aan op een vrije
USB-poort van de computer. De
muis is uitgerust met Plug & Play-
functionaliteit en is na een paar
seconden gereed voor gebruik.
2. Dpi-wisselknop: Steeds als u op de
dpi-knop drukt, wordt een volgende
stap van de sensorresolutiecyclus
geactiveerd. De verlichtingskleur geeft
gedurende 2 seconden een indicatie
van de dpi-instelling: 800 (Volcano
Red), 1200 (Cobalt Green), 2000
(Midnight Blue), 3200dpi (Venerable
White).
3. Modus Automatisch vuren inschakelen:
Houd de dpi-knop gedurende 3
seconden ingedrukt. Houd daarna
de linker muisknop ingedrukt om het
automatisch vuren met 50 clicks/s te
activeren. Druk opnieuw kort op de
dpi-knop om de modus Automatisch
vuren uit te schakelen.
PL
1. Połącz mysz z wolnym portem USB
komputera. Mysz obsługuje funkcję
plug&play i po kilku sekundach jest
gotowa do pracy.
2. Przycisk wyboru dpi: Naciśnięcie
przycisku wyboru dpi: przełączenie
między czterema rozdzielczościami
do wyboru. Kolor podświetlenia
wskazuje przez 2 sekundy wybraną
rozdzielczość dpi: 800 (Volcano Red),
1200 (Cobalt Green), 2000 (Midnight
Blue), 3200dpi (Venerable White).
3. Aktywacja trybu automatycznego
ognia: nacisnąć i przytrzymać przez
3 sekundy przycisk dpi. Następnie
nacisnąć lewy przycisk myszy, by
aktywować automatyczny ogień z 50
kliknięciami/sekundę. Aby wyłączyć
tryb automatycznego ognia, nacisnąć
krótko przycisk dpi.
FI
1. Liitä johto tietokoneesi vapaaseen
USB-liitäntään. Hiiri tunnistetaan
automaattisesti ja se on käyttövalmis
pian tämän jälkeen.
2. Dpi-vaihtopainike: Dpi-
vaihtopainikkeen painalluksella:
vaihdetaan neljän peräkkäin
kytkettävän sensoritarkkuuden välillä.
Valaistusväri näyttää 2 sekunnin ajan
dpi-tason: 800 (Volcano Red), 1 200
(Cobalt Green), 2 000 (Midnight Blue), 3
200dpi (Venerable White).
3. Aktivoi automaattinen
klikkaustoiminto: Pidä dpi-painiketta
painettuna 3 sekunnin ajan.
Pidä sen jälkeen hiiren vasenta
painiketta painettuna aktivoidaksesi
automaattinen klikkaustoiminto (n. 50
klikkausta/s). Lopeta automaattinen
klikkaustoiminto painamalla uudelleen
lyhyesti dpi-painiketta.
HU
1. Csatlakoztassuk az egeret a
számítógép szabad USB portjára. Az
egér plug & play funkcióval rendelkezik
és pár másodperc múlva már
használható.
2. Dpi-átváltógomb: A Dpi-átváltógomb
használata: váltson a négy
átkapcsolható érzékelő felbontás
között. A megvilágítás színe 2
másodpercig a dpi-fokozatot jelzi:
800 (Volcano Red), 1200 (Cobalt
Green), 2000 (Midnight Blue), 3200 dpi
(Venerable White).
3. Az öntüzelő mód aktiválása: Tartsa a
dpi-gombot 3 másodpercen keresztül
lenyomva. Végül tartsa lenyomva az
egér bal gombját, hogy aktiválja az
50 kattintás/s automatikus tüzelést.
Ezután ismét nyomja meg röviden a
dpi-gombot, az automatikus tüzelés
befejezéséhez.
CONTUS
SL-680002-BKRD
QUICK INSTALL GUIDE
CONTUS – GAMING MOUSE
CO
NT
US
CO
NT
US
DPI
DPI
CO
NT
US
DPI
3
CO
NT
US
CO
NT
US
DPI
DPI
CO
NT
US
DPI
IN 5V DC 20mA
1
CO
NT
US
CO
NT
US
DPI
DPI
CO
NT
US
DPI
2
LED RED: 800 dpi
LED GREEN: 1200 dpi
LED BLUE: 2000 dpi
LED WHITE: 3200 dpi
AUTOFIRE MODE
PRESS
PRESS 3s
CLICK


