27
The following pages include Spectra’s most commonly used technical bulletins, covering tests,
adjustments, troubleshooting, and common points of confusion.
MISC-1: DWYER FLOW METER SERVICE
The mechanical flow meter, PL-FMT-10 (10 GPH range) or PL-FMT-20 (20 GPH range) can be
opened for cleaning if it becomes difficult to read or if the little ball gets stuck.
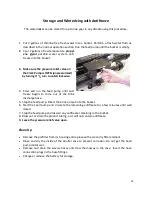
The flow meter will come completely apart for cleaning. First remove the meter from the pan-
el. Remove the four small screws that hold the stainless steel bracket in place. Carefully pry off
the bracket. On the very top of the meter is a clear plastic slide-off cover over an Allen screw.
Use a flat bladed screwdriver to push the cover off. Holding the meter upright, remove the Al-
len screw with a ¼” Allen wrench. Invert the flow meter and catch the ball as it falls out. You
can use tooth paste or plastic window polish to polish the inside using a small bottle brush.
Clean the ball and give it a few coats of wax. If the o-rings are damaged or the unit has been
leaking, install new o-rings using a little silicone grease to ease assembly. These are standard o
-rings and should be available at most larger auto parts or bearing stores. Reassemble in re-
verse.
MISC-3 ACCUMULATOR PRESSURE
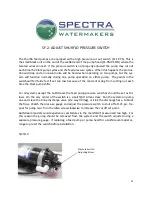
Your Spectra Watermakers is supplied with a pressure accumulator tank (PL-ACC-TK), which
should be installed in the feed water line between the prefilters and the Clark Pump.
The purpose of the feed line accumulator is to reduce the spikes in the feed pressure caused
by the cycling of the Clark Pump. If the accumulator is not properly charged it can lead to
problems with the ShurFlo Pump pressure cutout switches. The accumulators have an air
valve on top similar to those found on car tires. This allows the internal air bladder of the ac-
cumulator to be pre-charged. The accumulator should be pumped up to about 65 psi (4.5 bar)
for best results. Add air using a tire pump or air compressor. You can experiment with the ex-
act pressure that will give the best pulsation dampening on your installation.
Technical Bulletins
Summary of Contents for AQUIFER 150
Page 2: ...2...
Page 4: ...4...
Page 32: ...32...
Page 40: ...40 Parts...
Page 41: ...41 PL MTS 3 8X1 2S HP CYL SST HP CYL CCA SO HPP ECCB HP CYL EC HP CYL R HP CYL PT Parts...

