10
Spectra 50-Series Library Tape Drive Replacement Guide
Removing the Drive from the DBA
1.
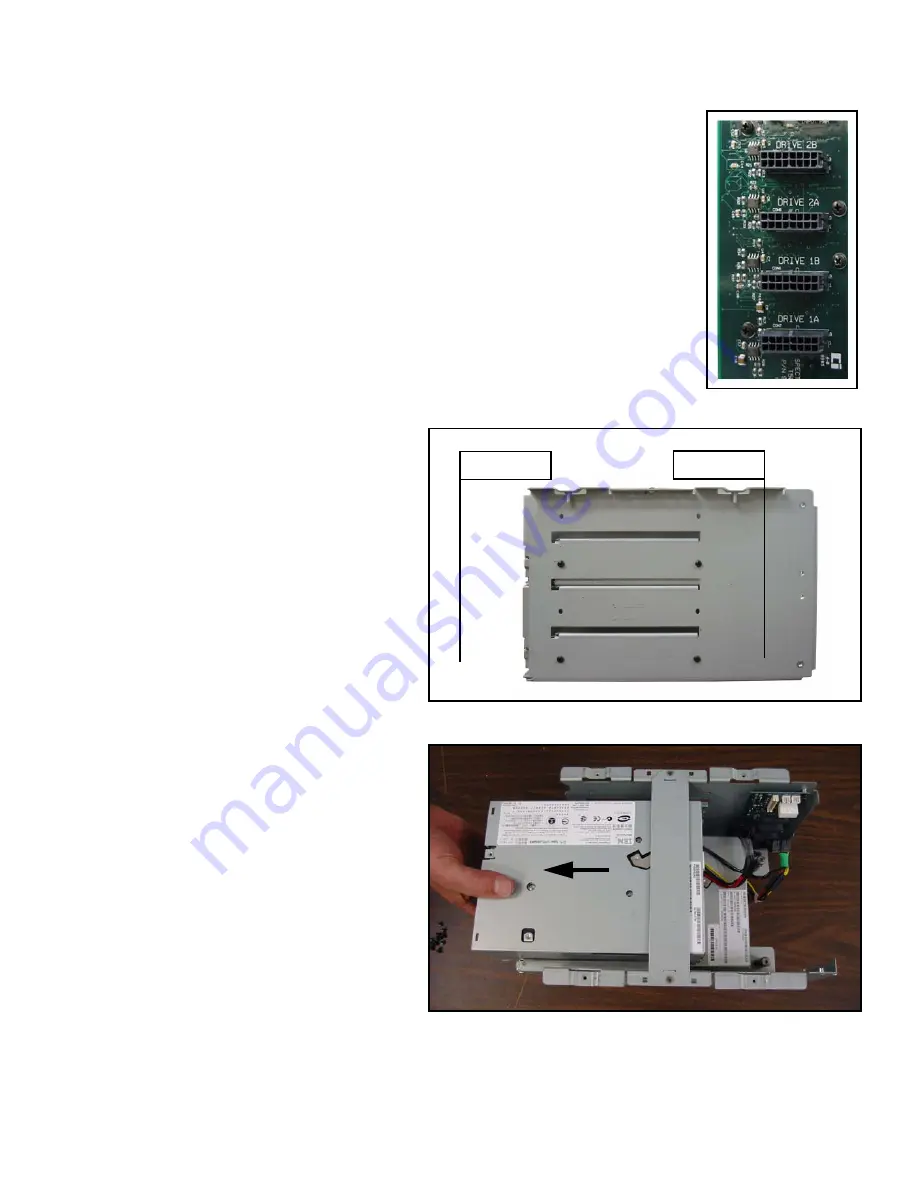
Unplug the drive that needs to be replaced from the DIB.
• Drives in a Spectra 50-Series library are numbered from the bottom up.
• If you have a library with full-height (FH) drives, the bottom drive
is Drive 1, and the top drive is Drive 2. They are plugged into the
DIB in ports 1A and 2A respectively.
• If you have a library with half-height (HH) drives, they are
numbered from Drive 1A at the bottom to Drive 2B at the top.
• Figure 15 at right shows the drive interface portion of the DIB.
It shows how drives in the library are installed from the bottom up.
2.
Remove the screws for the drive you
want to replace (Figure 16).
There are two screws on each side of the
DBA.
Figure 16
A side view of the DBA.
3.
Carefully slide the drive out through the
front of the DBA (Figure 17).
Figure 17
Sliding the drive out through the front of the DBA.
Figure 15
The DIB.
Drive 1
Drive 2
Drive 3
Drive 4
HH Drives
FH Drives
Drive 1
Drive 2


