background image

For Machines Mfg. Since 8/09

Model SB1027

-53-

S E R V I C E

5.

  Loosen the two cap screws on the face of the 

leadscrew nut shown in Figure 64.

Figure 64. Cross leadscrew nut and cap screws.

Cross Leadscrew

Nut & Cap Screws

6.

  Re-install the key onto the leadscrew so that 

you can use the ball handle in the next step.

7.

  Use the T-handle hex wrench or similar 

tool to rotate the adjustment plate on the 

leadscrew nut in small increments, then 

rotate the cross slide ball handle to check the 

amount of backlash.

8.

  When you are satisfied with the adjustment, 

re-tighten the two cap screws.

9.

  Re-install the parts previously removed in 

the reverse order.

Belt Tensioning

Figure 65. Belt tensioning controls.

Tension

Adjustment

Lever

Motor Mount

Cap Screw

(1 of 2)

Adjustment

Cap Screw

Power is transferred from the motor to the 

spindle with heavy-duty ribbed belts. With 

normal use, these belts will gradually stretch 

over time. When they do, perform the follow 

procedure to re-tension them.

Tools Needed 

Qty

Hex Wrench 6mm .................................................1

Hex Wrench 10mm ...............................................1

To re-tension the belts:

1.

  DISCONNECT MILL FROM POWER!

2.

  Loosen the two motor mount cap screws, one 

on each side of the motor (see Figure 65).

3.

  Push the belt tension adjustment lever 

back with moderate force, then tighten the 

adjustment cap screw in and against the 

motor mounting plate to secure the setting.

4.

  Re-tighten the motor mount cap screws.

Summary of Contents for SB1027F

Page 1: ...of an electric power bar Wiring diagram of the lower electrical panel Page 58 to accommodate the electrical connections for the power drawbar Aside from the information contained in this update all other content in the owner s manual applies to this machine For your own safety you MUST read and understand this update and the applicable owner s manual Keep this update for future reference If you ha...

Page 2: ...2 L1 L3 20A Fuse 20A Fuse 2T1 4T2 6T3 8T4 2T1 4T2 6T3 8T4 110V Outlets T T R2 R2 T2 T2 R R R R T T T T 2R 0 0 0 0 0 0 1 2 3 4 5 9 30 34 35 L1 L3 30 1 20 20 33 33 5 2 13 13 8 8 3 9 34 35 4 4 0 U2 L1 L3 21 22 22 21 22 21 21 6 15 Plug As Recommended 1 2 3 4 5 9 21 22 34 35 34 35 R1 T1 R1 T1 7 Ground L1 L3 G Hot Hot 220V 34 34 35 35 1R 1R R R R R 0 A1 A2 A2 To Spindle Motor To Frequency Drive To Power...

Page 3: ...derstand this insert the entire Model SB1027 Owner s Manual and the Fagor DRO Owner s Manual to reduce the risk of injury when using this machine If you have any further questions about this manual insert or the differences between the Model SB1027F and the Model SB1027 contact our Technical Support at 360 734 1639 or email sales southbendlathe com REF PART DESCRIPTION REF PART DESCRIPTION 1008 PS...

Page 4: ...ment 220V Single Phase 60 Hz Full Load Current Rating 8 95A Minimum Circuit Size 15A Inverter Type Yaskawa V1000 Switch Magnetic Switch w Thermal Overload Protection Switch Voltage 220V Recommended Power Cord 14 Gauge 3 Wire 300 VAC Plug Included No Recommended Plug Outlet Type NEMA 6 15 Motors Spindle Type AEVF Induction Horsepower 3 HP Voltage 220V Phase 3 Phase Amps 8 5A Speed 1720 RPM Cycle 60...

Page 5: ...e to Table 0 18 in Drilling Capacity for Cast Iron 1 in Drilling Capacity for Steel 3 4 in Number of Vertical Spindle Speeds Variable Range of Vertical Spindle Speeds 60 5000 RPM Number of Longitudinal Feeds Variable Feed Rate 0 3 1 3 FPM Quill Diameter 3 375 in Quill Feed Rates 0 0015 0 003 0 006 in rev Table Info Table Length 48 in Table Width 9 in Table Thickness 3 in Number of T Slots 3 T Slot...

Page 6: ...und Rating 54 db no load 5000 RPM Features Fagor DRO High Quality Low Vibration AEVF Spindle Motor P4 ABEC 7 High Quality Angular Contact Spindle Bearings Powered Recycling Coolant System X Y Leadscrew Nuts Double Bronzed for Ultra Smooth Movement w Minimal Backlash Lever Action One Shot Pump Lubrication System Auto Downfeed Stop with Micro Adjustable Stop Variable Speed Longitudinal Power Feed Ha...

Page 7: ...dreds of Thousands of Lathes Sold With a Tradition of Quality Since 1906 Copyright April 2010 For Machines Mfg Since 8 09 MODEL SB1027 9 X 48 EVS MILLING MACHINE w COOLANT SYSTEM POWER FEED OWNER S MANUAL ...

Page 8: ...ation is a process that happens through training and experience If you are not an experienced operator of this type of machinery read through this entire manual then learn more from an experienced operator schooling or research before attempting operations Following this advice will help you avoid serious personal injury and get the best results from your work Manual Feedback We ve made every effo...

Page 9: ...Panel 26 Table Movement 27 Table Locks 27 Graduated Index Rings 27 X Axis Power Feed 28 Head Movement 29 Tilting Head 29 Rotating Head 30 Tramming Spindle 30 Ram Movement 33 Moving Ram Back and Forth 33 Rotating Ram 33 Setting Spindle Speed 34 Determining Spindle Speed 34 Setting Spindle Speed Range 34 Setting Spindle Speed 35 Downfeed Controls 35 Using the Coarse Downfeed Handle 35 Fine Downfeed ...

Page 10: ...OTING 54 ELECTRICAL Electrical Safety Instructions 56 Upper Electrical Panel 57 Lower Electrical Panel 58 Control Panel Wiring 59 Electrical Component Pictures 60 PARTS Headstock 61 Quill 64 Gearbox 65 Belt Housing 67 Ram 69 Column Knee Saddle 70 Table 72 One Shot Oiler 74 Coolant System 75 Electric Box Control Panel 76 Tools 78 Machine Labels A 79 Machine Labels B 80 WARRANTY RETURNS 81 ...

Page 11: ...ne television set mechanical calculator computer and camera of that decade could barely fit into one large room together now they fit into a tiny box that is no bigger than a box of breath mints And the average production machinist spends more time at a computer than at a machine Technology has been much refined and the world operates on a much faster pace But some things haven t changed The same ...

Page 12: ...dentification Drive System Headstock See Page 5 for Identification Coolant Nozzle Valve X Axis Ball Handle Coolant Return Hose One Shot Oiler Z Axis Crank Y Axis Ball Handle X Axis Power Feed Power Feed Limit Switch Control Panel See Page 5 for Identification Electrical Cabinet Lifting Eye Bolt Splash Pan Knee Work Table ...

Page 13: ...re manual and received proper training Drive System Headstock Control Panel Identification Figure 2 SB1027 drive system and headstock identification Motor Belt Tension Adjustment Lever Belt Housing Spindle Brake Switch Fine Downfeed Handwheel Downfeed Clutch Lever Quill Dial Indicator Rod Quill Lock Lever Coarse Downfeed Lever Manual Power Downfeed Selector Downfeed Direction Pin Downfeed Rate Sel...

Page 14: ... Single Phase 60 Hz Phase Inverter Yaskawa V1000 Switch Magnetic Switch w Thermal Overload Protection Switch Voltage 220V Minimum Circuit Size 15 Amp Recommended Power Cord 14 Gauge 3 Wire 300 VAC Plug Included No Recommended Plug NEMA 6 15 Motors Spindle Type AEVF Induction Horsepower 3 HP Voltage 220V Phase 3 Phase Amps 8 5 Amps Number Of Speeds 1 Speeds 1725 RPM Cycle 60 Hz Power Transfer Belt ...

Page 15: ...Steel 3 4 Number of Spindle Speeds Variable Range of Spindle Speeds 60 5000 RPM Number of Longitudinal Feed Rates Variable Longitudinal Feed Rate Range 0 31 3 FPM Quill Diameter 3 375 Number of Quill Auto Feed Rates 3 Quill Auto Feed Rates 0 0015 0 003 0 006 in rev Table Information Length Width Thickness 48 x 9 x 3 Number of T Slots 3 T Slot Width Height 5 8 x 1 T Slot Distance Center to Center 2...

Page 16: ...etup Cleaning Time 1 2 Hours Features High Quality Low Vibration AEVF Spindle Motor P4 ABEC 7 High Quality Angular Contact Spindle Bearings Powered Recycling Coolant System X Y Leadscrew Nuts Double Bronzed for Ultra Smooth Movement w Minimal Backlash Lever Action One Shot Pump Lubrication System Auto Downfeed Stop with Micro Adjustable Stop Variable Speed Longitudinal Power Feed Hardened and Prec...

Page 17: ... Death or catastrophic harm WILL occur Moderate injury or fire MAY occur Death or catastrophic harm COULD occur Machine or property damage may occur Basic Machine Safety 1 Owner s Manual All machinery and machining equipment presents serious injury hazards to untrained users To reduce the risk of injury anyone who uses THIS item MUST read and understand this entire manual before starting 2 Persona...

Page 18: ... verifying that all fastening devices are properly secured and items attached to spindles have enough clearance to safely rotate 11 Chuck Keys or Adjusting Tools Tools used to adjust spindles chucks or any moving rotating parts will become dangerous projectiles if left in place when the machine is started Reduce this risk by developing the habit of always removing these tools immediately after usi...

Page 19: ...ng results and reduces the risk of personal injury from broken tool debris Inspect cutting tools for sharpness chips or cracks before each use and ALWAYS make sure the cutting tools are firmly held in place before starting the machine 1 Understanding Controls The mill is a complex machine that presents severe cutting or amputation hazards if used incorrectly Make sure you understand the use and op...

Page 20: ... with any API GL 2 grease Stiff grease brush Phillips dcrewdriver 2 Floor mounting hardware as needed Hex wrench 5mm Hex wrench 6mm Combo wrench 1 2 or ratchet and 1 2 socket The purpose of the preparation section is to help you prepare your machine for operation The typical preparation process is as follows 1 Unpack the machine and inventory the contents of the box crate 2 Clean the machine and i...

Page 21: ...moved from the shipping crate you should have the following inventory Description Figure 3 Qty A Front Way Cover 1 B Rear Way Cover 1 C Fine Downfeed Handwheel 1 D Drawbar 7 16 20 x 181 2 1 E Ball Handles Left Y Axis X Axis 2 F Ball Handle Power Feed 1 G Ball Handle Handles 3 H Oil Bottle 1 I Tool Box 1 J Combo Closed End Wrench 19 21mm 1 K Combo Open End Wrench 12 14mm 1 L Coarse Downfeed Lever 1...

Page 22: ...ugh test them on an inconspicuous area of a painted area to make sure they will not damage it Basic steps for removing rust preventative 1 Put on safety glasses and disposable gloves 2 Coat all surfaces that have rust preventative with a liberal amount of your cleaner or degreaser and let them soak for a few minutes 3 Wipe off the surfaces If your cleaner or degreaser is effective the rust prevent...

Page 23: ...ent The physical environment where your machine is operated is important for safe operation and longevity of parts For best results operate this machine in a dry environment that is free from excessive moisture hazardous or flammable chemicals airborne abrasives or extreme conditions Extreme conditions for this type of machinery are generally those where the ambient temperature is outside the rang...

Page 24: ...e 5 refer to Ram Movement on Page 33 and Headstock Movement on Page 29 for detailed instructions Note After re positioning the ram and headstock make sure they are locked in place to prevent unexpected movement during lifting and moving 2 Place the lifting web straps under the ram and connect them to the safety hook as illustrated in Figure 5 Note Place padding between the straps and the mill to p...

Page 25: ...ensitive enough to show a distinct movement when a 0 003 shim approximately the thickness of one sheet of standard newspaper is placed under one end of the level See the figure below for an example of a high precision level We strongly recommend securing your machine to the floor if it is hardwired to the power source Consult with your electrician to ensure compliance with local codes Although not...

Page 26: ...h the leadscrew key then slide it onto the X axis leadscrew 4 Secure the ball handles with the hex nuts removed in Step 1 Note Tighten the hex nuts just until they are snug Overtightening could increase the wear of the moving parts Figure 8 Ball handle assemblies Ball Handle Handle Spring Loaded Bushing Y Axis Ball Handle 5 Remove the hex nut from the Y axis leadscrew 6 Align the keyway of the bal...

Page 27: ...wn in Figure 12 from the base rim slide the splash pan into position then secure it with the removed cap screws 2 Use Teflon tape or pipe sealant on the threads of the pipe elbows then install them into the coolant drain holes located on both ends of the table as shown in Figure 13 Figure 13 Coolant return hose connections Pipe Elbows Coolant Return Screen Figure 11 Rear way cover installed Cap Sc...

Page 28: ...p and assembled as previously described in this manual it is ready to be connected to the power source Note About Required Power Source The milling machine is equipped with a Yaskawa phase inverter that changes single phase power into 3 phase which is used by the spindle motor Note About Extension Cords Using an incorrectly sized extension cord may decrease the life of electrical components on the...

Page 29: ...his mill without the correct amount of coolant in the reservoir could damage it and void the warranty ALWAYS make sure there is the correct amount of coolant in the reservoir before using the pump 2 Clean out the coolant reservoir in the base of the mill then fill it with coolant refer to the Coolant System section on Pages 48 49 for specific details 3 Clear away all tools and objects used during ...

Page 30: ...2 WITHOUT resetting the emergency STOP button press the ON button The machine should not start If the machine does not start the emergency STOP button safety feature is working correctly If the machine does start with the emergency STOP button pushed in immediately disconnect power to the machine The emergency STOP button safety feature is not working correctly This safety feature must work proper...

Page 31: ...l tools cables and other items are well clear of table movement as you follow these steps 2 Refer to the Table Movement section beginning on Page 27 to understand how the power feed table locks and limit switch function 3 Loosen the table locks on the front of the table 4 Plug the power feed power cord into a 110V power outlet Note There are available 110V outlets on the right side of the electric...

Page 32: ...ure trouble free performance from the mill To perform the spindle break in procedure 1 Successfully perform all the steps in the Test Run section beginning on Page 21 2 Make sure the spindle is at a complete stop 3 Set the spindle speed to the low range refer to Setting Spindle Speed beginning on Page 34 for detailed instructions 4 Start the spindle rotation at a medium speed and let the mill run ...

Page 33: ...the correct positioning of the cutting tool and workpiece for the operation If the X axis power feed will be used during the operation the operator confirms the speed and length of table movement required To reduce the risk of serious injury when using this machine read and understand this entire manual before beginning any operations Loose hair clothing or jewelry could get caught in machinery an...

Page 34: ...wer to flow to the mill s electrical components Coolant Switch Turns coolant pump ON and OFF Spindle Direction Switch Starts stops and reverses spindle rotation Spindle Speed Dial Controls the spindle speed Spindle Speed Display Shows the current spindle speed in revolutions per minute RPM Emergency STOP Button When pressed disables the flow of power to the mill s electrical components Before resu...

Page 35: ...ted Index Rings The table ball handles and elevation crank have graduated index rings attached see Figure 21 that are used to accurately determine table movement in the increments listed in the table below Axis Individual Increment One Full Revolution X 0 001 0 200 Y 0 001 0 200 Z 0 001 0 100 Figure 21 Graduated table index rings Index Rings Table Locks Refer to Figure 20 for the locations of the ...

Page 36: ...ith one full revolution equal to 0 200 of table travel To confirm the power feed settings that you will be using during operation we recommend that you use the power feed to move the table through the intended cutting path before starting the spindle rotation and taking the cut Tool Needed Qty Hex Wrench 12mm 1 To operate the X axis power feed 1 Loosen the X axis table locks refer to Figure 20 on ...

Page 37: ...ee tilt lock bolts on the right side of the ram adapter shown in Figure 25 3 Use one hand to apply pressure to the head in the direction of the tilt then slowly rotate the tilt bolt Rotating this bolt clockwise will tilt the head back 4 When the head is in the correct position for your operation re tighten all three lock bolts Always lock the head firmly in place after tilting or rotating it Unexp...

Page 38: ... ensure the spindle is exactly 90 to the table This procedure involves mounting a dial test indicator to the quill or spindle rotating it around the table and adjusting the spindle axis Z axis 90 to the table X and Y axes as illustrated in Figure 27 We encourage you to research the many variations of spindle tramming to find the one that works best for you If you do not already have a preference f...

Page 39: ...asks Stone the table to remove all nicks and burrs then clean off all debris Verify the table is clean by running your hand over the top of it Position the table for the milling operation you intend to perform after the tramming preferably centered to the saddle Tighten any table knee quill or ram locks that should be tight during the intended milling operation 3 Place the parallel block underneat...

Page 40: ...ly during the process of re tightening the lock bolts 9 Place the parallel block directly under the spindle and across the width of the table as illustrated in Figure 30 Note Generally the goal in the next steps is to get the difference of the indicator readings between the end of the parallel bar down to 0 0005 However the acceptable variance will depend on the requirements for your operation 6 R...

Page 41: ...ise will move the ram backward 4 Re tighten the lock levers after you have re positioned the ram Rotating Ram 1 DISCONNECT MILL FROM POWER 2 Loosen the four lock bolts on top of the turret see Figure 32 Note There are two lock bolts on either side of the ram Figure 32 Ram rotating controls Rotation Scale Lock Bolts 2 of 4 Note In the next step take care not to entangle or stretch the electrical ca...

Page 42: ...g the correct spindle speed is important for safe and satisfactory results as well as maximizing tool life To set the spindle speed for your operation you will need to 1 Determine the best spindle speed for the cutting task and 2 configure the mill controls to produce the required spindle speed Determining Spindle Speed Many variables affect the optimum spindle speed to use for any given operation...

Page 43: ...ge and the bottom values are for the low range Downfeed Controls Spindle downfeed movement on the mill is controlled by three mechanisms 1 The coarse downfeed handle 2 the fine downfeed handwheel and 3 the auto downfeed system Using the Coarse Downfeed Handle 1 DISCONNECT MILL FROM POWER 2 To set the downfeed for manual control pull the downfeed selector knob out then rotate it clockwise until the...

Page 44: ...Make sure the pin of the coarse downfeed handle hub is engaged with one of the detents on the downfeed sleeve see Figure 38 5 Make sure the quill lock lever is loose so that the quill can easily move 6 Rotate the coarse downfeed handle around the hub to control the depth of the spindle Figure 38 Coarse downfeed handle hub detents and pin Handle Hub Detents Pin ...

Page 45: ...heel is used to secure it in place H Quill Dog Moves with the quill and spindle and disengages the downfeed clutch lever when it meets either the top or downfeed stop I Downfeed Selector Sets the mill for manual downfeed or auto downfeed control Using the Fine Downfeed Handwheel 1 Make sure that the spindle rotation is turned OFF and the spindle is at a complete stop 2 To set the downfeed for manu...

Page 46: ...s correct for your operation It may be necessary to rock the fine downfeed handwheel back and forth to move the pin all the way in or out Note The direction pin has three positions 1 In for one downfeed direction 2 middle for neutral or no movement and 3 out for the reverse direction The direction of spindle travel for the in and out positions is relative to the direction of spindle rotation Keep ...

Page 47: ...lightly until you can pull the clutch lever out to the left and it locks in place which will start the auto downfeed spindle travel To avoid the risk of gear damage always start spindle rotation before using the auto downfeed rate selector Figure 41 Positions of the auto downfeed rate selector M L H H 0 006 in rev L 0 0015 in rev M 0 003 in rev Rates given in inches of travel per revolution of the...

Page 48: ...uding pin inside the spindle taper then firmly push the tool into the spindle to seat it 5 With one hand holding the tool in place insert the drawbar into the spindle from the top of the head then thread it into the tool see Figure 44 6 Tighten the drawbar until it is snug Avoid overtightening as it could make removing the tool difficult Unloading Tooling Tools Needed Qty Wrench 21mm 1 Brass Hamme...

Page 49: ...ncy Coolant not flowing correctly Any other unsafe condition Before Beginning Operations Make sure the electric box door is closed and properly latched Turn the spindle direction switch to the STOP middle position and the speed dial all the way counterclockwise to prevent high speed spindle startup when connected to power see Page 26 Move the downfeed selector to the manual forward position to pre...

Page 50: ...Keep each charts as a maintenance record for the mill 360 734 1540 FAX 360 676 1075 www southbendlathe com South Bend Lathe Co Monthly Maintenance Chart for Model SB1027 Milling Machine 1 2 3 4 5 6 7 8 9 10 11 12 13 14 15 16 17 18 19 20 21 22 23 24 25 26 27 28 29 30 31 Inspection Coolant System Gib Adjustment End of Day Disconnected From Power Cleaned Protected Lubrication Quill Table Saddle Knee ...

Page 51: ...40 hrs 45 Table Elevation Leadscrew Z Axis 40 hrs 46 Power Feed Gears 160 hrs 46 Figure 45 Recommended lubrication tasks schedules and instruction page references Cleaning Regular cleaning is one of the most important steps in taking good care of this machine Each operator is responsible for cleaning the machine immediately after using it or at the end of the day We recommend that the cleaning rou...

Page 52: ...table through all paths of movement to evenly distribute the lubricant Use the sight glass on the side of the oiler to know when to re fill the reservoir Figure 47 One shot oiler controls Pump Handle Sight Glass Reservoir Cap Quill Oil Type Mobil Vactra 2 or ISO 68 Equivalent Oil Amount Fill Oil Cup Check Add Frequency 4 hrs of Operation Lift the oil cup cap shown in Figure 46 to fill the oil cup ...

Page 53: ...itting Ram Ways Oil Type Mobil Vactra 2 or ISO 68 Equivalent Oil Amount Thin Coat Check Add Frequency 40 hrs of Operation Move the ram back and forth as necessary to access the full length of the ways see Figure 50 then use a clean shop rag to apply a thin coat of lubricant Figure 50 Exposing the ram ways for lubrication Ram Ways Head Ram Rack Pinion Gear The interaction between the cast iron surf...

Page 54: ...cess until the entire leadscrew is covered with a thin coat of lubricant Power Feed Gears Grease Type Medium Weight Lithium Grease Grease Amount Two Pumps of Grease Gun Check Add Frequency 40 hrs of Operation Tool Needed Qty Wrench 19mm 1 To lubricate the power feed gears 1 DISCONNECT MACHINE FROM POWER 2 Remove the hex nut and ball handle from the power unit end of the longitudinal leadscrew see ...

Page 55: ...the bevel gear keyway with the key as you slide the gear onto the leadscrew and mesh its teeth with the drive gear 7 Replace the graduated dial ring into position and secure it with the knurled retaining ring do not overtighten 8 Slide the ball handle onto the leadscrew align the keyway with the leadscrew alignment key then secure it with the hex nut removed in Step 2 9 Move the table with the pow...

Page 56: ...nning the coolant pump without adequate coolant in the reservoir may permanently damage the coolant pump This action is considered abusive and is not covered by the warranty 3 If the level of coolant in the reservoir is less than 2 add more fluid through the screen to fill the tank BIOLOGICAL POISON HAZARD Use the correct personal protection equipment when handling cutting fluid Follow federal sta...

Page 57: ...ols Needed Qty Hex Wrench 3mm 1 Hex Wrench 5mm 1 Catch Pan 1 Bucket 5 Gal 1 To change the coolant 1 Put on personal protective equipment 2 Place a the catch pan on the table position the coolant nozzle over the pan then use the coolant pump to drain the reservoir Note When the catch pan is full empty it into the 5 gallon bucket then repeat the process 3 DISCONNECT MILL FROM POWER 4 Remove the cool...

Page 58: ...nt screws Machine Storage To avoid rust problems or corrosion damage use the following information to protect your investment when storing the mill for any length of time DISCONNECT MILL FROM POWER Lubricate the mill as directed in the Lubrication section beginning on Page 43 Clean out the coolant reservoir in the base of the mill as directed in the Changing Coolant section on Page 49 Thoroughly c...

Page 59: ...screw rotates before the attached device begins to move Although the mill is equipped with double bronzed longitudinal and cross leadscrew nuts to minimize backlash leadscrews will always have a certain amount of backlash that will increase with normal wear Generally 0 005 0 010 leadscrew backlash is acceptable to ensure smooth movement and reduce the risk of premature thread wear However if you f...

Page 60: ...s Longitudinal Leadscrew Backlash 1 DISCONNECT MILL FROM POWER 2 Loosen the two cap screws on the leadscrew nut accessed from underneath the left side of the table as shown in Figure 61 Figure 61 Longitudinal leadscrew nut and cap screw as viewed from underneath the left side of the table Leadscrew Nut 1 of 2 Cap Screw Figure 62 Ball handle rings and key removed from the cross leadscrew Cross Lead...

Page 61: ...nstall the parts previously removed in the reverse order Belt Tensioning Figure 65 Belt tensioning controls Tension Adjustment Lever Motor Mount Cap Screw 1 of 2 Adjustment Cap Screw Power is transferred from the motor to the spindle with heavy duty ribbed belts With normal use these belts will gradually stretch over time When they do perform the follow procedure to re tension them Tools Needed Qt...

Page 62: ...t cutting tool for the operation 4 Spindle speed is incorrect for the operation 4 Select appropriate spindle speed Page 34 5 Motor connection wired incorrectly 5 Correct motor wiring connections Page 59 6 Plug receptacle is at fault or wired incorrectly incorrect voltage coming from power source 6 Test for good contact correct wiring problems ensure hot lines have correct voltage on all legs 7 Pul...

Page 63: ...e the tool replace if damaged 4 Spindle speed too fast feed rate too slow 4 Use correct spindle speed and feed rate Page 34 5 Gibs are too loose 5 Properly adjust gibs Page 50 Table hard to move 1 Table saddle knee locks are tightened down 1 Full loosen locks needed for movement 2 Chips have loaded up on the ways 2 Frequently clean away chips from the ways that build up during operation 3 Ways are...

Page 64: ...ts including serious injury or fire 4 Motor Wiring The motor wiring shown in these diagrams is current at the time of printing but it may not match your machine Always use the wiring diagram inside the motor junction box 5 Circuit Requirements You MUST follow the requirements at the beginning of this manual when connecting your machine to a power source 6 Capacitors Inverters Some capacitors and p...

Page 65: ... 40 Ohm Thermal Brake Resistor Variable Frequency Drive Yaskawa V1000 CIMR VT2A0020BAA 200V 3 Ph 5 5kW 3 7kW U V W 6 8 13 7 12 11 10 R1 T1 B1 B2 T1 8 13 R1 freq drive wiring To Control Panel Page 59 To Spindle Motor Page 59 To Transformer Page 58 To Contactor Page 58 To Relay Page 58 To Chassis Ground Page 58 To Lower Electrical Panel Page 58 Upper Electrical Panel See Figure 67 ...

Page 66: ...4 35 U2 W2 L1 L3 20A Fuse 20A Fuse 2T1 4T2 6T3 8T4 2T1 4T2 6T3 8T4 110V 5 15 Outlets T T R2 R2 T2 T2 R R R R T T T T 2R 0 0 0 0 0 0 1 2 3 4 5 9 30 34 35 L1 L3 30 1 20 20 33 33 5 2 13 13 8 8 3 9 34 35 4 4 0 U2 L1 L3 21 22 22 21 22 21 21 6 15 Plug As Recommended 1 2 3 4 5 9 21 22 34 35 34 35 R1 T1 R1 T1 7 Ground L1 L3 G Hot Hot 220V 34 34 35 35 1R 1R R R R R 0 A1 A2 A2 U2 W2 W2 0 2 3 Main Power Swit...

Page 67: ... Dial Spindle Speed Display X2 X1 3 NO 4 1 2 2 2 11 11 10 9 7 6 5 4 3 5 4 1 2 3 0 2 9 12 12 10 S Capacitor 3M 450V Rd Rd Rd Rd Yl Yl Yl X1 Y1 Z1 U2 V2 W2 U1 V1 W1 W W 34 35 V U 2 2 3 3 Ground component wiring control panel wiring To Electrical Panel Frequency Drive Pages 58 57 Control Panel See Figure 66 Spindle Brake See Figure 69 Spindle Motor 220V 3 Phase See Figure 68 Coolant Pump Motor 220V S...

Page 68: ... Model SB1027 E L E C T R I C A L Electrical Component Pictures Figure 66 Control panel wiring Figure 68 Spindle motor wiring Figure 69 Spindle brake switch wiring Figure 70 Coolant pump motor wiring Figure 67 Electrical panel wiring ...

Page 69: ...9 50 51 52 53 54 55 56 57 58 59 60 61 62 63 64 65 66 67 68 69 70 71 72 73 74 75 76 77 78 79 80 81 82 83 84 85 86 87 88 89 90 91 92 93 94 95 96 97 98 99 100 101 102 103 104 105 106 107 108 109 110 111 112 113 114 115 116 117 118 119 120 121 122 123 124 125 126 127 128 129 130 131 132 133 134 135 136 137 138 139 9 49 55 54 38 9 22 21 19 38 18 81 21 18 65 31 65 112 83 37A 73A 55A 127A 107A 133A 105A ...

Page 70: ...AR CRADLE THROW OUT 71 PSB10240071 OVERLOAD CLUTCH WORM GEAR 30T 25 PSB10240025 WORM SHAFT 72 PR05M EXT RETAINING RING 15MM 26 PSS01M SET SCREW M6 1 X 10 73A PSB10240073A PINION OVERLOAD CLUTCH ASSY 27 PK102M KEY 4 X 4 X 18 73 PSB10240073A PINION OVERLOAD CLUTCH SHAFT 28 PSB10240028 WORM GEAR 74 PSB10240073A OVERLOAD CLUTCH 29 PSB10240029 CLUSTER GEAR RETAINER 75 PSB10240073A CLUTCH COMPRESSION SP...

Page 71: ...0127A KNURLED SLEEVE 106 PCAP105 CAP SCREW 3 8 16 X 5 8 128 PSB10240127A HANDWHEEL CAPTIVE PIN 107A PSB10240107A STOP TRIP BAR ASSEMBLY 129 PSB10240129 QUILL LOCK NUT 107 PSB10240107A STOP SHAFT TRIP BAR 130 PSB10240130 QUILL LOCK SLEEVE 108 PSB10240107A COMPRESSION SPRING 131 PSB10240133A LOCK SHAFT 109 PSB10240107A STOP SHAFT TRIP SHAFT 132 PSB10240133A TAPERED COMPRESSION SPRING 110 PRP61M ROLL...

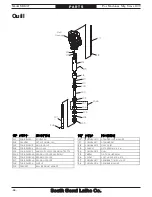
Page 72: ...SB10240211 SPANNER NUT 203 PSB10240203 QUILL END CAP 212 PSB10240212 QUILL SKIRT 204 PSB10240204 QUILL SEAL 213 PSS26M SET SCREW M5 8 X 6 205 PSB10240205 ANGULAR CONTACT BEARING 7207 P4 214 PSB10240214 QUILL 206A PSB10240206A BEARING SPACER ASSEMBLY 215 PW02M FLAT WASHER 5MM 206 PSB10240206A BEARING SPACER 216 PS09M PHLP HD SCR M5 8 X 10 207 PSB10240206A BEARING SPACER 217 PSB10240217 DRAWBAR 7 16...

Page 73: ... 65 P A R T S Gearbox 301 302 303 304 305 306 307 308 309 310 311 312 313 314 315 316 317 318 321 322 323 324 325 326 327 328 329 330 331 332 333 334 335 336 337 339 340 341 342 343 344 345 346 347 348 349 306 329 For Reference Only 303A 307A ...

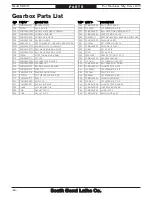
Page 74: ... 5 X 14 308 PSB10240307A BULL GEAR BEARING SPACER 334 PK14M KEY 5 X 5 X 18 309 PR38M INT RETAINING RING 62MM 335 PZERK005 GREASE FITTING ST 1 8 PT 310 PSB10240310 SPACER 336 PSB10240336 GEARBOX HOUSING 311 PSB10240303A SPANNER LOCK WASHER 337 PCAP14M CAP SCREW M8 1 25 X 20 312 PSB10240303A SPANNER NUT 339 PSB10240339 BULL GEAR SHIFT PINION 313 PSB10240313 BEARING SLEEVE WASHER 340 PSB10240340 HI L...

Page 75: ...4 405 406 407 408 409 410 411 412 413 414 415 416 417 418 419 420 421 422 423 424 425 426 427 428 429 430 431 432 433 434 435 436 437 438 439 440 441 442 443 444 445 446 447 448 449 450 451 452 453 454 455 456 457 458 459 460 461 462 463 464 465 412 418 415 442 For Reference Only 466 403A ...

Page 76: ...10270447 CAPTIVE PIN 414 PCAP12M CAP SCREW M8 1 25 X 40 448 PSB10240456 BRAKE LEVER 415 PSS26M SET SCREW M5 8 X 6 449 PSB10240449 KNOB 3 8 16 416 PSB10270416 TOP BEARING COVER 450 PSB10240458 BRAKE OPERATING FINGER 417 PSB10270417 BRAKE SWITCH MOUNTING BLOCK 451 PSB10240459 BRAKE FINGER PIVOT STUD 418 PCAP24M CAP SCREW M5 8 X 16 452 PR36M EXT RETAINING RING 7MM 419 PSB10270419 BRAKE SWITCH 453 PSB...

Page 77: ...AM ADAPTER 525 PSB10240524 RAM PINION SCREW 507 PSB10240017 INDICATOR PLATE 526 PSB10240525 TURRET 508 PSB10240508 WORM THRUST WASHER 527 PSB10240526 RAM GIB ADJUSTMENT SCREW 509 PSB10240509 LOCK COLLAR 528 PN08 HEX NUT 3 8 16 510 PSS02M SET SCREW M6 1 X 6 529 PSB10240528 RAM LOCK PLUNGER 511 PK36M KEY 5 X 5 X 50 530 PSB10240530A LOCK LEVER STUD 512 PSB10240512 HEAD TILT WORM 531A PSB10240530A LOC...

Page 78: ...4 615 616 617 618 619 620 621 622 623 624 625 626 627 628 629 630 631 632 633 634 635 636 637 638 639 640 641 642 643 644 645 646 647 648 649 650 651 652 653 654 655 656 657 658 659 660 661 662 663 664 605 605 608 628 643 602 603 628 607 608 608 605 608 655 608 665 666 665 667 607 608 626A Available only as a set 619A 613A 651A ...

Page 79: ... PINION 616 PSB10240616 LOWER KNEE LOCK PLUNGER 650 PSS03M SET SCREW M6 1 X 8 617 P51305 THRUST BEARING 51305 651A PSB10240651A CHIP GUARD SET 618 PK20M KEY 5 X 5 X 15 651 PSB10240651A OUTER CHIP GUARD 619A PSB10240619A VERTICAL LEADSCREW W NUT ASSY 652 PSB10240651A MIDDLE CHIP GUARD 619 PSB10240619A VERTICAL LEADSCREW INCH 653 PSB10240651A INNER CHIP GUARD 620 PCAP02M CAP SCREW M6 1 X 20 654 PSB1...

Page 80: ... 704 705 706 708 709 710 711 707 712 713 714 715 716 717 718 719 720 721 722 735 736 737 738 739 740 741 742 743 744 745 746 747 748 749 750 751 752 753 715 716 717 718 719 720 721 722 701 702 723 724 725 729 730 705 707 709 731 732 710 711 733 734 735 713 713 738 710 711 736A Available only as a set 714A Available only as a set 723A 723A 704A 704A ...

Page 81: ...8 PCAP06M CAP SCREW M6 1 X 25 712 PSB10240712 CROSS FEED BEARING BRACKET 739 PW03M FLAT WASHER 6MM 713 PK92M KEY 3 X 3 X 25 740 PSB10240714A FRONT CROSS LEADSCREW NUT 714A PSB10240714A CROSS FEED LEADSCREW W NUT ASSY 741 PSB10240736 LEADSCREW NUT BRACKET 714 PSB10240714A CROSS FEED LEADSCREW 742 PSB10270736A LEFT LONGITUDINAL LEADSCREW NUT 715 PSS01 SET SCREW 5 16 18 X 1 743 PSB10240714A REAR CROS...

Page 82: ... D E F G H K 801 K REF PART DESCRIPTION REF PART DESCRIPTION 801 PSB10240801 ELBOW JOINT M4 X 1 8 PT 805 PCAP01M CAP SCREW M6 1 X 16 802 PSB10240802 T JOINT 806 PSB10240806 FLEXIBLE STEEL TUBE 4 X 500MM 803 PSB10240803 ONE SHOT OILER ASSEMBLY 807 PCAP38M CAP SCREW M5 8 X 25 804 PCAP02M CAP SCREW M6 1 X 20 808 PSB10240808 OIL DISTRIBUTOR 8 PORT ...

Page 83: ...0903 COOLANT PUMP 1 8HP 220V 1PH 60HZ 912 PSB10270912 COOLANT NOZZLE 3 8 X 30 IN 904 PSB10270904 BARBED HOSE FITTING 3 8 PT X 1 2 IN 913 PSB10270913 PIPE ELBOW 90 DEG 3 8 PT X 1 2 IN 905 PSB10270905 THREADED HOSE CLAMP 3 4 IN 914 PSB10270914 COOLANT HOSE 1 2 X 59 IN 906 PSB10270906 COOLANT HOSE 1 2 X 43 1 2 IN 915 PSB10270915 HOSE CLAMP 3 4 IN 907 PSB10270904 BARBED HOSE FITTING 3 8 PT X 1 2 IN 91...

Page 84: ...s Mfg Since 8 09 Model SB1027 P A R T S Electric Box Control Panel 1001 1002 1003 1004 1005 1006 1007 1008 1009 1010 1011 1012 1013 1014 1015 1016 1017 1018 1019 1020 1021 1022 1023 1024 1025 1026 1027 1028 1029 1032 ...

Page 85: ...22 RELAY SOCKET OMRON 1007 PSB10271007 RELAY OMRON MYA1 24V 1023 PSB10271023 EMERGENCY STOP BUTTON 1008 PSB10271008 CONTACTOR AB C09 400 220V 1024 PSB10271024 SPINDLE MOTOR ON BUTTON 1009 PSB10271009 ELECTRICAL RECEPTACLE 110V 1025 PSB10271025 COOLANT SWITCH 1010 PSB10271010 COOLING FAN ASSEMBLY 1026 PSB10271026 SPINDLE DIRECTION SWITCH 1011 PSB10271011 TERMINAL BLOCK 14 POST 1027 PSB10271027 SPIN...

Page 86: ... 1105 1106 1107 REF PART DESCRIPTION REF PART DESCRIPTION 1101 PSB10241004 TOOLBOX 1105 PWR1921C CLOSED WRENCH 19 21MM 1102 PSDF2 SCREWDRIVER FLAT 2 1106 PAW1510M HEX WRENCH 10PC 1 5 10 MM 1103 PSDP2 PHLP HD SCREWDRIVER 2 1107 PSB10241007 BOTTLE FOR OIL 1104 PWR1214 WRENCH 12 14MM ...

Page 87: ...06 PSB10271206 MACHINE ID LABEL 1214 PSBPAINT03 SB DARK BLUE TOUCH UP PAINT 1207 PSB10271207 CONTROL PANEL LABEL 1215 PSBPAINT 02 SB LIGHT BLUE TOUCH UP PAINT 1208 PSB10241105 DOWNFEED SELECTOR LABEL 1216 PSBPAINT01 SB GRAY TOUCH UP PAINT 1201 1202 1203 1204 1205 1206 1207 1208 1209 1210 1211 1212 1213 1214 1215 1216 The safety labels provided with your machine are used to make the operator aware ...

Page 88: ...L02HL DISCONNECT WARNING LABEL 1220 PSB10271220 SPEED RANGE LABEL 1210 PSBLABEL13HL CLOSE DOOR WARNING LABEL 1221 PSB10271221 220V 1PH LABEL 1217 PSB10241112 POWER FEED CAUTION LABEL 1222 PSB10271222 BIOHAZARD WARNING LABEL 1218 PSB10241115 POWER FEED NOTICE LABEL 1223 PSB10241119 110V OUTLET CAUTION LABEL 1219 PSB10241116 110V 1PH LABEL 1224 PSB10241118 110V 1PH OUTLET LABEL ...

Page 89: ... machine complies with the provisions of any law act code regulation or standard of any domestic or foreign government industry or authority In no event shall South Bend s liability under this warranty exceed the original purchase price paid for this machine Any legal actions brought against South Bend Lathe Company shall be tried in the State of Washington County of Whatcom This is the sole writt...

Page 90: ...South Bend Lathe Co P O Box 2027 Bellingham WA 98227 PHONE 360 734 1540 Administrative Offices FAX 360 676 1075 International FAX 360 734 1639 USA only southbendlathe com Printed In Taiwan JBTS12256 ...

Reviews: