background image


16

NOTES ON DISC


—

  Only use groundless loudspeakers.  

—

  Use only loudspeakers of minimal 40Watt, using fewer watts may result in damaging your 

loud speakers at higher volumes.  

—

  Use 4~8  (Ohm impedance) loudspeakers only; using higher or lesser impedance may 

damage the unit.  

—

  Do not use 3-cable loudspeakers and do not connect the loudspeakers minus to the car 

body.  

—

  (GND).Using a BTL circuit and each loudspeaker must be connected with insulated cables 

according the diagram.  

—

  Loudspeaker cables and/or optional external power amplifiers must always be about 30cm. 

away from the antenna and/or antenna extension parts. 

—

  If want to display for 7” TFT, parking wire must be connected to ground. 


Summary of Contents for VR-651 B

Page 1: ...CD MP3 MP4 AM FM Radio Support Bluetooth Only for VR 651B model Owner s Manual Take the time to read through this owner s manual Familiarity with installation and operation procedures will help you obtain the best Performance from your new DVD receiver ...

Page 2: ... car interior by means of ventilation or air conditioning Operate in well ventilated areas Do not turn on or off the product in short intervals When turning the unit off wait for at least 10 seconds prior to turning the unit on again Do not operate the player with scratched bended or broken discs and when a disc is not loaded properly do not force it into the player Do not watch video playback whi...

Page 3: ...TERY 10 MAIN MENU 10 ƹ RADIO PLAYER 10 ƹ DVD PLAYER 11 ƹUSB SD MMC OPERATION 12 ƹAV IN MODE 13 ƹSETTING CONTROL 13 BLUETOOTH SECTION Only for VR 651B model 14 STEERING WHEEL CONTROL 15 OTHER FUNCTIONS 15 NOTES ON DISC 16 TROUBLESHOOTING 17 TROUBLESHOOTING 18 TECHNICAL SPECIFICATIONS 19 BLUETOOTH CONNECTION ATTENTION INSTRUCTIONS 20 VIDEO FILE CONVERSION 21 ...

Page 4: ... operation of the unit 1 Washer Spring Washer M5 Nut 1 each 2 Mounting Strap 1 3 Bolt 1 4 Screw 4 5 Mounting Collar 1 6 Release Key 2 7 Screw 1 8 Rubber Cushion 1 Power cable Noted Product image may vary from the actual delivery User Manual Remote Control Trim ring Warranty card ...

Page 5: ...e driver s way and will not injure the passenger in case there is a sudden stop like an emergency stop INSTALLATION Figure 1 Insert the unit into dash board hole and fix it If necessary place the mount strap at the rear of the unit and fix it with provided washer as figure 2 Place Trim Ring over the unit and installation is completed as figure 1 UN INSTALLATION Insert the supplied extraction keys ...

Page 6: ...Connector 1 If your car is equipped with the ISO connector then connect the ISO connectors as illustrated 2 For connections without the ISO connectors check the wiring in the vehicle carefully before connecting incorrect connection may cause serious damage to this unit 3 Cut the connector connect the colored leads of the power cord to the car battery as shown in the color code table below for spea...

Page 7: ... mode Radio DVD if there is a disc in unit USB if there is a USB device in the unit CARD if there is a SD MMC card in the unit and AV IN 5 EJECT Button Press to eject a disc If the disc is not removed for about 10 seconds after eject the disc is reinserted automatically 6 USB slot USB slot for Multimedia playback files only Insert a USB into this slot and the unit will automatically start reading ...

Page 8: ...nd in sequence of FM1 FM2 FM3 AM1 AM2 In DVD mode press to play randomly 6 Cursor buttons Use the buttons to select the menu item the title track or to show next frame 7 MENU ROOT button Short press it to show main menu In DVD mode long press it to enter TITLE MENU Enable only if the DVD disc with title menu 8 SUBTITLE button Press it to select the subtitle language Available only if the disc with...

Page 9: ...ress this button again at the ending point of the section you want to repeat B section A B repeating starts Press it again to cancel the A B repeat function Press it and hold for two seconds in DVD mode to zoom the image in or out in the sequence of ZOOM 2 ZOOM 3 ZOOM 4 ZOOM 1 2 ZOOM 1 3 ZOOM 1 4 21 LOUD only for RDS Press to set LOUD on or OFF 22 seek button In DVD mode Press button to skip to th...

Page 10: ...n the unit Do not drop the remote control onto the floor it will damage it beyond repair Do not use the remote control unit while simultaneously operating the remote control unit of any other equipment they may interfere resulting in improper operation The battery normally last for about one year although depending how often the remote control is used If the remote control unit isn t working even ...

Page 11: ...nd hold this icon to select station forward automatically Touch this icon to select station backward manually Touch and hold this icon to select station backward automatically Touch this icon to back to the main menu ƹ DVD PLAYER To start DVD Player tap on DVD button from main menu screen You will not see any buttons while DVD is played Buttons will appear when you tap on TFT screen Tap the screen...

Page 12: ...show display playback progress Touch it to show DVD main Touch this button to return to the title Select the preferred language for the subtitles Touch it to select Audio Touch it to select playback track or chapter ƹUSB SD MMC OPERATION When a file disc USB or a memory card is played the screen will show following interface Touch it to select music files Touch it to select photo files Touch it to...

Page 13: ...gain TIME Adjust the digital time DATE Adjust the digital date BEEP Select keypad sound on or off CALIBRATION Touch screen and adjustment SWC Steering wheel control LANGUAGE Select different language EQ Select the EQ type VOL Adjust the digital volume TREBLE Select the digital treble effect BASS Select the digital bass effect LONDNESS Selecting loudness ON will emphasize the low frequency output F...

Page 14: ...ter searching new device Sound Stream select it input password 0000 and confirm ok device paring is finished The text Enter Number will shows on the panel after the pairing is completed It means device is connected and ready for BLUETOOTH communication Auto connect Disconnect When power on the unit the last paired phone will be remembered Tap the icon on the unit it will connect to the phone via B...

Page 15: ...ING WHEEL CONTROL Tap SWC icon to set steering wheel control function OTHER FUNCTIONS Subwoofer Connect the subwoofer to the unit using sub output see electrical diagram Tap MENU on screen enter into main menu setting choose setting menu Choose SOUND and set subwoofer ON to enable subwoofer Parking When the car is stopped and the parking brake is working the screen can display the video image othe...

Page 16: ...pedance may damage the unit Do not use 3 cable loudspeakers and do not connect the loudspeakers minus to the car body GND Using a BTL circuit and each loudspeaker must be connected with insulated cables according the diagram Loudspeaker cables and or optional external power amplifiers must always be about 30cm away from the antenna and or antenna extension parts If want to display for 7 TFT parkin...

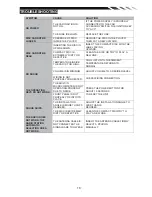
Page 17: ...n buttons are pressed Display is not Accurate The microprocessor has malfunctioned due to noise etc Turn off the power Then press the no open button and remove the DCP Press the reset button for about 2 seconds with a thin rod Panel or main unit Connectors are dirty Wipe the dirt off with a soft cloth moistened with cleaning alcohol CD Sound is bad directly after power is turned on Compact disc is...

Page 18: ...L THE AMBIENT TEMPERATURE RETURNS TO NORMAL NO SOUND VOLUME IS IN MINIMUM ADJUST VOLUME TO A DESIRED LEVEL WIRING IS NOT PROPERLY CONNECTED CHECK WIRING CONNECTION THE OPERATION KEYS DO NOT WORK THE BUILT IN MICROCOMPUTER IS NOT OPERATING PROPERLY DUE TO NOISE PRESS THE POWER BUTTON FOR ABOUT 10 SECONDS TO RESET THE UNIT FRONT PANEL IS NOT PROPERLY FIX INTO ITS PLACE SOUND SKIPS THE INSTALLATION A...

Page 19: ...Radio Frequency range EUROPE AREA 87 5 108MHz Step 50KHz Frequency range SOUTH AMERICA AREA 87 5 108MHz Step 100KHz Frequency range ASIA AREA 87 5 108MHz Step 50KHz 65 74MHz Step 10KHz Frequency range U S A AREA 87 5 107 9MHz Step 200KHz Preset memory stations 18 AM MW Radio Frequency range EUROPE AREA 522kHz 1620 KHz Step 9KHz Frequency range SOUTH AMERICA AREA 520kHz 1710 KHz Step 10KHz Frequenc...

Page 20: ... ...

Page 21: ... ...

Page 22: ... ...

Page 23: ...device may not cause harmful interference and 2 this device must accept any interference received including interference that may cause undesired operation NOTE 1 Any changes or modifications to this unit not expressly approved by the party responsible for compliance could void the user s authority to operate the equipment ...

Reviews: