Getting started
6
5
Automatically tuning the TV
Note:
If you need to re-enter the ‘Automatic Tuning’ procedure at any time, you can do so by pressing
the Auto Start up button (refer to page 7)
1.
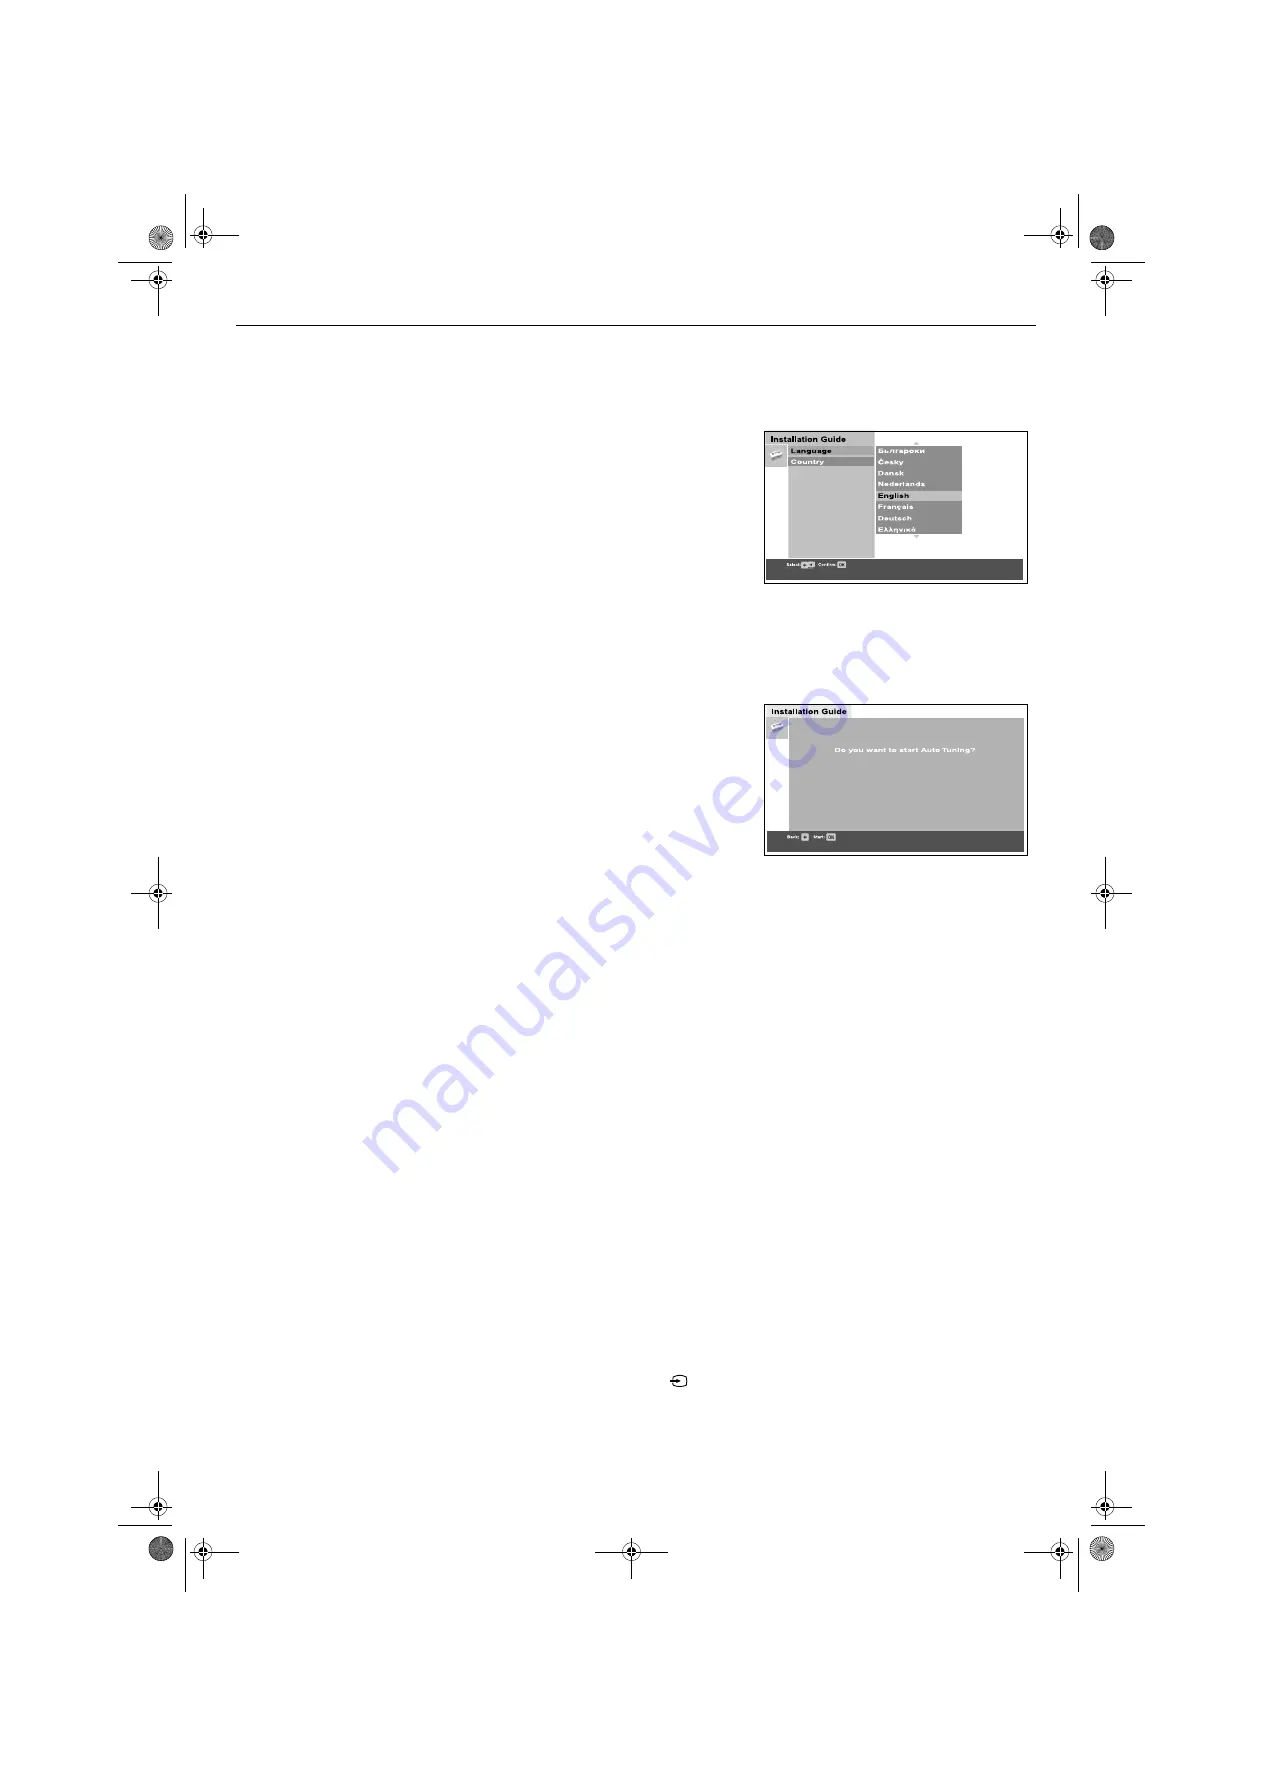
When you switch on the TV for the first time, the Sony logo appears on
the TV screen followed by the Language/Country menu with the word
‘English’ highlighted. Press the
V
or
v
buttons on the remote control to
highlight your required language. Press the
OK
button to confirm your
choice. From now on all menus appear in your chosen language.
2.
The word Country is now highlighted. Press the
V
or
v
buttons to choose
the country in which you are using the TV. It is important to select the
correct country to ensure correct Teletext displays. Press the
OK
button
to confirm your choice.
The picture rotation prompt appears. Sometimes the Earth’s natural
magnetism can cause the screen to look tilted.
a)
If no correction is required, press the
OK
button.
b)
If some correction is required, press the
V
or
v
button to rotate the
picture over a range of -5 to +5. Press the
OK
button to store.
The picture centring prompt appears. This allows you to adjust the
vertical position of the display if it is not centralised.
a)
If no correction is required, press the
OK
button.
b)
If some correction is required, press the
V
or
v
button to set the new
position. Press the
OK
button to store.
The autotune prompt screen appears. Press the
OK
button to select
Yes
.
The autotune procedure begins, tuning all the available channels. A
display then appears on the TV screen to inform you of the tuning
progress.
If no channels are found, a display appears on screen asking you to
confirm your aerial is connected. Check the aerial is connected correctly
then press the
OK
button to repeat the tuning process.
Once tuning is complete, the ‘Programme Sorting’ prompt appears. If you
wish to change the order of the stored channels, press the
OK
button
and refer to page 15 for instructions. If you do not wish to sort the
channels at this time, press the
MENU
button to return to normal
operation.
3.
To view programmes, press the
PROG+/-
button or the numbered
buttons on the remote control.
6
Finding your video channel
If you connected a VCR to your TV when following the ‘Connecting an aerial and a
VCR to the TV’ instructions, you now need to find your video channel.
1.
Press the
PROG+/-
button on the remote control until the picture from the
pre-recorded tape appears on screen.
Notes:
If you wish to move your video channel to a different programme number, refer to
‘Programme Sorting’ on page 15
.
If you have connected your VCR using a scart lead, press the
button
repeatedly on the remote control until the picture from the pre-recorded tape
appears on the TV screen.
Autotune prompt
Language/Country menu
GBpages1-8.fm Page 6 Monday, January 10, 2005 5:44 PM
Summary of Contents for WEGA KV-32HQ150K
Page 2: ...K cover fm Page 2 Monday January 10 2005 5 42 PM ...
Page 3: ...1 BG BGpages1 8 fm Page 1 Monday January 10 2005 5 42 PM ...
Page 26: ...24 BGpages18 24 fm Page 24 Monday January 10 2005 5 43 PM ...
Page 27: ...1 CZ CZpages1 8 fm Page 1 Monday January 10 2005 5 43 PM ...
Page 50: ...24 CZpages18 24 fm Page 24 Monday January 10 2005 5 44 PM ...
Page 51: ...1 GB GBpages1 8 fm Page 1 Monday January 10 2005 5 44 PM ...
Page 74: ...24 GBpages18 24 fm Page 24 Monday January 10 2005 5 45 PM ...
Page 75: ...1 HU HUpages1 8 FM Page 1 Monday January 10 2005 5 45 PM ...
Page 98: ...24 HUpages18 24 FM Page 24 Monday January 10 2005 5 45 PM ...
Page 99: ...1 PL PLpages1 8 fm Page 1 Monday January 10 2005 5 46 PM ...
Page 122: ...24 PLpages18 24 FM Page 24 Monday January 10 2005 5 46 PM ...
Page 123: ...1 RU RUpages1 8 fm Page 1 Monday January 10 2005 5 46 PM ...
Page 146: ...24 RUpages18 24 fm Page 24 Monday January 10 2005 5 47 PM ...
Page 147: ...K cover fm Page 3 Monday January 10 2005 5 42 PM ...


