background image

18

To access Text

Press 

/

.

Each time you press 

/

, the display changes 

cyclically as follows:
Text mode 

t

 Text Superimpose mode 

t

 TV mode 

t

 Text mode 

t

 (repeat)

To select a page, press the number buttons or PROG 
+/–.
To hold a page, press 

/

.

To reveal hidden information, press 

/

.

To change brightness of Text, press 

 repeatedly to 

choose between four different options.
To switch off Text, press 

.

Tips

• Ensure that the TV is receiving a good signal, or some text 

errors may occur.

• Most TV channels broadcast a Text service. For 

information on the use of the service, select the index page 
(usually page 100).

• When four coloured items appear at the bottom of the Text 

page, Fastext is available. Fastext allows you to access 
pages quickly and easily. Press the corresponding 
coloured button to access the page.

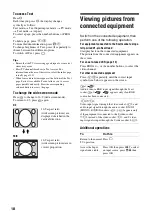
To change the wide screen mode

Press 

 to change to 16:9 (wide screen mode).

To return to 4:3, press 

 again.

4:3

16:9

Viewing pictures from 
connected equipment

Switch on the connected equipment, then 
perform one of the following operation.

For equipment connected to the Scart socket using a 
fully-wired 21-pin Scart lead

Start playback on the connected equipment.
The picture from the connected equipment appears on 
the screen.

For an auto-tuned VCR (page 12)

Press PROG +/–, or the number buttons, to select the 
video channel. 

For other connected equipment

Press 

/

 repeatedly until the correct input 

symbol (see below) appears on the screen.

Additional operations

16:9 aspect ratio 
(widescreen pictures) are 
displayed stretched in the 
vertical direction.

m M

16:9 aspect ratio 
(widescreen pictures) are in 
correct proportion.

1/

1:

Audio/video or RGB input signal through the Scart 
socket 

1/

1. 

1 appears only if an RGB 

source has been connected.

2/

2:

Video input signal through the video socket 

2, and 

audio input signal through the audio socket L/G/S/I 
(MONO), R/D/D/D sockets 

2. 

2 appears only 

if the equipment is connected to the S video socket 

2 instead of the video socket 

2, and S video 

input signal is input through the S video socket 

2.

To

Do this

Return to the normal 
TV operation

Press . 

Access the Input 
signal index table

Press OK, then press 

,

. To select 

an input source, press 

M

/

m

, then 

press OK. 

Summary of Contents for WEGA KLV-15SR3U

Page 1: ...ony Corporation LCD Colour TV 2 632 370 43 1 Printed in Taiwan KLV 15SR3U Operating Instructions Before operating the TV please read the Safety Information section of this manual Retain this manual for future reference ...

Page 2: ...you should lose the fuse cover please contact your nearest Sony service station How to replace the fuse Open the fuse compartment with a blade screwdriver and replace the fuse To prevent the risk of electric shock do not insert the plug cut off from the mains lead into a socket outlet This plug cannot be used and should be destroyed To reduce the risk of fire or electric shock do not expose this a...

Page 3: ...m connected equipment 18 Navigating through menus 19 Overview of the menus 19 Picture Adjustment menu 21 Picture Mode 21 Contrast Brightness Colour Hue Sharpness Backlight 21 Reset 21 Noise Reduction 21 Colour Tone 22 Sound Adjustment menu 23 Sound Effect 23 Treble Bass Balance 23 Reset 23 Dual Sound 24 Auto Volume 24 Features menu 25 Power Saving 25 TV Speakers 25 RGB Center 25 Set Up menu 26 Lan...

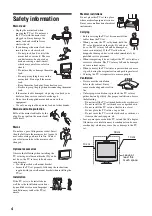
Page 4: ...V set Installation If the TV set is to be installed on a wall have the installation carried out by qualified service men Improper installation may render the TV set unsafe Medical institutions Do not place this TV set in a place where medical equipment is in use It may cause malfunction of medical instruments Carrying Before carrying the TV set disconnect all the cables from the TV set When you ca...

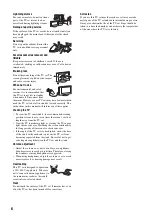
Page 5: ...mediately by qualified service personnel To prevent fire keep flammable objects candles etc and electric bulbs away from the TV set Oils Do not install this TV set in restaurants that use oil Dust absorbing oil may enter and damage the TV set Fall Place the TV set on a secure stable stand Do not hang anything on the TV set If you do the TV set may fall from the stand or wall mount bracket causing ...

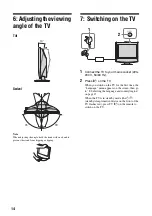
Page 6: ...length away from the TV set View the TV in moderate light as viewing the TV in poor light strains your eyes Watching the screen continuously for long periods of time can also strain your eyes If the angle of the TV set is to be adjusted steady the base of the stand with your hand to prevent the TV set from becoming separated from the stand Be careful not to get your fingers caught between the TV s...

Page 7: ...optional components at least 30 cm away from the TV set If a VCR is installed in front of the TV set or beside the TV set the picture may become distorted Handling and cleaning the screen surface cabinet of the TV set The screen surface is finished with a special coating to prevent strong light reflections To avoid material degradation or screen coating degradation observe the following precaution...

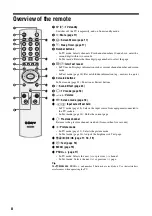
Page 8: ...xt buttons 8 9 Sound Effect page 23 9 TV mode page 18 0 2 Volume qa Screen mode page 18 qs Input select Text hold In TV mode page 18 Selects the input source from equipment connected to the TV sockets In Text mode page 18 Holds the current page qd Previous channel Returns to the previous channel watched for more than five seconds qf Picture mode In TV mode page 21 Selects the picture mode In Text ...

Page 9: ...ource from equipment connected to the TV sockets 3 2 Volume Increases or decreases the volume 4 P Programme In TV mode Selects the next or previous channel 5 1 Power Switches the TV on or off 6 Power indicator Lights up in green when the TV is switched on 7 1 Standby Sleep Timer indicator Lights up in red when the TV is in standby mode Flashes red when a button is pressed on the remote control Lig...

Page 10: ...ies in an environmentally friendly way Certain regions may regulate disposal of the battery Please consult your local authority Do not use different types of batteries together or mix old and new batteries Handle the remote with care Do not drop or step on it or spill liquid of any kind onto it Do not place the remote in a location near a heat source or in a place subject to direct sunlight or in ...

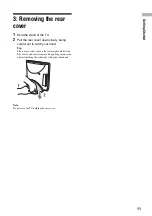
Page 11: ...he rear cover down slowly being careful not to catch your hand Tip The rear cover has tabs on the lower right and left side The cover can be easily removed by pulling out one side while stabilizing the other side with your other hand Note Do not carry the TV holding the rear cover ...

Page 12: ...d supplied 3 1 Coaxial cable not supplied Rear of the TV AC adaptor supplied IN OUT DC IN 16 5V SMARTLINK 1 1 Coaxial cable not supplied Scart lead not supplied RF lead not supplied 2 1 Mains lead supplied 1 Rear of the TV 3 B 2 2 VCR AC adaptor supplied ...

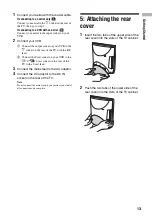
Page 13: ...e rear of the TV with the RF lead 2 Connect the Scart socket on your VCR to the 1 1 Scart socket on the rear of the TV with a Scart lead 3 Connect the mains lead to the AC adaptor 4 Connect the AC adaptor to the DC IN socket on the rear of the TV Note Do not connect the mains lead to your mains socket until all connections are complete 5 Attaching the rear cover 1 Insert the two tabs of the upper ...

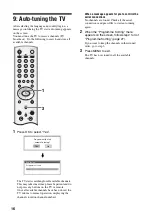
Page 14: ...Connect the TV to your mains socket 220 240 V 50 60 Hz 2 Press 1 on the TV When you switch on the TV for the first time the Language menu appears on the screen then go to 8 Selecting the language and country region on page 15 When the TV is in standby mode the 1 standby sleep timer indicator on the front of the TV flashes red press TV 1 on the remote to switch on the TV 10 75 75 1 2 ...

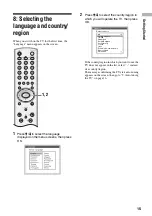
Page 15: ...ect the country region in which you will operate the TV then press OK If the country region in which you want to use the TV does not appear in the list select instead of a country region The message confirming the TV start auto tuning appears on the screen then go to 9 Auto tuning the TV on page 16 1 2 Country Select country United Kingdom Ireland Nederland België Belgique Luxembourg France Italia...

Page 16: ...emote Once all available channels have been stored the TV returns to normal operation displaying the channel stored on channel number 1 When a message appears for you to confirm the aerial connections No channels are found Check all the aerial connections and press OK to start auto tuning again 2 When the Programme Sorting menu appears on the screen follow step 2 to 3 of Programme Sorting page 27 ...

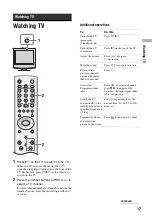
Page 17: ... the TV temporarily Standby mode Press TV 1 Turn off the TV completely Press 1 on the top of the TV Adjust the volume Press 2 increase decrease Mute the sound Press Press again to restore Return to the previous channel watched for more than five seconds Press Access the Programme index table Press OK To select a channel press M m then press OK To access the Input signal index table see page 18 Swi...

Page 18: ...form one of the following operation For equipment connected to the Scart socket using a fully wired 21 pin Scart lead Start playback on the connected equipment The picture from the connected equipment appears on the screen For an auto tuned VCR page 12 Press PROG or the number buttons to select the video channel For other connected equipment Press repeatedly until the correct input symbol see belo...

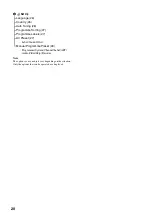
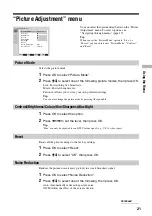
Page 19: ...s see page 19 Also see page in parentheses for details of each menu Using the Menu 1 4 2 3 4 Overview of the menus 1 Picture Adjustment Picture Mode 21 Contrast Brightness Colour Hue Sharpness Backlight 21 Reset 21 Noise Reduction 21 Colour Tone 22 2 Sound Adjustment Sound Effect 23 Treble Bass Balance 23 Reset 23 Dual Sound 24 Auto Volume 24 3 Features Power Saving 25 TV Speakers 25 RGB Center 25...

Page 20: ...tion Only the options that can be operated are displayed 4 Set Up Language 26 Country 26 Auto Tuning 26 Programme Sorting 27 Programme Labels 27 AV Preset 27 Label Sound Offset Manual Programme Preset 28 Programme System Channel Label AFT Audio Filter Skip Decoder ...

Page 21: ... M m to select OK then press OK Reduces the picture noise snowy picture in a weak broadcast signal 1 Press OK to select Noise Reduction 2 Press M m to select one of the following then press OK Auto Automatically reduces the picture noise Off Modifies the effect of the noise reduction You can select the options listed below on the Picture Adjustment menu To select options see Navigating through men...

Page 22: ...o select Colour Tone 2 Press M m to select one of the following then press OK Warm Gives the white colours a red tint Normal Gives the white colours a neutral tint Cool Gives the white colours a blue tint Colour Tone ...

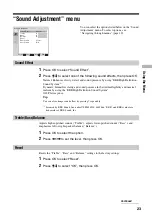
Page 23: ...638258 4482866 BBE and BBE symbol are trademarks of BBE Sound Inc Adjusts higher pitched sounds Treble adjusts lower pitched sounds Bass and emphasizes left or right speaker balance Balance 1 Press OK to select the option 2 Press to set the level then press OK Resets the Treble Bass and Balance settings to the factory settings 1 Press OK to select Reset 2 Press M m to select OK then press OK You c...

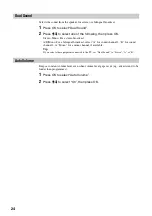
Page 24: ... For a bilingual broadcast select A for sound channel 1 B for sound channel 2 or Mono for a mono channel if available Tip If you select other equipment connected to the TV set Dual Sound to Stereo A or B Keeps a constant volume level even when volume level gaps occur e g adverts tend to be louder than programmes 1 Press OK to select Auto Volume 2 Press M m to select On then press OK Dual Sound Aut...

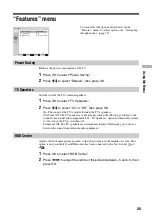
Page 25: ...urns to On when the TV is switched off Permanent Off The TV speakers are permanently turned off allowing you to always listen to the sound from external audio equipment Adjusts the horizontal picture position so that the picture is in the middle of screen This option is only available if an RGB source has been connected to the Scart socket 1 1 1 Press OK to select RGB Center 2 Press to adjust the ...

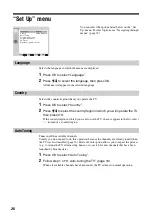
Page 26: ...o not need to do this operation because the channels are already tuned when the TV was first installed page 16 However this option allows you to repeat the process e g to retune the TV after moving house or to search for new channels that have been launched by broadcasters 1 Press OK to select Auto Tuning 2 Follow step 1 of 9 Auto tuning the TV page 16 When all available channels have been tuned t...

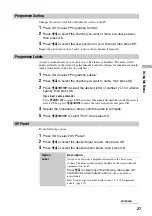
Page 27: ...umber s for a blank space then press OK If you input a wrong character Press M m to select 5 and press OK repeatedly until the wrong character is selected Then press M m to select the correct character and press OK 4 Repeat the procedure in step 3 until the name is complete 5 Press M m to select End then press OK Do the following options 1 Press OK to select AV Preset 2 Press M m to select the des...

Page 28: ...Press M m to select one of the following TV broadcast systems then press B G For western European countries regions D K For eastern European countries regions I For the United Kingdom L For France 5 Press M m to select Channel then press OK 6 Press M m to select S for cable channels or C for terrestrial channels then press 7 Tune the channels as follows If you do not know the channel number freque...

Page 29: ...o not experience any sound distortion we recommend that you leave this option set to the factory setting Off Note You cannot receive stereo or dual sound when Low or High is selected Skip Skips unused channels when you press PROG to select channels You can still select a skipped channel using the number buttons 1 After selecting Skip press 2 Press M m to select On then press OK To restore a skippe...

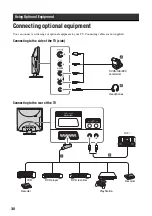
Page 30: ...of optional equipment to your TV Connecting cables are not supplied Connecting to the side of the TV side Connecting to the rear of the TV L G S I MONO R D D D Headphones SVHS Hi8 DVC camcorder R D D D L G S I SMARTLINK 1 1 C D VCR DVD player DVD recorder Decoder PlayStation Decoder Hi Fi ...

Page 31: ...en to sound from the TV on headphones PlayStation DVD player decoder DVD recorder or VCR that supports SmartLink C Connect to the Scart socket 1 1 SmartLink is a direct link between the TV and a VCR DVD recorder For more information on SmartLink refer to the instruction manual supplied with your VCR or DVD recorder Hi Fi audio equipment D Connect to the audio output sockets to listen to the sound ...

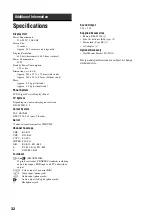
Page 32: ...AL SECAM NTSC 3 58 4 43 only Video In Aerial 75 ohm external terminal for VHF UHF Channel Coverage VHF E2 E12 UHF E21 E69 CATV S1 S20 HYPER S21 S41 D K R1 R12 R21 R69 L F2 F10 B Q F21 F69 I UHF B21 B69 Terminals 1 1 SMARTLINK 21 pin Scart socket CENELEC standard including audio video input RGB input and TV audio video output 2 S video input 4 pin mini DIN 2 Video input phono jack 2 Audio input pho...

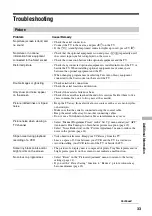
Page 33: ...three to five years in normal use one to two years at the seaside Picture dotted lines or stripes noise Keep the TV away from electrical noise sources such as cars motorcycles or hair dryers Make sure that the aerial is connected using the coaxial cable Keep the aerial cable away from other connecting cables Do not use a 300 ohm twin lead cable as interference may occur Picture noise when viewing ...

Page 34: ...ow or High in the Manual Programme Preset option page 29 Unable to receive a stereo or dual sound broadcast Check that Audio Filter is set to Off in the Manual Programme Preset option page 29 General Problem Cause Remedy The TV turns off automatically the TV enters standby mode Check if the Sleep Timer function is activated page 17 The remote does not function Replace the batteries Wrong character...

Page 35: ... MENU button 8 Mute button 8 N Noise Reduction 21 Number buttons 8 O OK button 8 P P buttons 9 Picture Adjustment menu 21 Picture Mode 21 Picture mode button 8 Power indicator 9 Power 1 switch 9 Power Saving 25 Previous channel button 8 PROG buttons 8 Programme index table 17 Programme Labels 27 Programme Sorting 27 R Remote control sensor 9 inserting batteries 10 overview 8 Reset picture adjustme...

Page 36: ...ony Corporation LCD Colour TV 2 632 370 43 1 Printed in Taiwan KLV 15SR3U Operating Instructions Before operating the TV please read the Safety Information section of this manual Retain this manual for future reference ...

Reviews: