Preparations
19
• Do not touch the ink ribbon or place the print cartridge
in a dusty location. Fingerprints or dust on the ink
ribbon may lower the print quality.
• Do not remove or insert print cartridges while printing
is in progress.
• Avoid storage in locations subject to high
temperatures and humidity, excessive dust, or direct
sunlight.
• When removing a partially used print cartridge for
storage, store it in its original packaging.
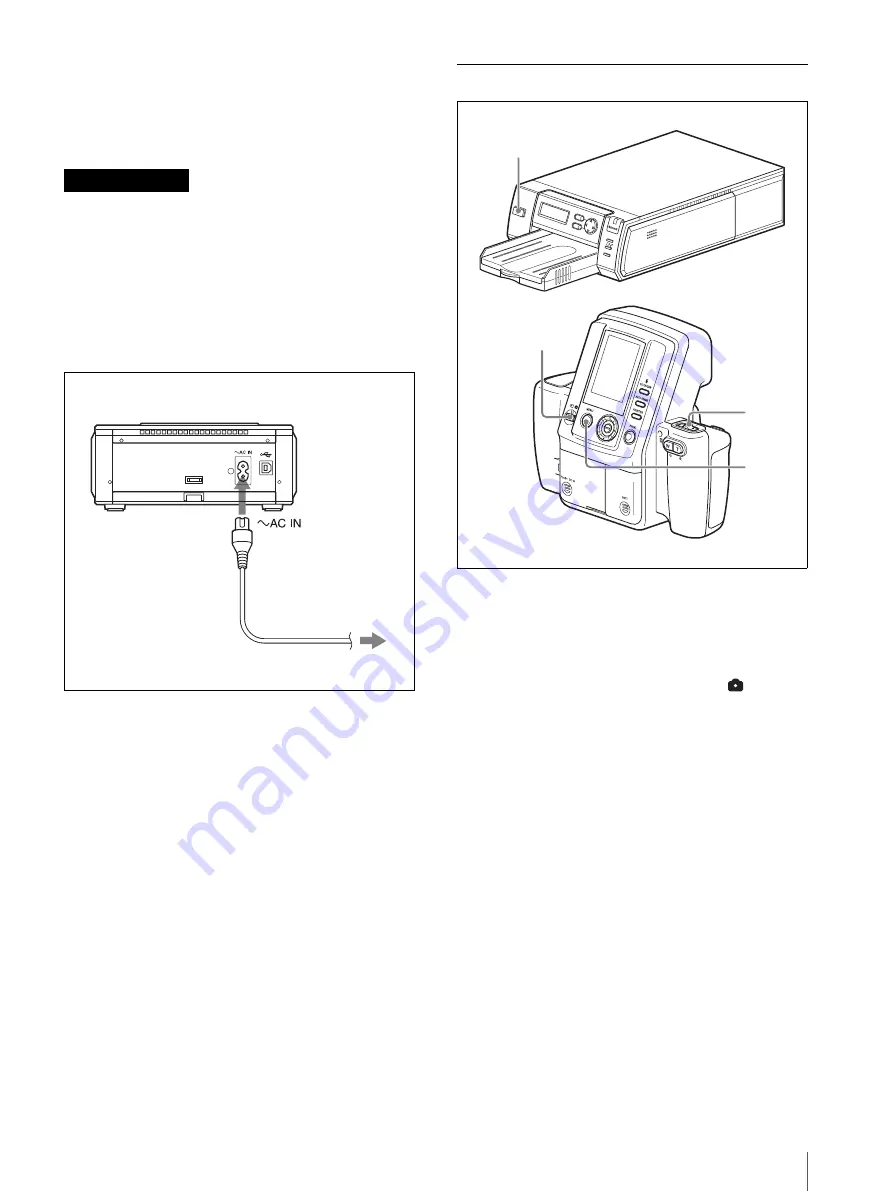
To connect the printer to a power outlet
Connect the printer to a power outlet using the power
cord.
Turning On the Power
1
Turn on the printer.
Check that Ready BT RSSI [- - - -] appears on the
operation display.
2
Set the mode switch on the camera to
.
3
Set the on/standby switch on the camera to
?
(on).
When turning on the camera for the first time, the
default setting screen appears.
For details on default settings, see “The first time
you turn on the camera (default setting)” on page
20.
The camera starts searching for the printer, and
“DISCOVERING” appears on the LCD. When the
camera finds the printer, “DISCOVERED” appears,
and the printer name and Bluetooth address are
displayed in black on the LCD. If the color of the
printer name and Bluetooth address do not change
to black but remain in gray, set the printer and
camera to standby mode and perform steps
1
through
3
again.
Notes on storage
Printer
Power cord
to power outlet
PUSH OPEN
EXEC
MENU
ALARM
DIGITAL
PHOTO
PRINTE
R
3
4
2
1
Summary of Contents for UPX-C300
Page 140: ...Index 140 ...
Page 211: ......


