34
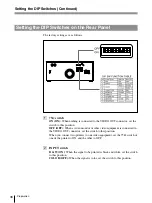
You can set the printer to the required print mode using the DIP switches.
The printer has two kinds of DIP switches;
• DIP switch on the sub panel
You can set the print mode frequently used in daily operation easily on the sub
panel.
• DIP switches on the rear panel
You can set the print mode and printer specifications you do not need to change
settings frequently.
How to change the DIP switch setting
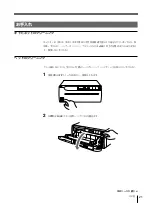
Before setting the DIP switches, turn the power off. Change the settings using a
small pointed tool such as a small screwdriver.
Note
ON or OFF indicated in parentheses shows the switch setting position.
Setting the DIP Switches on the Sub Panel
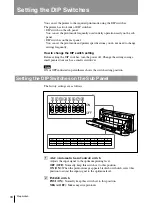
The factory settings are as follows.
1
AGC (Automatic Gain Control) switch
Adjusts the input signal to the optimum printing level.
OFF (OFF):
Normally keep this switch set to this position.
ON (ON):
When the printout image appears blackish or whitish, select this
position to adjust the input signal to the optimum level.
2
IMAGE switch
POSI (ON):
Normally keep this switch set to this position.
NEGA (OFF):
Makes negative printouts.
Setting the DIP Switches
Preparation
O F F
1
2
3
4
5
6
7
8
ON
OFF
NO
FUNCTION
ON
OFF
1
2
3
4
5
6
7
8
RESERVED RESERVED
ON
OFF
GAMMA
POST FEED
TONE
HARD
IMAGE SHARPNESS
AGC
POSI
SOFT
NEGA
ON
OFF
TONE
TONE
Summary of Contents for UP-960
Page 29: ...29 その他 ...
Page 102: ......
Page 103: ......
Page 104: ...Sony Corporation Printed in Japan ...

