Sony Trinitron CPD-E210 Operating Instructions Manual Download Page 15

15

D:\###sagyou\02 gatu\0203-ya\874120S CPD-E210\01US03BAS-UC.fm

masterpage:Right

CPD-E210

4-077-098-11 (1)

* If a second degauss cycle is needed, allow a minimum interval of 20 minutes for the best result. A humming noise may be heard, but this is not a 

malfunction.

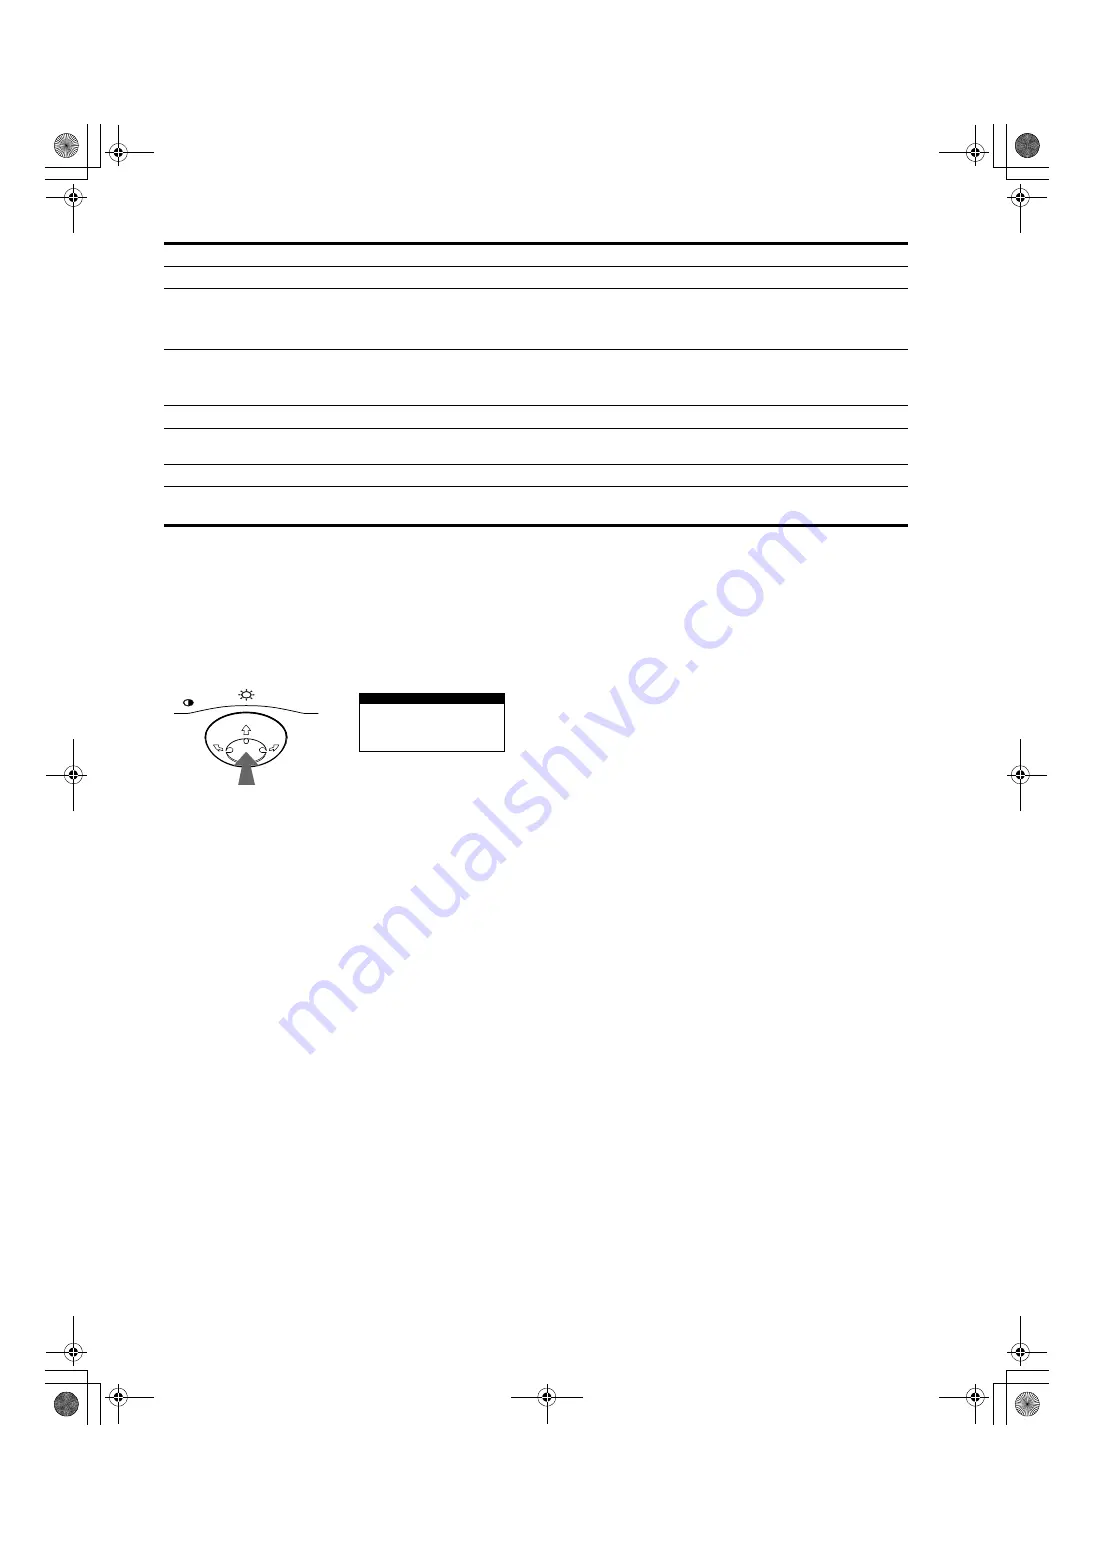
Displaying this monitor’s name, serial number, 
and date of manufacture.

While the monitor is receiving a video signal, press and hold the 
center of the control button for more than five seconds to display 
this monitor’s information box.

If the problem persists, call your authorized Sony dealer and give 
the following information.
• Model name: CPD-E210
• Serial number
• Name and specifications of your computer and graphics board.

Edges of the image are curved

• Adjust the geometry (page 10).

Wavy or elliptical pattern (moire) 
is visible

• Select MOIRE ADJUST and adjust the moire cancellation effect (page 11).

x

Problems caused by the connected computer or other equipment

• Change your desktop pattern.

Color is not uniform

• Degauss the monitor* (page 11). If you place equipment that generates a magnetic field, 

such as a speaker, near the monitor, or if you change the direction the monitor faces, color 
may lose uniformity.

White does not look white

• Adjust the color temperature (page 10).

Letters and lines show red or blue 
shadows at the edges

• Adjust the convergence (page 10).

Monitor buttons do not operate

• If the control lock is set to ON, set it to OFF (page 11).

A hum is heard right after the 
power is turned on

• This is the sound of the auto-degauss cycle. When the power is turned on, the monitor is 

automatically degaussed for five seconds.

Symptom

Check these items

MENU

MODE L : CPD - E 2 1 0

SER NO : 1 2 3 4 5 6 7

MANUF ACTURED : 2 0 0

I NFORMA T I ON

0 - 1 5

Example

b

01US01COV-UC.book  Page 15  Thursday, February 3, 2000  4:06 PM

Summary of Contents for Trinitron CPD-E210

Page 1: ...poration Trinitron Color Computer Display Operating Instructions D sagyou 02 gatu 0203 ya 874120S CPD E210 01US01COV UC fm masterpage Right CPD E210 4 077 098 11 1 CPD E210 01US01COV UC book Page 1 Thursday February 3 2000 4 06 PM ...

Page 2: ...t expressly approved in this manual could void your authority to operate this equipment INFORMATION This product complies with Swedish National Council for Metrology MPR standards issued in December 1990 MPR II for very low frequency VLF and extremely low frequency ELF If you have any questions about this product you may call Sony Customer Information Center 1 800 222 SONY 7669 or write to Sony Cu...

Page 3: ...1 Precautions 4 Identifying parts and controls 5 Setup 6 Step 1 Connect your monitor to your computer 6 Step 2 Connect the power cord 6 Step 3 Turn on the monitor and computer 7 Selecting the on screen menu language LANG 7 Customizing Your Monitor 8 Navigating the menu 8 Adjusting the brightness and contrast 9 Adjusting the centering of the picture CENTER 9 Adjusting the size of the picture SIZE 9...

Page 4: ...uipment which generates magnetism such as a transformer or high voltage power lines near or on an electrically charged metal surface Maintenance Clean the screen with a soft cloth If you use a glass cleaning liquid do not use any type of cleaner containing an anti static solution or similar additive as this may scratch the screen s coating Do not rub touch or tap the surface of the screen with sha...

Page 5: ...cator lights up in green when the monitor is turned on and either flashes in green and orange or lights up in orange when the monitor is in power saving mode 4 AC IN connector page 6 This connector provides AC power to the monitor 5 Video input connector HD15 page 6 This connector inputs RGB video signals 0 700 Vp p positive and sync signals DDC Display Data Channel is a standard of VESA AC IN MEN...

Page 6: ...te Do not touch the pins of the video cable connector as this might bend the pins x Connecting to an IBM PC AT or compatible computer x Connecting to a Macintosh or compatible computer Step 2 Connect the power cord With the monitor and computer switched off first connect the power cord to the monitor then connect it to a power outlet AC IN IBM PC AT or compatible computer to video output AC IN You...

Page 7: ...Adjusting the monitor s resolution and color number Adjust the monitor s resolution and color number by referring to your computer s instruction manual The color number may vary according to your computer or video board The color palette setting and the actual number of colors are as follows High Color 16 bit t 65 536 colors True Color 24 bit t about 16 77 million colors In true color mode 24 bit ...

Page 8: ...OLOR page 10 Select the COLOR menu to adjust the picture s color temperature You can use this to match the monitor s colors to a printed picture s colors MENU MENU EXIT CENTER SIZE GEOM COLOR LANG HELP CONV OPTION OK MENU 2 6 S I ZE CENTER 2 6 S I ZE CENTER 2 6 GEOMETRY RETURN TO MA I N MENU RECOMMENDED RESOLUT I ON F L I CKER TH I N HOR I ZONTAL L I NE D I STORTED SHAPE OUT OF FOCUS D I SCOLORAT ...

Page 9: ...GHTNESS CONTRAST menu appears on the screen 2 Move the control button m M to adjust the brightness and to adjust the contrast 6 The menu automatically disappears after about 3 seconds Adjusting the centering of the picture CENTER This setting is stored in memory for the current input signal 1 Press the center of the control button The main MENU appears on the screen 2 Move the control button to hi...

Page 10: ...to a printed picture s colors This setting is stored in memory for all input signals 1 Press the center of the control button The main MENU appears on the screen 2 Move the control button to highlight COLOR and press the center of the control button again The COLOR menu appears on the screen 3 Move the control button m M to select a color temperature The preset color temperatures are 5000K and 930...

Page 11: ...the screen adjust the moire cancellation level To adjust the amount of moire cancellation first move the control button m M to select MOIRE ADJUST Then move the control button until the moire effect is at a minimum Moire is a type of natural interference which produces soft wavy lines on your screen It may appear due to interference between the pattern of the picture on the screen and the phosphor...

Page 12: ...ove the control button to jump directly to the GEOMETRY menu OUT OF FOCUS The picture may seem to be out of focus when the red and blue color signals are not aligned properly causing red or blue shadows to appear around letters and lines Try adjusting the picture s convergence to make the shadows disappear Move the control button to jump directly to the CONVERGENCE menu When the CONVERGNECE menu i...

Page 13: ... appears on the screen if you press any button on the monitor After a few seconds the monitor enters the power saving mode again Power consumption of 0 W is acheivable by disconnecting the power cord from the power outlet Troubleshooting Before contacting technical support refer to this section If thin lines appear on your screen damper wires The lines you are experiencing on your screen are norma...

Page 14: ... replaced an old monitor with this monitor reconnect the old monitor and adjust the frequency range to the following Horizontal 30 85 kHz Vertical 48 120 Hz If no message is displayed and the 1 power indicator is green or flashing orange Use the Self diagnosis function back cover If using a Macintosh system Check that the Macintosh adapter not supplied and the video signal cable are properly conne...

Page 15: ...isible Select MOIRE ADJUST and adjust the moire cancellation effect page 11 xProblems caused by the connected computer or other equipment Change your desktop pattern Color is not uniform Degauss the monitor page 11 If you place equipment that generates a magnetic field such as a speaker near the monitor or if you change the direction the monitor faces color may lose uniformity White does not look ...

Page 16: ... authorized Sony dealer of the monitor s condition Be sure to note the model name and serial number of your monitor Also note the make and model of your computer and video board Specifications CRT 0 24 mm aperture grille pitch center 17 inches measured diagonally 90 degree deflection FD Trinitron Viewable image size Approx 327 243 mm w h 14 3 4 9 5 8 inches 16 0 viewing image Resolution Maximum Ho...

Reviews: