background image

Adjustment Using the Menus


26

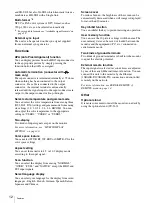
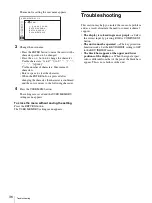
• Flicker free
• Model name and serial number
• OPTION A and serial number
• OPTION B and serial number

COLOR TEMP/SPACE menu

The COLOR TEMP/SPACE menu is used for adjusting 
the picture white balance or color space. 
You need to use the measurement instrument to adjust 
the white balance.
Recommended: Konica Minolta color analyzer CA-210

USER CONTROL menu

The USER CONTROL menu is used for adjusting the 
picture.
Items that cannot be adjusted depending on the input 
signal are displayed in black.

For details of input signals and adjustable/setting items, 
see page 15
.

For the video input

Submenu

Setting

COLOR TEMP

Selects the color temperature from 
among “D93,” “D65,” “D56,” 
“USER1,” “USER2” and “USER3.”

MANUAL 
ADJUSTMENT

If you set the COLOR TEMP to 
USER1, USER2 or USER3 setting, 
the item displayed is changed from 
black to white, which means you 
can adjust the color temperature.
The set values are memorized.

ADJUST GAIN

: Adjusts the 

color balance (GAIN). 

ADJUST BIAS

: Adjusts the 

color balance (BIAS). 

COPY FROM

: If you select 

“D93,” “D65” or “D56,” the 
white balance data for the 
selected color temperature 
will be copied in the 
“USER1,” “USER2” or 
“USER3” setting.

COLOR SPACE

Selects the color space from among 
ITU-709, EBU, SMPTE-C and 
OFF. OFF sets the color space to 
the original color reproduction of 
the panel.

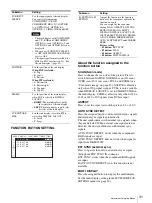
C O L O R   T E M P :  

xxxxxx

M A N U A L   A D J U S T M E N T :


  A D J U S T  

G A I N :  

  A D J U S T  

B I A S :  

  C O P Y  

F R O M :  

xxx

C O L O R   S PA C E :  

x

COLOR TEMP/SPACE

Submenu

Setting

AUTO CHROMA/
PHASE

Adjusts color intensity (CHROMA) 
and tones (PHASE). 

AUTO ADJ VALUE

: Selects 

ON or OFF of the auto 
adjustment.  When you set 
to OFF, this parameter is 
reset to the factory setting.  
When you set to ON, the 
automatically adjusted value 
is enabled.

START

: The auto adjustment 

starts when you display the 
color bar signals (Full/
SMPTE/EIA) on the screen 
and press the ENTER 
button.  After adjusting the 
color intensity, press the 
MENU button to clear the 
adjustment screen. After the 
adjustment is done correctly, 
the AUTO ADJ VALUE is 
automatically set to ON.

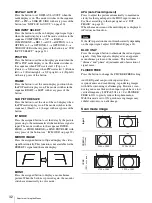
A U T O   C H R O M A / P H A S E  
  A U T O  

A D J  

VA L U E :

 xx

  S TA R T :  

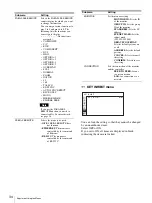
USER CONTROL 1/3

S U B   C O N T R O L  
  B R I G H T N E S S :  

x

  A P E R T U R E :  

x

USER CONTROL 2/3

P I C T U R E   C O N T R O L  
  A C C :  

xx

  C T I :  

x

  V  

S H A R P N E S S :  

x

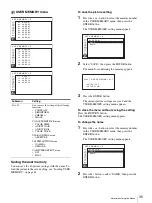
I N P U T   S E T T I N G  
  S H I F T  

H :  

xxx

  S H I F T  

V :  

xx

USER CONTROL 3/3

Summary of Contents for trimaster EL PVM-2551MD

Page 1: ...Professional Video Monitor 4 409 417 13 2 2011 Sony Corporation Instructions for Use Before operating the unit please read this manual thoroughly and retain it for future reference PVM 2551MD ...

Page 2: ...imits for a Class A digital device pursuant to Part 15 of the FCC Rules These limits are designed to provide reasonable protection against harmful interference when the equipment is operated in a commercial environment This equipment generates uses and can radiate radio frequency energy and if not installed and used in accordance with the instruction manual may cause harmful interference to radio ...

Page 3: ... IEC60950 1 IEC60065 or other IEC ISO Standards applicable to the equipments 2 Furthermore all configurations shall comply with the system standard IEC60601 1 1 Everybody who connects additional equipment to the signal input part or signal output part configures a medical system and is therefore responsible that the system complies with the requirements of the system standard IEC60601 1 1 If in do...

Page 4: ...uld be used adjacent to or stacked with other equipment it should be observed to verify normal operation in the configuration in which it will be used Guidance and manufacturer s declaration electromagnetic emissions The PVM 2551MD is intended for use in the electromagnetic environment specified below The customer or the user of the PVM 2551MD should assure that it is used in such an environment E...

Page 5: ... mode 2 kV common mode 1 kV differential mode 2 kV common mode Mains power quality should be that of a typical commercial or hospital environment Voltage dips short interruptions and voltage variations on power supply input lines IEC 61000 4 11 5 UT 95 dip in UT for 0 5 cycle 40 UT 60 dip in UT for 5 cycles 70 UT 30 dip in UT for 25 cycles 5 UT 95 dip in UT for 5 sec 5 UT 95 dip in UT for 0 5 cycl...

Page 6: ...transmitters as determined by an electromagnetic site survey a should be less than the compliance level in each frequency range b Interference may occur in the vicinity of equipment marked with following symbol NOTE 1 At 80 MHz and 800 MHz the higher frequency range applies NOTE 2 These guidelines may not apply in all situations Electromagnetic propagation is affected by absorption and reflection ...

Page 7: ...aration distance according to frequency of transmitter m 150 kHz to 80 MHz d 1 2 P 80 MHz to 800 MHz d 1 2 P 800 MHz to 2 5 GHz d 2 3 P 0 01 0 12 0 12 0 23 0 1 0 38 0 38 0 73 1 1 2 1 2 2 3 10 3 8 3 8 7 3 100 12 12 23 For transmitters rated a maximum output power not listed above the recommended separation distance d in meters m can be estimated using the equation applicable to the frequency of the...

Page 8: ... 13 Input Signals and Adjustable Setting Items 15 Rear Panel 16 Connecting the AC Power Cord 18 Installing the Input Adaptor 19 Removing the Connector Cover 19 Selecting the Default Settings 20 Selecting the Menu Language 21 Using the Menu 22 Loading USER MEMORY 24 Adjustment Using the Menus 24 Items 24 Adjusting and Changing the Settings 25 STATUS menu 25 COLOR TEMP SPACE menu 26 USER CONTROL men...

Page 9: ... screen to lose uniformity The screen and the cabinet become warm during operation This is not a malfunction On Burn in Due to the characteristics of the material used in the OLED panel for its high precision images permanent burn in may occur if still images are displayed in the same position on the screen continuously or repeatedly over extended periods Images that may cause burn in Masked image...

Page 10: ...tection plate surface monitor surface in contact with a rubber or vinyl resin product for a long period of time The finish of the surface may deteriorate or the coating may come off Disposal of the Unit Do not dispose of the unit with general waste Do not include the monitor with household waste When you dispose of the monitor you must obey the law in the relative area or country Recommendation to...

Page 11: ...Unlike the conventional bottom emission structure of TFT Sony s OLED panel can reproduce a crisper image due to high brightness Furthermore a unique microcavity structure makes RGB primary colors purer and deeper by utilizing light resonance effects that magnify optimum light wave lengths and diminish undesired light wave lengths The panel s 10 bit driver enables smooth gradation of color shading ...

Page 12: ...tion see MULTI DISPLAY SETTING on page 30 Color space feature You can select ITU R BT 709 EBU or SMPTE C for the color space settings Aspect setting You can set the monitor to 4 3 or 16 9 display mode according to the input signal Scan function You can select the display from among NORMAL OVER FULL and NATIVE except the HD15 and DVI input signals Select language display You can select your languag...

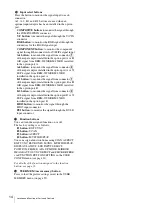
Page 13: ...ease the color intensity or the button to decrease it h BRIGHT brightness buttons Adjusts the picture brightness Press the button to increase the brightness or the button to decrease it i Menu operation buttons Displays or sets the on screen menu MENU button Press to display the on screen menu Press again to clear the menu buttons Press to select the items and setting values ENTER button Press to ...

Page 14: ...n port A B 1 button to monitor the signal from connector 1 of the input adaptor installed in the option port B or R G B signal from BKM 229X BKM 256DD installed in the option port B B 2 button to monitor the signal from connector 2 of the input adaptor installed in the option port B or Y PB PR signal from BKM 229X BKM 256DD installed in the option port B HD15 button to monitor the signal through t...

Page 15: ...RESET 2 to 6 see page 40 Input signal Item Video 3 Y C 3 B W 3 Component 4 RGB 4 SDI Computer SD HD SD HD SD 5 HD 6 3G 14 DVI 13 HD15 CONTRAST a a a a a a a a a a a BRIGHT 1 a a a a a a a a a a a CHROMA a a a a a a a a a a PHASE a NTSC a a a a a a a a a APERTURE a a a a a a a a a a a COLOR TEMP a a a a a a a a a a a COLOR SPACE a a a a a a a a a a a AUTO CHROMA PHASE a a a ACC a CTI a a V SHARPNES...

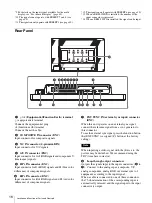
Page 16: ...ls e B PB IN connector BNC Input connector for B of RGB signals and PB blue color difference of component signals f R PR IN connector BNC Input connector for R of RGB signals and PR red color difference of component signals g EXT SYNC IN external sync input connector BNC When this unit operates on an external sync signal connect the reference signal from a sync generator to this connector To use t...

Page 17: ...ils on this connector refer to the Interface Manual for Programmers saved in the supplied CD ROM Japanese and English only CAUTION When you connect the LAN cable of the unit to peripheral device use a shielded type cable to prevent malfunction due to radiation noise For safety do not connect the connector for peripheral device wiring that might have excessive voltage to this port Follow the instru...

Page 18: ...socket on the AC adaptor Then attach the AC plug holder to the AC power cord 2 Slide the AC plug holder over the cord until it locks 3 Insert the DC IN connector into the DC 5V 24V IN connector on the bottom of this unit until it locks To remove the AC power cord First pull out the AC plug holder while pressing the lock levers Next pull out the DC IN connector from the DC 5V 24V IN connector while...

Page 19: ...REMOTE connector RJ 45 To use the connector remove the connector cover as follows Before removing the connector cover disconnect the power cord 1 Remove the screw of the connector cover 2 Remove the connector cover Save the screw and cover so that you can reattach the cover if necessary Caution These connectors are designed to allow direct contact with conductive circuits Weak voltage may be prese...

Page 20: ... area further and then press the ENTER button The confirmation screen is displayed Confirm the selected area When the setting is wrong press the RETURN button to return to the previous screen 3 3 4 5 3 1 2 COLOR TEMP COMPONENT LEVEL NTSC SETUP FLICKER FREE 1NORTH AMERICA D65 BETA7 5 7 5 OFF 2LATIN AMERICA PAL PAL N AREA ARGENTINA D65 SMPTE 0 ON PARAGUAY D65 SMPTE 0 ON URUGUAY D65 SMPTE 0 ON NTSC P...

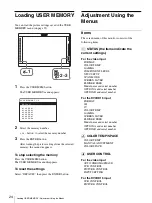
Page 21: ...r displaying the menu and other on screen displays ENGLISH English is selected in the default setting The current settings are displayed in place of the x marks on the illustrations of the menu screen 1 Turn on the unit 2 Press the CONTROL button The operation buttons are displayed 3 Press the MENU button The menu appears The menu presently selected is shown in yellow 4 Press the or button to sele...

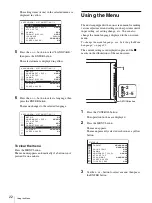
Page 22: ...gs are displayed in place of the x marks on the illustrations of the menu screen 1 Press the CONTROL button The operation buttons are displayed 2 Press the MENU button The menu appears The menu presently selected is shown as a yellow button 3 Use the or button to select a menu then press the ENTER button MATRIX xxx COMPONENT LEVEL xxxx NTSC SETUP x GAMMA xxx FORMAT DISPLAY xxxx LANGUAGE ENGLISH I ...

Page 23: ...onfirm the setting When returning the adjustment or setting to the previous value Press the RETURN button before pressing the ENTER button Notes An item displayed in black cannot be accessed You can access the item if it is displayed in white If the key inhibit has been turned on all items are displayed in black To change any of the items turn the key inhibit to OFF first For details on the key in...

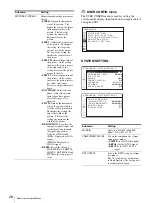
Page 24: ...s of the following items STATUS the items indicate the current settings For the video input FORMAT COLOR TEMP GAMMA COMPONENT LEVEL NTSC SETUP SCAN MODE SCREEN SAVER FLICKER FREE Model name and serial number OPTION A and serial number OPTION B and serial number For the DVI HD15 input FORMAT fH fV COLOR TEMP GAMMA SCREEN SAVER FLICKER FREE Model name and serial number OPTION A and serial number OPT...

Page 25: ...ging the Settings STATUS menu The STATUS menu is used to display the current status of the unit The following items are displayed For the video input Signal format Color temperature Gamma Component level NTSC setup Scan mode Screen saver Flicker free Model name and serial number OPTION A and serial number OPTION B and serial number For the DVI HD15 input Signal format fH fV Color temperature Gamma...

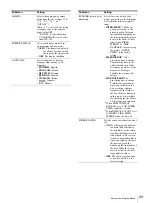
Page 26: ...ance BIAS COPY FROM If you select D93 D65 or D56 the white balance data for the selected color temperature will be copied in the USER1 USER2 or USER3 setting COLOR SPACE Selects the color space from among ITU 709 EBU SMPTE C and OFF OFF sets the color space to the original color reproduction of the panel COLOR TEMP xxxxxx MANUAL ADJUSTMENT ADJUST GAIN ADJUST BIAS COPY FROM xxx COLOR SPACE x COLOR ...

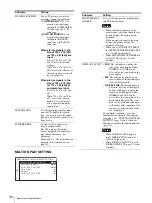
Page 27: ... When the setting is higher the picture becomes even more crisp INPUT SETTING SHIFT H Adjusts the position of the picture As the setting increases the picture moves to the right and as the setting decreases the picture moves to the left SHIFT V Adjusts the position of the picture As the setting increases the picture moves up and as the setting decreases the picture moves down Submenu Setting Subme...

Page 28: ... of the picture with the left side of the picture fixed The higher the setting the larger the width of the picture The lower the setting the narrower the width of the picture RESOLUTION Sets when the computer signal is input and it is difficult to understand the signal type such as XGA 60 or WXGA 60 XGA Displayed as XGA signal WXGA Displayed as WXGA signal RESET Resets the value of SIZE H SIZE V S...

Page 29: ...MERGE or LINE DOUBLER for processing the picture INTER FIELD is the factory setting FIELD MERGE 2 The processing time is shorter Combines the lines in the odd fields and even fields alternately regardless of the movement of images Suitable for viewing still images LINE DOUBLER The processing time is shorter Performs interpolation by repeating each line in the data receiving sequence regardless of ...

Page 30: ... xxx POSITION x FRAME SUB PICTURE SIZE x x USER CONFIG MULTI DISPLAY SETTING Submenu Setting MULTI DISPLAY ENABLE Selects ON to display the multi display and OFF not to display Notes When the frame frequency of the main display is different from that of the sub display the picture may be disturbed When no signal is input to the main display the picture may not be displayed correctly When you set S...

Page 31: ...G menu see page 30 SUB INPUT SELECT Sets the input signal of the sub display You can select from among COMPOSITE Y C RGB COMPONENT HD15 DVI OPTION A 1 OPTION A 2 OPTION B 1 OPTION B 2 VIDEO WAVE and OFF Notes The multi display with COMPOSITE and Y C RGB and COMPONENT OPTION A 1 and OPTION A 2 and OPTION B 1 and OPTION B 2 is not displayed When you set SUB INPUT SELECT to OFF MULTI DISPLAY ENABLE i...

Page 32: ...FIELD MERGE t LINE DOUBLER with every press of the button see I P MODE on page 29 MIRROR IMAGE Press the assigned button to flip and display the video signal horizontally This function is not available for the PRESET 1 signal and the multi display MONO Press the assigned button to display a monochrome picture When the buttons is pressed again the monitor switches automatically to color mode APA Au...

Page 33: ...to output EXT 5V DVI OUT Selects ON to output external 5 V power from the DVI output connectors and OFF not to output EDID UPDATE Downloads the EDID information from the main unit the monitor to the BKM 256DD Select START and then press the ENTER button to start downloading the EDID information automatically During download EDID UPDATING is displayed and the CONTROL button cannot be operated When ...

Page 34: ...MONO MIRROR IMAGE FLICKER FREE Note If you use the PARALLEL REMOTE function you need to connect cables For more details see page 38 SERIAL REMOTE Selects the mode to be used OFF SERIAL REMOTE does not function ETHERNET The monitor is controlled by the command of Ethernet RS 232C The monitor is controlled by the command of RS 232C MONITOR Set the monitor setting MONITOR ID Sets the ID of the monito...

Page 35: ...ars To change the name 1 Press the or button to select the memory number in the USER MEMORY menu then press the ENTER button The USER MEMORY setting menu appears 2 Press the button to select NAME then press the ENTER button Submenu Setting 01 to 20 You can save the setting of the following functions CONTRAST BRIGHTNESS CHROMA PHASE COLOR TEMP SPACE menu COLOR TEMP ADJUST GAIN ADJUST BIAS COLOR SPA...

Page 36: ...menu appears To close the menu without saving the setting Press the RETURN button The USER MEMORY setting menu appears Troubleshooting This section may help you isolate the cause of a problem and as a result eliminate the need to contact technical support The display is colored in green or purple t Select the correct input by pressing RGB or COMPONENT button The unit cannot be operated t The key p...

Page 37: ...ive Sync On Green 0 3 Vp p sync negative Sync TTL level polarity free H V separate sync Plug Play function corresponds to DDC2B DVI D input connector DVI D 1 TMDS single link Parallel remote Modular connector 8 pin 1 Serial remote LAN D sub 9 pin RS 232C 1 RJ 45 modular connector 1 Ethernet 10BASE T 100BASE TX Optional input port 2 ports Signal format H 15 kHz to 45 kHz V 48 Hz to 60 Hz DC IN conn...

Page 38: ...of a flammable anesthetic mixture with air or with oxygen or nitrous oxide Mode of operation Continuous Design and specifications are subject to change without notice Pin assignment PARALLEL REMOTE connector Modular connector 8 pin You can allocate functions using the REMOTE menu see page 33 Wiring required to use the Remote Control Connect the function you want to use with a Remote Control to the...

Page 39: ...DD see page 40 a Available Not available 1 The frame rate is also compatible with 1 1 001 2 Component only 9 NC System Composite Y C BKM 227W RGB Component BKM 229X BKM 220D BKM 243HS BKM 250TG 575 50I PAL a a a a a 480 60I NTSC 1 a a a a a 576 50P a 480 60P a 1080 50I a a a 1080 60I 1 a a a 720 50P a 2 a a 720 60P 1 a a a 1080 50P a 1080 60P 1 a Pin number Signal ...

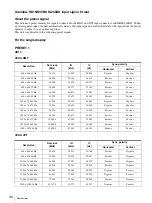
Page 40: ...9 500 46 875 75 000 Positive Positive 800 600 85 Hz 56 250 53 674 85 061 Positive Positive 1024 768 60 Hz 65 000 48 363 60 004 Negative Negative 1024 768 70 Hz 75 000 56 476 70 069 Negative Negative 1024 768 75 Hz 78 750 60 023 75 029 Positive Positive 1024 768 85 Hz 94 500 68 677 84 997 Positive Positive 1152 864 75 Hz 108 000 67 500 75 000 Positive Positive 1280 960 60 Hz 108 000 60 000 60 000 P...

Page 41: ...9 995 Positive Negative Resolution Dot clock MHz fH kHz fV Hz Sync polarity Horizontal Vertical Resolution Dot clock MHz fH kHz fV Hz Sync polarity Horizontal Vertical 720 400 70 Hz 28 322 31 469 70 087 Negative Positive 1280 800 60 Hz 68 900 48 935 59 969 Negative Negative Preset signal fH kHz fV Hz HD15 1514 483 31 5 60 1476 576 31 3 50 1920 1080 33 75 60 1920 1080 28 50 DVI BKM 256DD 1280 483 3...

Page 42: ...PTE 274M BTA S 001B 720 60P SMPTE 296M 720 50P SMPTE 296M DVI BKM 256DD 576 50P ITU R BT 1358 480 60P SMPTE 293M 1080 50I SMPTE 274M 1035 60I SMPTE 260M BTA S 001B 1080 60I SMPTE 274M BTA S 001B 720 60P SMPTE 296M 720 50P SMPTE 296M Preset signal fH kHz fV Hz 1422 1064 33 75 60 712 480 15 734 60 704 572 15 625 50 Preset signal fH kHz fV Hz 1280 1008 33 75 60 712 480 15 734 60 704 572 15 625 50 Res...

Page 43: ...0 1920 1080 33 75 60 1920 1080 28 50 1280 720 45 0 60 1280 1024 63 2 60 1280 1024 64 0 60 Preset signal fH kHz fV Hz HD15 720 483 31 5 60 720 576 31 3 50 1280 720 45 0 60 1280 720 37 5 50 DVI BKM 256DD 720 483 31 5 60 720 576 31 3 50 1280 720 45 0 60 1280 720 37 5 50 Preset signal fH kHz fV Hz HD15 640 480 31 5 60 1024 768 48 4 60 1280 960 60 0 60 DVI BKM 256DD 1024 768 1 33 75 60 1024 768 48 4 60...

Page 44: ...I BKM 256DD 576 50P ITU R BT 1358 480 60P SMPTE 293M 1080 50I SMPTE 274M 1035 60I SMPTE 260M BTA S 001B 1080 60I SMPTE 274M BTA S 001B 720 60P SMPTE 296M 720 50P SMPTE 296M Preset signal fH kHz fV Hz 1422 1064 33 75 60 712 480 15 734 60 704 572 15 625 50 Preset signal fH kHz fV Hz 1280 1008 33 75 60 712 480 15 734 60 704 572 15 625 50 Preset signal Signal standards ...

Page 45: ...talled Approx 8 5 kg 18 lb 12 oz when the optional stand is not installed and two BKM 229X are installed AC adaptor Mass Approx 1 2 kg 2 lb 10 oz 618 4 24 3 8 273 5 10 7 8 376 14 7 8 100 4 200 7 7 8 100 4 100 4 138 5 1 2 23 5 15 16 Length of M4 screws 4 Monitor cabinet Attached object 7 9 32 to 9 3 8 M4 screw 59 9 2 3 8 102 1 4 1 8 195 7 3 4 302 12 125 5 471 5 18 5 8 264 8 10 1 2 5 3 7 32 54 5 2 1...

Page 46: ...Sony Corporation ...

Reviews: