background image

Playing Discs

23

7

Press 

l

 AMS 

L

.

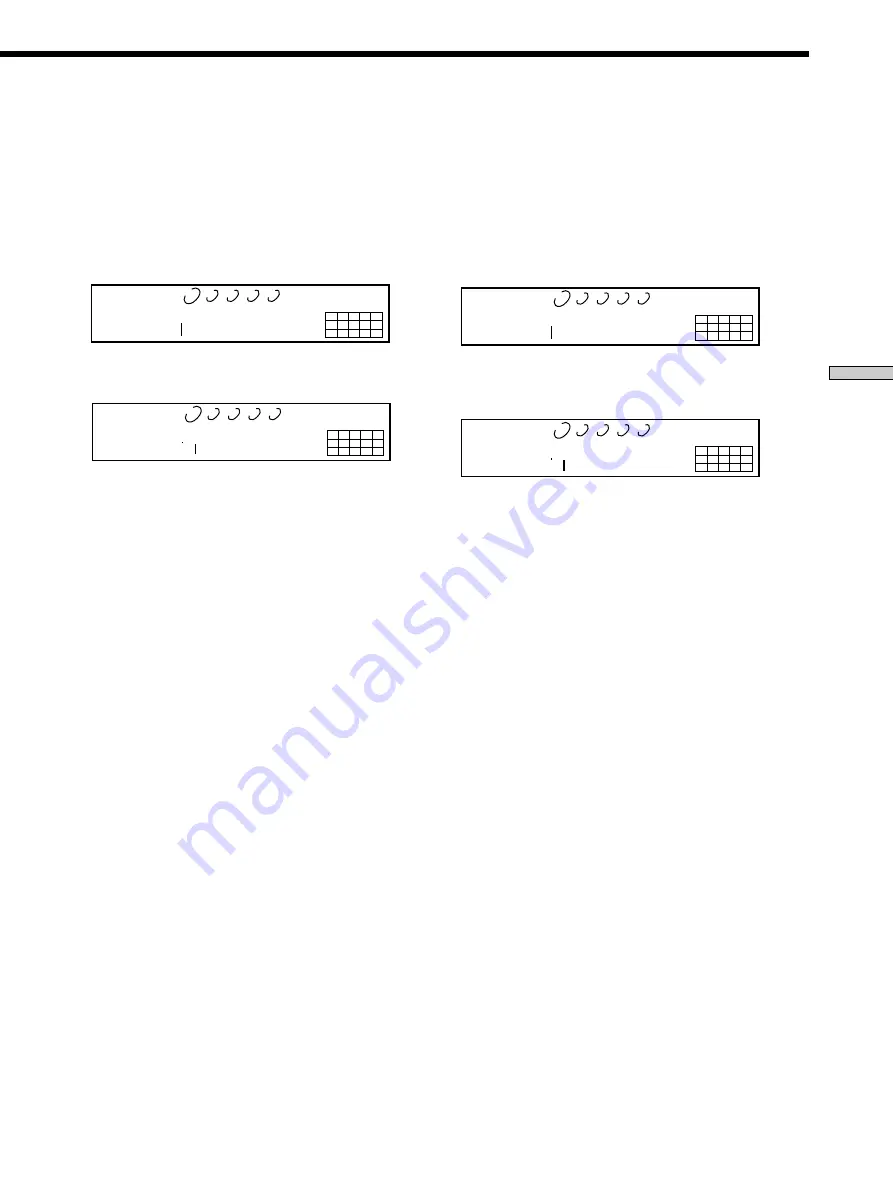
The balance adjustment display appears.
In stop mode, the test tone is output from the selected
speaker.
Example: When you select “SURR BALANCE”

during stop mode, the test tone is output
from the front speakers and surround
speakers.

8

Turn 

l

 AMS 

L

 to adjust the output level.

9

Press 

l

 AMS 

L

.

The player status returns to Step 6.
Repeat Step 6 through 9 for more adjustments.

10

Press MENU after you finish adjusting.

The display returns to the normal display.

Adjusting the output level from the remote


Z

You can adjust the output level of each speaker from the
listening position by using the supplied remote.

1

Press LEVEL ADJ during playback or stop mode.

During playback, go to Step 4.

2

Press 

.

/

>

 repeatedly until “TONE ON”

appears in the display.

3

Press ENTER.

The test tone issues from the speakers in sequence
with the speaker type appearing in the display.

4

Press 

.

/

>

 repeatedly until the desired item

appears in the display.

Select the item from “CNTR BALANCE,” “SURR
BALANCE,” or “SW BALANCE.”

Note

When you set the Sub woofer to “––” in the Multi-channel
playback mode (page 21), “SW BALANCE” does not appear.
Similarly, “CNTR BALANCE” or “SURR BALANCE” does
not appear when you set the corresponding speaker to “––.”

F R T : _ _ _ _ _ : S U R R

S A C D

MULTI

5.1CH

1

2

3

4

5

6

7

8

9 10

DISCS

ALL

CD1

1

2

3

4

5

F R T : _ _ _ _ _ : S U R R

S A C D

MULTI

5.1CH

1

2

3

4

5

6

7

8

9 10

DISCS

ALL

CD1

1

2

3

4

5

5

Press ENTER.

The balance adjustment display appears.
In stop mode, the test tone is output from the selected
speaker.
Example: When you select “SURR BALANCE”

during stop mode, the test tone is output
from the front speakers and surround
speakers.

6

Press 

.

/

>

 repeatedly to adjust the output

level.

7

Press ENTER.

The player status returns to Step 4.
Repeat Step 4 through 7 for more adjustments.

8

Press LEVEL ADJ after you finish adjusting.

The display returns to the normal display.

F R T : _ _ _ _ _ : S U R R

S A C D

MULTI

5.1CH

1

2

3

4

5

6

7

8

9 10

DISCS

ALL

CD1

1

2

3

4

5

F R T : _ _ _ _ _ : S U R R

S A C D

MULTI

5.1CH

1

2

3

4

5

6

7

8

9 10

DISCS

ALL

CD1

1

2

3

4

5

Summary of Contents for SCD-CE775 Marketing

Page 1: ...4 233 315 14 1 Super Audio CD Player 2001 Sony Corporation SCD CE775 Operating Instructions ...

Page 2: ...nterference to radio communications However there is no guarantee that interference will not occur in a particular installation If this equipment does cause harmful interference to radio or television reception which can be determined by turning the equipment off and on the user is encouraged to try to correct the interference by one or more of the following measures Reorient or relocate the recei...

Page 3: ...llows you to adjust the multi channel playback environment according to the allocation and size of your speakers A Super Audio D A Converter and Direct Digital Sync System which allows higher quality sound reproduction Editing of Disc and Track Titles etc on a TEXT display for Super Audio CDs and conventional CDs Others A Super Audio CD can mark up to 255 track numbers This feature applies to SCD ...

Page 4: ...upplied White L Red R White L Red R Black Black To FRONT IN jacks L R To SURROUND or REAR IN jacks L R To CENTER IN jack To SUB WOOFER IN jack Multi channel amplifier AV amplifier etc Getting Started Before You Start the Hookup Checking the supplied accessories This player comes with the following items Audio connecting cord phono jack 2 Red and White y phono jack 2 Red and White 2 phono jack 1 Bl...

Page 5: ...n you make the Multi channel connection connect the ANALOG 2CH OUT jacks also using another audio connecting cord not supplied so that you can play a CD or SACD when you set the input selector of your amplifier to CD or SACD input During playback of a conventional CD or a 2CH Super Audio CD the same signal that is output from the ANALOG 2CH OUT jacks is also output from the ANALOG 5 1CH FRONT L R ...

Page 6: ... back to their original position 1 Remove all the discs from the disc tray 2 Press A OPEN CLOSE to close the disc tray No Disc appears in the display 3 Wait for 10 seconds then press POWER to turn off the player Connecting via DIGITAL CD OUT OPTICAL connector Use an optical digital cable for this connection When connecting the optical digital cable to the DIGITAL CD OUT OPTICAL connector take the ...

Page 7: ... resume normal play from Shuffle Play or Program Play qd SHUFFLE button 19 Press to select Shuffle Play qf PROGRAM button 20 Press to select Program Play qg REPEAT button 18 Press repeatedly to play all tracks or only one track on the disc qh TIME TEXT button 13 Each time you press the button the playing time of the track the total remaining time on the disc or TEXT information appears in the disp...

Page 8: ...r etc using the audio connecting cords 3 DIGITAL CD OUT OPTICAL connector 6 Connect to an audio component using an optical digital cable 4 CONTROL A1 jacks 6 26 Connect to a Sony audio component using the monaural 2P mini plug cord Note Only the audio signals of the CD can be output from the DIGITAL CD OUT connectors shown in 3 Those of the Super Audio CD cannot be output through DIGITAL CD OUT R ...

Page 9: ...stop play 9 AMS AMS Automatic Music Sensor buttons 16 Press to locate a specific track 0 m M buttons 17 Press to locate a portion you want to play within a track qa DISC SKIP buttons 16 Press to select the disc qs CD1 2 COMMAND MODE switch 6 Select the command mode qd DISPLAY MODE button 13 Press to turn off the information qf SACD CD button 12 Each time you press the button while the Hybrid disc ...

Page 10: ...yer is set to the multi channel playback mode automatically CD layer CD layer Multi channel playback area 2 channel playback area HD Super Audio CD layer HD Super Audio CD layer HD Super Audio CD layer HD Super Audio CD layer Playing Discs Compatible Disc Types You can play the following discs with this player Depending on the type of disc to be played select the appropriate indicator by pressing ...

Page 11: ...CS 1 DISC The player plays All discs in the player consecutively in the order of disc number Only the disc you ve selected Playing a Disc The operations for normal play and the basic operations during play are explained below 1 Turn on the amplifier Turn down the volume level to the lowest 2 Select the player position using the input selector on the amplifier 3 Press POWER to turn on the player 4 ...

Page 12: ...ten to when playing a 2 channel Multi channel Super Audio CD page 11 After you stop play using x press MULTI 2CH repeatedly to light either MULTI CH or 2 CH Note During playback increase the volume level gradually starting from the lowest level The output from this unit may contain band width that are out of the normal listening range This may cause damage to the speakers or ears 7 Press N Playbac...

Page 13: ...pears Displaying information while the player is playing Z Press TIME TEXT Each time you press the button the current track number and its elapsed time or remaining time appears or the total remaining time for the disc appears in the display When the player detects a Multi channel Super Audio CD the channel information appears before the default display appears Turning off the information in the d...

Page 14: ... the disc name artist name and track names from TEXT discs Other information cannot be displayed DISCS ALL S O N Y B A N D A C D ART CD1 TEXT 1 2 3 4 5 6 7 8 9 10 1 2 3 4 5 DISCS ALL S O N Y H I T S S A C D CD1 TEXT 1 2 3 4 5 6 7 8 9 10 1 2 3 4 5 DISCS ALL 1 1 0 4 5 2 8 S A C D CD1 TEXT DISC TRACK INDEX MIN SEC 1 2 3 4 5 6 7 8 9 10 1 2 3 4 5 MULTI CH S MULTI CH MULTI CH Disc title Artist name Tota...

Page 15: ...utton If the play of the current disc ends the player stops playing If the disc is played in 1 DISC Repeat Play mode see page 18 the current disc starts playing again In ALL DISCS Shuffle Play mode see page 19 tracks are reshuffled on the current disc In Program Play mode see page 20 only the tracks on the current disc are played EX CHANGE DISC SKIP Displaying the information of a TEXT disc in oth...

Page 16: ...buttons 10 To locate The next or succeeding tracks The current or preceding tracks A specific track directly You need to Turn l AMS L clockwise until you find the track When using the remote press repeatedly until you find the track Turn l AMS L counterclockwise until you find the track When using the remote press repeatedly until you find the track Turn l AMS L until you find the track number you...

Page 17: ...ay The disc has reached its end Press or m to go back Note Tracks that are only a few seconds long may be too short for monitoring In this case the player may not search correctly m M lAMSL H Locating a point by setting the start time Time Search 1 Turn l AMS L or press to select the desired track in stop mode 2 Press and hold m M to set the time to start play while looking at the display You can ...

Page 18: ...tedly until REPEAT 1 appears in the display Repeat 1 Play starts To stop Repeat 1 Play Press x To resume normal play Press REPEAT repeatedly until REPEAT 1 goes off Note If you turn off the player or disconnect the power cord the player will store the last setting of repeat play REPEAT or REPEAT 1 and recall it the next time you turn on the player Playing Tracks Repeatedly You can play an entire d...

Page 19: ...ying all the tracks once H CONTINUE SHUFFLE Shuffle Play on one disc You can play all tracks on the specific disc in a random order 1 Press SHUFFLE repeatedly until 1 DISC appears in the display 2 Press DISC 1 5 to start 1 DISC Shuffle Play on the selected disc appears while the player is shuffling the tracks The player will stop after playing all the tracks once To resume normal play Press CONTIN...

Page 20: ... buttons H 10 PROGRAM CHECK To resume normal play Press CONTINUE z You can create your program while checking the disc labels While the disc tray is open follow Steps 1 to 8 with pressing the DISC SKIP button to check the disc labels Note that if the programmed track number isn t found on the disc that step is automatically erased z The program remains even after Program Play ends Press H to play ...

Page 21: ...NU 2 Turn l AMS L until 2CH SPK MODE appears in the display 3 Press l AMS L The playback mode appears in the display Playback mode 2CH Direct 2CH SW 4 Turn l AMS L until desired mode appears in the display 5 Press l AMS L Note You cannot operate this function when the player is in the CD or Multi channel playback mode Operate this function when the player is in the 2 channel Super Audio CD playbac...

Page 22: ...r Similarly CNTR BALANCE or SURR BALANCE does not appear when you set the corresponding speaker to About Large or Small speaker A Large speaker is a speaker that can reproduce bass frequencies plentifully If you select Small for the surround speakers the bass frequencies will come from the front speakers and or sub woofer For normal use select MCH Direct or set all the speakers to Large ex 5 Large...

Page 23: ...tem appears in the display Select the item from CNTR BALANCE SURR BALANCE or SW BALANCE Note When you set the Sub woofer to in the Multi channel playback mode page 21 SW BALANCE does not appear Similarly CNTR BALANCE or SURR BALANCE does not appear when you set the corresponding speaker to F R T _ _ _ _ _ S U R R S A C D MULTI 5 1CH 1 2 3 4 5 6 7 8 9 10 DISCS ALL CD1 1 2 3 4 5 F R T _ _ _ _ _ S U ...

Page 24: ...musician s name category or date of purchase z When you select a TEXT disc The disc title is stored as the Disc Name automatically In this case it is not counted as the stored Disc Name up to 255 discs If the disc title has more than 15 characters the first 14 characters of the disc title are stored see page 14 Note that you cannot change the Disc Name of the TEXT disc Labeling discs on the player...

Page 25: ...t F Press 3 Press 3 Press 3 m M DISC CAPS Number buttons SPACE ENTER CLEAR NAME INPUT 6 Press M to select the character The selected character lights up and the flashing cursor appears to indicate the next space to be input You can also go to the next space by pressing other number buttons 7 Repeat Steps 4 through 6 to input more characters 8 Press NAME INPUT to store the Disc Name Repeat Steps 1 ...

Page 26: ...to CD Amplifier CD player MD deck Other component Additional Information Using the CONTROL A1II control system This player is compatible with the CONTROL A1II Control System The CONTROL A1II control system was designed to simplify the operation of audio systems composed of separate Sony components CONTROL A1II connections provide a path for the transmission of control signals that enable automatic...

Page 27: ...ed by qualified personnel before operating it any further AC power cord must be changed only at the qualified service shop On power sources Before operating the player check that the operating voltage of the player is identical with your local power supply The operating voltage is indicated on the nameplate at the rear of the player The player is not disconnected from the mains as long as it is at...

Page 28: ...Clean the disc with a soft cloth slightly moistened with water and remove moisture with a dry cloth Do not use solvents such as benzine thinner record cleaners or anti static spray Notes on CD R CD RW playback Discs recorded on CD R CD RW drives may not be played back because of scratches dirt recording condition or the drive s characteristics Besides the discs which are not yet finalized at the e...

Page 29: ...back mode so that the Sub woofer is set to a page 21 When you play a track that does not contain the LFE signal the signal outputs from the SUB WOOFER jack only when you select 5 Small SW or FRT Large SW for the Multi channel playback mode page 22 Specifications When a super audio CD is played Playing frequency range 2 Hz to 100 kHz Frequency response 2 Hz to 50 kHz 3 dB Dynamic range 103 dB or mo...

Page 30: ...7 Shuffle Play 19 Super Audio CD 10 T U V W X Y Z TEXT 14 TOC 11 Index A Accessories 4 Amplifier not supplied 4 AMS Automatic Music Sensor 12 ANALOG OUT 5 1CH 4 2CH 5 B Batteries 4 C Cable Optical digital 6 Continuous Play 11 Cord Audio connecting 4 D E F G DIGITAL CD OUT 6 Disc Name 24 Displaying information 12 H I J K Hooking Up Audio Components 4 Power 6 L Labeling a disc 24 Locating a specific...

Page 31: ...31 Additional Information ...

Page 32: ...Printed in Malaysia Sony Corporation ...

Reviews: