background image

Need help? Email 

[email protected]

 or call 701-203-3757 x3 

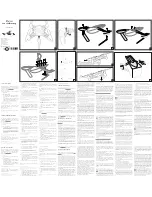
6.


Plug in the antenna cable into the GeoSnap control module. Be sure to route the 
antenna cable over the drone arm. 


7.


Install a zip tie as shown to secure the antenna cable and provide strain relief. Then cut 
off the excess zip tie.  


Summary of Contents for S1

Page 1: ...ort fieldofviewllc com or call 701 203 3757 x3 1 GeoSnap Airpeak S1 Integration Guide INSTALLATION 1 Remove the 4 screws from the gimbal mount on the bottom of the drone circled below using the included 2 5mm allen wrench ...

Page 2: ...ote There is thread locker pre applied on the screws so be sure not to confuse the resistance from the thread locker with the screws being fully tight 3 To raise the antenna mast you must first loosen the thumb screw rotate the mast to the vertical position then tighten the thumb screw again Note It is normal to feel hear a click when loosening the thumb screw This is due to the specialty lock was...

Page 3: ...lp Email support fieldofviewllc com or call 701 203 3757 x3 3 4 Install the GeoSnap control module assembly by first aligning the zip ties and wires as shown 5 Tighten the zip ties and then cut off the excess ...

Page 4: ...ll 701 203 3757 x3 4 6 Plug in the antenna cable into the GeoSnap control module Be sure to route the antenna cable over the drone arm 7 Install a zip tie as shown to secure the antenna cable and provide strain relief Then cut off the excess zip tie ...

Page 5: ...na mast down in preparation for the next step 9 Flip the drone upside down and remove the gimbal power cable by unplugging it from the gimbal quick release mount and the drone Note be sure to keep this cable in case you need to operate the drone without the GeoSnap system in the future ...

Page 6: ...r call 701 203 3757 x3 6 10 Install the provided power cable splitter as shown 11 Install a zip tie as shown and plug in the red JST power connector into its mating connector on the side of the GeoSnap mount plate Trim off the end of the zip tie ...

Page 7: ...mbal and install the GeoSnap hotshoe module Make sure the hotshoe module is slid all the way forward and then tighten the two screws using the included M2 allen wrench 13 Install your camera in the gimbal as shown Tighten the hotshoe thumb nut and the slider tray thumb screw so that the camera is secure ...

Page 8: ... system to trigger the camera plug the trigger cable into the trigger port at this time Also be sure to plug the USB C cable back into the camera 15 Grab the GeoSnap control module to hotshoe module cable and plug it into the hotshoe module Secure the cable to the top of the gimbal with a zip tie as shown ...

Page 9: ...all 701 203 3757 x3 9 16 Adhere a cable clip to the back of the gimbal and route the cable as shown Use zip ties to loop the excess cable and then plug in the 8 pin connector Make sure there is enough slack in the cable so the gimbal can move freely ...

Page 10: ...lp Email support fieldofviewllc com or call 701 203 3757 x3 10 17 Now that all the cabling is in place balance the gimbal according to Sony Gremsy s instructions 18 The installation integration is now complete ...

Page 11: ...se multiple sets of drone batteries to map your entire project we recommend hot swapping the drone s batteries so the GeoSnap system remains powered on and logging during the swap s D If for some reason you need to power cycle the GeoSnap system while the drone is powered on you can do so by unplugging the red JST power connector and then plugging it back in E The GeoSnap system is intended to sta...

Page 12: ...om or call 701 203 3757 x3 12 F When you need to remove the gimbal from the drone unplug the GeoSnap control module to hotshoe module cable here G All other GeoSnap documents and videos are available at https www fieldofviewllc com downloads ...

Reviews: