


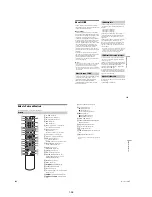

1-12
48
b
Notes
• If one programme contains two picture sizes, the
selected size is recorded. However, if the 16:9 signal
cannot be recorded as 16:9, it is recorded as 4:3.
• Remnants of images may appear on your screen when
using “Rec NR.”
• “Rec Video Equalizer” does not affect the input of the
DV IN jack and does not work with RGB signals.
The recorder can automatically divide a recording
(a title) into chapters by inserting chapter marks
during recording. To disable this function, set
“Auto Chapter” in “Features” setup to “Off”
(page 92).
When recording on the HDD or a DVD-RW (VR
mode)
The recorder detects changes in the picture and
sound and automatically inserts chapter marks.
You can also insert and erase chapter marks
manually (page 69).
When recording on other recordable discs
Chapter marks are inserted at approximately 6-
minute intervals during recording.
b
Note
When dubbing (page 72), the chapter marks in the
dubbing source are not retained in the dubbed title.
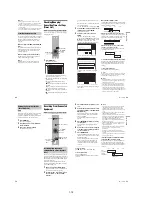
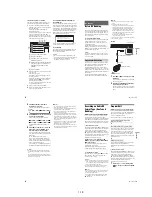
Checking/Changing/
Cancelling Timer Settings
(Timer List)
You can check, change, or cancel timer settings
using the Timer List.
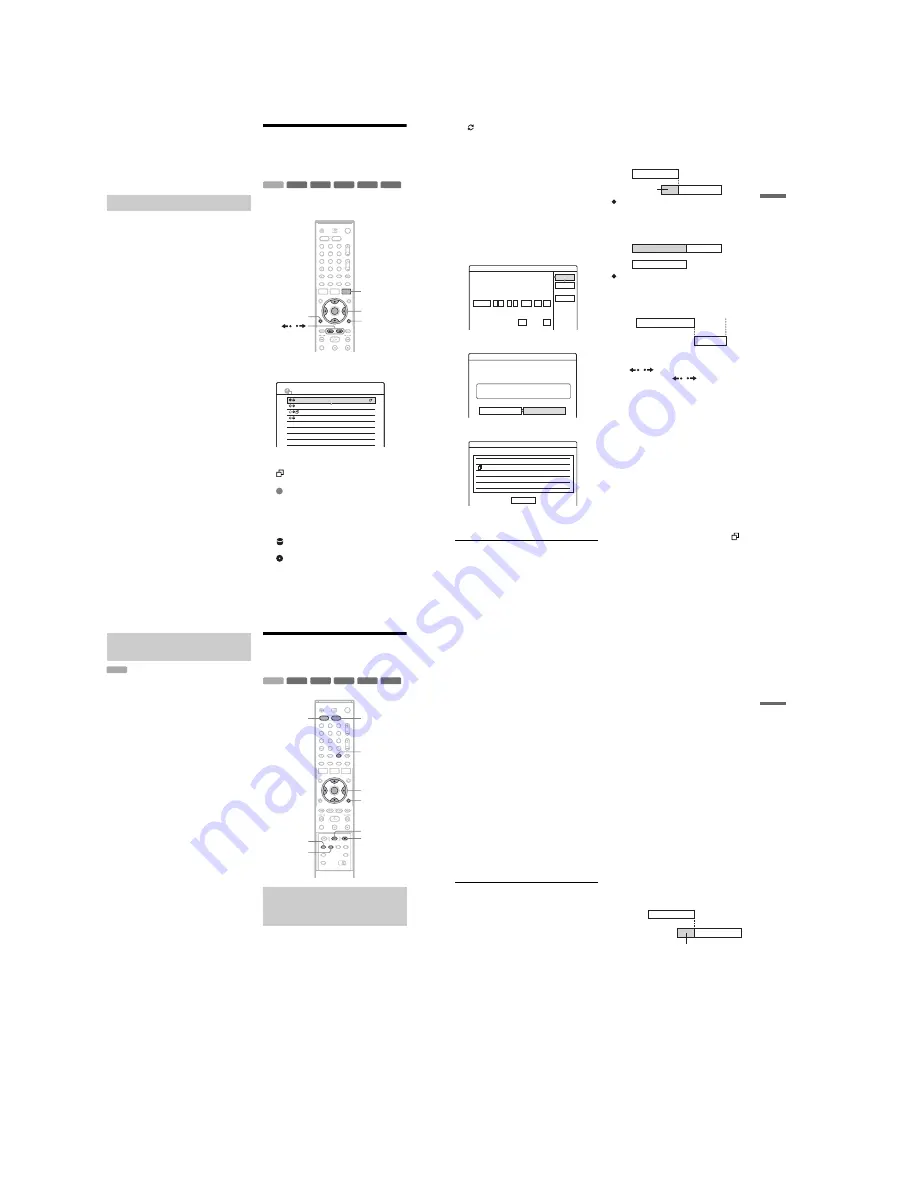
1
Press TIMER LIST.
The Timer List appears.
Timer information displays the recording
date, time, recording mode, etc.
: Indicates that the setting is overlapped by
another setting.
(green): Indicates the setting can be
recorded.
z
(red): Indicates the setting currently being
recorded.
a
(grey): Indicates that the setting cannot be
recorded in the selected recording mode.
: Indicates the setting being recorded on
the HDD.
: Indicates the setting being recorded on a
DVD.
Creating chapters in a title
-RW
VR
+
RW
-
R
+
R
-RW
Video
+
R
HDD
1
2
3
4
6
7
8
9
0
5
<
/
M
/
m
/
,
,
ENTER
O
RETURN
TIMER LIST
TOOLS
/
10:30
TIMER LIST
22:00-22:15 AAB
DEF
GHI
DEF
SP
SP
SLP
SLP
16:00-17:00
21:00-22:00
20:30-21:30
Mon-Sat
Fri
29.10
Fri
29.10
Sat 30.10
PDC
VPS
PDC
VPS
49
T
im
er
Rec
ord
ing
: Indicates that the Update function is set.
When all of the timer settings do not fit on the
list, scroll bar appears.
To view the hidden timer settings, press
M
/
m
.
2
Select the timer setting you want to check/
change/cancel, and press ENTER.
The sub-menu appears.
3
Select one of the options, and press
ENTER.
“Modify”: Changes the timer setting.
Select an item using
<
/
,
and adjust using
M
/
m
. Select “OK,” and press ENTER. For the
PDC/VPS or Update functions, select
“Details” and change the settings (page 44).
“Erase”: Erases the timer setting. Select
“OK,” and press ENTER.
“Check Overlap”: Checks for overlapped
settings.
Select “Close” to return to the Timer List.
To change or cancel the setting, repeat steps 2
and 3 above.
When the timer settings overlap
The programme that starts first has priority and the
second programme starts recording only after the
first programme has finished.
When the recordings start at the same time
The programme that is set last has priority. In this
example, timer setting B is set after A, so the first
part of timer setting A will not be recorded.
When the end time of one recording and the
start time of another are the same
After finishing the previous recording, the other
recording may be delayed.
To scroll the list display by page (Page mode)
Press
/
while the list display is turned on.
Each time you press
/
, the entire Timer
List changes to the previous/next page of timer
settings.
To turn off the Timer List
Press TIMER LIST or
O
RETURN.
z
Hint
While recording, you cannot modify the timer setting for
the current recording, but you can extend the recording
duration of the recording time (page 44).
b
Notes
• When “PDC/VPS” is set to “On” for one or more timer
recordings, the start times may change in the event of a
broadcast delay or early start.
• Even if the timer is set, timer recordings cannot be
made while recording a programme that has priority.
• Even if the timer is set for the same daily or weekly
programme, the timer recording cannot be made if it
overlaps with a programme that has priority. “
” will
appear next to the overlapped setting in the Timer List.
Check the priority order of the settings.
Modify
Modify the timer setting.
OK
Cancel
On
Off
PDC/VPS
Update
:
22 00
Start
:
22 15
Stop
HDD
Media
SP
Mode
Date
Mon-Sat
Prog.
AAB
Details
22:00-22:15 AAB
Mon-Sat
HDD SP
Erase
Are you sure you want to erase this timer setting?
OK
Cancel
Check Overlap
These timer settings overlap.
29.10 20:30-21:30 DEF
DVD SP
PDC/VPS
PDC/VPS
Close
29.10 21:00-22:00 GHI
Fri
Fri
DVD SLP
7:00
8:00
9:00
10:00
A
B
will be cut off
7:00
8:00
A
B
9:00
10:00
7:00
9:00
10:00
A
B
,
continued
50
If there is not enough space for a timer recording,
the recorder automatically erases old titles
recorded on the HDD. The oldest, played title is
erased. The protected titles are not erased.
1
Press TIMER LIST.
The Timer List appears.
2
Press TOOLS to select “Auto Title Erase,”
and press ENTER.
3
Select “On,” and press ENTER.
The default setting is “Off.”
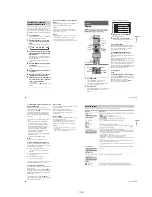
Recording From Connected
Equipment
You can set the recorder to automatically record
programmes from connected equipment that has a
timer function (such as a satellite tuner). Connect
the equipment to the LINE 3/DECODER jack of
the recorder (page 25).
When the connected equipment turns on, the
recorder starts recording a programme from the
LINE 3/DECODER jack.
1
Before recording, select HDD or DVD.
If you select DVD, insert a recordable DVD
(see “Inserting a Disc” on page 29).
2
Set “Synchro Rec” in “Features” setup to
“Record to HDD” or “Record to DVD”
(page 94).
Automatically erasing old titles
(Auto Title Erase)
HDD
Recording from connected
equipment with a timer (Synchro
Rec)
-RW
VR
-RW
VR
+
RW
-
R
+
R
-RW
Video
+
R
HDD
REC MODE
<
/
M
/
m
/
,
,
ENTER
x
REC STOP
SYNCHRO
REC
INPUT SELECT
1
2
3
4
6
7
8
9
0
5
DVD
HDD
X
REC PAUSE
TOOLS
51
T
im
er
Rec
ord
ing
3
Press INPUT SELECT repeatedly to select
“L3.”
4
Select the line input audio when recording
a bilingual programme on the HDD or DVD-
RWs (VR mode).
Press TOOLS to select “Line Audio Input,”
and press ENTER. Then select “Bilingual,”
and press ENTER.
For details about bilingual recording, see
page 42.
5
Press REC MODE repeatedly to select the
recording mode.
For details about the recording mode, see
page 41.
6
Set the timer on the connected equipment
to the time of the programme you want to
record, and turn it off.
7
Press SYNCHRO REC.
The SYNCHRO REC indicator lights up on
the front panel. The recorder is ready to start
Synchro-Recording.
The recorder automatically starts recording
when it receives an input signal from the
connected equipment. The recorder stops
recording when the connected equipment
turns off.
To stop recording
Press
x
REC STOP or SYNCHRO REC.
To cancel Synchro Rec
Press SYNCHRO REC.
The SYNCHRO REC indicator on the recorder
turns off.
b
Notes
• The recorder starts recording only after detecting the
video signal from the connected equipment. The
beginning of the programme may not be recorded
regardless of whether or not the recorder’s power is on
or off.
• During Synchro-Recording, other operations such as
normal recording cannot be done.
• To use the connected equipment while the recorder is
standing by for Synchro-Recording, cancel Synchro-
Recording by pressing SYNCHRO REC. Be sure to
turn off the connected equipment and press
SYNCHRO REC to reset Synchro-Recording before
the timer recording starts.
• The Synchro Rec function does not work when “Line3
Input” of “Scart Setting” in “Video” setup is set to
“Decoder” (page 89).
• The Synchro Rec function does not work with some
tuners. For details, see the tuner’s operating
instructions.
• While the recorder is standing by for Synchro-
Recording, the Auto Clock Set function (page 86) does
not work.
• To use the Synchro Rec function, you must first set the
recorder’s clock correctly.
If the timer settings of a Synchro-Recording
and another timer recording overlap
Regardless of whether or not the programme is a
Synchro Rec programme, the programme that
starts first has priority and the second programme
starts recording only after the first programme has
finished.
7:00
8:00
9:00
10:00
First
programme
will be cut off
Second
programme
,
continued
Summary of Contents for RDR-HX1010
Page 6: ...MEMO 6 ...
Page 98: ...MEMO 5 10E ...


