background image

Recording

50

b

Note

• You cannot record an index signal on a recorded tape 

afterward.

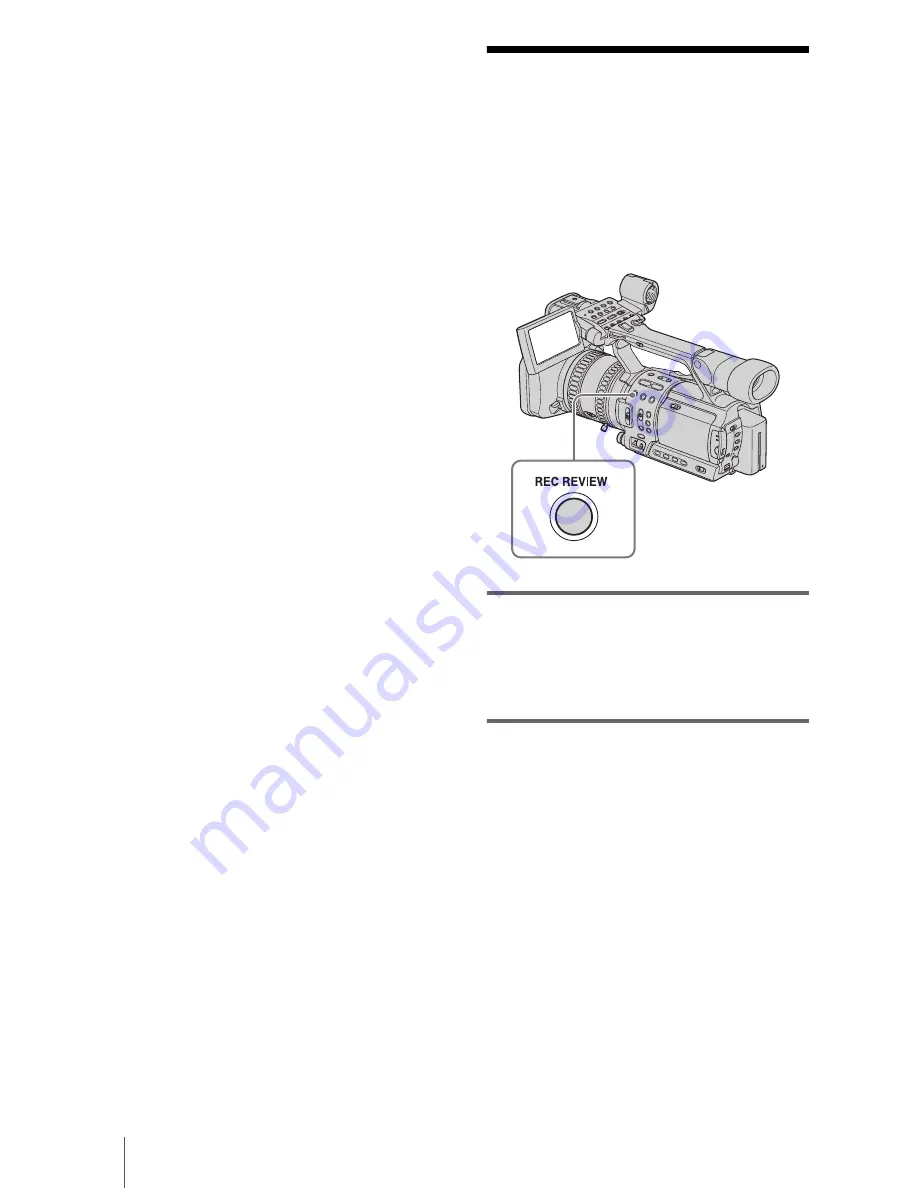
Reviewing the most 
recently recorded 
scenes – Rec Review

You can view a few seconds of the scene 
recorded just before you stopped the tape.

In the standby mode, press REC 
REVIEW.

The last few seconds of the most recently 
recorded scene are played back. Then, your 
camcorder is set to the standby mode. 

Summary of Contents for QUALIA 002

Page 1: ......

Page 2: ...echargeable batteries call toll free 1 800 822 8837 or visit http www rbrc org Caution Do not handle damaged or leaking Lithium Ion batteries For customers in the U S A If you have any questions about this product you may call Sony Customer Information Center 1 800 222 SONY 7669 The number below is for the FCC related matters only Regulatory Information Owner s Record The model and serial numbers ...

Page 3: ... communications However there is no guarantee that interference will not occur in a particular installation If this equipment does cause harmful interference to radio or television reception which can be determined by turning the equipment off and on the user is encouraged to try to correct the interference by one or more of the following measures Reorient or relocate the receiving antenna Increas...

Page 4: ...ting the LCD panel 20 Adjusting the viewfinder 21 Step 5 Setting the date and time 22 Step 6 Inserting a cassette tape 23 Step 7 Setting the screen language 24 Attaching the supplied accessories 25 Attaching the shoulder brace 25 Attaching the external microphone 26 Attaching the shoulder strap 28 Attaching the shoe adaptor 28 Removing the lens hood 28 Recording Recording movies 29 Recording for a...

Page 5: ...atures 46 Developing scenes smoothly Shot transition 46 Fading in and out of a scene FADER 48 Recording an index signal at the beginning of recording 49 Reviewing the most recently recorded scenes Rec Review 50 Playback Viewing movies 51 Playing back in various modes 52 Various playback functions 53 Searching for the last scene of the most recent recording END SEARCH 53 Displaying the screen indic...

Page 6: ...OLOR etc 68 Using the IN OUT REC menu REC FORMAT TV TYPE etc 69 Using the OTHERS menu CLOCK SET WORLD TIME etc 74 Customizing Personal Menu 77 Assigning the functions 80 Dubbing Editing Dubbing to another tape 82 Recording pictures from a VCR or TV 86 Connecting to a computer 89 Dubbing sound to a recorded tape 90 Connecting an analog VCR to the computer via your camcorder Signal conversion functi...

Page 7: ... HDV format and recording playback 104 About the InfoLITHIUM battery pack 105 About i LINK 107 Maintenance and precautions 108 Specification 111 Quick Reference Identifying parts and controls 114 Index 122 Note on the icons used in this manual Features available for the HDV format only Features available for the DV format only ...

Page 8: ...Quick Start Guide 8 Quick Start Guide Recording movies 1 Attach the charged battery pack to the camcorder To charge the battery see page 15 Press the battery pack and slide it down Battery Pack ...

Page 9: ...of the arrow to open the lid The cassette compartment comes out automatically b Insert the cassette with its window side facing out then push the center of the back of the cassette c Press on the cassette compartment Close the cassette lid after the cassette compartment slides back in by itself OPEN EJECT lever Window side ...

Page 10: ...2 The pictures are recorded in the HDV format in the default setting To record in the DV format see page 70 a Open the hood shutter b Open the LCD panel and adjust the angle c While pressing the green button set the POWER switch to CAMERA d Press REC START STOP Recording starts To change to standby mode press REC START STOP again Quick Start Guide Recording movies Continued ...

Page 11: ...1 4 View the recorded picture on the LCD screen a While pressing the green button set the POWER switch to VCR b Press m rewind c Press N play to start the playback To stop press x stop To turn off the power set the POWER switch to OFF CHG ...

Page 12: ... may be copyrighted Unauthorized recording of such materials may be contrary to the copyright laws The LCD panel viewfinder and lens Exposing the LCD screen the viewfinder or the lens to direct sunlight for long periods of time may cause malfunctions Be careful when placing the camera near a window or outdoors Do not aim at the sun Doing so might cause your camcorder to malfunction Take pictures o...

Page 13: ...13 Do not hold the camcorder by the following parts Viewfinder LCD panel Battery pack Microphone Jack holder ...

Page 14: ...1 This is attached to your camcorder b Note If you attach an optical filter optional or so remove the lens hood Large eyecup 1 To attach it to your camcorder see page 21 AC Adaptor charge 1 Power cord 1 Connecting cord DK 215 1 Rechargeable battery pack NP F970 1 Wireless Remote Commander 1 A V connecting cable 1 Component video cable 1 i LINK cable 1 Shoe adaptor 1 To attach it to your camcorder ...

Page 15: ...HIUM battery pack L series to your camcorder b Note You cannot use batteries other than the InfoLITHIUM battery pack L series p 105 Do not short circuit the DC plug of the AC Adaptor charger with any metallic objects This may cause a malfunction Use a nearby wall outlet when using the AC Adaptor charger Disconnect the AC Adaptor charger from the wall outlet immediately if any malfunction occurs Do...

Page 16: ...ry that indicates that the battery has been sufficiently charged for use If you continue charging until the CHARGE lamp turns off and FULL appears on the display window the battery has now been fully charged and can be used for a little longer period Remove the battery pack from the AC Adaptor charger To attach the battery pack to the camcorder Press the battery pack and slide it down To remove th...

Page 17: ...roximate number of minutes required when you fully charge a fully discharged battery pack at 25 C 77 F 10 30 C 50 86 F recommended b Note NP F330 F530 500 510 710 battery packs cannot be used with your camcorder Recording time Approximate number of minutes available when you use a fully charged battery pack at 25 C 77 F Recording in the HDV format Recording in the DV format BATTERY INFO 50 0 100 B...

Page 18: ...nutes available when you use a fully charged battery pack at 25 C 77 F HDV format pictures DV format pictures With the LCD BACKLIGHT switch set to ON b Note The recording and playback time will be shorter when you use your camcorder in low temperature The battery information will not be correctly displayed when the battery pack is discharged Using an outside power source You can use the AC Adaptor...

Page 19: ...ect the AC Adaptor charger to the camcorder p 18 3 Set the mode switch to VCR CAMERA 4 Set the POWER switch to OFF CHG The CHG charge lamp lights up and charging starts When the battery is fully charged the CHG lamp goes out Disconnect the connecting cord DK 215 from the DC IN jack of the camcorder Charging time Approximate number of minutes required when you fully charge a fully discharged batter...

Page 20: ...e power Set the POWER switch to OFF CHG Step 4 Adjusting the LCD panel and viewfinder Adjusting the LCD panel You can adjust the angle and brightness of the LCD panel to meet various recording situations Even when there are obstructions between you and the subject you can check the subject on the LCD screen during recording by adjusting the angle of the LCD panel Open the LCD panel 180 degrees the...

Page 21: ...HERS menu to OFF p 74 Adjusting the viewfinder You can view images using the viewfinder when you close the LCD panel Use the viewfinder when the battery is running out or when the screen is hard to see 1 Lift up the viewfinder 2 Adjust the viewfinder lens adjustment lever until the picture is clear When the picture in the viewfinder is hard to see If you cannot see the picture in the viewfinder cl...

Page 22: ... date and time again 1 Turn on your camcorder p 20 2 Open the LCD panel and adjust the angle Proceed to step 6 when you set the clock for the first time 3 Press MENU 4 Select the OTHERS menu by turning the SEL PUSH EXEC dial then press the dial 5 Select CLOCK SET by turning the SEL PUSH EXEC dial then press the dial 6 Set Y year by turning the SEL PUSH EXEC dial then press the dial You can set any...

Page 23: ... cassette compartment automatically comes out and opens up 2 Insert a cassette with its window side facing out 3 Press on the cassette compartment The cassette compartment automatically slides back in 4 Close the lid To eject the cassette 1 Slide the OPEN EJECT lever in the direction of the arrow and open the lid The cassette compartment automatically comes out 2 Take out the cassette then press T...

Page 24: ...GUAGE by turning the SEL PUSH EXEC dial then press the dial 6 Select the desired language by turning the SEL PUSH EXEC dial then press the dial 7 Press MENU to hide the menu screen z Tip Your camcorder offers ENG SIMP simplified English for when you cannot find your native tongue among the options POWER switch OTHERS STBY RETURN ASS I GN BTN CLOCK SET WORLD T I ME LANGUAGE BEEP REC LAMP FORMAT LAM...

Page 25: ... with the boss hole on the camcorder 2 Ailing the camera attaching screw with the tripod receptacle of the camcorder and fasten the screw To use the shoulder brace 1 Unlock the lock lever 2 Pull the adjuster out and set the shoulder pad to the desired position 3 Adjust the adjuster length 4 Lock the lock lever When you finished using the adjuster Replace the shoulder pad and the adjuster to the or...

Page 26: ...s priority of the internal microphone The external microphone is monaural Use the internal microphone to record stereo sound To attach the external microphone to the camcorder 1 Install the battery in the microphone Loosen the grip and insert a battery by matching the and on the battery to the and in the battery compartment 2 Loosen the microphone holder screw and open the cover 3 Place the microp...

Page 27: ...r supply Early replacement of the battery is therefore recommended When the supplied microphone cable is used to connect an external microphone monaural sound is recorded on both left and right channels z Tip Sound may be recorded at lower volume with the supplied external microphone than with the internal microphone thanks to the wide dynamic range of the external microphone This is not a malfunc...

Page 28: ... screw and then press down and pull out the accessory b Note If the microphone part of the attached external microphone stretches out too long it may obstruct the light of a video light etc attached to the shoe adaptor Removing the lens hood Loosen the lens hood fixing screw then turn the lens hood in the direction of the arrow To attach the lens hood Align the marks on the lens hood to those on t...

Page 29: ...t to recording standby 4 Select the recording format To record in the HDV format Select the IN OUT REC menu REC FORMAT then HDV1080i the default setting p 70 appears on the LCD screen and your camcorder is set to recording standby To record in the DV format Select the IN OUT REC menu REC FORMAT then DV p 70 appears on the LCD screen the DV format lamp lights up and your camcorder is set to recordi...

Page 30: ...r ND2 flashes on the screen activate the ND filter p 39 b Note Before changing the battery pack set the POWER switch to OFF CHG When the camcorder is left in recording standby for more than about 3 minutes your camcorder exits the recording standby mode the drum stops rotating to prevent tape wear and battery loss Since the power does not turn off you can restart recording by pressing REC START ST...

Page 31: ... times longer than you can when recording in the SP mode A tape recorded in the LP mode should be played back only on this camcorder Using zoom Zoom levers are mounted on the camera itself and on the handle Occasional use of the zoom is effective but use it sparingly for the best results 1 Set the ZOOM switch to LEVER REMOTE 2 Press the power zoom lever slightly for a slower zoom Press it further ...

Page 32: ...ring to zoom b Note Rotate the zoom ring at an appropriate speed Zooming may not be able to catch up the rotating speed of the ring if it is rotated too fast When you zoom using the Remote Commander set the ZOOM switch to LEVER REMOTE Zoomed position and picture angle change when the ZOOM switch is switched from LEVER REMOTE to RING If you rotate the zoom ring fast motor noise will become louder a...

Page 33: ...CONV and TV TYPE settings p 72 Functions assigned to the ASSIGN buttons p 80 Picture profile setup p 43 1 Press STATUS CHECK 2 Turn the SEL PUSH EXEC dial to display the desired item Each time you turn the dial the items appear in the following order AUDIO t OUTPUT t ASSIGN t PICT PROFILE To turn off the display of the recording setup information Press STATUS CHECK b Note Information of the pictur...

Page 34: ... To cancel the back light function press BACK LIGHT again b Note The back light function is canceled when you press SPOT LIGHT You cannot use the back light function if 2 or more items out of iris gain and shutter speed are adjusted manually Recording the subject lit by strong light SPOT LIGHT When the subject is lit by strong light such as in a theater use the spot light function to prevent peopl...

Page 35: ...the adjustment data is memorized To recall adjustment data from the memory 1 During recording or in the standby mode set the AUTO LOCK switch to the center position to release the auto lock mode 2 Set the WHT BAL switch to A or B 3 Press WHT BAL The white balance is set to the recalled adjustment b Note Avoid subjecting your camcorder to mechanical shock while A or B is flashing If A or B does not...

Page 36: ...e functions See page 35 for details on how to adjust the white balance b Note If you want to set the exposure intentionally to other than a proper level adjust the iris gain and shutter speed manually If you adjust only one of either iris shutter speed or gain manually you can record with iris priority shutter speed priority or gain priority respectively z Tip To adjust the brightness of pictures ...

Page 37: ...ore automatic adjustment Press IRIS or set the AUTO LOCK switch to AUTO LOCK b Note If you set the AUTO LOCK switch to AUTO LOCK other manually adjusted items gain shutter speed white balance also become temporarily automatic As you shift the zoom from W wide to T telephoto the aperture value varies from F1 6 to F2 8 z Tip You can select the rotation direction of the iris dial with IRIS DIAL on th...

Page 38: ...d items iris shutter speed white balance also become temporarily automatic Adjusting the shutter speed You can manually adjust and fix the shutter speed for your convenience Depending on the shutter speed you can make the subject look still or on the contrary emphasize the fluidity of movement 1 During recording or in the standby mode set the AUTO LOCK switch to the center position to release the ...

Page 39: ...levels of ND filter setting ND filter 1 reduces the volume of light to about 1 6 and ND filter 2 to about 1 32 If ND1 or ND2 flashes in the standby mode set the ND FILTER switch to the respective position If ND1 flashes Set the ND FILTER switch to 1 to turn on ND1 If ND2 flashes Set the ND FILTER switch to 2 to turn on ND2 If ND OFF flashes Set the ND FILTER switch to OFF to turn off the indicator...

Page 40: ...s the dial 3 Select ZEBRA LEVEL by turning the SEL PUSH EXEC dial then press the dial 4 Select the desired level by turning the SEL PUSH EXEC dial then press the dial Select a value from 70 to 100 or 100 If you select 70 the zebra pattern appears at the part of 70 5 of the brilliance signal If you select 100 the zebra pattern appears at all areas of the brilliance signal over 100 The default setti...

Page 41: ...ove the power zoom lever towards T telephoto to adjust the focus and then towards W wide angle to adjust the zoom for recording When you want to record a close up image of a subject move the power zoom lever towards W wide angle to fully magnify the image then adjust the focus To focus on a distant subject Record the subject with the FOCUS switch slid down to INFINITY appears If you release the sw...

Page 42: ...ns optional When the focus mode is switched from automatic to manual When you rotate the focus ring When AF ASSIST on the CAMERA menu is set to ON you can focus manually by rotating the focus ring during auto focusing p 61 Enhancing the outline to focus PEAKING You can enhance the outline of the image on the screen for easier focusing During recording or in standby mode set the ZEBRA PEAKING switc...

Page 43: ...1 In the standby mode press PICTURE PROFILE 2 Select a picture profile number by turning the SEL PUSH EXEC dial then press the dial PP1 through PP6 are available 3 Select SETTING by turning the SEL PUSH EXEC dial then press the dial 4 Select an item to be adjusted by turning the SEL PUSH EXEC dial then press the dial 5 Adjust the picture quality by turning the SEL PUSH EXEC dial then press the dia...

Page 44: ...ade HIGH reddishness or blueishness is reduced to LOW reddishness or blueishness is increased AWB SENS is not effective under a clear sky or the sun Item Adjustment CINEMA TONE γ OFF Normal recording TYPE1 A better tone scale than the standard video gamma reproduces natural intermediate colors between a skin color and neutral colors A skin color will look lively when recorded with this setting Fur...

Page 45: ... reset the picture profile settings by picture profile number You cannot reset all picture profile settings at once 1 Press PICTURE PROFILE 2 Select the number of the picture profile to be reset by turning the SEL PUSH EXEC dial then press the dial 3 Select SETTING by turning the SEL PUSH EXEC dial then press the dial 4 Select RESET by turning the SEL PUSH EXEC dial then press the dial 5 Select YE...

Page 46: ...adjustment Recording a picture using various features Developing scenes smoothly Shot transition You can register the settings of focus zoom iris gain shutter speed and white balance and then change the recording setting from the current one to the registered one resulting in a smooth transition of scenes Shot transition For example you can shift the focus from closer objects to farther objects or...

Page 47: ...e EXEC lamp 2 Press REC START STOP 3 Press the button A or B in which the desired setting was stored Pictures will be recorded with the settings that were changed automatically from the current ones to the stored ones b Note You cannot zoom focus or adjust manually while checking or activating the Shot transition When you change SHOT TRANS on the CAMERA SET menu turn off the STORE CHECK EXEC lamp ...

Page 48: ...ECK EXEC lamps are all turned off Fading in and out of a scene FADER You can add the following effects to currently recording pictures Assign the FADER function to one of the ASSIGN buttons in advance See page 80 for details on how to assign a function BLACK FADER WHITE FADER REC START STOP ...

Page 49: ...dex signal at the beginning of recording If you make an index for a scene you can easily search for the scene later p 59 The index function will make it easier to check the transition of recording or edit your pictures using index signals Assign the index function to one of the ASSIGN buttons in advance See page 80 to assign a function Press the ASSIGN button assigned to the index function When pr...

Page 50: ...ewing the most recently recorded scenes Rec Review You can view a few seconds of the scene recorded just before you stopped the tape In the standby mode press REC REVIEW The last few seconds of the most recently recorded scene are played back Then your camcorder is set to the standby mode ...

Page 51: ...volume by pressing VOLUME decrease increase To stop playback Press x stop To pause Press X pause during playback Press N play or X pause again to restart the playback Playback stops automatically when the pause mode continues for more than 3 minutes To fast forward or rewind Press M fast forward or m rewind in stop mode To review movies on the viewfinder Close the LCD panel Then adjust the viewfin...

Page 52: ...rious modes You will not hear the recorded sound Also you may see mosaic like images of the previously played picture remaining on the screen To return to the normal playback mode press N play Horizontal lines may appear at the top bottom or in the center of the screen This is not a malfunction b Note Pictures in the HDV format are not output from the HDV DV jack when they are paused or played bac...

Page 53: ... on the tape Displaying the screen indicators You can choose to display the time code tape counter and other information on the screen Press DISPALY BATT INFO The indicator switches on or off as you press the button z Tip You can display the screen indicators during playback on a TV Select the OTHERS menu DISP OUTPUT then V OUT PANEL p 76 However only playback mode indicators and tape counter appe...

Page 54: ...e camera settings data Select the OTHERS menu DATA CODE then DATE p 75 Each time you press DATA CODE the date time indicator turns on and off Displaying the video information Status check You can check the setup value of the following items Audio setup such as audio mix p 66 Output signal setup VCR HDV DV etc p 69 Functions assigned to the ASSIGN buttons p 80 1 Press STATUS CHECK 2 Turn the SEL PU...

Page 55: ...with HDV DV and has an i LINK jack Before connecting the i LINK cable select the IN OUT REC menu VCR HDV DV then AUTO the default setting In case of this connection the TV needs to be set so that it recognizes that the camcorder is connected Refer to the operating manual supplied with the TV for the details To connect the TV using the component video cable To view the picture recorded in the HDV f...

Page 56: ... the TV connected The audio will not be output when you connect with the S video cable alone b Note Be sure that you set VCR HDV DV before connecting the i LINK cable Otherwise the TV might not be able to recognize the video signal correctly Pictures in the DV format are not output from the COMPONENT OUT jack if copyright protection signals are recorded in the pictures z Tip If you connect your ca...

Page 57: ...dio input jack of your TV or VCR To connect the TV using the A V connecting cable When there is an S video jack on the device to be connected connect it with your camcorder by the S video jacks using an S video cable optional instead of the yellow video plug of the A V connecting cable supplied Use an S video cable to produce high resolution pictures The audio will not be output when you connect w...

Page 58: ...necting cable optional for that purpose b Note Pictures in the DV format are not output from the COMPONENT OUT jack if copyright protection signals are recorded in the pictures Locating a scene on a tape for playback Searching quickly for a desired scene Zero set memory 1 During playback press ZERO SET MEMORY on your camcorder or Remote Commander at the point you want to locate later on The tape c...

Page 59: ... Remote Commander b Note If 1 day s recording is less than 2 minutes your camcorder may not accurately find the point where the recording date changes The Date search will not function correctly when there is a blank section between recorded sections on the tape Searching for a recording start point Index search You can locate the point where an index signal is recorded p 49 1 Set the POWER switch...

Page 60: ...the desired item by turning the SEL PUSH EXEC dial then press the dial The available menu items vary depending on the power mode of your camcorder Unavailable items will be grayed out 5 Select the desired setting by turning the SEL PUSH EXEC dial then press the dial 6 Press MENU to hide the menu screen To return to the previous screen select RETURN POWER switch OTHERS STBY RETURN ASS I GN BTN CLOC...

Page 61: ... REDUCE p 64 HANDLE ZOOM p 64 ZEBRA LEVEL p 65 CENTER MARKR p 65 FRAME REC p 65 AUDIO SET MULTI SOUND p 66 AUDIO MIX p 66 AUDIO MODE p 67 WIND p 67 MIC LINE IN p 67 INT MIC SENS p 67 EXT MIC SENS p 67 LCD VF SET LCD COLOR p 68 LCD BL LEVEL p 68 VF B LIGHT p 68 IN OUT REC VCR HDV DV p 69 REC FORMAT p 70 REC MODE p 70 DV WIDE REC p 71 COMPONENT p 72 i LINK CONV p 72 AV c DV OUT p 73 OTHERS ASSIGN BT...

Page 62: ...utomatically in accordance with the brightness of the subject FAST MIDDLE and SLOW are available GAIN SETUP Select the adjustment value for each position H M and L of the GAIN switch p 37 1 Select H M or L by turning the SEL PUSH EXEC dial then press the dial 2 Select an adjustment value by turning the SEL PUSH EXEC dial then press the dial 0dB 3dB 6dB 9dB 12dB 15dB and 18dB are available The larg...

Page 63: ...d SOFT TRANS Select to make the transition slow at the beginning and end and linear in midway GOFF Select to start the shot transition immediately 5 sec Select to start the shot transition after 5 seconds 10 sec Select to start the shot transition after 10 seconds 20 sec Select to start the shot transition after 20 seconds GON Select to activate the SteadyShot function You can select the type of t...

Page 64: ...press the dial Speeds 1 through 8 are available The larger the number the faster the zoom speed 3 Select OK by turning the SEL PUSH EXEC dial then press the dial HARD Select to activate the SteadyShot function with stronger effect This mode is not recommended for recording with camera panning technique GSTANDARD Select to activate the standard SteadyShot function SOFT Select to activate the Steady...

Page 65: ...u use frame recording continuously the remaining tape time will not be indicated correctly The last scene will be longer than other scenes You cannot record index signals during frame recording GOFF Select when you do not want to display the center marker on the screen p 30 ON Select to display the center marker on the screen GOFF Select to record in the standard recording mode ON Select to record...

Page 66: ...ing returns to STEREO when you disconnect the power source from your camcorder for more than 5 minutes z Tip If you want to distribute the sound that was recorded in only L left channel using an external monaural microphone to be output from both right and left channels select 1 AUDIO MIX You can adjust the audio balance between the originally recorded sound ST1 and sound added afterwards ST2 on t...

Page 67: ...ereo sound with high quality GON Standard setting OFF Select when you want to record the sound as it is without reducing the noise caused by wind GEXT MIC Select to input an audio signal when a microphone is connected to the MIC LINE jack LINE Select to input an audio signal when an audio device is connected to the MIC LINE jack GNORMAL The standard setting HIGH Use this setting to record a quiet ...

Page 68: ... this setting LCD BL LEVEL You can adjust the brightness of the LCD screen s backlight The recorded picture will not be affected by this setting b Note When you connect your camcorder to outside power sources BRIGHT is automatically selected for this setting VF B LIGHT You can adjust the brightness of the viewfinder The recorded picture will not be affected by this setting b Note When you connect ...

Page 69: ... signal switches between HDV and DV the picture and sound disappear temporarily When i LINK CONV is set to ON pictures are output as follows at AUTO an HDV signal is converted to the DV format and output a DV signal is output as it is at HDV an HDV signal is converted to the DV format and output a DV signal is not output at DV a DV signal is output as it is an HDV signal is not output GAUTO Select...

Page 70: ...uare noise may appear or sound may be interrupted when you play back the tape on other camcorders or VCRs When you mix recordings in the SP mode and in the LP mode on one tape the playback picture may be distorted or the time code may not be written properly between the scenes GHDV1080i Select to record in the HDV1080i specification DV Select to record in the DV format GSP SP Select to record in t...

Page 71: ... TV as well GON Select to view the recorded pictures on a 16 9 wide TV screen OFF Select to view the recorded pictures on a 4 3 TV screen The playback picture may look different depending on the TV connected On the LCD screen or viewfinder screen On a 4 3 TV screen On a 16 9 wide TV screen On the LCD screen or viewfinder screen On a 4 3 TV screen On a 16 9 wide TV screen The dark bars are transluc...

Page 72: ...TV connected 480i Select when connecting your camcorder to a TV with the component input jack G1080i 480i Select when connecting your camcorder to a TV that has the component input jack and is capable of displaying the 1080i signal GOFF Select to output the pictures from the HDV DV jack in accordance with the REC FORMAT and VCR HDV DV settings ON HDVcDV Select to always output the pictures in the ...

Page 73: ... recording A V c DV OUT You can connect a digital device and an analog device to your camcorder and convert the signal transmitted from the connected devices to the appropriate signal on your camcorder GOFF Select when you are not using the Signal conversion function ON To output analog images and sound in digital format using your camcorder The analog signal input to the AUDIO VIDEO jack of your ...

Page 74: ...just the time difference when using your camcorder abroad Set the time difference by turning the SEL PUSH EXEC dial the clock will be adjusted in accordance with the time difference If you set the time difference to 0 the clock returns to the originally set time LANGUAGE You can select or change the language used for the on screen display p 24 You can select from English Simplified English Canadia...

Page 75: ...ose to the subject When the subject reflects the light of the recording lamp GON Select to turn on the format lamp The lamp of the format that is selected in REC FORMAT lights up when the POWER switch is set to CAMERA The lamp of the format that is selected in VCR HDV DV lights up when the POWER switch is set to VCR OFF Select when you do not want to turn on the format lamp The i LINK lamp also do...

Page 76: ... with a cassette inserted and your camcorder calculates the remaining amount of tape After you press N play or DISPLAY BATT INFO ON Select to always display the remaining tape indicator GLCD PANEL Select to show indicators such as the time code on the LCD screen and in the viewfinder V OUT PANEL Select to show indicators such as the time code on the TV screen LCD screen and in the viewfinder GON S...

Page 77: ...enu Add You can add frequently used menu items to Personal Menu for easier and faster access b Note You can add up to 28 menu items each for the CAMERA and VCR modes If you want to add more you must delete a less important menu item before adding a new menu item p 78 1 Press P MENU 2 Select P MENU SETUP by turning the SEL PUSH EXEC dial then press the dial 3 Select ADD by turning the SEL PUSH EXEC...

Page 78: ... to delete by turning the SEL PUSH EXEC dial then press the dial 5 Select YES by turning the SEL PUSH EXEC dial then press the dial The selected menu is deleted from Personal Menu 6 Press P MENU 0 00 00 120min STBY P MENU END Se l ec t t he i t em RETURN WB PRESET AE RESPONSE GAIN SETUP SHOT TRANS STEADYSHOT STDYSHOT TYP 0 00 00 120min STBY P MENU END ADD YES NO STDYSHOT TYP Add t o CAMERA mode s ...

Page 79: ... P MENU 2 Select P MENU SETUP by turning the SEL PUSH EXEC dial then press the dial 0 00 00 120min STBY P MENU END END P MENU SHOT TRANS REC FORMAT AE RESPONSE WB PRESET GAIN SETUP ASS I GN BTN 0 00 00 120min STBY P MENU SETUP RETURN ADD DELETE SORT RESET P MENU END 0 00 00 120min STBY P MENU END Se l ec t i t em t o move RETURN SHOT TRANS ASS I GN BTN REC FORMAT AE RESPONSE WB PRESET GAIN SETUP 1...

Page 80: ... the functions you need to assign them to the ASSIGN buttons to use them You can assign single function to each ASSIGN 1 2 3 button Functions you can assign to the ASSIGN buttons FADER p 48 STEADYSHOT INDEX SAVE p 49 AUDIO DUB p 91 DISPLAY p 53 BARS p 30 1 Press MENU 2 Select the OTHERS menu by turning SEL PUSH EXEC dial then press the dial 3 Select ASSIGN BTN by turning SEL PUSH EXEC dial then pr...

Page 81: ... Select OK by turning SEL PUSH EXEC dial then press the dial 7 Press MENU to hide the menu z Tip When you press the ASSIGN button assigned to the STEADYSHOT the SteadyShot function is released and appears on the LCD screen To activate the SteadyShot fucntion press the same button again You can select the effect level of the SteadyShot function at STDYSHOT TYP on the CAMERA SET menu p 64 There are ...

Page 82: ...t when VCR HDV DV is set to AUTO and i LINK CONV is set to ON Only pictures in the selected format will be dubbed when VCR HDV DV is set to HDV or DV Other pictures will be dubbed as blank portions so neither picture nor sound will be dubbed b Note If you change the settings of VCR HDV DV and i LINK CONV with the i LINK cable connected the video device may not be able to recognize the video signal...

Page 83: ...tures in the HDV format will be dubbed as blank portions so neither picture nor sound will be dubbed b Note If you change the settings of VCR HDV DV and i LINK CONV with the i LINK cable connected the video device may not be able to recognize the video signal from the camcorder at the time of dubbing If i LINK CONV is set to OFF while VCR HDV DV is set to AUTO pictures recorded in the HDV mode wil...

Page 84: ...not be output if you connect with the S video cable alone b Note Select the OTHERS menu DISP OUTPUT then LCD PANEL the default setting p 76 When you connect your camcorder to a monaural device connect the yellow plug of the A V connecting cable to the video jack and the red or the white plug to the audio jack on the VCR or the TV z Tip To record the date time and camera settings data first have th...

Page 85: ... the dubbing is finished stop your camcorder and the VCR b Note When you use the i LINK cable the recorded picture becomes rough when a picture is paused on your camcorder while recording it to a VCR Pictures recorded in the HDV format are not output from the HDV DV jack during playback pause or in playback modes other than normal playback When you use the i LINK cable you cannot record the pictur...

Page 86: ...om an HDV compatible VCR Use your camcorder as a recorder and connect it to an HDV compatible device using the i LINK cable supplied On this camcorder recorder select the IN OUT REC menu VCR HDV DV then AUTO p 69 before connecting b Note In case of digital broadcasting you may not be allowed to record some programs for copyright reasons p 104 i LINK cable supplied Signal flow Player HDV compatible...

Page 87: ...h the S video cable alone b Note You can record pictures from DV AV devices only in the DV format When you use the A V connecting cable supplied select the OTHERS menu DISP OUTPUT then LCD PANEL the default setting p 76 When you connect your camcorder to a monaural device connect the yellow plug of the A V connecting cable to the video jack and the red or the white plug to the audio jack on the VC...

Page 88: ...ture becomes rough when a picture is paused on your VCR When you use the i LINK cable you cannot record the picture and sound separately When you use the i LINK cable if you pause or stop the recording and restart it the picture may not be recorded smoothly z Tip The i LINK lamp HDV or DV on the HDV DV jack holder will light up and indicate the format of the input signal when you use the i LINK ca...

Page 89: ... Connect a computer that can handle the signal of the format indicated by the i LINK lamps If you connect a computer that cannot handle the signal the computer may hang up or may not recognize the signal from your camcorder Disconnect the i LINK cable before resetting REC FORMAT when the POWER switch is set to CAMERA Otherwise the computer may hang up z Tip The i LINK lamp HDV or DV on the HDV DV ...

Page 90: ... input to be recorded takes precedence in the order of MIC LINE jack t AUDIO VIDEO jack t internal microphone b Note When you use the AUDIO VIDEO jack or the internal microphone to record additional sound the picture will not be output from the AUDIO VIDEO jack Check the picture on the LCD screen or the viewfinder and the sound on the headphones You cannot record additional audio When the tape is ...

Page 91: ... X pause and start playing back the audio you want to record at the same time The mark remains on the LCD screen while sound is recorded The new sound is recorded in stereo 2 ST2 7 Press x stop when you want to stop recording To set the end point for audio dubbing During playback press ZERO SET MEMORY at the scene at which you want to stop audio dubbing Then perform steps 4 to 6 The recording stop...

Page 92: ... ST1 and the sound recorded afterwards ST2 then press the dial The original sound ST1 is output in the default setting The adjusted audio balance returns to the default setting about 5 minutes after the battery pack or other power sources have been disconnected 6 Press MENU to hide the menu screen ...

Page 93: ...n application software to import video signals must be installed on the computer Connecting a computer Refer to the manual supplied with the application software for the system requirements of the computer b Note Select the OTHERS menu DISP OUTPUT then LCD PANEL the default setting p 76 Before connecting the i LINK cable select the IN OUT REC menu VCR HDV DV then DV p 69 If you do this operation w...

Page 94: ... MENU to hide the menu screen 8 Start playback on the analog device 9 Start importing on the computer Refer to the manual supplied with the program software or its on line help for details After importing the picture and sound Stop importing on the computer and stop playback on the analog device b Note Your camcorder may not be able to output the signal to the computer correctly depending on the v...

Page 95: ...nect the AC Adaptor charger from the wall outlet or remove the battery pack then reconnect it after about 1 minute If the functions still do not work press the RESET button using a sharp pointed object If you press the RESET button all settings including the clock setting except the Personal Menu and Picture Profile settings are reset A clattering noise is heard when the camcorder is handled with ...

Page 96: ...rged enough This is not a malfunction cFully charge the battery again If the problem persists replace the battery pack with a new one It may be damaged p 15 106 The power turns off frequently although the remaining battery indicator indicates that the battery pack has enough power to operate A problem has occurred in the remaining battery time indicator or the battery pack has not been charged eno...

Page 97: ...cator does not appear while using a cassette with Cassette Memory cSince your camcorder is not compatible with the Cassette Memory no indicator appears The remaining tape indicator is not displayed cSet REMAINING to ON on the OTHERS menu to always display the remaining tape indicator p 76 Symptom Cause and or Corrective Actions An unknown language appears on the screen cSee page 24 An unknown indi...

Page 98: ...cassette during the operation The SteadyShot does not function cSet STEADYSHOT to ON in the CAMERA SET menu p 63 cPress the ASSIGN button assigned to the SteadyShot p 80 The auto focus does not function cSet the FOCUS switch to AUTO to enable auto focus p 41 cThe recording conditions are not suitable for auto focus Adjust the focus manually p 41 The focus is set to auto but the focus shifts as the...

Page 99: ...yed on the screen The tape you are playing was recorded without setting the date and time A blank section on the tape is being played The data code on a tape with a scratch or noise cannot be read END SEARCH does not work The POWER switch is set to CAMERA The cassette was ejected after recording p 53 The cassette is new and has nothing recorded END SEARCH does not work correctly There is a blank s...

Page 100: ...PUT to LCD PANEL on the OTHERS menu p 76 When connected using the i LINK cable no picture appears on the monitor screen during dubbing cSet VCR HDV DV on the IN OUT REC menu according to the requirements of the connected device p 69 New sound added to a recorded tape is not heard cIn the AUDIO SET menu adjust AUDIO MIX from the ST1 original sound side until the sound is heard properly p 66 Picture...

Page 101: ...ed Remove and insert the cassette then operate your camcorder again Do not perform this procedure if moisture starts to condense p 108 cRemove the power source Reconnect it again and operate your camcorder again cChange the tape E 61 ss E 62 ss cContact your Sony dealer or local authorized Sony service facility Inform them of the 5 digit code which starts from E E Battery level warning The battery...

Page 102: ...the tab cSee page 104 Q The tape has reached the end Others Cannot record due to copyright protection Cannot add audio Disconnect the i LINK cable cSee page 90 Not recorded in SP mode Cannot add audio cSee page 90 Not recorded in 12 bit audio Cannot add audio cSee page 90 Cannot add audio on the blank portion of a tape cSee page 90 HDV recorded tape Cannot add audio cSee page 90 Cannot add audio c...

Page 103: ...local time by setting a time difference when using your camcorder abroad Select WORLD TIME on the OTHERS menu then set the time difference p 74 System Used in NTSC Bahama Islands Bolivia Canada Central America Chile Colombia Ecuador Guyana Jamaica Japan Korea Mexico Peru Surinam Taiwan the Philippines the U S A Venezuela etc PAL Australia Austria Belgium China Czech Republic Denmark Finland German...

Page 104: ...ck If the cassette you play back on your camcorder contains copyright signals you cannot copy it to a tape in another video device connected to your camcorder When you record You cannot record software on your camcorder that contains copyright control signals for copyright protection of software Cannot record due to copyright protection appears on the LCD screen or on the TV screen if you try to r...

Page 105: ...ack that has functions for communicating information related to operating conditions between your camcorder and an optional AC Adaptor charger The InfoLITHIUM battery pack calculates the power consumption according to the operating conditions of your camcorder and displays the remaining battery time in minutes With an AC Adaptor charger optional the remaining battery time and charging time appear ...

Page 106: ...t be restored if it is used in high temperatures for a long time or if left in a fully charged state or when the battery pack is frequently used Use the remaining battery time indication as a guide to the approximate shooting time The E mark that indicates low battery flashes even if there are still 5 to 10 minutes of battery time remaining depending on the operating conditions or ambient temperat...

Page 107: ...ns IEEE 1394 is an international standard standardized by the Institute of Electrical and Electronics Engineers About i LINK Baud rate i LINK s maximum baud rate varies according to the device There are 3 types S100 approx 100Mbps S200 approx 200Mbps S400 approx 400Mbps The baud rate is listed under Specifications in the operating instructions of each piece of device It is also indicated near the ...

Page 108: ...ot wrap your camcorder with a towel for example and operate it Doing so might cause heat to build up inside When disconnecting the power cord pull by the plug and not the cord Do not damage the power cord such as by placing anything heavy on it Keep metal contacts clean Keep the Remote Commander and button type battery out of children s reach If the battery is accidentally swallowed consult a doct...

Page 109: ...ing The video head suffers from wear after long use If you cannot obtain a clear image even after using a cleaning cassette it might be because the video head is worn Please contact your Sony dealer or local authorized Sony service facility to have the video head replaced LCD screen Do not add excessive pressure on the LCD screen as it may cause damage If your camcorder is used in a cold place a r...

Page 110: ... discharged gradually if you do not use your camcorder The button type battery will be fully discharged in about 3 months if you do not use your camcorder at all However even if the pre installed button type battery is not charged the camcorder operation will not be affected if you are not recording the date Procedures Connect your camcorder to a wall outlet using the supplied AC Adaptor charger a...

Page 111: ...pixels Effective Approx 1 070 000 pixels Lens Carl Zeiss Vario Sonnar SQ T Combined power zoom lens Filter diameter 72 mm 2 7 8 in 12 Optical F 1 6 2 8 Focal length 4 5 54 mm 3 16 2 1 4 in When converted to a 35 mm still camera 32 5 390 mm 1 5 16 15 3 8 in 40 480 mm 1 5 8 19 in in 4 3 TV mode Color temperature AUTO ONE PUSH A B INDOOR 3 200 K OUTDOOR 5 800 K Minimum illumination 3 lx lux F 1 6 Inp...

Page 112: ...inal 8 4 V 1 4 A in charge mode Operating temperature 0 C to 40 C 32 F to 104 F Storage temperature 20 C to 60 C 4 F to 140 F Dimensions approx 136 48 90 mm 5 1 8 1 10 16 3 1 2 in w h d excluding the projecting parts Mass approx 280 g 9 9 oz Rechargeable battery pack NP F970 Maximum output voltage DC 8 4 V Output voltage DC 7 2 V Capacity 47 5 Wh 6 600 mAh Dimensions approx 38 4 60 0 70 8 mm 1 9 1...

Page 113: ...vel 114 dB SPL 10 0 Pa input level for 1 waveform distortion at 1 kHz converted into equivalent input sound pressure level 0 dB 20µPa Dynamic range More than 92 dB Ambient temperature range For operation 0 C to 60 C 32 F to 140 F For storage 20 C to 60 C 32 F to 140 F Wind noise is the value measured by applying a wind velocity of 2 m s 6 6 ft s from all directions to the microphone the mean value...

Page 114: ...ear remote sensor E Rear camera recording lamp p 29 F BATT RELEASE battery release button p 16 G REC START STOP button p 29 H i LINK lamps HDV DV p 85 Lights up when handling an i LINK signal I Battery pack p 15 J Shoe adaptor attaching part p 28 K External microhone holder p 26 L Power zoom lever p 31 M EXPANDED FOCUS button p 41 N Grip belt p 12 O POWER switch p 20 ...

Page 115: ...ance switch A B PRESET p 35 K Handle zoom switch H L OFF p 32 L REC REVIEW button p 50 M Format lamps p 29 N Viewfinder p 12 21 O BACK LIGHT button p 34 P SPOT LIGHT button p 34 Q ASSIGN buttons 1 2 3 p 80 R ZEBRA PEAKING switch p 40 42 S IRIS button p 37 T GAIN button p 37 U AUTO LOCK switch p 35 37 38 V WHT BAL white balance button p 35 W SHUTTER SPEED button p 38 Each of the buttons has a raise...

Page 116: ... VCR button p 53 H Handle zoom lever p 32 I Video control buttons Rewind Playback Fast forward Pause Stop Slow Record p 51 J LCD BRIGHT buttons p 20 K LCD BACK LIGHT switch p 20 L ZERO SET MEMORY button p 58 M BARS button p 30 N REC START STOP button and HOLD lever p 30 O AUTO MAN manual audio switch p 46 P CHG charge lamp p 15 Q DC IN jack p 15 R AUDIO LEVEL dial p 46 Each of the buttons has a ra...

Page 117: ...Lens Your camcorder is equipped with a Carl Zeiss lens which can reproduce fine images The lens for your camcorder was developed jointly by Carl Zeiss in Germany and Sony Corporation It adopts the MTF measurement system for video cameras and offers a quality level as fine as that of a Carl Zeiss lens Moreover your camcorder employs the Carl Zeiss Vario Sonnar SQ T lens designed exclusively for QUA...

Page 118: ... not to damage the LCD panel B Lens hood p 29 C OPEN EJECT lever p 23 D Cassette compartment lid p 23 E Tripod receptacle Make sure that the length of the tripod screw is less than 5 5 mm 7 32 inch Otherwise you cannot attach the tripod securely and the screw may damage your camcorder F Viewfinder lens adjustment lever p 21 G PICTURE PROFILE button p 43 H MENU button p 60 I P MENU button p 77 J ST...

Page 119: ...ompartment 2 Insert 2 size AA R6 batteries by matching the and on the batteries to the and in the battery compartment 3 Replace the cover back until it clicks b Notes on the Remote Commander Point the remote sensor away from strong light sources such as direct sunlight or overhead lighting Otherwise the Remote Commander may not function properly The Remote Commander may not function properly when ...

Page 120: ...ipod securely and the screw may damage this unit AC Adaptor charger A Terminal shutter For the supplied InfoLITHIUM L series B DC IN jack Only for DCC VQ1 car battery cord optional C DC output jack D Terminal shutter For InfoLITHIUM M series E CHARGE lamp F Mode switch G DISPLAY CHANGE button H Display window I Warning J Remaining charging time K Normal charging L Full charging M Remaining battery...

Page 121: ... Audio mode p 67 60min q Remaining tape p 30 Frame recording p 65 Output analog images and sound in digital format p 73 HDV input DV input p 88 Zero set memory p 58 Q Z Warning p 101 9 Manual focus p 41 Backlight p 34 Spot light p 34 n Preset white balance p 35 A B One push white balance p 35 Iris closed p 37 L ND 1 R F 1 6 18dB 180 HDV1080i 0 00 00 120min 60min PP1 STBY Example Indicators in the ...

Page 122: ...splay DISP OUTPUT 76 Display indicators 121 Dual sound track tape 66 Dubbing 82 DV WIDE REC 71 E END SEARCH 53 Expanded focus 41 Exposure 34 EXT MIC SENC 67 F FADER 48 Flickering FLCKR REDUCE 64 Focus 41 FORMAT LAMP 75 Frame playback 52 Frame recording FRAME REC 65 Full charge 15 G Gain 37 GAIN SETUP 62 Grip belt 12 H HANDLE ZOOM 64 Handle zoom speed 32 HDV 12 103 104 Headphones jack 117 I i LINK ...

Page 123: ...ersion function A V c DV OUT 73 94 SKINTONE DTL 44 Skip scan 52 Smooth transition See END SEARCH SP Standard Play See Recording mode REC MODE SPOT LIGHT 34 START TIMER 63 STATUS CHECK 33 54 SteadyShot STEADYSHOT 63 SteadyShot type STDYSHOT TYP 64 Stereo 66 Sub sound See MULTI SOUND T Tape counter 30 58 Telephoto See Zoom Time code 30 Transition curve TRANS CURVE 63 Transition time TRANS TIME 63 Tr...

Page 124: ... 2 594 137 11 1 ...

Reviews: