background image

19

 FR

Composants du système

Composants du système

Le système de communication vidéo PCS-TL50 est constitué des composants 
système nécessaires pour une vidéoconférence de base et d’équipements en 
option pour une vidéoconférence avancée.

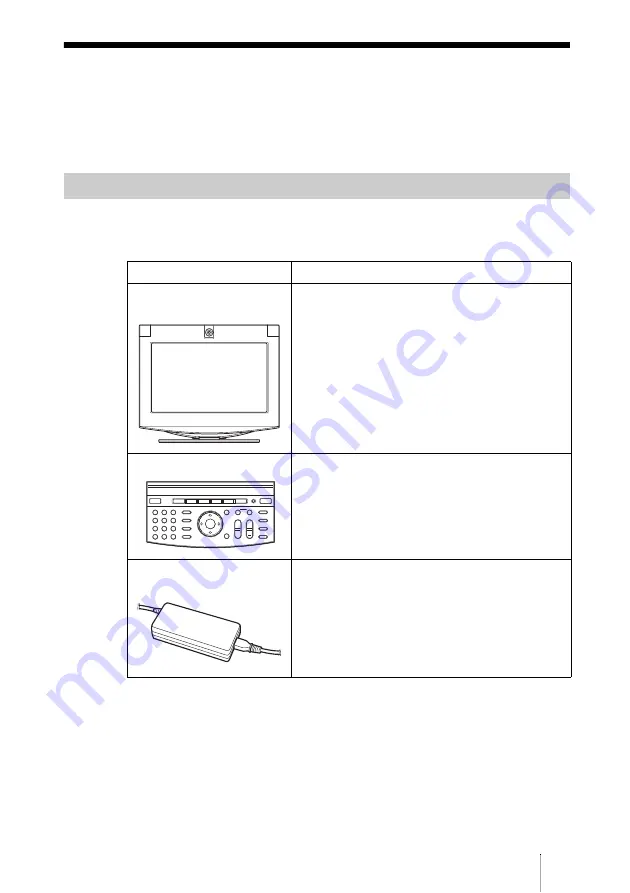
Le système de communication vidéo PCS-TL50 constitue l’élément de base du 
système de vidéoconférence. Il est constitué des éléments suivants :

Composants du système de base

Unité

Description

Système de communication 
vidéo PCS-TL50

Comprend la caméra, l’écran, le codec vidéo, le 
codec audio, l’éliminateur d’écho, les interfaces 
réseau et le contrôleur système.

Télécommande PCS-RTL50

Utilisée pour faire fonctionner le système de 
communication vidéo.

Adaptateur secteur 
PCS-AC19V8

Assure l’alimentation électrique du système de 
communication vidéo.

T

W

+

Summary of Contents for PCS-TL50

Page 1: ...Guide Please read it before proceeding Guide d utilisation Lisez le avant de continuer Bedienanleitung Lesen Sie sie bitte bevor Sie fortfahren Guía de functionamiento Léalo antes de continuar Guida per l uso Leggere attentamente prima di procedere Guia de Operação Leia antes de continuar GB FR DE ES IT CS PT PCS TL50 ...

Page 2: ...にご相談ください すぐに お買い上げ店またはソニーのサービス窓口 にご連絡ください m 1 電源を切る 2 電源コードや接続コードを抜く 3 買い上げ店またはソニーのサービス窓口に連絡す る 安全のために 安全のための注意事項を守る 定期点検をする 故障したら使わない 万一 異常が起きたら 煙が出たら 異常な音 においがしたら 内部に水 異物が入ったら 製品を落としたりキャビネットを破損したときは 警告表示の意味 取扱説明書および製品 では 次のような表示 をしています 表示の 内容をよく理解してか ら本文をお読みくださ い この表示の注意事項を 守らないと 火災や感 電などにより死亡や大 けがなど人身事故につ な が る こ と が あ り ま す この表示の注意事項を 守らないと 感電やそ の他の事故によりけが をしたり周辺の物品に 損害を与えたりするこ とがあります 注意を促す記号 ...

Page 3: ...ルを 調節する 20 音量を調節する 21 画質を調節する 22 会議を終了する 23 回線を切る 23 ヘルプを表示する 24 システムの接続 25 接続端子の使いかた 25 接続上のご注意 26 接続例 LAN 接続 26 接続例 ISDN 接続 27 コンピューターディスプレイ ビデオモニターとして使う 28 コンピューターと接続する 28 ビデオ機器と接続する 28 コンピューターやビデオ機器の 映像を見る 29 仕様 31 この操作ガイドには 事故を防ぐための 重要な注意事項と製品の取り扱いかたを 示しています この操作ガイドをよくお 読みのうえ 製品を安全にお使いくださ い お読みになったあとは いつでも見ら れるところに必ず保管してください また 付属の CD ROM には 本機のより 詳しい情報を記載した取扱説明書が収録 されています 操作ガイドと併せてお読 みください ...

Page 4: ...口に交換 をご依頼ください 雨のあたる場所や 油煙 湯気 ほ こりの多い場所には置かない 火災や感電の原因となるこ とがあります 雷が鳴り出したら 電源プラグには 触れない 感電の原因になります 落雷のおそれがあるときは本機を使 用しない 落雷により 感電したり本機 が故障することがあります 雷が予測されるときは 火災 や感電 製品の故障を防ぐた めにネットワークケーブル や電源プラグを抜いてくだ さい また 雷が鳴りだした ら 本機には触らないでくだ さい たこ足配線をしない 配線器具をたこ足配線して 定格を超えた電流が流れる と 火災などの原因となりま す AC アダプターの AC プラグ DC プラグは根元まで差し込む しっかり根元まで差し込ま ないと 火災や感電の原因と なります 警告 下記の注意を守らないと 火災や感電により 死亡や大けがにつながることがあります ...

Page 5: ...ター に必要以上の電流が流れ 故 障や発熱 火災の原因となり ます 特に ホームテレホンやビジ ネスホンの回線には 絶対に 接続しないでください 10BASE T と 100BASE TX タイプ以外のネットワーク 一般電話回線 ISDN デジタル 対応公衆 電話のデジタル側のジャッ ク PBX デジタル式構内交換 機 回線 ホームテレホンやビジネス ホンの回線 上記以外の電話回線など また ネットワークコネク ターをお使いになるときは 職場などのネットワーク管理 者にご相談ください 下記の注意を守らないと 火災や感電により 死亡や大けがにつながることがあります ...

Page 6: ...う 付属の AC アダプターや電 源コード 接続コードを使わ ないと 感電や故障の原因に なることがあります 付属の AC アダプターは指定された 製品以外には使用しない 指定された製品以外に使用 すると 故障の原因になるこ とがあります ぬれた手で電源プラグにさわらない ぬれた手で電源プラグの抜 き差しをすると 感電の原因 となることがあります ぬれた手で AC アダプターにさわら ない 感電の原因となることがあ ります 分解や改造をしない 火災や感電 けがの原因とな ることがあります 内部の点 検や修理はお買い上げ店ま たはソニーのサービス窓口 にご依頼ください お手入れの際は 電源を切って電源 プラグを抜く 電源を接続したままお手 入れをすると 感電の原因 となることがあります 移動させるときは電源コード 接続 コードを抜く 接続したまま移動させると コードが傷つき 火災や感電 の原...

Page 7: ... ご注意ください 近づけた場 合は記録内容が破壊されま す 通電中の本体や AC アダプターに長 時間触れない 温度が相当上がることがあ ります 長時間皮膚が触れたままに なっていると 低温やけどの 原因になることがあります 排気口からの排気に長時間あたらな い 本機をご使用中 その動作状 況により排気口から温風が 排出されることがあります この温風に長時間あたると 低温やけどの原因となる場 合があります 長時間使用しないときは電源ケーブ ルや AC アダプターのプラグを抜く 長時間使用しないときは 安全のため AC アダプター のプラグをコンセントから 抜いてください ディスプレイ画面を長時間継続して 見ない ディスプレイなどの画面を 長時間継続して見続けると 目が疲れたり 視力が低下す るおそれがあります ディスプレイ画面を見続け て体の一部に不快感や痛み を感じたときは すぐに本シ ...

Page 8: ...と液晶が 割れて 故障やけがの原因と なることがあります 人が通行するような場所に置かない コード類は正しく配置する 電源コードや信号ケーブル は 足に引っかけると製品の 落下や転倒などによりけが の原因となることがありま す 人が踏んだり 引っか かったりするような恐れの ある場所を避け 十分注意し て接続 配置をしてくださ い 転倒 移動防止の処理をする 本製品をラックに取り付け たり 取り外すときは 転倒 移動防止の処置をしないと 倒れたり 動いたりして け がの原因となることがあり ます 安定した姿勢で注意深 く作業してください また ラックの設置状況 強度を十 分にお確かめください 下記の注意を守らないと けがをしたり周辺の物品に 損害を与えることがあります ...

Page 9: ...Reader が起動し 本機の取 扱説明書の表紙が画面に表示されま す 目次 の各項目をクリックすると そ の見出しのページが表示されます Adobe Reader6 0J のインストー ル Adobe Reader6 0J をインストールする ために必要なハードウェア ソフト ウェアは以下のとおりです Intel Pentium または 100 パーセ ント互換のプロセッサを搭載したパ ソコン Microsoft Windows 98 SE Windows Millennium Windows NT 4 0 Service Pack 5 または Windows 2000 以降 64MB 以上の RAM 70MB 以上のハードディスクの空き 容量 Adobe Reader は下記のホームページか ら最新版が無料で入手できます 日本向け http www adobe co jp produc...

Page 10: ...の性能を保持す るために 使用 保管場所について 次のような場所での使用および保管は 避けてください 極端に寒いところや暑いところ 湿気 ほこりの多いところ 激しく振動するところ 強い磁気を発生するものの近く 強力な電波を発生する機器やラジオ の送信所の近く 雑音が多いところ 液晶画面について 液晶画面を太陽に向けたままにする と 液晶画面を傷めてしまいます 窓 際や室外に置くときなどはご注意く ださい 液晶画面を強く押したり ひっかいた り 上にものを置いたりしないでくだ さい 画面にムラが出たり 液晶パネ ルの故障の原因になります 寒い所でご使用になると 画像が尾を 引いて見えたり 画面が暗く見えたり することがありますが 故障ではあり ません 温度が上がると元にもどりま す 静止画を継続的に表示した場合 残像 を生じることがありますが 時間の経 過とともに元に戻ります 使用中に画面や...

Page 11: ...の点をご了承のうえ 本機をお 使いください 内蔵スピーカーについて スピーカーからは磁気が発生していま すので 磁気テープや磁気ディスクな どはスピーカー開口部から離しておい てください データが破損するおそれ があります お手入れについて お手入れをする前に 必ず電源プラグ をコンセントから抜いてください 液晶の画面は特殊加工がされていま すので なるべく画面に触れないよう にしてください また画面の汚れをふ きとるときは 乾いた柔らかい布でふ きとってください アルコール シンナー ベンジンなど は使わないでください 変質したり 塗装がはげたりすることがあります 化学ぞうきんをご使用の際は その注 意書きに従ってください 殺虫剤のような揮発性のものをかけ たり ゴムやビニール製品に長時間接 触させると 変質したり 塗装がはげ たりすることがあります ...

Page 12: ...の 1 電源 スイッチを押す スイッチのインジケーターが緑色に点灯し 本機の電源が入ります 3 カメラのシャッターが開いていることを確認する 閉じている場合は上面のシャッタースイッチを右へスライドさせて開 いてください 4 リモコンのビデオ会議ボタンを押してランチャーメニューを表示 する 1 電源 スイッチ Press the arro key on the remote commander to adjust the camera でカメラを調整できます IP 012 345 678 912 詳細ダイヤル アドレス帳 ISDN ダイヤル ISDN 012345678912 Bob John 2 3 4 5 6 1 ...

Page 13: ...ヤルを登録する方法 を説明します 1 リモコンの V v B b ボタンを押して ランチャーメニュー上で相 手を登録したいワンタッチダイヤルを選び 決定ボタンを押す ワンタッチ ダイヤル操作メニューが表示されます John Press the arro key on the remote commander to adjust the camera でカメラを調整できます IP 012 345 678 912 詳細ダイヤル アドレス帳 ISDN ダイヤル ISDN 012345678912 Bob 2 3 4 5 6 1 ワンタッチ ダイヤル操作 編集 キャンセル T W 上に移動 左に 移動 下に移動 右に 移動 ランチャーメニュー ワンタッチ ダイヤル操作メニュー ワンタッチダイヤルリスト ...

Page 14: ...リスト編集メニューが表示されます 3 ワンタッチダイヤルの登録内容を設定する リモコンの V v B b ボタンを押して項目を選び 決定ボタンを押し て決定します 数字ボタンと ボタンで数値を入力します 数字ボタンの入力 モードを切り換えるにはカナ 英 数ボタンを押します 名前 IP LAN 回線種別 リスト編集 1024 Kbps LAN 使用帯域 保存 キャンセル LAN リスト編集メニュー 上に移動 左に 移動 下に移動 右に 移動 T W 数字ボタン ボタン カナ 英 数ボタン 上に移動 左に 移動 下に移動 右に 移動 ...

Page 15: ...る項目か ら LAN を選ぶ 3 IP アドレス入力欄を選び リモコンの数 字ボタンと ボタン ピリオド で 相手の IP アドレスを入力する 4 LAN 使用帯域 を選び 使用する帯域 幅を選ぶ 5 ワンタッチダイヤルリストに表示する静 止画を選ぶ 4 2 5 1 3 Bob 名前 A ISDN 回線種別 リスト編集 6B 384K 使用回線数 保存 キャンセル ISDN 1 相手の名前を入力する 2 回線種別 を選び 表示される項目か ら ISDN を選ぶ 3 電話番号入力欄を選び リモコンの数字 ボタンで相手の回線番号を入力する 4 使用回線数 を選び 使用する ISDN 回 線のチャンネル数を選ぶ 5 ワンタッチダイヤルリストに表示する静 止画を選ぶ 4 2 5 1 3 ...

Page 16: ...手をワンタッチダイヤルに登録する リモコンの V v B b ボタンで 保存 を選び 決定ボタンを押 す アドレス帳メニューが表示されます これで 設定した内容がランチャーメニューのワンタッチダイヤルリ ストとアドレス帳へ同時に登録されます IP 012 345 678 912 詳細ダイヤル アドレス帳 ISDN ダイヤル ISDN 012345678912 Bob 3 4 5 6 1 John 2 ランチャーメニュー ...

Page 17: ... を押す 選択した相手にダイヤルが始まります ディスプレイに 発信中 LAN または 発信中 ISDN と表示されます 相手とつながると ミーティングを始めます と表示されます これで会議を始めることができます Press the arro key on the remote commander to adjust the camera でカメラを調整できます IP 012 345 678 912 詳細ダイヤル アドレス帳 ISDN ダイヤル ISDN 012345678912 Bob 3 4 5 6 1 2 John T W ワンタッチダイヤルリスト ワンタッチダイヤルボタン ミーティングを始めます 自分側の映像 相手側の映像 ...

Page 18: ...ボタンで使用する回線インターフェースを選 び 決定ボタンを押してください LAN LAN を使ってビデオ会議システムと接続する場合 音声電話 ISDN 回線で音声のみの電話と接続する場合 ボイスミー ティング ISDN ISDN 回線でビデオ会議システムと接続する場合 相手の IP アドレス LAN のとき または電話番号 ISDN または 音声電話のとき を番号入力欄に入力する リモコンの V v B b ボタンで番号入力欄を選び 決定ボタンを押し ます その後 リモコンの数字ボタンで数字を入力します IP 012 345 678 912 詳細ダイヤル アドレス帳 ISDN ダイヤル ISDN 012345678912 Bob 3 4 5 6 1 John 2 T W ダイヤル 回線種別 番号入力欄 上に移動 左に 移動 下に移動 右に 移動 ...

Page 19: ...ッチダイヤルに登録していない相手を呼び出す リモコンの V v B b ボタンを押して ダイヤル を選び 決定 ボタンを押す またはリモコンの接続 切断 ボタンを 押す 選択した相手にダイヤルが始まります ディスプレイに 発信中 LAN または 発信中 ISDN と表示されます 相手とつながると ミーティングを始めます と表示されます これで会議を始めることができます ミーティングを始めます 自分側の映像 相手側の映像 ...

Page 20: ...押してカメラアングルを調節します 調 節し終ったら決定ボタンを押します ズームとカメラアングルを調節する Press the arro key on the remote commander to adjust the camera IP 012 345 678 912 詳細ダイヤル アドレス帳 ISDN ダイヤル ISDN 012345678912 Bob John 2 3 4 5 6 1 リモコンの決定ボタンでカメラアングルの調整が出来るようになります T W T W 通信していないときは 通信中は 自分側の映像 相手側の映像 映像が大きくなる 映像が小さくなる アングルの調節 ズームの調整 上に移動 左に 移動 下に移動 右に 移動 ...

Page 21: ... B b ボタンで 自分側の映像のズー ムとカメラアングルを調節できます 相手側の映像のズームとカメラアングルを調整する場合は 取扱説明 書をご覧ください 相手から送られてくる音声を調節するには リモコンの音量 ボタンを押します 自分側から相手に送られる音声を一時的に消すには リモコンのマイクオン オフボタンを押します ディスプレイに MIC OFF と表示されます もう一度押すと音声 が再び送られます 音量を調節する T W 押すと音声が切れる 音量が大きくなる 音量が小さくなる ...

Page 22: ...押す 画質調整メニューが表示されます 2 V v ボタンを押して設定項目を選び OK ボタンを押す 選んだ設定項目の調整画面が表示されます 3 V v ボタンを押して調整し OK ボタンを押す 4 MENU ボタンを押してメニューを消す お買い上げ時の状態に戻すには 画質調整メニュー最下部の 標準に戻す を選び OK ボタンを押し ます 画質を調節する モード 標準 ピクチャー 068 ブライト 050 バックライト 100 標準に戻す ㆬᛯ ቯ 1 ੌ 07 画質 MENU V v OK 右側面 ピクチャー 068 戻る OK 終了 MENU ...

Page 23: ...を選び 決定ボタン を押す または リモコンの接続 切断 ボタンをもう 一度押す これで相手との回線が切れ ランチャーメニューに戻ります スタンバイ状態にするには リモコンの 1 ボタンを押します ディスプレイの電源を切って待 機状態にしますか というメッセージが表示されたら B または b ボタンを押して OK を選び 決定ボタンを押します スタンバイ状態の場合は 相手からの呼び出しを受けることができま す 電源を切るには 本機の右側面の 1 電源 スイッチを 1 秒以上長く押して電源を切 り 会議に使用したその他の機器の電源を切ります 回線を切る 切断しますか キャンセル OK ...

Page 24: ...JP 24 ヘルプを表示する ヘルプを表示する リモコンのヘルプボタンを押すと 操作案内用のバルーンヘルプまた はヘルプ画面が表示されます ヘルプ画面を消すには もう一度ヘルプボタンを押します T W ...

Page 25: ...25 JP システムの接続 システムの接続 ここでは 代表的なシステムの接続のしかたを説明します 接続端子はリアカバーの内側にあります リアカバーを外してケーブルを接続し 接続終了後に再びリアカバー を取り付けてください リアカバーを外すには 手前に引っぱります リアカバーを取り付けるには 4 か所の突起を合わせ 押し付けます 接続端子の使いかた 接続端子 ...

Page 26: ...ネットワークなどに接続しないでください 接続するときは 必ず各機器の電源を切ってから行ってください 本機が壊れますので 電源を入れたままケーブルを抜き差ししない でください 安全のために 100BASE TX 10BASE T 端子を過電圧が加わるお それのあるネットワークなどに接続しないでください 接続上のご注意 接続例 LAN 接続 DC 19 5V へ ビデオコミュニケーション システム PCS TL50 電源コンセント AC 100V へ 電源コード 付属 LAN へ UTP ケーブルカテゴリー 5 ストレート 別売り 100BASE TX 10BASE T へ AC アダプター PCS AC19V8 付属 1 2 3 4 1 4 の順に接続してください ...

Page 27: ...ージョンアップすることがあります 画 面にバージョンアップ中のメッセージが表示されている間は故障の原因と なりますので 絶対に電源を切らないでください 接続例 ISDN 接続 ビデオコミュニケーション システム PCS TL50 インターフェース ケーブル ISDN ユニットに付属 ISDN ユニット 別売り TERMINAL へ ISDN UNIT ヘ ISDN モジュラーケーブル 別売り ISDN1 6 へ ISDN 1 3 へ PCSA B384S PCSA B768S DC 19 5V へ 電源コンセント AC 100V へ 電源コード 付属 AC アダプター PCS AC19V8 付属 1 2 3 4 1 4 の順に接続してください ...

Page 28: ...バーを外し コンピューターを接続します リアカバーの外しかたは 25 ページをご覧ください 本機のリアカバーを外し ビデオ機器を接続します リアカバーの外しかたは 25 ページをご覧ください コンピューターと接続する ビデオ機器と接続する コンピューター ビデオコミュニケーションシステム PCS TL50 AUDIO IN RGB へ 音声接続コード 別売り 音声出力へ RGB IN へ D sub 15 ピン ケーブル 別売り RGB 出力へ VTR DVD プレーヤー など ビデオコミュニケーションシステム PCS TL50 VIDEO IN へ 映像接続コード 別売り 映像出力へ AUDIO IN L R へ 音声接続コード 別売り 音声出力へ ...

Page 29: ...ビデオ映像が交互に切り換わり ます 本機のスピーカーから 選んだ入力の音声がステレオで聞こえます 音声接続をしている場合 2 リモコンの音量 ボタンを押して 音量を調節する 3 本機右側面の MENU V v OK ボタンを使って 映像の画質調 節をする 調節のしかたは 画質を調節する 22 ページ をご覧ください ビデオ会議中にコンピューターやビデオ機器の映像を見る 本機のディスプレイでコンピューターやビデオ機器の映像を見ている とき 相手から会議に呼び出されると 自動的に子画面表示モードに なり 相手側の映像が子画面に表示されます コンピューターやビデオ機器の映像を見る T W 相手側の映像 コンピューターや ビデオ機器の映像 ...

Page 30: ...るには リモコンのビデオ会議ボタンを押します コンピューターやビデオ機器の映像に戻すには 再び PC ビデオボ タンを押します ビデオ会議とコンピューターまたはビデオ機器の映像を 2 画面表示 で見るには リモコンの 2 画面ボタンを押します 左側 メイン画面 にコンピューターまたはビデオ機器の映像 右側 サブ画面 にビデオ会議の映像が表示されます ビデオ会議の映像を相手側から自分側の映像に切り換えるには リモコンの相手 自分ボタンを押し 表示制御メニューの 表示 の 設定 相手側 自分側 を変更します 通信中でないときは 子画面や 2 画面表示はできません ご注意 T W ビデオ会議ボタン 子画面ボタン 相手 自分ボタン 2 画面ボタン ...

Page 31: ...H 263 独自方式 音声 周波数帯域 14 kHz MPEG4 Audio 7 kHz G 722 G 722 1 ITU T 勧告準拠 3 4 kHz G 711 G 728 G 723 1 G729 ITU T 勧告準拠 伝送レート 56 Kbps 64 Kbps G 711 ITU T 勧告準拠 48 Kbps 56 Kbps 64 Kbps G 722 ITU T 勧告準拠 64 Kbps 96 Kbps MPEG4 Audio LAN による接続 24 Kbps 32 Kbps G 722 1 ITU T 勧告準拠 LAN に よる接続 16 Kbps G 728 ITU T 勧告 準拠 8 Kbps G 729 ITU T 勧告準 拠 LAN による接続 5 3 Kbps 6 3 Kbps G 723 1 ITU T 勧告準拠 LAN に よる接続 ネットワーク 多重分離化 ...

Page 32: ...比 16 9 解像度 1280 768 明るさ 400 Cd m2 以上 応答時間 15 ms 以内 コントラスト比 500 1 視野角 160 以上 発色数 1670 万色 ディスプレイコントローラー PinP 4隅 P P 2画面表示 入力 内部 テレビ会議用 外部 RGB コンピューター ディスプレイ 外部 Video 外部ビデオ入力 NTSC PAL 自動認識 ワイド切替 ノーマル ズーム ワイド ワイドズーム RGB 切替 640 480 800 600 1024 x 768 1280 x 768 など 拡大 表示可能 音量調整 PCS 側は固定 ディスプレイ 基板のアンプによる音量調 整 OSD 輝度 色合い 位置 幅 高 さ調整などが可能 スピーカー スピーカー 3 W 2 マイクロホン 周波数帯域 15 kHz 指向特性 単一指向性 その他 電源電圧 19 5V 消費電流 ...

Page 33: ...いこと 外形寸法 81 49 165 mm 幅 高さ 奥行き 質量 約 800 g マイクロホン PCS A1 別売り 周波数帯域 13 kHz 指向特性 無指向性 外形寸法 74 16 93 mm 幅 高さ 奥行き 質量 約 170 g 電源 プラグインパワータイプ マイクロホン PCS A300 別売り 周波数帯域 13 kHz 指向特性 単一指向性 外形寸法 68 16 96 mm 幅 高さ 奥行き 質量 約 200 g 電源 プラグインパワータイプ ISDN ユニット PCSA B384S PCS B384 別売り 電源電圧 19 5 V 消費電流 0 3 A 動作温度 5 C 35 C 動作湿度 20 80 保存温度 20 C 60 C 保存湿度 20 80 結露しないこと 外形寸法 PCSA B384S 165 34 127 mm 幅 高さ 奥行き 突起部含ま ず PCS B3...

Page 34: ...240 33 160 mm 幅 高さ 奥行き 突起部含ま ず 質量 PCSA DSB1S 約 1 1 kg PCS DSB1 約 850 g 付属品 インターフェースケーブル 8 m 1 取扱説明書 1 B P ワランティブックレット 1 H 320 MCU ソフトウェア PCS 320M1 別売り 外形寸法 50 2 8 21 5 mm 幅 高 さ 奥行き 質量 約 4 g 付属品 シリアル番号シール 1 取扱説明書 1 H 323 MCU ソフトウェア PCS 323M1 別売り 外形寸法 50 2 8 21 5 mm 幅 高 さ 奥行き 質量 約 4 g 付属品 シリアル番号シール 1 取扱説明書 1 仕様および外観は 改良のため予告なく変 更することがありますが ご了承ください 本機は JIS C 61000 3 2 適合品 です JIS C 61000 3 2 適合品とは 日本工...

Page 35: ......

Page 36: ...t at a voltage other than 120 V may require the use of a different line cord or attachment plug or both To reduce the risk of fire or electric shock refer servicing to qualified service personnel This device complies with Part 15 of the FCC Rules Operation is subject to the following two conditions 1 This device may not cause harmful interference and 2 this device must accept any interference rece...

Page 37: ... batterij mag alleen vervangen worden door vakbekwaam servicepersoneel Gooi de batterij niet weg maar lever deze in als klein chemisch afval KCA Lever het apparaat aan het einde van de levensduur in voor recycling de batterij zal dan op correcte wijze verwerkt worden If you dispose the unit consult your nearest Sony Service Center The built in battery must be treated as a chemical waste For the cu...

Page 38: ...system is in use This is not a malfunction LCD display panel Although the LCD display panel is made with high precision technology black dots may appear or bright points of light red blue or green may appear constantly on the LCD screen Color stripes and uneven brightness may also appear when you view from specific viewing angles This is a structural property of the LCD panel and is not a malfunct...

Page 39: ...Disconnecting the Line 18 Displaying the Help 19 System Components 20 Basic System Components 20 Optional Equipment 21 System Connections 23 Using the Connectors 23 Notes on Connections 24 System Connection via a LAN 24 System Connection via an ISDN 25 Use as Computer Display or Video Monitor 26 Connecting to a Computer 26 Connecting to Video Equipment 26 Displaying the Picture from the Computer o...

Page 40: ...will open displaying the files on the CD ROM 2 Double click the PDF file named English Adobe Reader will start then display the cover page of the Operating Instructions Clicking an item in the Table of Contents allows you to jump to the relevant page To install Adobe Reader 6 0 E To install Adobe Reader 6 0 E in your computer you need the following hardware and software A computer with an Intel Pe...

Page 41: ...erence 2 Press 1 power switch on the right side of the system The indicator of the switch lights in green and the system turns on 3 Make sure that the shutter of the camera is open If it is closed slide the shutter switch on the top of the system to open the shutter 4 Press the VIDEO CONF button on the Remote Commander to display the launcher menu 1 power switch IP 012 345 678 912 Detailed Dial Ph...

Page 42: ...select the One Touch Dial to register a remote party then press the ENTER button The One Touch Dial Operation menu opens John IP 012 345 678 912 Detailed Dial Phone Book ISDN Dial ISDN 012345678912 Bob 2 3 4 5 6 1 One Touch Dial Operation Edit Cancel 1 2 3 4 5 6 7 8 9 0 CONNECT DISCONNECT HELP 1 6 5 4 3 2 ZOOM INPUT SELECT FAR NEAR RETURN PinP PandP VOLUME MENU BACK SPACE CLEAR SYMBOL ALPHA NUM WI...

Page 43: ...erals Press the ALPHA NUM alphabet numeral button to select the input mode of the number buttons IP Index List Edit Save Cancel LAN ENTER ENTER LAN Line I F 1024 Kbps LAN Bandwidth List Edit menu Up Down Left Right 1 2 3 4 5 6 7 8 9 0 CONNECT DISCONNECT HELP 1 6 5 4 3 2 ZOOM INPUT SELECT FAR NEAR RETURN PinP PandP VOLUME MENU BACK SPACE CLEAR SYMBOL ALPHA NUM WIDE MODE BACK LIGHT CAPTURE IMAGE MIC...

Page 44: ...ommander 4 Select LAN Bandwidth then select the bandwidth you are using 5 Select a still image to be displayed in the One Touch Dial list 5 2 4 1 3 Bob Index A ISDN Line I F List Edit 6B 384K Number of Lines Save Cancel ISDN 1 Enter the name of a remote party 2 Select Line I F then select ISDN from the displayed submenu 3 Select the telephone number text box then enter the telephone number of the ...

Page 45: ...ander to select Save then press the ENTER button The Phone Book menu appears The set items are registered in the Phone Book at the same time as in the One Touch Dial list of the launcher menu IP 012 345 678 912 Detailed Dial Phone Book ISDN Dial ISDN 012345678912 Bob 3 4 5 6 1 John 2 Launcher menu ...

Page 46: ...lay When the system connects to the remote system the message Meeting starts appears on the display Now you can start a videoconference IP 012 345 678 912 Detailed Dial Phone Book ISDN Dial ISDN 012345678912 Bob 3 4 5 6 1 2 John T W 1 2 3 4 5 6 7 8 9 0 CONNECT DISCONNECT HELP 1 6 5 4 3 2 ZOOM INPUT SELECT FAR NEAR RETURN PinP PandP VOLUME MENU BACK SPACE CLEAR SYMBOL ALPHA NUM WIDE MODE BACK LIGHT...

Page 47: ...hone number for ISDN or Telephone of the remote party in the text box Press the V v B or b button on the Remote Commander to select the text box then press the ENTER button Enter numerals using the number buttons on the Remote Commander 3 Press the V v B or b button on the Remote Commander to select Dial then press the ENTER button Or press the CONNECT DISCONNECT button on the Remote Commander The...

Page 48: ...ot Registered for One Touch Dial When the system connects to the remote system the message Meeting starts appears on the display Now you can start a videoconference Meeting starts Picture on the local site Picture on the remote site ...

Page 49: ...ommander Refer to the Operating Instructions to adjust the zoom and camera angle of the picture on the remote site Adjusting the Zoom and Camera Angle IP 012 345 678 912 Detailed Dial Phone Book ISDN Dial ISDN 012345678912 Bob John 2 3 4 5 6 1 Press the PUSH ENTER button on the Remote Commander to adjust the camera angle T W HELP 1 6 5 4 3 2 ZOOM INPUT SELECT FAR NEAR RETURN ENTER PinP PandP VOLUM...

Page 50: ...the MENU V v and OK buttons on the right side of the Video Communication System 1 Press the MENU button on the right side of the system The Picture Quality menu appears Adjusting the Volume Adjusting the Picture Quality T W HELP 1 6 5 4 3 2 ZOOM INPUT SELECT FAR NEAR RETURN ENTER PinP PandP VOLUME MENU BACK SPACE CLEAR SYMBOL ALPHA NUM WIDE MODE BACK LIGHT CAPTURE IMAGE MIC ON OFF DISPLAY SELECT P...

Page 51: ...tment menu of the selected item appears 3 Press the V or v button on the right side of the system to adjust the picture quality then press the OK button 4 Press the MENU button to exit the menu To reset to the default picture quality Select Reset the lowest setting item then press the OK button Picture 068 Back OK Exit MENU ...

Page 52: ...mander and the message Turn the display off and set to standby mode appears Press the B or b button to select OK then press the ENTER button You can receive a call from a remote party in the standby mode To turn off the power Press the 1 power switch on the right side of the system for more the one second to turn the system off and turn off other equipment used for the videoconference Disconnectin...

Page 53: ...perations on the display To hide the help guide press the HELP button again T W 1 2 3 4 5 6 7 8 9 0 CONNECT DISCONNECT HELP HELP 1 6 5 4 3 2 ZOOM INPUT SELECT FAR NEAR RETURN ENTER PinP PandP VOLUME MENU BACK SPACE CLEAR SYMBOL ALPHA NUM WIDE MODE BACK LIGHT CAPTURE IMAGE MIC ON OFF ABC DEF JKL GHI MNO TUV PQRS WXYZ DISPLAY SELECT PC VIDEO VIDEO CONF ...

Page 54: ...tion System is the basic system of the Videoconferencing System It contains the following components Basic System Components Unit Description PCS TL50 Video Communication System Contains the camera display video codec audio codec echo canceler network interfaces and system controller PCS RTL50 Remote Commander Used to operate the Video Communication System PCS AC19V8 AC adaptor Supplies power to t...

Page 55: ...an ISDN line Up to six ISDN lines 12B channels usable The PCSA B768S and PCS B768 have the same functions This manual uses the PCSA B768S as a representative model Data Solution Box PCSA DSB1S PCS DSB1 Use of this device allows easy connection with a computer or projector for a data conference The PCSA DSB1S and PCS DSB1 have the same functions This manual uses the PCSA DSB1S as a representative m...

Page 56: ...phone speaker system suitable for remote communication The uni directional microphones pick up clear voice with minimum background noise Moreover the omni directional speaker outputs sound equally in all directions PCS 323M1 H 323 MCU Software Allows use for a multipoint videoconference over LAN connection PCS 320M1 H 320 MCU Software Allows use for a multipoint videoconference over ISDN connectio...

Page 57: ... rear cover When using the connectors remove the rear cover connect cables to the connectors and replace the rear cover To remove the rear cover Pull the rear cover toward you To replace the rear cover Align the four projections on the rear cover with the holes on the rear of the unit and press the cover Using the Connectors Connectors ...

Page 58: ...connect disconnect a cable with the power on Doing so may damage the Video Communication System For safety do not connect the 100BASE TX 10BASE T connector to a network that applies an excess voltage via the 100BASE TX 10BASE T connector Notes on Connections System Connection via a LAN PCS TL50 Video Communication System Power cord to 100BASE TX 10BASE T to LAN to DC19 5V PCS AC19V8 AC adaptor to ...

Page 59: ... While the upgrading message appears on the display be sure not to turn off the Video Communication System Doing so may cause malfunction of the system System Connection via an ISDN Notes PCS TL50 Video Communication System Power cord to DC19 5V to a wall outlet supplied not supplied Interface cable supplied with the ISDN unit to ISDN UNIT to TERMINAL to ISDN 1 6 ISDN Unit to ISDN 1 3 ISDN modular...

Page 60: ...e page 23 Remove the rear cover of the Video Communication System and connect video equipment For removing the rear cover see page 23 Connecting to a Computer Connecting to Video Equipment Video Communication System PCS TL50 to AUDIO IN RGB to RGB IN Audio connecting cord not supplied D sub 15 pin cable not supplied to audio output to RGB output Computer Video Communication System PCS TL50 to AUDI...

Page 61: ... side of the system For the adjustments see Adjusting the Picture Quality on page 16 To display the picture from the computer or video equipment during videoconference If you receive a call when you are viewing the picture from the computer or video equipment on the display the system automatically enters the Picture in Picture mode and the picture of the remote party is displayed as a window pict...

Page 62: ... the computer or video equipment is displayed on the left main picture and the picture of the videoconference is displayed on the right sub picture To change the remote picture of videoconference to the local picture Press the FAR NEAR button on the Remote Commander and change the Display setting Far or Near in the Display Control menu The Picture in Picture and Picture and Picture features are no...

Page 63: ...T Recommendation 64 Kbps 96 Kbps MPEG4 Audio when using LAN 24 Kbps 32 Kbps G 722 1 compliant with ITU T Recommendation when using LAN 16 Kbps G 728 compliant with ITU T Recommendation 8 Kbps G 729 compliant with ITU T Recommendation when using LAN 5 3 Kbps 6 3 Kbps G 723 1 compliant with ITU T Recommendation when using LAN Network Multiplexing Video audio data Frame format H 221 compliant with IT...

Page 64: ...perating temperature 5 C to 35 C 41 F to 94 F Operating humidity 20 to 80 Storage temperature 20 C to 60 C 4 F to 140 F Storage humidity 20 to 80 no condensation Dimensions 528 445 110 mm w h d 20 7 8 17 5 8 4 3 8 inches not including the stand 528 445 265 mm w h d 20 7 8 17 5 8 10 1 2 inches including the stand Mass Approx 10 kg 22 lb 7 oz Supplied accessories Remote Commander PCS RTL50 1 Size AA...

Page 65: ...768 ISDN Unit optional Power requirements 19 5 V Power consumption 0 5 A Operating temperature 5 C to 35 C 41 F to 94 F Operating humidity 20 to 80 Storage temperature 20 C to 60 C 4 F to 140 F Storage humidity 20 to 80 no condensation Dimensions PCSA B768S 165 34 127 mm w h d 6 1 2 1 3 8 5 inches not including the projected parts PCS B768 165 34 127 mm w h d 6 1 2 1 3 8 5 inches not including the...

Page 66: ...x 4 g 0 1 oz Supplied accessories Serial Number seal 1 Operating Instructions 1 PCS 323M1 H 323 MCU Software optional Dimensions 50 2 8 21 5 mm w h d 2 1 8 7 8 inches Mass Approx 4 g 0 1 oz Supplied accessories Serial Number seal 1 Operating Instructions 1 Design and specifications are subject to change without notice ...

Page 67: ......

Page 68: ...Pour les utilisateurs en Europe Avertissement Il s agit d un produit Classe A Dans un environnement domestique cet appareil peut provoquer des interférences radio dans ce cas l utilisateur peut être amené à prendre des mesures appropriées Si des interférences se produisent contactez votre service après vente agréé Sony Voor de klanten in Nederland Dit apparaat bevat een vast ingebouwde batterij di...

Page 69: ...panneau d affichage LCD est fabriqué avec une technologie de haute précision des points noirs ou des points brillants de lumière rouge bleu ou vert peuvent apparaître en permanence sur l écran LCD Des bandes de couleur et un contraste irrégulier peuvent également apparaître lorsque vous visualisez à partir d angles spécifiques Il s agit d une propriété structurelle du panneau LCD Il ne s agit pas ...

Page 70: ...on de la ligne 17 Affichage de l aide 18 Composants du système 19 Composants du système de base 19 Equipement en option 20 Connexions du système 22 Utilisation des connecteurs 22 Remarques sur les connexions 23 Connexion système via un réseau LAN 23 Connexion système via un réseau RNIS 24 Utilisation comme écran d ordinateur ou moniteur vidéo 25 Raccordement à un ordinateur 25 Connexion à un équip...

Page 71: ...être s ouvre Elle affiche les fichiers contenus dans le CD ROM 2 Double cliquez sur le fichier PDF appelé Anglais Adobe Reader démarre et affiche la page de garde du Mode d emploi Cliquez sur un élément de la Table des matières pour y accéder Pour installer Adobe Reader 6 0 E Pour installer Adobe Reader 6 0 E sur votre ordinateur vous devez disposer du matériel et des logiciels suivants Un ordinat...

Page 72: ... alimentation 1 situé sur le côté droit du système Le voyant de l interrupteur s allume en vert et le système est mis sous tension 3 Vérifiez que l obturateur de la caméra est ouvert S il est fermé faites glisser le bouton de l obturateur situé en haut du système pour l ouvrir 4 Appuyez sur la touche VIDEO CONF de la télécommande pour afficher le menu de démarrage 1 Interrupteur d alimentation Pre...

Page 73: ...aide de la touche V v B ou b de la télécommande puis appuyez sur la touche ENTER Le menu Fonctionnement d appels One Touch s ouvre John IP 012 345 678 912 Composition détaillée Annuaire RNIS Appel ISDN 012345678912 Bob 2 3 4 5 6 1 Fonctionnement d appels One Touch Edition Annuler 1 2 3 4 5 6 7 8 9 0 CONNECT DISCONNECT HELP 1 6 5 4 3 2 ZOOM INPUT SELECT FAR NEAR RETURN PinP PandP VOLUME MENU BACK S...

Page 74: ...s chiffres Appuyez sur la touche ALPHA NUM alphabet chiffre pour sélectionner le mode d entrée des touches numériques IP Nom Edition de l annuaire Enregistrer Annuler LAN ENTER ENTER LAN Interface réseau 1024 Kbps Bande passante LAN Menu Edition de l annuaire Haut Bas Gauche Droite 1 2 3 4 5 6 7 8 9 0 CONNECT DISCONNECT HELP 1 6 5 4 3 2 ZOOM INPUT SELECT FAR NEAR RETURN PinP PandP VOLUME MENU BACK...

Page 75: ...t de la télécommande 4 Sélectionnez Bande passante LAN puis la bande passante que vous utilisez 5 Sélectionnez une image fixe à afficher dans la liste One Touch Dial 5 2 4 1 3 Nom RNIS Interface réseau Edition de l annuaire 384k Débit Enregistrer Annuler ISDN A 1 Entrez le nom d un correspondant 2 Sélectionnez Interface réseau puis RNIS dans le sous menu affiché 3 Sélectionnez la zone de texte du ...

Page 76: ...B ou b de la télécommande puis appuyez sur la touche ENTER Le menu Annuaire s ouvre Les éléments définis sont enregistrés dans l annuaire ainsi que dans la liste One Touch Dial du menu de démarrage IP 012 345 678 912 Composition détaillée Annuaire RNIS Appel ISDN 012345678912 Bob 3 4 5 6 1 John 2 Menu de démarrage ...

Page 77: ... l écran Lorsque le système se connecte au système distant le message Début de la conférence apparaît à l écran Vous pouvez maintenant commencer la vidéoconférence IP 012 345 678 912 Composition détaillée Annuaire RNIS Appel ISDN 012345678912 Bob 3 4 5 6 1 2 John T W 1 2 3 4 5 6 7 8 9 0 CONNECT DISCONNECT HELP 1 6 5 4 3 2 ZOOM INPUT SELECT FAR NEAR RETURN PinP PandP VOLUME MENU BACK SPACE CLEAR SY...

Page 78: ...de téléphone RNIS pour RNIS ou Téléphone du correspondant dans la zone de texte Sélectionnez la zone de texte à l aide de la touche V v B ou b de la télécommande puis appuyez sur la touche ENTER Entrez des chiffres à l aide des touches numériques de la télécommande 3 Sélectionnez Appel à l aide de la touche V v B ou b de la télécommande puis appuyez sur la touche ENTER Ou appuyez sur la touche CON...

Page 79: ...tré pour One Touch Dial Lorsque le système se connecte au système distant le message Début de la conférence apparaît à l écran Vous pouvez maintenant commencer la vidéoconférence Début de la conférence Image du site local Image du site distant ...

Page 80: ...télécommande Reportez vous au Mode d emploi pour régler le zoom et l angle de caméra de l image sur le site distant Réglage de l angle de caméra et du zoom IP 012 345 678 912 ISDN 012345678912 Bob John 2 3 4 5 6 1 Appuyez sur la touche PUSH ENTER de la télécommande pour régler l angle de prise de vue Annuaire RNIS Appel Composition détaillée T W HELP 1 6 5 4 3 2 ZOOM INPUT SELECT FAR NEAR RETURN E...

Page 81: ...U V v et OK situées à droite du système de communication vidéo 1 Appuyez sur la touche MENU situé sur le côté droit du système Le menu de la qualité image apparaît Réglage du volume Réglage de la qualité image T W HELP 1 6 5 4 3 2 ZOOM INPUT SELECT FAR NEAR RETURN ENTER PinP PandP VOLUME MENU BACK SPACE CLEAR SYMBOL ALPHA NUM WIDE MODE BACK LIGHT CAPTURE IMAGE MIC ON OFF DISPLAY SELECT PC VIDEO VI...

Page 82: ...élément sélectionné s affiche 3 Appuyez sur la touche V ou v située à droite du système pour régler la qualité image puis appuyez sur la touche OK 4 Appuyez sur la touche MENU pour quitter le menu Pour revenir à la qualité image par défaut Sélectionnez Reset l élément de réglage le plus bas puis appuyez sur la touche OK Picture 068 Back OK Exit MENU ...

Page 83: ...ndre l écran et passer au mode Veille apparaît Appuyez sur la touche B ou b pour sélectionner OK puis appuyez sur la touche ENTER Vous pouvez recevoir l appel d un correspondant en mode de veille Pour mettre le système hors tension Appuyez sur l interrupteur d alimentation 1 situé à droite du système pendant plus d une seconde pour mettre le système hors tension et mettez hors tension les autres é...

Page 84: ...yez sur la touche HELP de la télécommande Pour masquer le guide d aide appuyez de nouveau sur la touche HELP T W 1 2 3 4 5 6 7 8 9 0 CONNECT DISCONNECT HELP HELP 1 6 5 4 3 2 ZOOM INPUT SELECT FAR NEAR RETURN ENTER PinP PandP VOLUME MENU BACK SPACE CLEAR SYMBOL ALPHA NUM WIDE MODE BACK LIGHT CAPTURE IMAGE MIC ON OFF ABC DEF JKL GHI MNO TUV PQRS WXYZ DISPLAY SELECT PC VIDEO VIDEO CONF ...

Page 85: ...l élément de base du système de vidéoconférence Il est constitué des éléments suivants Composants du système de base Unité Description Système de communication vidéo PCS TL50 Comprend la caméra l écran le codec vidéo le codec audio l éliminateur d écho les interfaces réseau et le contrôleur système Télécommande PCS RTL50 Utilisée pour faire fonctionner le système de communication vidéo Adaptateur ...

Page 86: ...ité d utiliser jusqu à six lignes RNIS et jusqu à 12 canaux B Le PCSA B768S et le PCS B768 ont les mêmes fonctions Ce manuel utilise le PCSA B768S comme modèle représentatif Unité de solution de données PCSA DSB1S PCS DSB1 Ce périphérique permet de connecter facilement un ordinateur ou un projecteur pour une conférence de données Le PCSA DSB1S et le PCS DSB1 ont les mêmes fonctions Ce manuel utili...

Page 87: ...communication à distance Les microphones unidirectionnels captent une voix claire avec un bruit de fond minimum En outre le haut parleur omnidirectionnel diffuse le son de manière uniforme dans toutes les directions Logiciel MCU PCS 323M1 H 323 Permet d organiser des vidéoconférences multipoint via une connexion LAN Logiciel MCU PCS 320M1 H 320 Permet d organiser des vidéoconférences multipoint vi...

Page 88: ...z les connecteurs retirez le capot arrière connectez les câbles aux connecteurs et remettez en place le capot arrière Pour retirer le capot arrière Tirez le capot arrière vers vous Pour remettre en place le capot arrière Alignez les quatre projections sur le capot arrière avec les trous situés à l arrière de l unité et appuyez sur le capot Utilisation des connecteurs Connecteurs ...

Page 89: ...nfonçant bien Ne branchez débranchez pas de câble lorsque le système est sous tension Ceci risque d endommager le système de communication vidéo Pour des raisons de sécurité veillez à ne pas raccorder le connecteur 100BASE TX 10BASE T à un réseau susceptible d envoyer une tension excessive Remarques sur les connexions Connexion système via un réseau LAN Système de communication vidéo PCS TL50 3 1 ...

Page 90: ...sque le message de mise à niveau apparaît à l écran ne mettez pas le système de communication vidéo hors tension Risque de provoquer un mauvais fonctionnement du système Connexion système via un réseau RNIS Remarques Système de communication vidéo PCS TL50 3 2 vers DC19 5V 4 vers une prise murale fourni non fourni Câble d interface fourni avec l unité RNIS 1 vers ISDN UNIT vers TERMINAL vers ISDN ...

Page 91: ...on vidéo en tant qu écran d ordinateur ou moniteur vidéo Retirez le capot arrière du système de communication vidéo et connectez un ordinateur Pour retirer le capot arrière reportez vous à la page 22 Raccordement à un ordinateur Système de communication vidéo PCS TL50 vers AUDIO IN RGB vers RGB IN Câble de connexion audio non fourni Câble D sub à 15 broches non fourni vers la sortie audio vers sor...

Page 92: ...ez le volume du son en appuyant sur les touches VOLUME de la télécommande 3 Réglez la qualité image à l aide des touches MENU V v et OK situées sur le côté droit du système Pour les réglages reportez vous à Réglage de la qualité image à la page 15 Connexion à un équipement vidéo Affichage de l image à partir de l ordinateur ou de l équipement vidéo Système de communication vidéo PCS TL50 vers AUDI...

Page 93: ...ement de la fenêtre de la vidéoconférence Appuyez sur la touche PinP de la télécommande Pour afficher l image de la vidéoconférence uniquement Appuyez sur la touche VIDEO CONF de la télécommande Appuyez de nouveau sur la touche PC VIDEO pour afficher l image de l ordinateur ou de l équipement vidéo uniquement Image du site distant Image de l ordinateur ou de l équipement vidéo T W 1 2 3 4 5 6 7 8 ...

Page 94: ...éo est affichée à gauche image principale et l image de la vidéoconférence est affichée à droite image secondaire Pour remplacer l image distante de la vidéoconférence par image locale Appuyez sur la touche FAR NEAR de la télécommande et modifiez le paramètre Plein écran Distante ou Locale dans le menu Plein écran Contrôle caméra Les fonctions Image dans Image et Image et Image ne sont pas disponi...

Page 95: ...tion d un LAN 24 Kbps 32 Kbps G0 722 1 recommandation ITU T en cas d utilisation d un LAN 16 Kbps G 728 recommandation ITU T 8 Kbps G 729 recommandation ITU T en cas d utilisation d un LAN 5 3 Kbps 6 3 Kbps G 723 1 recommandation ITU T en cas d utilisation d un LAN Réseau Multiplexage Vidéo audio données Format d images H 221 conforme à la recommandation ITU T Interface LAN standard 64 Kbps à 1920...

Page 96: ...9 5 V Consommation 7 7 A Température d utilisation 5 C à 35 C 41 F à 94 F Humidité de fonctionnement 20 à 80 Température de stockage 20 C à 60 C 4 F à 140 F Humidité de stockage 20 à 80 sans condensation Dimensions 528 445 110 mm l h p 20 7 8 17 5 8 4 3 8 pouces support non compris 528 445 265 mm l h p 20 7 8 17 5 8 10 1 2 pouces support non compris Poids 10 kg 22 lb 7 oz environ Accessoires fourn...

Page 97: ...mprises Masse PCSA B384S Environ 400 g 14 oz PCS B384 Environ 400 g 14 oz Accessoires fournis Câble d interface 5 m 16 4 pieds 1 Mode d emploi 1 Certificat de garantie 1 Unité RNIS PCSA B768S PCS B768 en option Alimentation 19 5 V Consommation 0 5 A Température d utilisation 5 C à 35 C 41 F à 94 F Humidité de fonctionnement 20 à 80 Température de stockage 20 C à 60 C 4 F à 140 F Humidité de stocka...

Page 98: ...Câble d interface 8 m 26 2 pieds 1 Mode d emploi 1 Certificat de garantie 1 Logiciel MCU PCS 320M1 H 320 en option Dimensions 50 2 8 21 5 mm l h p 2 1 8 7 8 pouces Poids 4 g 0 1 oz environ Accessoires fournis Etiquette de numéro de série 1 Mode d emploi 1 Logiciel MCU PCS 323M1 H 323 en option Dimensions 50 2 8 21 5 mm l h p 2 1 8 7 8 pouces Poids 4 g 0 1 oz environ Accessoires fournis Etiquette d...

Page 99: ......

Page 100: ...BATTERIEN DIE GELTENDEN BESTIMMUNGEN Für Kunden in Europa Warnung Dies ist eine Einrichtung welche die Funk Entstörung nach Klasse A besitzt Diese Einrichtung kann im Wohnbereich Funkstörungen verursachen in diesem Fall kann vom Betreiber verlangt werden angemessene Maßnahmen durchzuführen und dafür anfzukommen Für Kunden in Deutschland Dieses Gerät ist nur für den Gebrauch in Gewerbe und Leichtin...

Page 101: ...werfen Sie nur entladene Batterien in die Sammelboxen beim Handel oder den Kommunen Entladen sind Batterien in der Regel dann wenn das Gerät abschaltet und signalisiert Batterie leer oder nach längerer Gebrauchsdauer der Batterien nicht mehr einwandfrei funktioniert Um sicherzugehen kleben Sie die Batteriepole z B mit einem Klebestreifen ab oder geben Sie die Batterien einzeln in einen Plastikbeut...

Page 102: ...Betriebs Dies ist keine Fehlfunktion LCD Anzeige Obgleich die LCD Anzeige unter Einsatz von Hochpräzisionstechnologie gefertigt wurde können konstante schwarze oder helle rote blaue oder grüne Lichtpunkte auf dem LCD Bildschirm erscheinen Außerdem können bei der Betrachtung aus einem bestimmten Winkel Farbstreifen und unregelmäßige Helligkeit auf dem Bildschirm auftreten Dies ist eine spezifische ...

Page 103: ... der Bildqualität 16 Beenden der Konferenz 18 Trennen der Verbindung 18 Aufrufen der Hilfe 19 Systemanschlüsse 20 Verwenden der Anschlüsse 20 Hinweise zu Anschlüssen 21 Systemanschluss über ein LAN 21 Systemanschluss über ISDN 22 Verwendung als Computerbildschirm oder Videomonitor 23 Anschließen an einen Computer 23 Anschließen an ein Videogerät 24 Anzeigen des Bilds vom Computer oder Videogerät 2...

Page 104: ...inem Fenster die Dateien auf der CD ROM angezeigt 2 Doppelklicken Sie auf die PDF Datei mit dem Namen Deutsch Adobe Reader startet und zeigt die Titelseite der Bedienungsanleitung an Klicken Sie auf einen Eintrag im Inhaltsverzeichnis um zur entsprechenden Seite zu springen Adobe Reader 6 0 E installieren Um Adobe Reader 6 0 E auf Ihrem Computer zu installieren benötigen Sie folgende Hardware und ...

Page 105: ... Schalter 1 rechts am System Die Anzeige des Schalters leuchtet grün und das System ist nun eingeschaltet 3 Überprüfen Sie ob der Verschluss der Kamera geöffnet ist Falls er geschlossen ist öffnen Sie ihn indem Sie die Verschlusstaste oben am System zur Seite schieben 4 Drücken Sie die Taste VIDEO CONF auf der Fernbedienung um das Menü Start aufzurufen 1 Ein Aus Schalter Press the PUSH ENTER butto...

Page 106: ... Fernbedienung die Option One Touch Anwahl um einen Fernteilnehmer zu registrieren und drücken Sie dann die Taste ENTER Das Menü One Touch Anwahl wird geöffnet John IP 012 345 678 912 Detail Anwahl Telefonbuch ISDN Wählen ISDN 012345678912 Bob 2 3 4 5 6 1 One Touch Anwahl Bearbeiten Abbrechen 1 2 3 4 5 6 7 8 9 0 CONNECT DISCONNECT HELP 1 6 5 4 3 2 ZOOM INPUT SELECT FAR NEAR RETURN PinP PandP VOLUM...

Page 107: ... der Taste Punkt eingeben Drücken Sie die Taste ALPHA NUM Buchstaben Ziffern um den Eingabemodus der Zifferntasten zu wählen ENTER ENTER IP Index List Edit Speichern Abbrechen LAN LAN Netz Schnittstelle 1024 Kbps LAN Bandbreite Menü List Edit Auf Ab Links Rechts 1 2 3 4 5 6 7 8 9 0 CONNECT DISCONNECT HELP 1 6 5 4 3 2 ZOOM INPUT SELECT FAR NEAR RETURN PinP PandP VOLUME MENU BACK SPACE CLEAR SYMBOL ...

Page 108: ...ählen Sie LAN Bandbreite und wählen Sie dann die verwendete Bandbreite 5 Wählen Sie ein Standbild für die Anzeige in der One Touch Anwahlliste 5 2 4 1 3 Index A ISDN Netz Schnittstelle List Edit 6B 384K Anzahl der Kanäle Speichern Abbrechen ISDN 1 Geben Sie den Namen des Fernteilnehmers ein 2 Wählen Sie Line I F und dann ISDN im angezeigten Untermenü 3 Wählen Sie das Textfeld Telefonnummer und geb...

Page 109: ...ption Speichern und drücken Sie dann die Taste ENTER Das Menü Telefonbuch wird angezeigt Die vorgenommenen Einstellungen werden gleichzeitig im Telefonbuch und in der One Touch Anwahlliste des Startmenüs gespeichert IP 012 345 678 912 Detail Anwahl Telefonbuch ISDN Wählen ISDN 012345678912 Bob 3 4 5 6 1 John 2 Menü Start ...

Page 110: ... Anzeige Wenn das System mit dem entfernten System verbunden ist erscheint die Meldung Konferenz beginnt in der Anzeige Nun kann die Videokonferenz beginnen IP 012 345 678 912 Detail Anwahl Telefonbuch ISDN Wählen ISDN 012345678912 Bob 3 4 5 6 1 2 John T W 1 2 3 4 5 6 7 8 9 0 CONNECT DISCONNECT HELP 1 6 5 4 3 2 ZOOM INPUT SELECT FAR NEAR RETURN PinP PandP VOLUME MENU BACK SPACE CLEAR SYMBOL ALPHA ...

Page 111: ...er ISDN 2 Geben Sie die IP Adresse für LAN oder die ISDN Telefonnummer für ISDN oder Telefon des Fernteilnehmers in dem Textfeld ein Wählen Sie mit der Taste V v B oder b auf der Fernbedienung das Textfeld aus und drücken Sie dann die Taste ENTER Geben Sie die Ziffern mit Hilfe der Zifferntasten auf der Fernbedienung ein 3 Wählen Sie mit der Taste V v B oder b auf der Fernbedienung Wählen aus und ...

Page 112: ...ritt 2 eingegebene IP Adresse oder ISDN Telefonnummer Anwahl LAN oder Anwahl ISDN wird angezeigt Wenn das System mit dem entfernten System verbunden ist erscheint die Meldung Konferenz beginnt in der Anzeige Nun kann die Videokonferenz beginnen Konferenz beginnt Bild des lokalen Teilnehmers Bild des Fernteilnehmers ...

Page 113: ...einstellen Angaben zum Einstellen des Zoomfaktors und des Kamerawinkels am entfernten Ort finden Sie in der Bedienungsanleitung Einstellen von Zoom und Kamerawinkel IP 012 345 678 912 Detail Anwahl Telefonbuch ISDN Wählen ISDN 012345678912 Bob John 2 3 4 5 6 1 Zur Einstellung der Kameraposition drücken Sie die Taste PUSH ENTER auf der Fernbedienung T W HELP 1 6 5 4 3 2 ZOOM INPUT SELECT FAR NEAR R...

Page 114: ...Anzeige über die Tasten MENU V v und OK an der rechten Seite des Videokommunikationssystems einstellen 1 Drücken Sie die Taste MENU auf der rechten Seite des Systems Das Menü Bildqualität erscheint Einstellen der Lautstärke Einstellen der Bildqualität T W HELP 1 6 5 4 3 2 ZOOM INPUT SELECT FAR NEAR RETURN ENTER PinP PandP VOLUME MENU BACK SPACE CLEAR SYMBOL ALPHA NUM WIDE MODE BACK LIGHT CAPTURE I...

Page 115: ...ion erscheint 3 Zum Einstellen der Bildqualität drücken Sie die Taste V oder v an der rechten Seite des Systems und drücken Sie dann die Taste OK 4 Drücken Sie die Taste MENU um das Menü zu verlassen So stellen Sie die standardmäßig vorgegebene Bildqualität wieder ein Wählen Sie Reset die unterste Einstelloption und drücken Sie dann die Taste OK Picture 068 Back OK Exit MENU ...

Page 116: ...Meldung Anzeige ausschalten und in den Bereitschaftsmodus schalten Drücken Sie zur Wahl von OK die Tasten B oder b und drücken Sie anschließend die Taste ENTER Im Standby Modus können Sie Anrufe von Fernteilnehmern entgegennehmen Ausschalten des Geräts Drücken Sie zum Ausschalten die Taste 1 Ein Aus Schalter auf der rechten Seite des Geräts länger als eine Sekunde und schalten Sie alle anderen für...

Page 117: ...onen auf dem Display aufzurufen Drücken Sie die Taste HELP erneut um die Hilfe auszublenden T W 1 2 3 4 5 6 7 8 9 0 CONNECT DISCONNECT HELP HELP 1 6 5 4 3 2 ZOOM INPUT SELECT FAR NEAR RETURN ENTER PinP PandP VOLUME MENU BACK SPACE CLEAR SYMBOL ALPHA NUM WIDE MODE BACK LIGHT CAPTURE IMAGE MIC ON OFF ABC DEF JKL GHI MNO TUV PQRS WXYZ DISPLAY SELECT PC VIDEO VIDEO CONF ...

Page 118: ... nehmen Sie die hintere Abdeckung ab schließen Sie die Kabel an und bringen Sie die hintere Abdeckung wieder an Hintere Abdeckung abnehmen Ziehen Sie die Abdeckung wie gezeigt ab Hintere Abdeckung anbringen Halten Sie die Abdeckung so dass die vier Nasen der Abdeckung mit den entsprechenden Öffnungen des Geräts fluchten und drücken Sie die Abdeckung an Verwenden der Anschlüsse Anschlüsse ...

Page 119: ...nur wenn das Gerät ausgeschaltet ist Andernfalls könnte das Videokommunikationssystem beschädigt werden Verwenden Sie den Anschluss 100BASE TX 10BASE T aus Sicherheitsgründen nicht in einem Netzwerk in dem der Anschluss 100BASE TX 10BASE T Überspannung ausgesetzt ist Hinweise zu Anschlüssen Systemanschluss über ein LAN PCS TL50 Video kommunikationssystem 3 1 an 100BASE TX 10BASE T an LAN 2 an DC 1...

Page 120: ...dung auf dem Bildschirm angezeigt wird sicherstellen dass das Videokommunikationssystem nicht ausgeschaltet wird Andernfalls kann dies zu einer Fehlfunktion des Systems führen Systemanschluss über ISDN Hinweise PCS TL50 Video kommunikationssystem 3 2 an DC 19 5 V 4 an Netzsteckdose gehört zum Lieferumfang gehört nicht zum Lieferumfang Schnittstellenkabel gehört zum Lieferumfang des ISDN Geräts 1 a...

Page 121: ...ildschirm oder Videomonitor verwenden Entfernen Sie die hintere Abdeckung des Videokommunikationssystems und schließen Sie einen Computer an Zum Entfernen der hinteren Abdeckung siehe Seite 20 Anschließen an einen Computer Videokommunikationssystem PCS TL50 an AUDIO IN RGB an RGB IN Audiokabel gehört nicht zum Lieferumfang 15 poliges D Sub Kabel gehört nicht zum Lieferumfang an Audioausgang an RGB...

Page 122: ...hlossen ist 2 Stellen Sie die Lautstärke durch Drücken der Tasten VOLUME auf der Fernbedienung ein 3 Stellen Sie die Bildqualität mit den Tasten MENU V v und OK auf der rechten Seite des Systems ein Zu diesen Einstellungen siehe Einstellen der Bildqualität auf Seite 16 Anschließen an ein Videogerät Anzeigen des Bilds vom Computer oder Videogerät Videokommunikationssystem PCS TL50 an AUDIO IN L R a...

Page 123: ...ld Fensters der Videokonferenz Drücken Sie die Taste PinP auf der Fernbedienung So rufen Sie nur das Bild der Videokonferenz auf Drücken Sie die Taste VIDEO CONF auf der Fernbedienung Drücken Sie die Taste PC VIDEO erneut um nur das Bild des Computers bzw Videogeräts aufzurufen Bild des Fernteilnehmers Bild vom Computer oder Videogerät T W 1 2 3 4 5 6 7 8 9 0 CONNECT DISCONNECT HELP 1 6 5 4 3 2 ZO...

Page 124: ...erscheint links Hauptbild und das Bild der Videokonferenz rechts Nebenbild So wechseln Sie von dem fernen Bild der Videokonferenz zum lokalen Bild Drücken Sie die Taste FAR NEAR auf der Fernbedienung und ändern Sie die Einstellung Fern oder Lokal unter Display im Menü Display Steuerung Das Bild im Bild Fenster sowie die zugehörigen Funktionen sind nicht verfügbar während keine Kommunikation mit de...

Page 125: ...entspricht der ITU T Empfehlung 64 Kbps 96 Kbps MPEG4 Audio bei Verwendung von LAN 24 Kbps 32 Kbps G0 722 1 entspricht der ITU T Empfehlung bei Verwendung von LAN 16 Kbps G 728 entspricht der ITU T Empfehlung 8 Kbps G 729 entspricht der ITU T Empfehlung bei Verwendung von LAN 5 3 Kbps 6 3 Kbps G 723 1 entspricht der ITU T Empfehlung bei Verwendung von LAN Netzwerk Multiplexverfahren Video Audio Da...

Page 126: ...er Lautsprecher 3 W 2 Mikrofon Frequenzbereich 15 kHz Direktionale Eigenschaften Richtmikrofon Allgemeines Betriebsspannung 19 5 V Stromverbrauch 7 7 A Betriebstemperatur 5 C bis 35 C Luftfeuchtigkeit bei Betrieb 20 bis 80 Lagertemperatur 20 C bis 60 C Luftfeuchtigkeit bei Lagerung 20 bis 80 nicht kondensierend Abmessungen 528 445 110 mm B H T ohne Fußteil 528 445 265 mm B H T mit Fußteil Gewicht ...

Page 127: ...sspannung 19 5 V Stromverbrauch 0 5 A Betriebstemperatur 5 C bis 35 C Luftfeuchtigkeit bei Betrieb 20 bis 80 Lagertemperatur 20 C bis 60 C Luftfeuchtigkeit bei Lagerung 20 bis 80 nicht kondensierend Abmessungen PCSA B768S 165 34 127 mm B H T ohne hervorstehende Teile PCS B768 165 34 127 mm B H T ohne hervorstehende Teile Gewicht PCSA B768S ca 400 g PCS B768 ca 400 g Mitgeliefertes Zubehör Schnitts...

Page 128: ...S 323M1 H 323 MCU Software optional Abmessungen 50 2 8 21 5 mm B H T Gewicht ca 4 g Mitgeliefertes Zubehör Aufkleber mit Seriennummer 1 Bedienungsanleitung 1 Design und Spezifikationen können ohne Vorankündigung geändert werden ...

Page 129: ......

Page 130: ...RECTO DESECHE LAS PILAS USADAS SIGUIENDO LAS INSTRUCCIONES Para los clientes de Europa Advertencia Éste es un producto de classe A En un ambiente doméstico este producto puede causar interferencias radioeléctricas en cuyo caso el usuario puede tener que tomar las medidas adecuadas En el caso de producirse interferencias póngase en contacto con el centro de servicio técnico Sony autorizado más cerc...

Page 131: ...es una avería Panel de la pantalla LCD Aunque el panel de la pantalla LCD está fabricado con tecnología de alta precisión es posible que aparezcan puntos negros o puntos brillantes de luz rojo azul o verde en la pantalla LCD También pueden aparecer rayas de color y brillo irregular cuando se visualiza desde determinados ángulos Se trata de una propiedad estructural del panel LCD y no se trata de n...

Page 132: ...onferencia 17 Desconexión de la línea 17 Visualización de la ayuda 18 Conexiones del sistema 19 Uso de los conectores 19 Observaciones sobre las conexiones 20 Conexión del sistema a través de una LAN 20 Conexión del sistema a través de una RDSI 21 Uso como pantalla de ordenador o monitor de vídeo 22 Conexión a un ordenador 22 Conexión al equipo de vídeo 23 Visualización de la imagen del ordenador ...

Page 133: ...ntes se abrirá una ventana que muestra los archivos del CD ROM 2 Haga doble clic en el archivo PDF denominado Español Se iniciará Adobe Reader y a continuación aparecerá la portada de las Instrucciones de funcionamiento Al hacer clic en un elemento del Índice se pasa directamente a la página correspondiente Instalación de Adobe Reader 6 0 E Para instalar Adobe Reader 6 0 E en su ordenador necesita...

Page 134: ...echo del sistema El indicador del interruptor se ilumina en verde y el sistema se enciende 3 Asegúrese de que la cortinilla de la cámara esté abierta Si está cerrada deslice el interruptor de la cortinilla de la parte superior del sistema para abrirla 4 Pulse el botón VIDEO CONF del mando a distancia para visualizar el menú de inicio Interruptor 1 alimentación Press the PUSH ENTER button on the Re...

Page 135: ...e un toque para registrar una ubicación remota y a continuación pulse el botón ENTER Se abre el menú Funcionamiento de marcación de un toque John IP 012 345 678 912 Marcación detallada Listin telefónico RDSI Marcar ISDN 012345678912 Bob 2 3 4 5 6 1 Funcionamiento de marcación de un toque Editar Cancelar 1 2 3 4 5 6 7 8 9 0 CONNECT DISCONNECT HELP 1 6 5 4 3 2 ZOOM INPUT SELECT FAR NEAR RETURN PinP ...

Page 136: ...cir los números Pulse el botón ALPHA NUM caracteres alfabéticos numéricos para seleccionar el modo de introducción de los botones numéricos ENTER ENTER IP Index Edición Guardar Cancelar LAN LAN Línea I F 1024 Kbps Ancho de banda LAN Menú Edición Arriba Abajo Iz quierda Derecha 1 2 3 4 5 6 7 8 9 0 CONNECT DISCONNECT HELP 1 6 5 4 3 2 ZOOM INPUT SELECT FAR NEAR RETURN PinP PandP VOLUME MENU BACK SPAC...

Page 137: ...o de banda LAN y a continuación seleccione el ancho de banda que utiliza 5 Seleccione una imagen fija para visualizarla en la lista de marcación de un toque 5 2 4 1 3 Index A RDSI Línea I F Edición 6B 384K Número de líneas Guardar Cancelar ISDN 1 Introduzca el nombre de una ubicación remota 2 Seleccione Línea I F y a continuación seleccione RDSI en el menú secundario visualizado 3 Seleccione el cu...

Page 138: ...ardar y a continuación pulse el botón ENTER Aparece el menú Listín telefónico Los elementos ajustados se registran en el Listín telefónico al mismo tiempo que en la lista de marcación de un toque del menú de inicio IP 012 345 678 912 Marcación detallada Listin telefónico RDSI Marcar ISDN 012345678912 Bob 3 4 5 6 1 John 2 Menú de inicio ...

Page 139: ...rcación RDSI Cuando el sistema se conecta a la ubicación remota aparece el mensaje Se inicia la conferencia en la pantalla Ya se puede iniciar la videoconferencia IP 012 345 678 912 Marcación detallada Listin telefónico RDSI Marcar ISDN 012345678912 Bob 3 4 5 6 1 2 John T W 1 2 3 4 5 6 7 8 9 0 CONNECT DISCONNECT HELP 1 6 5 4 3 2 ZOOM INPUT SELECT FAR NEAR RETURN PinP PandP VOLUME MENU BACK SPACE C...

Page 140: ...ón remota mediante una RDSI 2 Introduzca en el cuadro de texto la dirección IP para LAN o el número de teléfono RDSI para RDSI o Teléfono de la ubicación remota Pulse el botón V v B o b del mando a distancia para seleccionar el cuadro de texto y a continuación pulse el botón ENTER Introduzca los números mediante los botones numéricos del mando a distancia 3 Pulse el botón V v B o b del mando a dis...

Page 141: ...ero de teléfono RDSI introducido en el paso 2 En la pantalla aparece Marcación LAN o Marcación RDSI Cuando el sistema se conecta a la ubicación remota aparece el mensaje Se inicia la conferencia en la pantalla Ya se puede iniciar la videoconferencia Se inicia la conferencia Imagen en la ubicación local Imagen en la ubicación remota ...

Page 142: ...ucciones de funcionamiento para ajustar el zoom y el ángulo de la cámara de la imagen de la ubicación remota Ajuste del zoom y del ángulo de la cámara IP 012 345 678 912 ISDN 012345678912 Bob John 2 3 4 5 6 1 Pulse el botón PUSH ENTER del mando a distancia para ajustar el ángulo de la cámara Marcación detallada Listin telefónico RDSI Marcar T W HELP 1 6 5 4 3 2 ZOOM INPUT SELECT FAR NEAR RETURN EN...

Page 143: ... botones MENU V v y OK del lado derecho del Sistema de comunicaciones de vídeo 1 Pulse el botón MENU del lado derecho del sistema Aparece el menú Calidad de imagen Ajuste del volumen Ajuste de la calidad de la imagen T W HELP 1 6 5 4 3 2 ZOOM INPUT SELECT FAR NEAR RETURN ENTER PinP PandP VOLUME MENU BACK SPACE CLEAR SYMBOL ALPHA NUM WIDE MODE BACK LIGHT CAPTURE IMAGE MIC ON OFF DISPLAY SELECT PC V...

Page 144: ...elemento seleccionado 3 Pulse el botón V o v del lado derecho del sistema para ajustar la calidad de la imagen y a continuación pulse el botón OK 4 Pulse el botón MENU para salir del menú Restablecimiento de la calidad de imagen predeterminada Seleccione Restablecer la opción de ajuste inferior y a continuación pulse el botón OK Picture 068 Back OK Exit MENU ...

Page 145: ...cerá el mensaje Apagar la pantalla y pasar a modo de espera Pulse el botón B o b para seleccionar OK y a continuación pulse el botón ENTER El modo de espera permite recibir llamadas desde una ubicación remota Desconexión de la alimentación Pulse el interruptor 1 alimentación del lado derecho del sistema durante más de un segundo para apagar el sistema y apagar los demás equipos utilizados para la ...

Page 146: ...a indicaciones para la mayoría de las operaciones Para ocultar la ayuda pulse de nuevo el botón HELP T W 1 2 3 4 5 6 7 8 9 0 CONNECT DISCONNECT HELP HELP 1 6 5 4 3 2 ZOOM INPUT SELECT FAR NEAR RETURN ENTER PinP PandP VOLUME MENU BACK SPACE CLEAR SYMBOL ALPHA NUM WIDE MODE BACK LIGHT CAPTURE IMAGE MIC ON OFF ABC DEF JKL GHI MNO TUV PQRS WXYZ DISPLAY SELECT PC VIDEO VIDEO CONF ...

Page 147: ...utilizan los conectores retire la cubierta trasera enchufe los cables a los conectores y vuelva a colocar la cubierta trasera Extracción de la cubierta trasera Tire de la cubierta trasera hacia usted Colocación de la cubierta trasera Alinee los cuatro salientes de la cubierta trasera con los orificios de la parte posterior de la unidad y empuje la cubierta Uso de los conectores Conectores ...

Page 148: ... desenchufe ningún cable con la alimentación conectada Si lo hace se puede dañar el Sistema de comunicaciones de vídeo Por motivos de seguridad no conecte el conector 100BASE TX 10BASE T a una red que suministre una tensión excesiva a través del conector 100BASE TX 10BASE T Observaciones sobre las conexiones Conexión del sistema a través de una LAN Sistema de comunicaciones de vídeo PCS TL50 3 1 a...

Page 149: ...ece en pantalla el mensaje de actualización asegúrese de no apagar el Sistema de comunicaciones de vídeo Si lo hace se pueden producir fallos de funcionamiento Conexión del sistema a través de una RDSI Notas Sistema de comunicaciones de vídeo PCS TL50 3 2 a DC 19 5 V 4 a la toma de pared suministrado no suministrado Cable de interfaz suministrado con la unidad RDSI 1 a ISDN UNIT a TERMINAL a ISDN ...

Page 150: ... vídeo como pantalla de ordenador o monitor de vídeo Retire la cubierta trasera del Sistema de comunicaciones de vídeo y conecte un ordenador Para retirar la cubierta trasera remítase a la página 19 Conexión a un ordenador Sistema de comunicaciones de vídeo PCS TL50 a AUDIO IN RGB a RGB IN Cable de conexión de audio no suministrado Cable D sub de 15 terminales no suministrado a salida de audio a s...

Page 151: ...umen del sonido mediante los botones VOLUME del mando a distancia 3 Ajuste la calidad de la imagen utilizando los botones MENU V v y OK del lado derecho del sistema Para los ajustes remítase a Ajuste de la calidad de la imagen en la página 15 Conexión al equipo de vídeo Visualización de la imagen del ordenador o del equipo de vídeo Sistema de comunicaciones de vídeo PCS TL50 a AUDIO IN L R a VIDEO...

Page 152: ...ón de la ventana de imagen de la videoconferencia Pulse el botón PinP del mando a distancia Visualización de la imagen de la videoconferencia solamente Pulse el botón VIDEO CONF en el mando a distancia Pulse de nuevo el botón PC VIDEO para visualizar solamente la imagen del ordenador o del equipo de vídeo Imagen en la ubicación remota Imagen del ordenador o del equipo de vídeo T W 1 2 3 4 5 6 7 8 ...

Page 153: ...o de vídeo aparece a la izquierda imagen principal y la imagen de la videoconferencia aparece a la derecha imagen secundaria Cambio de la imagen remota de la videoconferencia a la imagen local Pulse el botón FAR NEAR del mando a distancia y cambie el ajuste de Imagen Remoto o Local en el menú Visualización Las funciones de imagen superpuesta e imágenes contiguas no están disponibles mientras no ha...

Page 154: ...cumple con las recomendaciones de la ITU T 64 Kbps 96 Kbps Audio MPEG4 si se utiliza LAN 24 Kbps 32 Kbps G 722 1 que cumple las recomendaciones de la ITU T si se utiliza LAN 16 Kbps G 728 que cumple con las recomendaciones de la ITU T 8 Kbps G 729 que cumple con las recomendaciones de la ITU T si se utiliza LAN 5 3 Kbps 6 3 Kbps G 723 1 que cumple las recomendaciones de la ITU T si se utiliza LAN ...

Page 155: ...frecuencia 15 kHz Característica direccional Direccional con ángulo cerrado Generales Alimentación eléctrica 19 5 V Consumo de energía 7 7 A Temperatura de funcionamiento 5 a 35 C 41 a 94 F Humedad de funcionamiento 20 a 80 Temperatura de almacenamiento 20 a 60 C 4 a 140 F Humedad de almacenamiento 20 a 80 sin condensación Dimensiones 528 445 110 mm an al prf 20 7 8 17 5 8 4 3 8 pulgadas sin inclu...

Page 156: ... prf 6 1 2 1 3 8 5 pulgadas excluyendo las partes que sobresalen Peso PCSA B384S Aprox 400 g 14 oz PCS B384 Aprox 400 g 14 oz Accesorios suministrados Cable de interfaz 5 m 16 4 pies 1 Manual de instrucciones 1 Folleto de garantía 1 Unidad RDSI PCSA B768S PCS B768 opcional Alimentación eléctrica 19 5 V Consumo de energía 0 5 A Temperatura de funcionamiento 5 a 35 C 41 a 94 F Humedad de funcionamie...

Page 157: ...terfaz 8 m 26 2 pies 1 Manual de instrucciones 1 Folleto de garantía 1 Software MCU PCS 320M1 H 320 opcional Dimensiones 50 2 8 21 5 mm an al prof 2 1 8 7 8 pulgadas Peso Aprox 4 g 0 1 oz Accesorios suministrados Precinto de número de serie 1 Manual de instrucciones 1 Software MCU PCS 323M1 H 323 opcional Dimensiones 50 2 8 21 5 mm an al prof 2 1 8 7 8 pulgadas Peso Aprox 4 g 0 1 oz Accesorios sum...

Page 158: ... CAUSARE ESPLOSIONI SMALTIRE LE BATTERIE USATE CONFORMEMENTE ALLE ISTRUZIONI Per gli acquirenti in Europa Attenzione Questo è un apparecchio di classe A e come tale in un ambiente domestico può causare interferenze radio È necessario quindi che l utilizzatore adotti gli accorgimenti adequati Nel caso si verifichino interferenze rivolgersi ad un centro assistenza Sony autorizzato Voor de klanten in...

Page 159: ...ifetto di funzionamento Display LCD Sebbene il display LCD si basi su una tecnologia ad alta precisione è possibile che compaiano dei punti neri o che dei punti luminosi rossi blu o verdi compaiano sullo schermo LCD in modo costante É anche possibile che compaiano strisce e zone a luminosità irregolare quando si adottano angolazioni di visualizzazione specifiche Si tratta di una proprietà struttur...

Page 160: ...5 Conclusione della conferenza 17 Disconnessione della linea 17 Visualizzazione della funzione Help 18 Connessioni del sistema 19 Utilizzo dei connettori 19 Note sulle connessioni 20 Configurazione del sistema tramite LAN 20 Connessione del sistema tramite ISDN 21 Utilizzo come schermo di computer o monitor video 22 Collegamento a un computer 22 Collegamento a un apparecchio video 23 Visualizzazio...

Page 161: ...alizzata una finestra che mostra i file contenuti nel CD ROM 2 Fare doppio clic sul file PDF denominato Italiano Viene avviato Adobe Reader e viene quindi visualizzato il frontespizio delle Istruzioni per l uso Facendo clic su una voce nel Sommario è possibile passare alla pagina corrispondente Per installare Adobe Reader 6 0 E Per installare Adobe Reader 6 0 E nel computer è necessario soddisfare...

Page 162: ...rruttore alimentazione 1 sul lato destro del sistema La spia dell interruttore si illumina in verde e il sistema si accende 3 Verificare che l otturatore della videocamera sia aperto In caso contrario far scorrere l interruttore dell otturatore sulla parte superiore del sistema per aprirlo 4 Premere il tasto VIDEO CONF del telecomando per visualizzare il menu di lancio 1 Interruttore alimentazione...

Page 163: ...One Touch Dial per registrare un partecipante remoto quindi premere il tasto ENTER Si apre il menu Funzionamento composizione One Touch Dial John IP 012 345 678 912 Composizione dettagliata Rubrica telefonica ISDN Componi ISDN 012345678912 Bob 2 3 4 5 6 1 Funzionamento composizione One Touch Modifica Annulla 1 2 3 4 5 6 7 8 9 0 CONNECT DISCONNECT HELP 1 6 5 4 3 2 ZOOM INPUT SELECT FAR NEAR RETURN ...

Page 164: ...mettere le cifre Premere il tasto ALPHA NUM alfa numerico per selezionare la modalità di immissione dei tasti numerici ENTER ENTER IP Indice Modifica elenco Salva Annulla LAN LAN Linea I F 1024 Kbps Larghezza di banda Menu Modifica elenco Su Giù Sinistra Destra 1 2 3 4 5 6 7 8 9 0 CONNECT DISCONNECT HELP 1 6 5 4 3 2 ZOOM INPUT SELECT FAR NEAR RETURN PinP PandP VOLUME MENU BACK SPACE CLEAR SYMBOL A...

Page 165: ...ando 4 Selezionare Larghezza di banda LAN quindi selezionare la larghezza di banda in uso 5 Selezionare un fermo immagine da visualizzare nell elenco One Touch Dial 5 2 4 1 3 Indice A ISDN Linea I F Modifica elenco 6B 384K Numero di linee Salva Annulla ISDN 1 Immettere il nome di un partecipante remoto 2 Selezionare Linea I F quindi selezionare ISDN dal sottomenu visualizzato 3 Selezionare la case...

Page 166: ...re il tasto ENTER Viene visualizzato il menu Rubrica telefonica Le voci di impostazione vengono registrate nella Rubrica telefonica nel momento in cui vengono registrate nell elenco One Touch Dial del menu di lancio IP 012 345 678 912 Composizione dettagliata ISDN ISDN 012345678912 Bob 3 4 5 6 1 John 2 Rubrica telefonica Componi Menu di lancio ...

Page 167: ...orso LAN o Chiamata in corso ISDN Quando il sistema si collega al sistema remoto viene visualizzato il messaggio La riunione ha inizio La videoconferenza può avere inizio IP 012 345 678 912 Composizione dettagliata Rubrica telefonica ISDN Componi ISDN 012345678912 Bob 3 4 5 6 1 2 John T W 1 2 3 4 5 6 7 8 9 0 CONNECT DISCONNECT HELP 1 6 5 4 3 2 ZOOM INPUT SELECT FAR NEAR RETURN PinP PandP VOLUME ME...

Page 168: ...artecipante remoto tramite connessione ISDN 2 Inserire l Indirizzo IP per LAN o il numero di telefono ISDN per ISDN o per la telefonata del partecipante remoto nella casella di testo Premere il tasto V v B o b del telecomando per selezionare la casella di testo quindi premere il tasto ENTER Inserire i numeri utilizzando i tasti numerici del telecomando 3 Premere il tasto V v B o b del telecomando ...

Page 169: ...ro di telefono ISDN inserito al punto 2 Chiamata in corso LAN o Chiamata in corso ISDN viene visualizzato sullo schermo Quando il sistema si collega al sistema remoto viene visualizzato il messaggio La riunione ha inizio La videoconferenza può avere inizio La riunione ha inizio Immagine del sito locale Immagine del sito remoto ...

Page 170: ...golazione dello zoom e dell angolatura della videocamera dell immagine del sito remoto consultare le Istruzioni per l uso Regolazione dello zoom e dell angolatura della videocamera IP 012 345 678 912 Composizione dettagliata ISDN ISDN 012345678912 Bob John 2 3 4 5 6 1 Premere il tasto PUSH ENTER sul telecomando per regolare l angolatura della videocamera Rubrica telefonica Componi T W HELP 1 6 5 4...

Page 171: ... i tasti MENU V v e OK sul lato destro del sistema di comunicazione video 1 Premere il tasto MENU sul lato destro del sistema Viene visualizzato il menu Qualità dell immagine Regolazione del volume Regolazione della qualità dell immagine T W HELP 1 6 5 4 3 2 ZOOM INPUT SELECT FAR NEAR RETURN ENTER PinP PandP VOLUME MENU BACK SPACE CLEAR SYMBOL ALPHA NUM WIDE MODE BACK LIGHT CAPTURE IMAGE MIC ON OF...

Page 172: ...i regolazione della voce selezionata 3 Premere il tasto V o v sul lato destro del sistema per regolare la qualità dell immagine quindi premere il tasto OK 4 Premere il tasto MENU per uscire dal menu Ripristino della qualità dell immagine predefinita Selezionare Reimpostare la voce di impostazione più in basso quindi premere il tasto OK Picture 068 Back OK Exit MENU ...

Page 173: ...messaggio Spegnere il display e impostare su modalità standby Premere il pulsante B o b per selezionare OK quindi premere il pulsante ENTER Nella modalità standby è possibile ricevere una chiamata da un partecipante remoto Per spegnere il sistema Per spegnere il sistema e disattivare i dispositivi utilizzati per la videoconferenza premere l interruttore alimentazione 1 sul lato destro del sistema ...

Page 174: ...sulla maggior parte delle operazioni visualizzate sullo schermo Per nascondere la guida premere nuovamente il tasto HELP T W 1 2 3 4 5 6 7 8 9 0 CONNECT DISCONNECT HELP HELP 1 6 5 4 3 2 ZOOM INPUT SELECT FAR NEAR RETURN ENTER PinP PandP VOLUME MENU BACK SPACE CLEAR SYMBOL ALPHA NUM WIDE MODE BACK LIGHT CAPTURE IMAGE MIC ON OFF ABC DEF JKL GHI MNO TUV PQRS WXYZ DISPLAY SELECT PC VIDEO VIDEO CONF ...

Page 175: ... Quando si utilizzano i connettori rimuovere il coperchio posteriore collegare i cavi ai connettori e rimontare il coperchio Per rimuovere il coperchio posteriore Tirare il coperchio posteriore Per rimontare il coperchio posteriore Allineare le quattro sporgenze sul coperchio posteriore ai fori sulla parte posteriore dell unità e premere il coperchio Utilizzo dei connettori Connettori ...

Page 176: ...are scollegare un cavo con l alimentazione inserita L inosservanza di questa istruzione potrebbe danneggiare il sistema di comunicazione video Ai fini della sicurezza non collegare il connettore 100BASE TX 10BASE T ad una rete che applica tensione eccessiva tramite il connettore 100BASE TX 10BASE T Note sulle connessioni Configurazione del sistema tramite LAN Sistema di comunicazione video PCS TL5...

Page 177: ...SDN Durante la visualizzazione del messaggio di aggiornamento in corso non spegnere il sistema di comunicazione video L inosservanza di questa istruzione potrebbe causare il malfunzionamento del sistema Connessione del sistema tramite ISDN Note Sistema di comunicazione video PCS TL50 3 2 a DC19 5V 4 a una presa di corrente in dotazione non in dotazione Cavo di interfaccia fornito con l unità ISDN ...

Page 178: ...ne video come schermo del computer o monitor video Rimuovere il coperchio posteriore del sistema di comunicazione video e collegare un computer Per la rimozione del coperchio posteriore vedere pagina 19 Collegamento a un computer Sistema di comunicazione video PCS TL50 a AUDIO IN RGB a RGB IN Cavo di collegamento audio non fornito Cavo a 15 piedini D sub non fornito all uscita audio all uscita RGB...

Page 179: ...Regolare il volume dell audio mediante i tasti VOLUME del telecomando 3 Regolare la qualità dell immagine utilizzando i tasti MENU V v e OK sul lato destro del sistema Per le regolazioni vedere Regolazione della qualità dell immagine a pagina 15 Collegamento a un apparecchio video Visualizzazione dell immagine dal computer o dall apparecchio video Sistema di comunicazione video PCS TL50 a AUDIO IN...

Page 180: ...la posizione dell immagine della videoconferenza nella finestra Premere il tasto PinP del telecomando Visualizzazione della sola immagine della videoconferenza Premere il tasto VIDEO CONF del telecomando Premere nuovamente il tasto PC VIDEO per visualizzare solo l immagine dal computer o dall apparecchio video Immagine del sito remoto Immagine dal computer o apparecchio video T W 1 2 3 4 5 6 7 8 9...

Page 181: ...video viene visualizzata sulla sinistra immagine principale e l immagine della videoconferenza sulla destra immagine secondaria Scambio tra l immagine remota della videoconferenza e l immagine locale Premere il tasto FAR NEAR sul telecomando e modificare l impostazione Immagine Remota o Locale nel menu Controllo Immagine Le funzioni Immagine nell immagine e Immagine e Immagine non sono disponibili...

Page 182: ... 722 conforme alle raccomandazioni ITU T 64 Kbps 96 Kbps MPEG4 Audio quando si usa una rete LAN 24 Kbps 32 Kbps G 722 1 raccomandazione ITU T quando si usa una rete LAN 16 Kbps G 728 conforme alle raccomandazioni ITU T 8 Kbps G 729 conforme alle raccomandazioni ITU T quando si usa una rete LAN 5 3 Kbps 6 3 Kbps G 723 1 raccomandazione ITU T quando si usa una rete LAN Rete Trasmissione in multiplex...

Page 183: ...fusore Diffusore 3 W 2 Microfono Campo di frequenza 15 kHz Caratteristiche direzionali Direzionale ad angolo diretto Dati generali Alimentazione 19 5 V Consumo di corrente 7 7 A Temperatura di utilizzo Da 5 C a 35 C Umidità durante l esercizio da 20 a 80 Temperatura di deposito Da 20 C a 60 C Umidità di deposito da 20 a 80 senza condensa Dimensioni 528 445 110 mm l a p supporto escluso 528 445 265...

Page 184: ...zionale Alimentazione 19 5 V Consumo di corrente 0 5 A Temperatura di utilizzo Da 5 C a 35 C Umidità durante l esercizio da 20 a 80 Temperatura di deposito Da 20 C a 60 C Umidità di deposito da 20 a 80 senza condensa Dimensioni PCSA B768S 165 34 127 mm l a p escluse le parti sporgenti PCS B768 165 34 127 mm l a p escluse le parti sporgenti Peso PCSA B768S circa 400 g PCS B768 circa 400 g Accessori...

Page 185: ...oftware MCU PCS 323M1 H 323 opzionale Dimensioni 50 2 8 21 5 mm l a p Peso Circa 4 g Accessori in dotazione Sigillo numero di serie 1 Istruzioni per l uso 1 Design e caratteristiche tecniche sono soggetti a modifiche senza preavviso ...

Page 186: ...N 端口注意事项 为了安全起见 请不要将 LAN 端口连接 到任何有过电压的网络设备 安装电池 遥控器附带 2 节 R6 AA 型 电池 为了避免爆炸的危险 请使用 R6 AA 型 锰电池或碱性电池 注意 如果更换的电池型号不正确 就会有爆 炸的危险 请按照说明处理废旧电池 对于欧洲用户 警告 此为 A 类产品 当在居住环境中使用 时 此产品可能会产生电磁干扰 在此 情况下 用户会被要求采取某些适当的 对策 在有干扰存在的情况下 请联系离您最 近的 Sony 维修机构 如果您将本机弃置不用 请联系临近的 Sony 维修中心 其中内置的电池必须 作为化学废弃品处理 本说明书主要介绍使用 ISDN 线路召开 电视会议的方法 但也包括对非 ISDN 线路的说明 如果您使用 ISDN 线路 请咨询 Sony 经销商以获取更多信息 在某些地区 可能不提供 ISDN 服务 ...

Page 187: ... 或者画面会变 暗 这并不是系统出现了故障 当温 度升高时此现象就会有所改善 当连续显示静止图像时屏幕中会出现 重影现象 经过一段时间后此现象会 消失 系统在使用过程中其屏幕和机壳温度 会升高 这并非故障 LCD 显示屏幕 尽管 LCD 显示屏幕是采用高精密技术 生产的 但屏幕上还是时常会出现黑 点或亮点 红色 蓝色或绿色 当 您从特定角度观看屏幕时 屏幕中还 会出现彩色条纹和亮度不均匀的情况 这是 LCD 屏幕的固有特性 而并非 故障 内置扬声器 扬声器会产生磁场 为了避免数据被损 坏 请不要将磁带和磁盘放在扬声器附 近 清洁 在清洁之前 请将电源线从 AC 电源插 座中拔出 LCD 表面带有一种特殊涂层 要清除 屏幕表面的灰尘 请使用一块干燥的 软布轻轻擦拭 请不要使用挥发性溶剂 如酒精 苯 或稀释剂 它们会损坏屏幕表面的涂 层 当您使用化学清洁布时 请仔细阅读 附带的使用说明 请不要...

Page 188: ...11 呼叫未注册单键拨号的对方 12 调整图像和声音 14 调整摄像机焦距和角度 14 调整图像质量 15 调整音量 15 结束会议 17 断开线路 17 显示帮助 18 系统连接 19 使用接口 19 连接说明 20 通过 LAN 的系统连接 20 通过 ISDN 的系统连接 21 用作计算机显示器 视频监视器 22 连接到计算机 22 连接到视频设备 22 显示来自计算机或视频设备的 图像 23 规格说明 25 附带的 CD ROM 中含有对此系统进行 了详细介绍的操作说明 请仔细阅读 操作说明和操作指南 ...

Page 189: ...dobe Reader 将启动 然后会显示操 作说明书的封面 单击目录中的项目跳转到相应的页面 要安装 Adobe Reader 6 0 E 要在您的计算机上安装 Adobe Reader 6 0 E 您需要下列硬件及软件 带有 Intel Pentium 或 100 兼容处理 器的计算机 Microsoft Windows 98 SE Windows Millennium Windows NT 4 0 Service Pack 5 或 Windows 2000 和更高操作系统 不小于 64 MB 的 RAM 不少于 70 MB 的可用磁盘空间 您可以从以下网站免费获得最新版本的 Adobe Reader 北美版 http www adobe com products acrobat readstep html 欧洲版 http www adobe com products acrobat...

Page 190: ...CS 6 打开系统 打开系统 在打开系统之前 请确定系统已经正确完成连接 有关连接系统的详情 请参见第 19 页的 系统连接 1 打开召开电视会议的设备 2 按系统右侧的 1 电源 开关 此开关的指示灯变为绿灯 同时系统打开 3 确保会议电视终端摄像机的挡板是打开的 如果它是关闭的 推系统顶部的挡板开关以打开挡板 4 按遥控器上的 VIDEO CONF 按钮以显示启动菜单 1 电源 开关 ...

Page 191: ...7CS 注册对方进行单键拨号 注册对方进行单键拨号 您可以在启动菜单的单键拨号列表中注册对方 然后就可以使用遥控器 上的单键拨号按钮进行拨号 本节内容向您介绍如何在启动菜单中注册用于单键拨号的对方 1 使用遥控器上的 V v B 或 b 按钮选择单键拨号以注册对方 然 后按 ENTER 按钮 将打开 单键拨号操作 菜单 启动菜单 单键拨号操作 菜单 上 下 左 右 单键拨号列表 ...

Page 192: ...M 字母 数字 按钮选择数字按钮的输入模式 编辑列表 菜单 上 下 左 右 1 2 3 4 5 6 7 8 9 0 CONNECT DISCONNECT HELP 1 6 5 4 3 2 ZOOM INPUT SELECT FAR NEAR RETURN PinP PandP VOLUME MENU BACK SPACE CLEAR SYMBOL ALPHA NUM WIDE MODE BACK LIGHT CAPTURE IMAGE MIC ON OFF ABC DEF JKL GHI MNO TUV PQRS WXYZ T W DISPLAY SELECT PC VIDEO VIDEO CONF ENTER ENTER ENTER 数字按钮 按钮 ALPHA NUM 按钮 上 下 左 右 ...

Page 193: ... 线路种类 然后从显示的子菜单中 选择 LAN 3 选择 IP 文本框 然后使用遥控器上的数字按 钮和 点号 按钮输入对方的 IP 地 址 4 选择 局域网带宽 然后选择您使用的带宽 5 在 单键拨号 列表中选择要显示的静止 图片 5 2 4 1 3 1 输入对方的名称 2 选择 线路种类 然后从显示的子菜单中 选择 ISDN 3 选择电话号码文本框 然后使用遥控器上的 数字按钮输入对方的电话号码 4 选择 使用线路数 然后选择拨叫对方时 使用的通道数量 5 在 单键拨号 列表中选择要显示的静止 图片 5 2 4 1 3 ...

Page 194: ...CS 10 注册对方进行单键拨号 4 使用遥控器上的 V v B 或 b 按钮选择 保存 然后按 ENTER 按钮 屏幕中出现 地址簿 菜单 启动菜单单键拨号列表中的设置项目同时也注册到地址簿中 启动菜单 ...

Page 195: ...11CS 使用单键拨号呼叫对方 使用单键拨号呼叫对方 当对方已注册到单键拨号列表中时 您可以使用单键拨号功能进行 呼叫 1 按对方已注册的单键拨号按钮 1 到 6 系统开始拨打所选的对方 显示屏幕上将出现 正在拨号 LAN 或 正在拨号 ISDN 当系统连接到远端系统时 显示屏幕上出现消息 开始会议 准备就绪 现在可以开始召开电视会议 单键拨号列表 单键拨号按钮 本地图像 远端图像 ...

Page 196: ...通过 LAN 连接到对方的会议电视终端 电话 通过 ISDN 连接到对方的 ISDN 电话 用来召开电话会议 ISDN 通过 ISDN 连接到对方的会议电视终端 2 在文本框中输入对方的 IP 地址 用于 LAN 或 ISDN 电话号码 用于 ISDN 或 电话 按遥控器上的 V v B 或 b 按钮选择文本框 然后按 ENTER 按钮 使用遥控器上的数字按钮输入数字 3 按遥控器上的 V v B 或 b 按钮选择 拨号 然后按 ENTER 按 钮 或者按遥控器上的 CONNECT DISCONNECT 按钮 此系统开始拨打步骤 2 中输入的 IP 地址或 ISDN 电话号码 显示屏幕上 将出现 正在拨号 LAN 或 正在拨号 ISDN 线路种类 拨号 文本框 上 下 左 右 ...

Page 197: ...13CS 呼叫未注册单键拨号的对方 当系统连接到远端系统时 显示屏幕上出现消息 开始会议 准备就绪 现在可以开始召开电视会议 本地图像 远端图像 ...

Page 198: ...您可以使用 ZOOM T W 和遥控器上的 V v B b 按钮调整本地图像的角 度和缩放图像 请参见操作说明调整缩放和远端图像的摄像机角度 调整摄像机焦距和角度 T W HELP 1 6 5 4 3 2 ZOOM INPUT SELECT FAR NEAR RETURN ENTER PinP PandP VOLUME MENU BACK SPACE CLEAR SYMBOL ALPHA NUM WIDE MODE BACK LIGHT CAPTURE IMAGE MIC ON OFF DISPLAY SELECT PC VIDEO VIDEO CONF ZOOM ENTER ENTER T W 未通讯时 通讯时 远端图像 本地图像 调整角度 放大 缩小 放大图像 缩小图像 上 下 左 右 ...

Page 199: ...侧的 MENU 按钮 此时出现 图像质量 菜单 调整音量 调整图像质量 T W HELP 1 6 5 4 3 2 ZOOM INPUT SELECT FAR NEAR RETURN ENTER PinP PandP VOLUME MENU BACK SPACE CLEAR SYMBOL ALPHA NUM WIDE MODE BACK LIGHT CAPTURE IMAGE MIC ON OFF DISPLAY SELECT PC VIDEO VIDEO CONF VOLUME MIC ON OFF 增加音量 减小音量 关闭本地的声音 Mode Standard Picture 068 Brightness 050 BackLight 100 Reset down Select OK Exit MENU Quality MENU V v OK 右侧 ...

Page 200: ...CS 16 调整图像和声音 2 按 V 或 v 按钮选择设置项目 然后按 OK 按钮 此时出现所选项目的调整菜单 3 按系统右侧的 V 或 v 按钮调整图像质量 然后按 OK 按钮 4 按 MENU 按钮退出菜单 恢复到默认的图像质量 选择最下面的设置项目 重置 然后按 OK 按钮 Picture 068 Back OK Exit MENU ...

Page 201: ... 按钮 显示屏幕上将显示消息 是否切断连接 2 按遥控器上的 B 或 b 按钮选择 OK 然后按 ENTER 按钮或按 CONNECT DISCONNECT 按钮 线路断开并恢复启动菜单 将系统设置为待机模式 按遥控器上的 1 按钮 此时屏幕中出现 关闭显示并设定到待机模 式 按 B 或 b 按钮选择 OK 然后按 ENTER 按钮 您可以在待机状态下接收来自对方的呼叫 要关闭电源 按系统右侧的 1 电源 开关并持续至少 1 秒钟关闭系统 并关闭其 它电视会议所使用的设备 断开线路 ...

Page 202: ...ELP 按钮 T W 1 2 3 4 5 6 7 8 9 0 CONNECT DISCONNECT HELP HELP 1 6 5 4 3 2 ZOOM INPUT SELECT FAR NEAR RETURN ENTER PinP PandP VOLUME MENU BACK SPACE CLEAR SYMBOL ALPHA NUM WIDE MODE BACK LIGHT CAPTURE IMAGE MIC ON OFF ABC DEF JKL GHI MNO TUV PQRS WXYZ DISPLAY SELECT PC VIDEO VIDEO CONF ...

Page 203: ...19CS 系统连接 系统连接 本节内容介绍了典型的系统连接 接口位于后盖里面 当您使用接口时 请取下后盖 将电缆连接到接口 然后装上后盖 取下后盖 将后盖朝您所在的方向拉 装上后盖 将后盖上的四个凸钉与设备背面的四个孔对齐 然后按压后盖 使用接口 接口 ...

Page 204: ...交流适配器或 电源线 安全插入交流适配器的 AC 插头和 DC 插头并确保插入到位 在电源打开时不要连接 拔下电缆 否则会损坏会议电视终端 考虑到安全性 请不要将 100BASE TX 10BASE T 接口与电压超过额定值的 网络连接 连接说明 通过 LAN 的系统连接 PCS TL50 会议 电视终端 电源线 1 到 100BASE TX 10BASE T 到 LAN 2 到 DC19 5V PCS AC19V8 交流适配器 4 到墙上插座 附带 不附带 UTP 电缆 5 类直缆 3 视按顺序连接 1 到 4 ...

Page 205: ...模块时 会议电视终端可能会升级 ISDN 模块的 软件 当屏幕中显示升级信息时 请不要关闭会议电视终端 否则会导致系 统出现故障 通过 ISDN 的系统连接 注意 PCS TL50 会议 电视终端 电源线 2 到 DC19 5V 4 到墙上插座 附带 不附带 接口电缆 随 ISDN 模块附带 1 到 ISDN UNIT 到 TERMINAL 到 ISDN 1 6 ISDN 模块 到 ISDN 1 3 ISDN 模块化 电缆 PCSA B384S PCSA B768S PCS AC19V8 交流适配器 视按顺序连接 1 到 4 3 ...

Page 206: ...器 取下会议电视终端的后盖 将其连接到计算机 有关如何取下后盖的详情 请参见第 19 页 取下会议电视终端的后盖 将其连接到视频设备 有关如何取下后盖的详情 请参见第 19 页 连接到计算机 连接到视频设备 PCS TL50 会议电视终端 到 AUDIO IN RGB 到 RGB IN 音频连接电缆 不附带 15 芯 D 型电缆 不附带 到音频输出 到 RGB 输出 计算机 PCS TL50 会议电视终端 到 AUDIO IN L R 到 VIDEO IN 视频连接电缆 不附带 音频连接电缆 不附带 到音频输出 到视频输出 录像机 DVD 播放器等 ...

Page 207: ...见第 15 页的 调整图像质量 在电视会议过程中显示来自计算机或视频设备的图像 如果您在屏幕上观看来自计算机或视频设备的图像时接收到一个呼叫 系统将自动进画中画模式 来自对方的图像将显示为窗口图像 显示来自计算机或视频设备的图像 T W 1 2 3 4 5 6 7 8 9 0 CONNECT DISCONNECT HELP 1 6 5 4 3 2 ZOOM INPUT SELECT FAR NEAR RETURN ENTER PinP PandP VOLUME MENU BACK SPACE CLEAR SYMBOL ALPHA NUM WIDE MODE BACK LIGHT CAPTURE IMAGE MIC ON OFF ABC DEF JKL GHI MNO TUV PQRS WXYZ DISPLAY SELECT PC VIDEO PC VIDEO VIDEO CONF 远端图像...

Page 208: ...辅图像 更改电视会议远端图像为本地图像 按遥控器上的 FAR NEAR 按钮并更改 显示控制 菜单中的 显示 设置 远端 或 本方 当没有与对方进行通讯时不能使用画中画和双画面功能 注意 T W 1 2 3 4 5 6 7 8 9 0 CONNECT DISCONNECT HELP 1 6 5 4 3 2 ZOOM INPUT SELECT FAR NEAR RETURN ENTER PinP PandP VOLUME MENU BACK SPACE CLEAR SYMBOL ALPHA NUM WIDE MODE BACK LIGHT CAPTURE IMAGE MIC ON OFF ABC DEF JKL GHI MNO TUV PQRS WXYZ DISPLAY SELECT PC VIDEO VIDEO CONF PinP 按钮 FAR NEAR 按钮 VIDEO CONF 按钮 ...

Page 209: ...符合 ITU T 建议 当使用 LAN 时 16 Kbps G 728 符合 ITU T 的建议 8 Kbps G 729 符合 ITU T 建 议 当使用 LAN 时 5 3 Kbps 6 3 Kbps G 723 1 符 合 ITU T 建议 当使用 LAN 时 网络 多路复用 视频 音频 数据 帧格式 H 221 符合 ITU T 的建议 接口 LAN 标准 64 Kbps 到 1920 Kbps ISDN BRI 可到 6 条线路 安装 PCSA B768S 时 可到 3 条线路 安装 PCSA B384S 时 数据传输速率 LSD 1 2 Kbps 4 8 Kbps 6 4 Kbps MLP 6 4 Kbps 24 Kbps 32 Kbps HMLP 62 4 Kbps 64 Kbps 128 Kbps 支持 LAN 协议 HTTP FTP Telnet RTP RTCP TCP...

Page 210: ...作温度 5 C 到 35 C 工作湿度 20 到 80 存放温度 20 C 到 60 C 存放湿度 存放湿度 20 到 80 无水汽冷凝 尺寸 81 49 165 毫米 宽 高 厚 重量 大约 800 克 PCS A1 外置麦克风 可选 带宽 13 kHz 方向特性 全向 尺寸 74 16 93 毫米 宽 高 厚 重量 大约 170 克 电源 插入式电源 PCS A300 麦克风 可选 带宽 13 kHz 方向特性 单向 尺寸 68 16 96 mm 毫米 宽 高 厚 重量 大约 200 克 电源 插入式电源 PCSA B384S PCS B384 ISDN 模块 可选 电源要求 19 5 V 能耗 0 3 A 工作温度 5 C 到 35 C 工作湿度 20 到 80 存放温度 20 C 到 60 C 存放湿度 20 到 80 无水汽冷凝 尺寸 PCSA B384S 165 34 127 ...

Page 211: ...寸 PCSA DSB1S 240 37 180 毫米 宽 高 厚 不含投影仪 组件 PCS DSB1 240 33 160 毫米 宽 高 厚 不含投影仪组件 重量 PCSA DSB1S 大约 1 1 千克 PCS DSB1 大约 850 克 随机附件 接口电缆 8 米 1 操作说明 1 质保书 1 PCS 320M1 H 320 MCU 软件 可选 尺寸 50 2 8 21 5 毫米 宽 高 厚 重量 大约 4 克 随机附件 序列号封条 1 操作说明 1 PCS 323M1 H 323 MCU 软件 可选 尺寸 50 2 8 21 5 毫米 宽 高 厚 重量 大约 4 克 随机附件 序列号封条 1 操作说明 1 设计和规格如有更改 恕不另行通知 ...

Page 212: ...motivos de segurança não conecte a porta LAN em nenhum dispositivo de rede que possa ter uma tensão excessiva Instalando baterias São fornecidas duas baterias R6 formato AA para o controle remoto Para evitar o risco de explosões use baterias alcalinas ou de manganês R6 formato AA ADVERTÊNCIA RISCO DE EXPLOSÃO SE A BATERIA FOR SUBSTITUÍDA POR UMA DO TIPO INCORRETO DESCARTE AS BATERIAS USADAS DE ACO...

Page 213: ...sendo utilizado Isso não é um funcionamento incorreto Painel do visor LCD Embora o painel do visor LCD seja feito com tecnologia de alta precisão podem aparecer pontos pretos ou brilhantes de luz vermelho azul ou verde constantes na tela LCD Faixas coloridas e brilho irregular também podem aparecer quando você exibe ângulos de visão específicos Essa é uma propriedade estrutural do painel LCD não s...

Page 214: ...m 15 Encerrando a Conferência 17 Desconectando a Linha 17 Exibindo a Ajuda 18 Conexões do Sistema 19 Usando os Conectores 19 Notas sobre conexões 20 Conexão do Sistema via LAN 20 Conexão do sistema via ISDN 21 Utilização como Tela de Computador ou Monitor de Vídeo 22 Conectando a um Computador 22 Conectando a um Equipamento de Vídeo 23 Exibindo a Imagem do Computador ou Equipamento de Vídeo 23 Car...

Page 215: ...intervalo será exibida uma janela que exibirá os arquivos existentes no CD ROM 2 Clique duas vezes no arquivo PDF com o nome English Inglês O Adobe Reader será iniciado e exibirá a página de Instruções de Operação Clicando em um item do Índice você irá para a página relevante Para instalar o Adobe Reader 6 0 E Para instalar o Adobe Reader 6 0 E em seu computador serão necessários os seguintes comp...

Page 216: ...o sistema O indicador do interruptor se acende na cor verde e o sistema é ligado 3 Certifique se de que o obturador da câmera esteja aberto Se ele estiver fechado deslize a chave do obturador na parte superior do sistema para abri lo 4 Pressione a tecla VIDEO CONF do controle remoto para exibir o menu do ativador 1 interruptor de alimentação Press the PUSH ENTER button on the Remote Commander to a...

Page 217: ...de Um Toque para registrar um local remoto e pressione a tecla ENTER O menu Operação de discagem de Um Toque será aberto John IP 012 345 678 912 Detalhar Discagem Lista Telefônica ISDN Discar ISDN 012345678912 Bob 2 3 4 5 6 1 Operação de discagem de Um Toque Editar Cancelar 1 2 3 4 5 6 7 8 9 0 CONNECT DISCONNECT HELP 1 6 5 4 3 2 ZOOM INPUT SELECT FAR NEAR RETURN PinP PandP VOLUME MENU BACK SPACE C...

Page 218: ...cla ALPHA NUM alfabética numérica para selecionar o modo de introdução das teclas numéricas ENTER ENTER IP Index Edição Salvar Cancelar LAN LAN Linha I F 1024 Kbps Largura de banda LAN Menu Edição Para cima Para baixo Es querda Direita 1 2 3 4 5 6 7 8 9 0 CONNECT DISCONNECT HELP 1 6 5 4 3 2 ZOOM INPUT SELECT FAR NEAR RETURN PinP PandP VOLUME MENU BACK SPACE CLEAR SYMBOL ALPHA NUM WIDE MODE BACK LI...

Page 219: ...to do controle remoto 4 Selecione Largura de banda LAN e a largura de banda utilizada 5 Selecione uma imagem estática a ser exibida na lista Discagem de Um Toque 5 2 4 1 3 Index A ISDN Linha I F Edição 6B 384K Número de linhas Salvar Cancelar ISDN 1 Introduza o nome do local remoto 2 Selecione Linha I F e ISDN no menu secundário exibido 3 Selecione a caixa de texto de número de telefone e introduz...

Page 220: ...nar Salvar e pressione a tecla ENTER O menu Lista Telefônica será aberto Os itens ajustados são registrados na Lista Telefônica ao mesmo tempo que a lista Discagem de Um Toque do menu do ativador IP 012 345 678 912 Detalhar Discagem Lista Telefônica ISDN ISDN 012345678912 Bob 3 4 5 6 1 John 2 Discar Menu do Ativador ...

Page 221: ...á no visor Quando o sistema conectar se com o sistema remoto a mensagem A reunião começa aparecerá no visor Você pode iniciar a videoconferência IP 012 345 678 912 Detalhar Discagem Lista Telefônica ISDN Discar ISDN 012345678912 Bob 3 4 5 6 1 2 John T W 1 2 3 4 5 6 7 8 9 0 CONNECT DISCONNECT HELP 1 6 5 4 3 2 ZOOM INPUT SELECT FAR NEAR RETURN PinP PandP VOLUME MENU BACK SPACE CLEAR SYMBOL ALPHA NUM...

Page 222: ...al remoto via ISDN 2 Insira o endereço IP no caso de LAN ou o número de telefone ISDN no caso de ISDN ou Telefone do local remoto na caixa de texto Pressione a tecla V v B ou b do controle remoto para selecionar a caixa de texto e pressione a tecla ENTER Insira numerais usando os botões numéricos do controle remoto 3 Pressione a tecla V v B ou b do controle remoto para selecionar Discar e pression...

Page 223: ...endereço IP ou número de telefone ISDN introduzido na etapa 2 Discagem LAN ou Discagem ISDN aparece na tela Quando o sistema conectar se com o sistema remoto a mensagem A reunião começa aparecerá no visor Você pode iniciar a videoconferência A reunião começa Imagem no ambiente local Imagem no local remoto ...

Page 224: ...e Operação para ajustar o zoom e o ângulo da câmera em relação à imagem do local remoto Ajustando o Ângulo da Câmera e o Zoom IP 012 345 678 912 Detalhar Discagem Lista Telefônica ISDN Discar ISDN 012345678912 Bob John 2 3 4 5 6 1 Pressione a tecla PUSH ENTER no controle remoto para ajustar o ângulo da câmera T W HELP 1 6 5 4 3 2 ZOOM INPUT SELECT FAR NEAR RETURN ENTER PinP PandP VOLUME MENU BACK ...

Page 225: ...K localizadas no lado direito do Sistema de Comunicação por Vídeo 1 Pressione a tecla MENU situada no lado direito do sistema O menu Qualidade de Imagem aparece Ajustando o Volume Ajustando a Qualidade de Imagem T W HELP 1 6 5 4 3 2 ZOOM INPUT SELECT FAR NEAR RETURN ENTER PinP PandP VOLUME MENU BACK SPACE CLEAR SYMBOL ALPHA NUM WIDE MODE BACK LIGHT CAPTURE IMAGE MIC ON OFF DISPLAY SELECT PC VIDEO ...

Page 226: ...tem selecionado será exibido 3 Pressione a tecla V ou v localizada no lado direito do sistema para selecionar a qualidade de imagem e pressione a tecla OK 4 Pressione a tecla MENU para sair do menu Para restaurar a qualidade de imagem padrão Selecione Reset o item de ajuste mais baixo e pressione a tecla OK Picture 068 Back OK Exit MENU ...

Page 227: ...gar a tela e ajustar para o Modo de espera Pressione a tecla B ou b para selecionar OK e a seguir pressione a tecla ENTER Você pode receber uma chamada de um local remoto em modo de espera Para desligar a alimentação Pressione o interruptor de alimentação 1 localizado no lado direito do sistema durante mais de um segundo para desligar o sistema e desligue os outros equipamentos usados para a video...

Page 228: ... operações na tela Para ocultar o guia de ajuda pressione novamente a tecla HELP T W 1 2 3 4 5 6 7 8 9 0 CONNECT DISCONNECT HELP HELP 1 6 5 4 3 2 ZOOM INPUT SELECT FAR NEAR RETURN ENTER PinP PandP VOLUME MENU BACK SPACE CLEAR SYMBOL ALPHA NUM WIDE MODE BACK LIGHT CAPTURE IMAGE MIC ON OFF ABC DEF JKL GHI MNO TUV PQRS WXYZ DISPLAY SELECT PC VIDEO VIDEO CONF ...

Page 229: ...ra Ao usar os conectores remova a tampa traseira conecte os cabos aos conectores e recoloque a tampa Para remover a tampa traseira Puxe a tampa traseira na sua direção Para recolocar a tampa traseira Alinhe as quatro projeções da tampa com os orifícios existentes na parte traseira da unidade e pressione a tampa Usando os Conectores Conectores ...

Page 230: ...enhum cabo com a alimentação ligada Isso pode danificar o Sistema de Comunicação por Vídeo Para sua segurança não conecte o conector 100BASE TX 10BASE T a uma rede que aplique uma voltagem excessiva via conector 100BASE TX 10BASE T Notas sobre conexões Conexão do Sistema via LAN Sistema de Comunicação por Vídeo PCS TL50 3 1 para 100BASE TX 10BASE T para LAN 2 para DC19 5V Adaptador de AC PCS AC19V...

Page 231: ...tualização estiver aparecendo na tela tenha o cuidado de não desligar o Sistema de Comunicação por Vídeo Caso contrário isso poderá causar mau funcionamento do sistema Conexão do sistema via ISDN Notas Sistema de Comunicação por Vídeo PCS TL50 3 2 para DC19 5V 4 para tomadade parede fornecido não fornecido Cabo de interface fornecido com a unidade ISDN 1 para ISDN UNIT para TERMINAL para ISDN 1 6 ...

Page 232: ...ação por Vídeo como tela de computador ou monitor de vídeo Remova a tampa traseira do Sistema de Comunicação por Vídeo e conecte um computador Para remover a tampa traseira consulte página 19 Conectando a um Computador Sistema de Comunicação por Vídeo PCS TL50 para AUDIO IN RGB para RGB IN Cabo de conexão de áudio não fornecido Cabo D sub de 15 pinos não fornecido para saída de áudio para saída RG...

Page 233: ...e pressionando as teclas VOLUME do controle remoto 3 Ajuste a qualidade de imagem usando as teclas MENU V v e OK situadas no lado direito do sistema Para obter informações sobre o ajuste consulte Ajustando a Qualidade de Imagem na página 15 Conectando a um Equipamento de Vídeo Exibindo a Imagem do Computador ou Equipamento de Vídeo Sistema de Comunicação por Vídeo PCS TL50 para AUDIO IN L R para V...

Page 234: ... da imagem na janela em uma videoconferência Pressione a tecla PinP do controle remoto Para exibir apenas a imagem da videoconferência Pressione a tecla VIDEO CONF do controle remoto Pressione novamente a tecla PC VIDEO para exibir apenas a imagem do computador ou equipamento de vídeo Imagem no local remoto Imagem do computador ou equipamento de vídeo T W 1 2 3 4 5 6 7 8 9 0 CONNECT DISCONNECT HEL...

Page 235: ...utador ou equipamento de vídeo é exibida à esquerda imagem principal e a imagem da videoconferência é exibida à direita imagem secundária Para mudar a imagem remota da videoconferência para a imagem local Pressione a tecla FAR NEAR do controle remoto e mude o ajuste de Imagem Remoto ou Local no menu Visualização O recurso Picture in Picture não estará disponível enquanto não houver comunicação com...

Page 236: ...T 48 Kbps 56 Kbps 64 Kbps G 722 compatível com a Recomendação ITU T 64 Kbps 96 Kbps MPEG4 Audio ao usar LAN 24 Kbps 32 Kbps G0 722 1 compatível com a Recomendação ITU T ao usar LAN 16 Kbps G 728 compatível com a Recomendação ITU T 8 Kbps G 729 compatível com a Recomendação ITU T ao usar LAN 5 3 Kbps 6 3 Kbps G 723 1 compatível com a Recomendação ITU T ao usar LAN Rede Multiplexação Vídeo áudio dad...

Page 237: ...de freqüência 15 kHz Característica direcional Direcional com ângulo fechado Geral Requisitos de energia 19 5 V Consumo de energia 7 7 A Temperatura de funcionamento 5 C a 35 C Umidade para o funcionamento 20 a 80 Temperatura de armazenamento 20 C a 60 C Umidade para o armazenamento 20 a 80 sem condensação Dimensões 528 445 110 mm l a p sem incluir o suporte 528 445 265 mm l a p sem incluir o supo...

Page 238: ... Consumo de energia 0 5 A Temperatura de funcionamento 5 C a 35 C Umidade para o funcionamento 20 a 80 Temperatura de armazenamento 20 C a 60 C Umidade para o armazenamento 20 a 80 sem condensação Dimensões PCSA B768S 165 34 127 mm l a p não incluindo as partes projetadas PCS B768 165 34 127 mm l a p não incluindo as partes projetadas Peso PCSA B768S Aprox 400 g PCS B768 Aprox 400 g Acessórios for...

Page 239: ...ftware MCU PCS 323M1 H 323 opcional Dimensões 50 2 8 21 5 mm l a p Peso Aprox 4 g Acessórios fornecidos Selo com Número de Série 1 Instruções de Operação 1 Projeto e características técnicas sujeitos a alteração sem prévia notificação ...

Page 240: ...Sony Corporation ...

Reviews: