Changing the Display Setting
21
Note
To set and save configurations other than above, the
optional calibration kit is required.
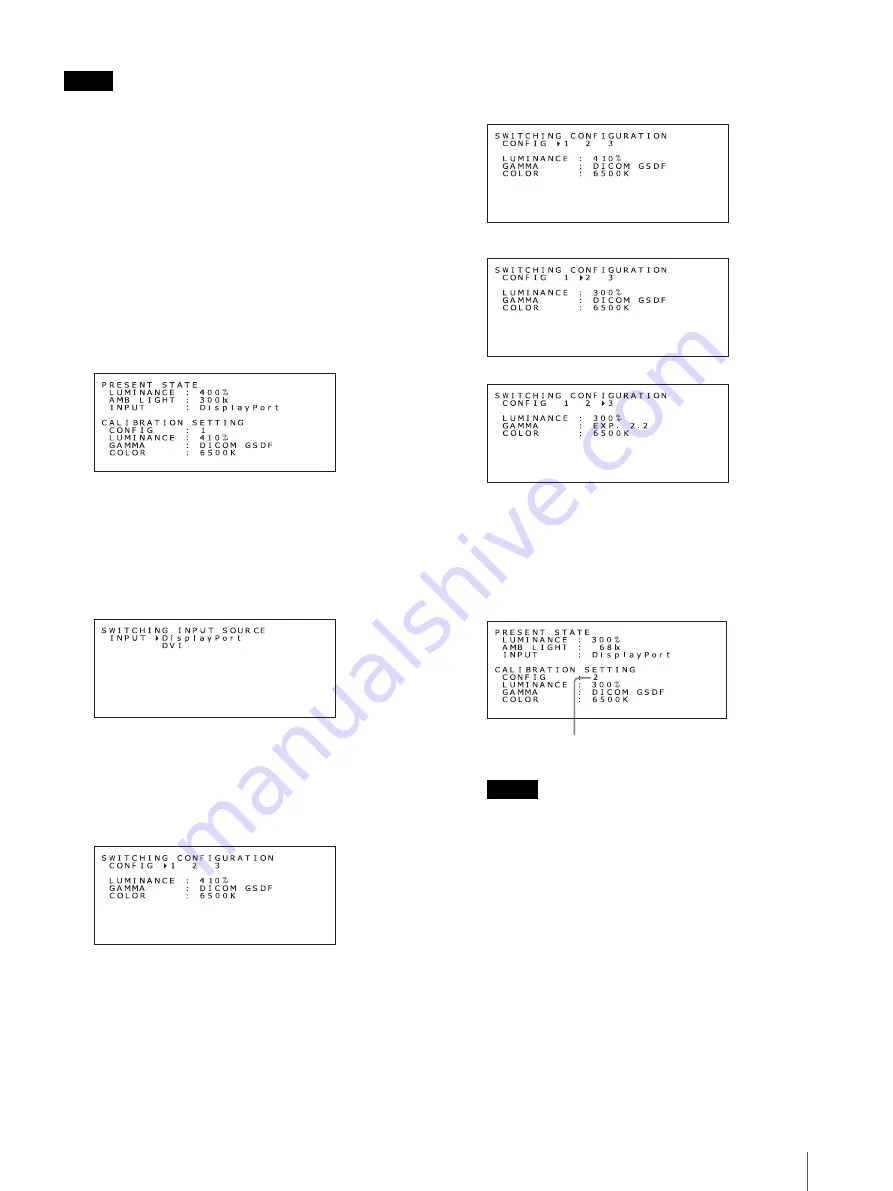
Switching configuration data
1
Press either the + or – button on the rear panel.
The information (or present operating state) screen
appears.
Pressing either button repeatedly changes the
display as follows: Information
t
present
operating state
t
display off.
The information screen automatically turns off
after about 15 seconds.
2
With the above screen displayed, press and hold the
+ and – buttons simultaneously for more than 2
seconds.
The SWITCHING INPUT SOURCE screen
appears.
3
Press the
1
(standby) switch on the front panel of
the unit.
The SWITCHING CONFIGURATION screen
appears.
Pressing the
1
(standby) switch repeatedly
switches between the SWITCHING INPUT
SOURCE and SWITCHING CONFIGURATION
screen.
4
Press either the + or – button to move the
B
(cursor), and select a configuration number.
r
r
5
Press and hold the + and – buttons simultaneously
for more than 2 seconds.
The information (present state) screen appears.
Example when “2” is selected:
Notes
• The configuration cannot be switched simply by
moving the
B
(cursor). In order to apply the
change, press and hold the + and – buttons for
more than 2 seconds after moving the cursor.
• The setting change will be canceled if there is no
menu operation for more than 15 seconds.
6
Press either the + or – button to close the
information screen and exit the setting.
Configuration number 2 is selected.
Summary of Contents for LMDDM20C
Page 31: ...Sony Corporation ...


