11
Using Y
our New Pr
ojection TV
Using Your New Projection TV
S
KP ER53/43 M90/M91/M61/M31 (GB/FR/CT/CS/PR/AR) 4 087 601 21(1)
VIDEO
R-AUDIO-L
LINE OUT
1
2
3
C
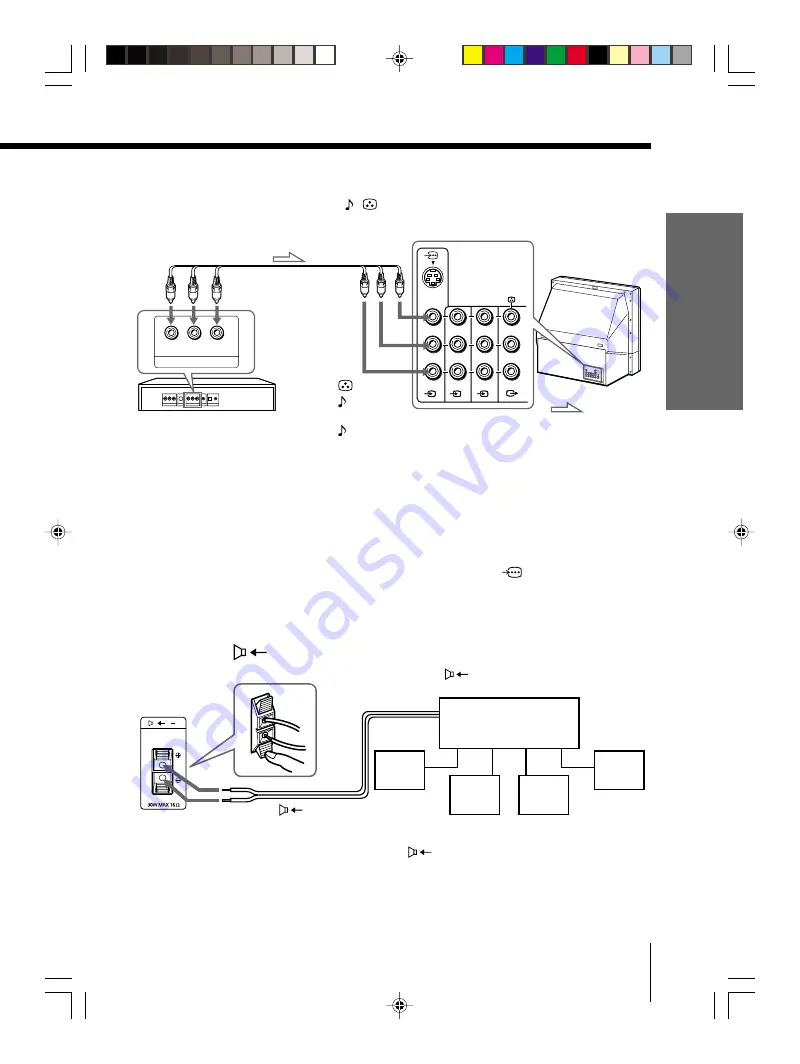
Connecting a DVD player to
t
(video input)
Connect
t
1, 2, or 3 (video input) /
(audio/video) connectors on your projection
TV to LINE OUT on your DVD player.
To audio/video
output
(yellow)
-L (MONO)
(white)
-R (red)
To
t
1, 2, or 3
(video input)
: Signal flow
Audio/Video cable
(not supplied)
Notes
• Since the high quality pictures on a DVD disc contain a lot of information,
picture noise may appear. In this case, adjust the sharpness (“SHARP”)
under “PERSONAL ADJUST” in the “PICTURE MODE” menu (see page
34).
• Connect your DVD player directly to your projection TV. Connecting the
DVD player through other video equipment will cause unwanted picture
noise.
• If your DVD player can output interlace and progressive mode signals,
select the interlace output when connecting to
(component video
input) on your projection TV. Your projection TV can receive either 525i/
60 Hz or 625i/50 Hz interlace signals.
Connecting an amplifier with Dolby
*
Pro Logic
decoder to
C– (center speaker input)
Connect the speaker terminals on your amplifier to
C– on your projection TV.
Note
• When making connection to
C– on your projection TV set
“SPEAKER: CENTER IN” in the “A/V CONTROL” menu. (see page 33)
* Manufactured under license from Dolby Laboratories Licensing
Corporation.
DOLBY, the double-D symbol
;
and ”PRO LOGIC” are trademarks of
Dolby Laboratories Licensing Corporation.
Rear of
projection TV
Rear of
projection TV
to
C– (center speaker
inputs)
Amplifier with Dolby
Pro Logic decoder
Rear
speaker
(L)
Front
speaker
(L)
Front
speaker
(R)
Rear
speaker
(R)
DVD
player


