29
-EN
Operations
EN
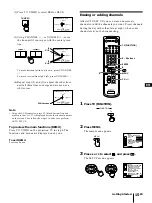
1
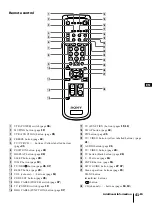
Press MENU.
2
Press
V
or
v
to select
, and press
.
3
Press
V
or
v
to select CURRENT TIME SET,
and press
.
4
Make sure the cursor (
z
) is to the left of
“--:-- AM,” and press
.
FRI 12:04 AM
CURRENT TIME SET
Use
Exit
MENU
MENU
FRI 12:00 AM
CURRENT TIME SET
Set the time.
Use
Exit
MENU
MENU
SUN 12 : 00 AM
CURRENT TIME SET
Set the day.
Use
Exit
MENU
MENU
– – – – –:– – AM
CURRENT TIME SET
Use
Exit
MENU
MENU
7
8
0
9
TIMER
– – – – –:– – AM
CURRENT TIME SET
ON/OFF TIMER
DAYLIGHT SAVING:NO
MENU
CC
Use
Exit
MENU
TIMER
– – – – –:– – AM
CURRENT TIME SET
ON/OFF TIMER
DAYLIGHT SAVING:YES
MENU
CC
Use
Exit
MENU
7
8
0
9
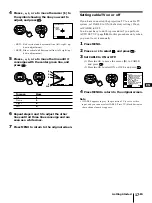
1
Press MENU.
2
Press
V
or
v
to select
t
, and press
.
3
Press
V
or
v
to select DAYLIGHT SAVING,
and press
.
4
Press
V
or
v
to select YES or NO, and press
.
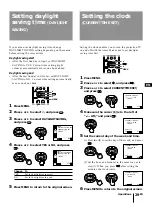
Setting daylight
saving time
(DAYLIGHT
SAVING)
Choose
To
YES
Set for daylight saving start.
NO
Set for daylight saving end.
5
Press MENU to return to the original screen.
If your area uses daylight saving time, change
DAYLIGHT SAVING setting depending on the season,
before setting the current time.
Daylight saving start
• After the first Sunday in April, set DAYLIGHT
SAVING to YES. Current time setting (right
column) automatically moves one hour ahead.
Daylight saving end
• After the last Sunday in October, set DAYLIGHT
SAVING to NO. Current time setting automatically
moves one hour back.
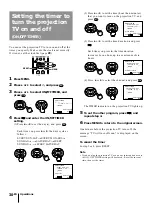
Setting the clock enables you to turn the projection TV
on and off with the timer. Make sure to set daylight
saving time first.
Setting the clock
(CURRENT TIME SET)
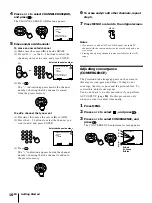
5
Set the current day of the week and time.
(1) Press
V
or
v
to set the day of the week, and press
.
(2) Set the hour and minutes in the same way as in
step (1). When you press
after setting the
minutes, the clock starts.
6
Press MENU to return to the original screen.
V
v
MENU
V
v
MENU

