1-2E
ILCE-9
1-2. PRECAUTION FOR REPLACEMENT
OF THE MECHA DEVICE SERVICE
(IMAGER)
Capture the data to PC from CD-ROM supplied with the mecha
device service when it is ordered.
Write the captured data in the set using “Imager DRA Data Write”
in the ADJUST tab of the Adjust manual.
After all adjustment items have been completed, execute “Phase
Difference AF Check” on the SERVICE tab of the Adjust manual.
1-3. PRECAUTION FOR REPLACEMENT
OF THE MECHA DEVICE SERVICE
(GYRO SENSOR) OR THE GY-1014
BOARD
Adjustment values of each gyro sensor are stored on the SY board.
Therefore, when the mecha device service or the GY-1014 board has
been replaced, write the sensitivity values of gyro sensor.
When replacing mecha device service:
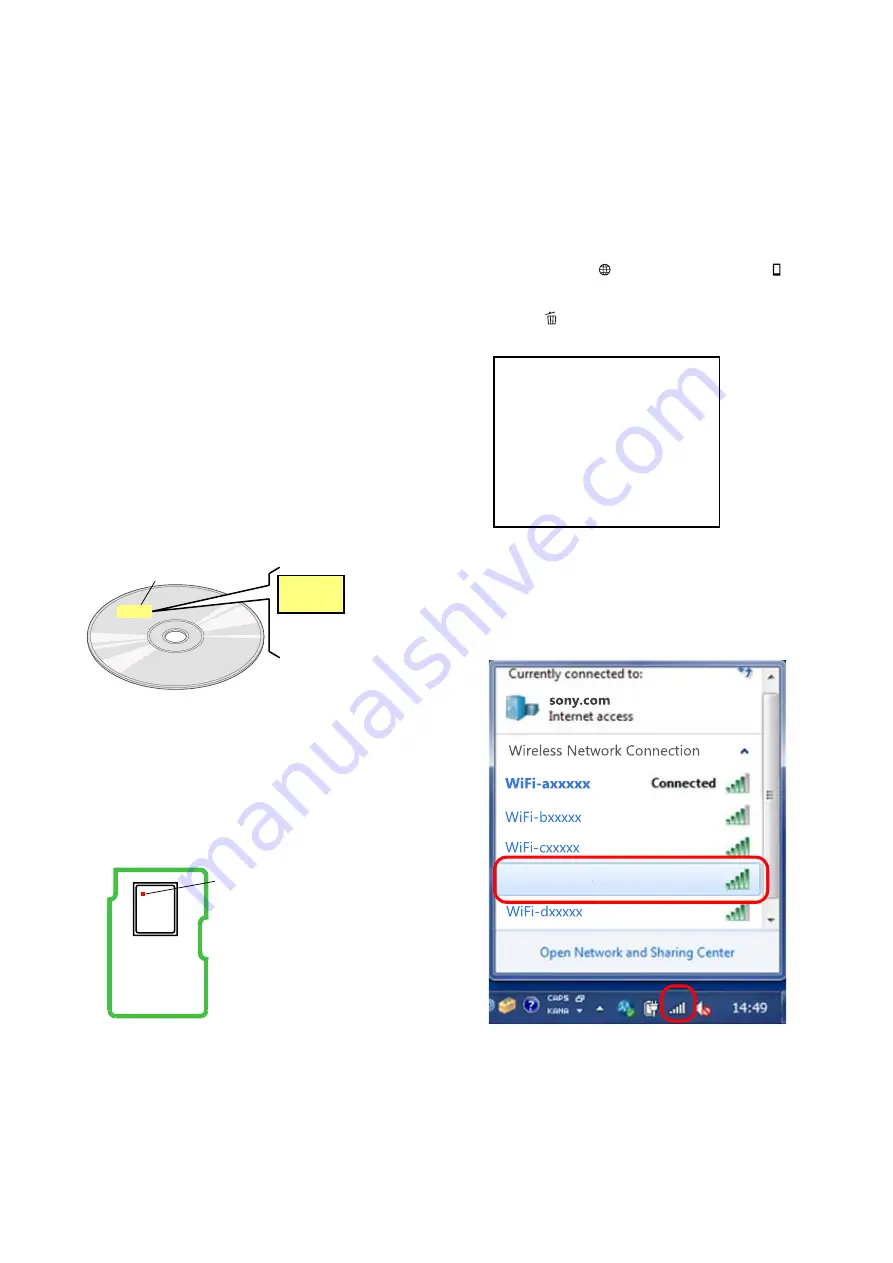
1. Read the sensitivity values of P and Y written on the gyro data
label of CD-ROM supplied with the mecha device service when
it is ordered, and memorize it.
Gyro Data
P Y
Gyro Data Label
P: Pitch Sensitivity Value
Y: Yaw Sensitivity Value
CD-ROM
Note
: The Pitch/Yaw Sensitivity Value is written by 1-digit number.
2. After the mecha device service has been replaced, execute “Set
Gyro Sensor Data” on the ADJUST tab by using the Adjust
manual to write the adjustment values.
When replacing GY-1014 board:
1. Read the sensitivity values of P and Y written on the repair parts,
and memorize it.
SE7701
P Y
Direction mark
P: Pitch Sensitivity Value
Y: Yaw Sensitivity Value
GY-1014 BOARD
Note
: The sensitivity value is written only on repair parts.
The Pitch/Yaw Sensitivity Value is written by 1-digit number.
2. After the GY-1014 board has been replaced, execute “Set Gyro
Sensor Data” on the ADJUST tab by using the Adjust manual to
write the adjustment values.
1-4. CHECKING THE Wi-Fi FUNCTION
Perform the following procedure to check the Wi-Fi function.
Required equipment: Windows personal computer with Wi-Fi
interface
1. Turn on the power of the unit.
2. Perform the following operations for the unit.
[MENU]
button
→
[ ]
→
[Ctrl w/ Smartphone]
→
[ Connec-
tion Info.]
3. QR code is displayed.
4. Press the [ ] button and then a password for Wi-Fi connection
is displayed..
SSID
DIRECT-XXXX:MODEL-NAME
Password
XXXXXXXX
Device Name
ILCE-XXXX
5. Confirm on the personal computer that the unit is detected as a
connectable wireless network.
6. To further confirm that the unit is connectable, connect the unit
to the personal computer and double-click the “current connec-
tion” from the icon displayed on the notice field, make sure that
the unit is displayed in the Wireless internet access column.
DIRECT-XXXX:MODEL-NAME
SYS SET
2018/04/18 01:20:10 (GMT+09:00)


