Adjusting the Screen
39
2
Slide or rotate the mounting wedge, lower plate, and/
or upper plate as required, then tighten the screws.
Adjusting the Screen
Before operating, make sure that “PRESET” in the
PRESET menu is set to “OFF.”
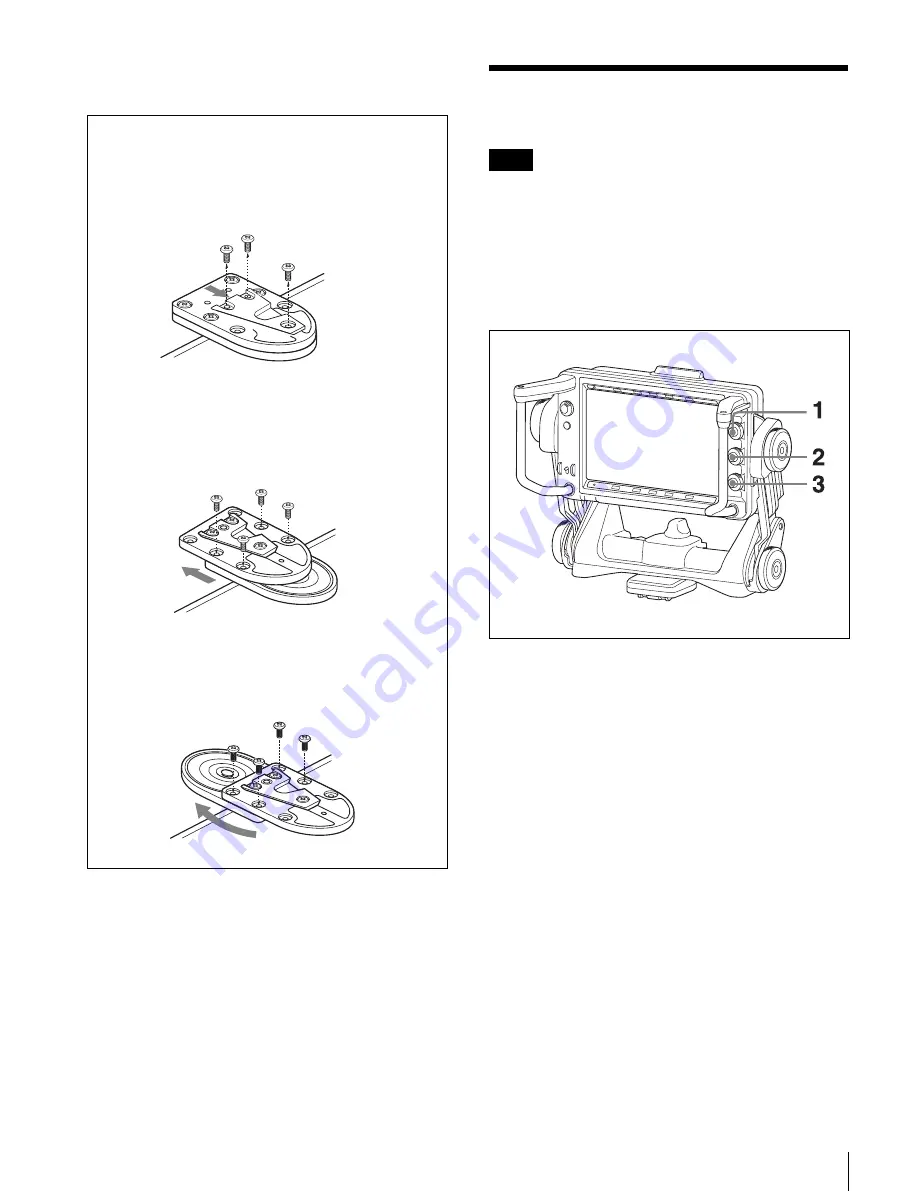
The BRIGHT, CONTRAST, and PEAKING controls do
not operate when “PRESET” is set to “ON.”
For details on menu operations, see “Using the Menu”
on page 44.
1
Turn the BRIGHT control to adjust the screen
brightness.
To increase the brightness:
Turn in a clockwise
direction.
2
Turn the CONTRAST control to adjust the screen
contrast.
To increase the contrast:
Turn in a clockwise
direction.
3
Turn the PEAKING control to adjust the peaking.
To sharpen the edges in the image:
Turn in a
clockwise direction.
To prevent accidental operation of the controls
When the menu is not displayed, press and hold the
MENU switch for three seconds or more so that “VR
LOCK” appears. This locks the BRIGHT, CONTRAST,
and PEAKING controls at their current settings,
preventing accidental operation. To unlock the controls,
press and hold the MENU switch for three seconds or
more again so that “VR UNLOCK” appears.
The lock is released whenever the power is turned on.
When the mounting wedge is slid forward:
The viewfinder moves 15 mm (19/32 inches) toward
the camera operator from the factory default
position.
When the lower plate is slid backward:
The viewfinder moves 20 mm (13/16 inches) toward
the camera lens from the factory default position.
When the upper plate is rotated 180°:
The viewfinder moves 64 mm (2 5/8 inches) toward
the camera operator from the factory default
position.
Note


