35
(GB)
9
Press ENTER.
The menu returns to the Wide Setup.
Setting the Wide Mode
Pictures can also be enlarged in the desired Wide
Mode regardless of the type of picture.
1
In the Screen Control menu, press
M
/
m
to move
the cursor (yellow) to “Wide Mode” and press
ENTER.
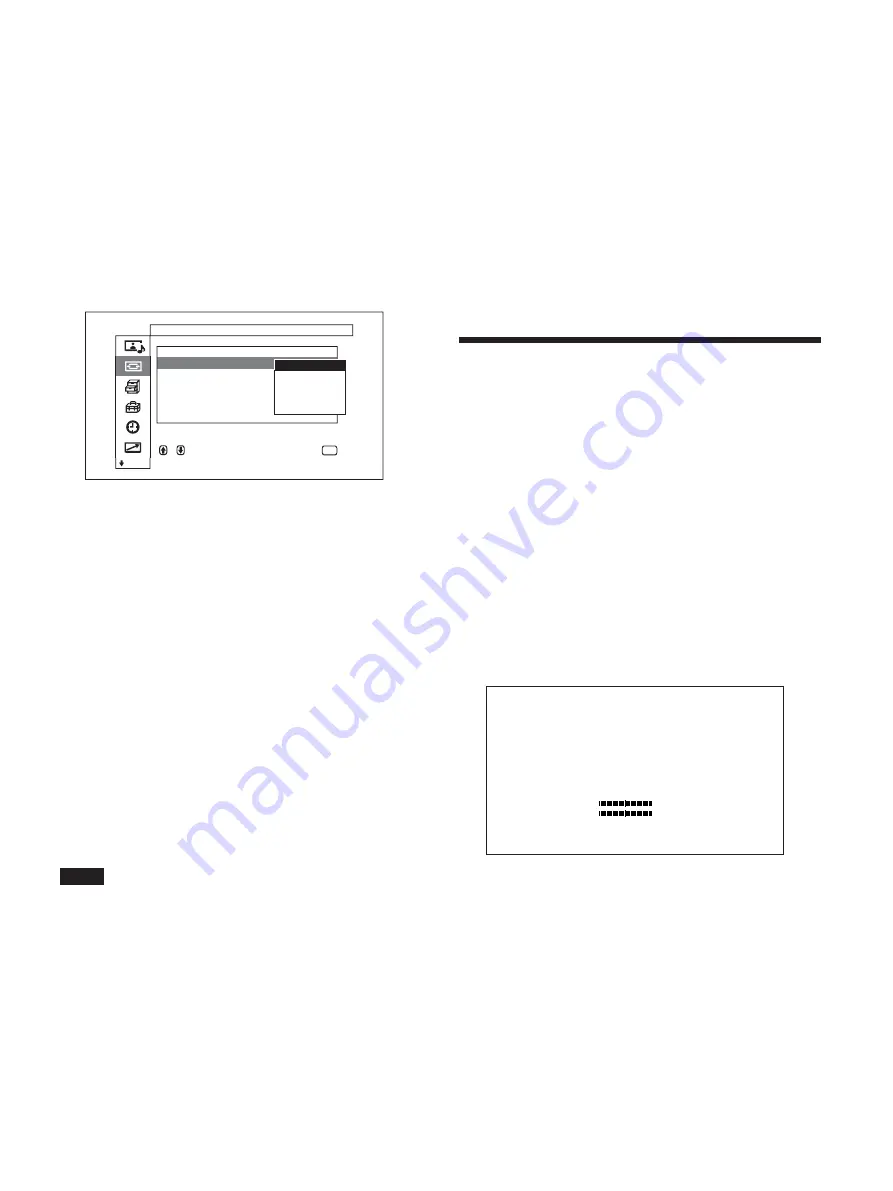
The following menu appears on the display panel.
S c r e e n
C o n t r o l
W i d e
S e t u p
W i d e
M o d e
:
S c r e e n
Z o o m
:
S c r e e n
S i z e
S c r e e n
S h i f t
A d j u s t
P i x e l
R e s e t
,
t o
s e l e c t ,
p r e s s
t o
r e t u r n
ENTER
E x p d . 4 / 3
L e t t e r b x
R e s t o r e
S u b t i t l e
4 / 3
2
Select the Wide Mode with
M
/
m
.
Expd.4/3 : Enlarges 4:3 pictures full-screen to
16:9 pictures.
Letterbx : Enlarges the picture all the way to the
left and right edges of the screen. (Black bars
may remain on the top and bottom of the
screen depending on the type of picture.)
Restore : Extends the left and right sides of the
picture over the entire screen without changing
the top and bottom.
Subtitle : Enlarges the picture all the way to the
left and right edges of the screen and
compresses only the area where captions are
displayed.
4/3 : Displays the picture without enlarging.
3
Press ENTER.
The menu returns to the Screen Control menu.
Notes
• The setting for the Wide Mode is in effect only for
the current input signal. When another signal format
or input source is selected, the setting is
automatically canceled and the Auto Wide function
is activated instead.
• The top or bottom of the picture may be cut off or
the captions may not be completely contained on the
screen depending on the type and size of picture.
Picture Enlargement / Resizing and Positioning the Picture
• Please be aware that if this unit is used for
commercial purposes, or is used for public viewing
in coffee shops or hotels, and that if the wide screen
switching function is used, screen compression or
elongation can result, and there may be some
infringement on copyrights as defined under the
copyright laws.
• The Wide Mode function enables you to enlarge
pictures regardless of their original aspect ratio. If
you select the aspect ratio different from the original,
however, the picture may look distorted. Take this in
account when using this function.
Resizing and Positioning
the Picture
You can shift the position of the picture so that it fits
the screen, or adjust the vertical and horizontal size of
the picture separately.
Refer to “Screen Control menu” on page 21 (GB) for
further details regarding the Screen Control menu.
Resizing the Picture
1
In the Screen Control menu, press
M
/
m
to move
the cursor (yellow) to “Screen Size” and press
ENTER.
The following menu appears on the display panel.
H
S i z e
0 0
V
S i z e
0 0
2
Adjust the picture size vertically and horizontally
with
M
/
m
/
<
/
,
.
<
/
,
: Adjust the picture size horizontally
M
/
m
: Adjust the picture size vertically
Horizontal picture size is displayed on the screen
with adjustment values ranging from MIN (–128)
to MAX (+127). Vertical picture size is displayed
on the screen with adjustment values ranging from
MIN (–128) to MAX (+127). The factory preset
value is 00.
3
Press ENTER.
The menu returns to the Screen Control menu.


