background image

16

Receiver Settings

Select a value that is close to the length 
of cable normally used.

OFF / 1m(3ft) / 1.5m(5ft) / 2m(7ft) / 
3m(10ft) / 4.5m(15ft) / 6m(20ft) / 
7.5m(25ft) / 9m(30ft) / 12m(40ft) / 
15m(50ft) / 18m(60ft) / 21m(70ft) / 
24m(80ft) / 27m(90ft) / 30m(100ft)

4

Select [Set].

This completes the configuration, and 
the main screen appears again.

The cable tone generator will be applied 
before the equalizer.

Configuring the equalizer

Configure the equalizer. Under factory 
default settings, the equalizer is set to 0 dB 
for each frequency and the function itself is 
set to [OFF].

1

In the [Setup] screen, select [Audio 
Setup].

The [Audio Setup] screen appears.

2

Select [Equalizer].

The [Equalizer] screen appears.

3

Select [ON] to enable the equalizer 
function, or [OFF] to disable it.

If you select [ON], the equalizer 
settings screen appears.

If you select [OFF], configuration is 
complete and the main screen appears 
again.

4

Select the frequency for which you 
want to adjust the level, and adjust the 
setting.

5

Select [Set].

The setting value is saved.
To cancel the setting, press the ESC 
button.

Configuring the transmitter 
muting function for the output 
connectors

You can select whether to enable the 
muting function controlled by the 
transmitter for the audio output of each 
output connector. The factory default 
setting is [To Balanced & Main Only].

1

In the [Setup] screen, select [Audio 
Setup].

The [Audio Setup] screen appears.

2

Select [TX Muting].

The [Apply TX Muting] screen 
appears.

3

Select the connectors for which you 
want the muting function enabled.

This completes the configuration, and 
the main screen appears again.

Tip

          Screen

display

Connector

To All 
Outputs

To 
Balanced 
& Main 
Only

To AUX/
Tuner 
Only

BALANCED 
OUTPUT

Enabled

Enabled

UNBALANCED 
OUTPUT MAIN

UNBALANCED 
OUTPUT AUX/
TUNER

Enabled

Summary of Contents for DWZ-B50GB

Page 1: ...4 471 613 13 1 2013 Sony Corporation Digital Wireless Package Operating Instructions Before operating the unit please read this manual thoroughly and retain it for future reference DWZ B50I DWZ B50GB ...

Page 2: ... ZRX HR50 11 Attaching the Supplied Accessories to the Body Pack Transmitter ZTX B01 12 Using the Microphone ECM GZ1UBMP 12 Receiver Settings 14 Half Rack Receiver ZRX HR50 14 Transmitter Settings 17 Configuring the Transmitting Channel Settings 17 Channel Display 18 Channel Frequency List 19 System Configuration Examples 22 Configuration Examples for the DWZ B50I 22 Configuration Example for the ...

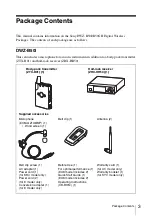
Page 3: ...ceiver ZRX HR50 Supplied accessories Antenna 2 Half rack receiver ZRX HR50 1 Microphone ECM GZ1UBMP 1 Wind screen 1 Warranty card 1 for UC model only Warranty booklet 1 for SYV model only Belt clip 1 Body pack transmitter ZTX B01 1 Belt clip screw 1 AC adapter 1 Power cord 1 for KR4 model only Power cord 2 for E model only Conversion adapter 1 for E model only Before Use 1 For optimal performance ...

Page 4: ...g Instructions Turkish 1 for SYV model only Operating Instructions CD ROM 1 Warranty card 1 for KR model only Warranty booklet 1 for SYV model only Body pack transmitter ZTX B01 1 Supplied accessories Belt clip 1 Guitar cable 1 For optimal performance 1 EU8 model includes 2 Quick Start Guide 1 EU8 model includes 2 Operating Instructions CD ROM 1 Belt clip screw 1 AC adapter 1 Power cord 1 for KR4 ...

Page 5: ...d professionals A new microphone that can comprehensively pick up the wide dynamic range produced by instruments has also been developed DWZ B50I Superb audio quality By transmitting audio signals via 24 bit high quality linear PCM digital transmission without signal compression decompression available only when the RF mode is set to Narrow Mode NARROW or similar processing the system provides sup...

Page 6: ...tenuator adjustment function the unit supports a wide range of audio input levels The supplied belt clip can be rotated in 90 degree increments allowing you to adjust the direction in which the cables extend based on your environment ZRX HR50 A half rack receiver equipped with large screen high resolution color LCD that combines high functionality with simple operability The Best Channel Selection...

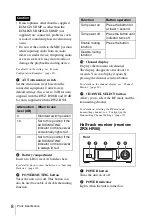
Page 7: ...able button operation You cannot turn on the unit while this switch is set to the LOCK position as even the power button is disabled Set the switch to the UNLOCK position to perform operations d Audio input connector Connect the supplied microphone DWZ B50I or connect a guitar or similar instrument here using the supplied guitar cable DWZ B50GB e AUDIO MUTING indicator Indicates the input level of...

Page 8: ...can also be used to enable or disable the muting function j Channel display Displays the transmission channel The display disappears after about 10 seconds You can display it again by pressing the channel selection button For details on the channel display see Channel Display page 18 k CHANNEL SELECT button Allows you to select the RF mode and the transmitting channel For details on selecting the ...

Page 9: ...screen from the settings screen e Rotary encoder Allows you to change settings For details on changing settings see Receiver Settings page 14 a ANTENNA a b connector BNC type Connect the supplied antenna here b UNBALANCED OUTPUT AUX TUNER external audio output connector headphone jack Connect monitoring equipment and similar peripheral devices here The audio output from the UNBALANCED OUTPUT AUX T...

Page 10: ... Power Supply This section describes the power supply for each device For details on how to insert batteries see Inserting Batteries page 10 Body pack transmitter ZTX B01 Power supplied by two LR6 size AA batteries The following types of battery can be used Alkaline dry cell batteries Rechargeable nickel metal hydride batteries Lithium batteries Half rack receiver ZRX HR50 Power supplied by the su...

Page 11: ...nsert the compartment into the unit Make sure that the battery compartment is locked securely inside the unit Attaching the Supplied Accessories This section describes how to attach the supplied accessories to each unit Attaching the Supplied Accessories to the Half Rack Receiver ZRX HR50 Attaching the antenna Removing the feet Insert the supplied antenna into the ANTENNA a b connector at the rear...

Page 12: ...upplied belt clip screw You can also rotate the belt clip 180 degrees or 90 degrees to the left or right before securing it Slide the guitar strap into the belt clip on the unit completely and make sure it is secure 1 2 3 4 Attach the mic holder clip to the section of the instrument where sound is emitted e g the bell section of a wind instrument Attach the gooseneck 4 to the mic holder clip in on...

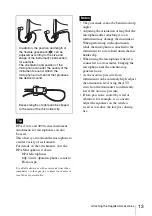
Page 13: ...e sure to hold down the mic holder clip When using the microphone when it is connected to a transmitter bringing the microphone near the antenna may generate noise As the acoustic pressure from instruments can be extremely high adjust the attenuation level using the ATT switch on the transmitter to sufficiently lower the acoustic pressure If low pass noise caused by wind or vibration for example i...

Page 14: ...ode is set to Wide Band and the transmission channel is set to 1 under factory default settings When using multiple channels up to six the two RF modes Wide Band and Narrow Band cannot be used simultaneously Select only one RF mode during use In addition Wi Fi and other environmental interference may reduce the actual number of channels that can be used simultaneously To select the RF mode 1 In th...

Page 15: ... Channel Scan The interference status of each channel in the selected RF mode is displayed The lengths of the bars indicate the strength of the interference Select the channel with the least interference C Select Manual Setup Configure the channel manually Select the channel you want to use This completes the configuration and the main screen appears again If you change the channel setting be sure...

Page 16: ...ngs screen appears If you select OFF configuration is complete and the main screen appears again 4 Select the frequency for which you want to adjust the level and adjust the setting 5 Select Set The setting value is saved To cancel the setting press the ESC button Configuring the transmitter muting function for the output connectors You can select whether to enable the muting function controlled b...

Page 17: ...g used in the transmitter This completes the configuration and the main screen appears again Transmitter Settings Configuring the Transmitting Channel Settings Two RF modes channel modes Wide Band and Narrow Band are available on the DWZ Each RF mode consists of six channels Select the appropriate channel according to your intended use The RF mode is set to Wide Band and the transmission channel i...

Page 18: ...election button to select 1 or a 4 Press and hold the channel selection button Selecting the channel 1 Press and hold the channel selection button while the unit is turned on The channel display blinks 2 Press the channel selection button to select the channel 3 Press and hold the channel selection button to apply the channel selection If you change the channel setting on the transmitter be sure t...

Page 19: ...nd NARROW channels a to f are as follows Each channel uses multiple compatible frequencies to increase reliability and redundancy The appropriate frequencies are used according to the surrounding wireless environment To ensure transmission quality do not place transmitters and receivers near wireless routers or computers Note ...

Page 20: ...ransmission Delay time Approx 3 milliseconds The Narrow Band NARROW mode avoids the effects of 2 4 GHz wireless remote controls that are used to operate lighting equipment and other wireless devices You can use this mode and make adjustments to prevent frequency overlaps in environments with multiple wireless systems Channel number Frequency 1 2402 2478 5 2 2421 5 2472 5 3 2427 5 2475 5 4 2424 5 2...

Page 21: ...hat cover the most commonly used channels channels 1 6 and 11 are shown in grey Ch 1 Ch a Ch b Ch c Ch d Ch e Ch f Ch 2 Ch 3 Ch 4 Ch 5 Ch 6 1 2 3 4 5 6 7 8 9 10 11 12 13 2402 2407 2412 2417 2422 2427 2432 2437 2442 2447 2452 2457 2462 2467 2472 2477 2482 Wi Fi channels Frequencies MHz DWZ Wide Band DWZ Narrow Band ...

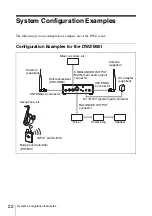
Page 22: ...s for the DWZ B50I Body pack transmitter ZTX B01 Half rackreceiver ZRX HR50 Mixer Power amp Speaker DC IN 12V power input connector Antenna supplied ANTENNA b connector UNBALANCED OUTPUT MAIN main audio output connector Mixer recorder etc ANTENNA a connector Antenna supplied BALANCED OUTPUT connector AC adapter supplied Saxophone etc INPUT switch MIC ...

Page 23: ...ansmitter ZTX B01 Guitar or bass Half rackreceiver ZRX HR50 Mixer Power amp Speaker DC IN 12V power input connector Antenna supplied ANTENNA b connector UNBALANCED OUTPUT MAIN main audio output connector Mixer recorder etc ANTENNA a connector Antenna supplied BALANCED OUTPUT connector AC adapter supplied ...

Page 24: ... batteries The battery life of a manganese battery is less than half that of an alkaline battery The unit is being used under cold conditions The batteries drain quickly under cold conditions There is no sound The RF mode or channel setting on the transmitter is different from that on the receiver Use the same RF mode and channel setting on both the transmitter and the receiver The muting function...

Page 25: ...n one transmitter Wide Band and Narrow Band are being used simultaneously When using multiple channels simultaneously use channels from a single RF mode either Wide Band or Narrow Band The service area i e operating range is small The antenna is not attached to the receiver Attach the supplied antenna The antenna is being squeezed Remove your hands from the antenna The audio quality is abnormal Th...

Page 26: ...or on the receiver lights even when the transmitter is off Interference is being received Set the receiver to a channel for which the RF indicator does not light and then set the transmitter to the same channel Symptom Meanings Remedy ...

Page 27: ...tions for installation To prevent audio noise caused by interference from other transmitters or by excessive RF inputs maintain a distance of at least 30 cm between the transmitter and the receiver Install the antenna of the receiver as far away from metallic objects as possible When using the units with a guitar noise may occur depending on the type of pickup used If noise occurs place the transm...

Page 28: ...ther communication devices near the DWZ series components may result in malfunction and interference with audio signals It is recommended that portable communication devices near the DWZ series components be turned off Notes Always verify that the unit is operating properly before use SONY WILL NOT BE LIABLE FOR DAMAGES OF ANY KIND INCLUDING BUT NOT LIMITED TO COMPENSATION OR REIMBURSEMENT ON ACCO...

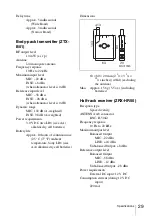
Page 29: ... dry cell batteries Battery life Approx 10 hours of continuous use 25 C 77 F ambient temperature Sony LR6 size AA alkaline dry cell batteries Dimensions 63 80 20 mm 2 1 2 3 1 4 13 16 inches w h d excluding the antenna Mass Approx 156 g 5 5 oz including batteries Half rack receiver ZRX HR50 Reception type Space diversity ANTENNA a b connector BNC R 50 Ω Frequency response 10 Hz to 22 kHz Maximum ou...

Page 30: ...e Frequency response 20 Hz to 22 000 Hz Directivity Uni directional Sensitivity 55 0 dB 3 0 dB 1 kHz Pa Operating temperature 0 C to 50 C 32 F to 122 F Storage temperature 20 C to 50 C 4 F to 122 F Cable length Approx 1 8 m 5 ft 11 in Dimensions φ13 29 mm φ17 32 1 3 16 in Mass Approx 25 g 0 9 oz excluding cable and connectors 96 44 168 Unit mm ø13 29 Unit mm ...

Page 31: ...Sony Corporation ...

Reviews: