


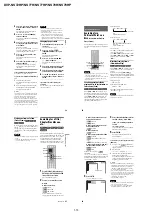


1-7
DVP-NS72HP/NS77H/NS77HP/NS78H/NS78HP
27
Playba
ck
Locking the disc tray (Child Lock)
You can lock the disc tray to prevent children
from opening it.
When the player is in standby mode, press
O
RETURN, ENTER, and then
[
/
1
on the
remote.
The player turns on and “LOCKED” appears
on the front panel display. The
A
and
Z
buttons on the player or the remote do not
work while the Child Lock is set.
To unlock the disc tray
When the player is in standby mode, press
O
RETURN, ENTER, and then
[
/
1
again.
Note
Even if you select “RESET” under “SETUP” in the
Control Menu (page 57), the disc tray remains
locked.
Resuming Playback From the
Point Where You Stopped the
Disc (Multi-disc Resume)
The player stores the point where you stopped
the disc for up to 6 discs and resumes
playback the next time you insert the same
disc. If you store a resume playback point for
the 7th disc, the resume playback point for the
first disc is deleted.
1
While playing a disc, press
x
to
stop playback.
“RESUME” appears on the front panel
display.
2
Press
H
.
The player starts playback from the point
where you stopped the disc in step 1.
z
Hint
To play from the beginning of the disc, press
x
twice, then press
H
.
Notes
• “MULTI-DISC RESUME” in “CUSTOM
SETUP” must be set to “ON” (default) for this
function to work (page 61).
• The point where you stopped playing is cleared
when:
– you change the play mode.
– you change the settings on the Setup Display.
• For DVD-VR mode, CDs, DATA CDs, and
DATA DVDs, the player remembers the resume
playback point for the current disc.
The resume point is cleared when:
– you opened the disc tray.
– you disconnect the mains lead.
– the player enters standby mode (DATA CD/
DATA DVD only).
• Resume Play does not work during Shuffle Play
and Programme Play.
• This function may not work with some discs.
• If “MULTI-DISC RESUME” in “CUSTOM
SETUP” is set to “ON” and you playback a
recorded disc such as DVD-RW, the player may
playback other recorded discs from the same
resume point.
Using the DVD’s Menu
A DVD VIDEO is divided into long sections
of a picture or a music feature called “titles.”
When you play a DVD VIDEO which
contains several titles, you can select the title
you want using the TOP MENU button.
When you play DVD VIDEOs that allow you
to select items such as language for the sound
and subtitles, select these items using the
MENU button.
1
Press TOP MENU or MENU.
The disc’s menu appears on the TV
screen.
The contents of the menu vary from disc
to disc.
2
Press
C
/
X
/
x
/
c
or the number
buttons to select the item you want
to play or change.
If you press the number buttons, the
following display appears.
Press the number buttons to select the
item you want.
3
Press ENTER.
1
,
continued
28
Selecting “ORIGINAL” or “PLAY
LIST” in DVD-VR mode
Some DVD-VR (Video Recording) mode
have two types of titles for playback:
originally recorded titles (ORIGINAL) and
titles that can be created on recordable DVD
players for editing (PLAY LIST). You can
select the type of title to be played.
1
Press DISPLAY when the player is
in stop mode.
The Control Menu appears.
2
Press
X
/
x
to select
(ORIGINAL/PLAY LIST), then press
ENTER.
The options for “ORIGINAL/PLAY
LIST” appear.
3
Press
X
/
x
to select a setting.
• PLAY LIST: plays the titles created
from “ORIGINAL” for editing.
• ORIGINAL: plays the titles originally
recorded.
4
Press ENTER.
Playing VIDEO CDs With PBC
Functions (PBC Playback)
PBC (Playback Control) allows you to play
VIDEO CDs interactively by following the
menu on the TV screen.
1
Start playing a VIDEO CD with PBC
functions.
The menu for your selection appears.
2
Press the number buttons to select
the item number you want.
3
Press ENTER.
4
Follow the instructions in the
menu for interactive operations.
Refer to the instructions supplied with the
disc, as the operating procedure may
differ depending on the VIDEO CD.
To return to the menu
Press
O
RETURN.
z
Hint
To play without using PBC, press
.
/
>
or the
number buttons while the player is stopped to select
a track, then press
H
or ENTER.
“Play without PBC” appears on the TV screen and
the player starts continuous play. You cannot play
still pictures such as a menu.
To return to PBC playback, press
x
twice then
press
H
.
Note
Depending on the VIDEO CD, “Press ENTER” in
step 3 may appear as “Press SELECT” in the
instructions supplied with the disc. In this case,
press
H
.
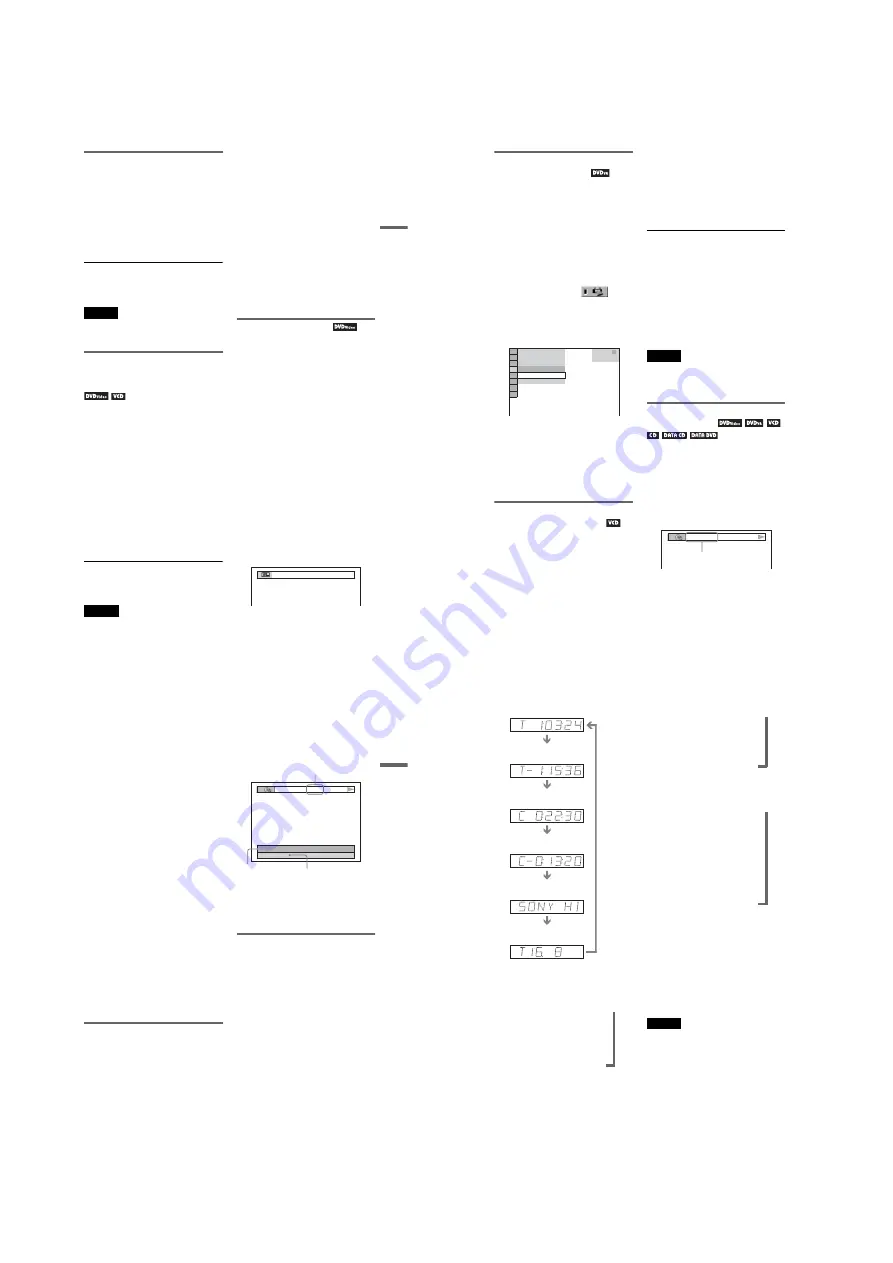
Checking the Playing Time and
Remaining Time
You can check the playing time and
remaining time of the current title, chapter, or
track. Also, you can check the DVD/CD text,
track name (MP3 audio), or file name (DivX
video) recorded on the disc.
1
Press TIME/TEXT during playback.
The following display appears.
2
Press TIME/TEXT repeatedly to
change the time information.
The available time information depends
upon the type of disc you are playing.
1 8 ( 3 4 )
1 2 ( 2 7 )
DVD-VR
PLAY LIST
PLAY LIST
ORIGINAL
T
1 : 3 2 : 5 5
T 1:01:57
Time
information
29
Playba
ck
◆
When playing a DVD
• T *:*:* (hours: minutes: seconds)
Playing time of the current title
• T–*:*:*
Remaining time of the current title
• C *:*:*
Playing time of the current chapter
• C–*:*:*
Remaining time of the current chapter
◆
When playing a VIDEO CD or Super
VCD (with PBC functions)
• *:* (minutes: seconds)
Playing time of the current scene
◆
When playing a VIDEO CD (without
PBC functions) or CD
• T *:* (minutes: seconds)
Playing time of the current track
• T–*:*
Remaining time of the current track
• D *:*
Playing time of the current disc
• D –*:*
Remaining time of the current disc
◆
When playing a Super VCD (without
PBC functions)
• T *:* (minutes: seconds)
Playing time of the current track
◆
When playing a DATA CD (MP3 audio)
or DATA DVD (MP3 audio)
• T *:* (minutes: seconds)
Playing time of the current track
◆
When playing a DATA CD (DivX video)
or DATA DVD (DivX video)
• *:*:* (hours: minutes: seconds)
Playing time of the current file
Checking the play information of
the disc
To check the DVD/CD text
Press TIME/TEXT repeatedly in step 2 to
display text recorded on the DVD/CD.
The DVD/CD text appears only when text is
recorded in the disc. You cannot change the
text. If the disc does not contain text, “NO
TEXT” appears.
To check DATA CD/DATA DVD album
name, etc.
By pressing TIME/TEXT while playing MP3
audio tracks or DivX video files on a DATA
CD/DATA DVD, you can display the name
of the album/track/file, and the audio bit rate
(the amount of data per second of the current
audio track) on your TV screen.
* Appears when:
– playing an MP3 audio track on a DATA CD/
DATA DVD.
– playing a DivX video file that contains MP3
audio on a DATA CD/DATA DVD.
Checking the information on the
front panel display
You can view the time information and text
displayed on the TV screen also on the front
panel display. The information on the front
panel display changes as follows when you
change the time information on your TV
screen.
T
17:30
128k
JAZZ
RIVER SIDE
Bit rate
*
Album name
Track/file name
,
continued
30
When playing a DVD
When playing a DATA CD (MP3 audio) or
DATA DVD (MP3 audio)
When playing a DATA CD (DivX video) or
DATA DVD (DivX video)
When playing a VIDEO CD (without PBC
functions) or CD
z
Hints
• When playing VIDEO CDs without PBC
functions, the track number, and the index number
are displayed after the text.
• When playing VIDEO CDs with PBC functions,
the scene number, or the playing time are
displayed.
• Long text that does not fit in a single line will
scroll across the front panel display.
• You can also check the time information and text
using the Control Menu (page 11).
Notes
• Depending on the type of disc being played, the
DVD/CD text or track name may not be
displayed.
• The player can only display the first level of the
DVD/CD text, such as the disc name or title.
• Playing time of MP3 audio tracks and DivX video
files may not be displayed correctly.
• If you play a disc containing JPEG image files
only, “BGM” appears when “MODE (MP3,
JPEG)” is set to “AUTO” or “AUTO (BGM),”
and “JPEG” appears when “MODE (MP3,
JPEG)” is set to “IMAGE (JPEG)” in the front
panel display.
Playing time of the current
title
Remaining time of the
current title
Playing time of the current
chapter
Remaining time of the
current chapter
Text
Current title and chapter
number
(returns to top automatically)
Playing time and number of the
current track
Track name
Current album and track number
(returns to top automatically)
,
,
,
Playing time of the current file
The current file name
The current album and file number
(returns to top automatically)
,,
,
Playing time and number of the
current track
Remaining time of the current track
Remaining time of the disc
Text
Playing time of the disc
,
,
,,,


