


1-3
12
Guide to the Control Menu Display
Use the Control Menu to select a function and to view related information. Press DISPLAY
repeatedly to turn on or change the Control Menu display as follows:
z
Hint
You can skip the ADVANCED display by setting
“ OFF” under “ ADVANCED” in the Control Menu
(page 48).
Control Menu Display
The Control Menu display 1 and 2 will show different items depending on the disc type. For
details about each item, please refer to the pages in the parentheses.
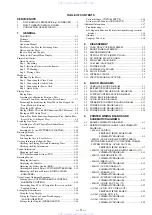
Example: Control Menu display 1 when playing a DVD
* Displays the scene number for VIDEO CDs
(PBC is on), track number for VIDEO CDs/
CDs, album number for DATA CDs.
** Displays the index number for VIDEO CDs/
CDs, MP3 audio track number for DATA CDs.
Control Menu display 1
m
Control Menu display 2 (DVD/VIDEO CD only)
m
ADVANCED display (DVD only, See page 48.)
m
Control Menu display off
,
OFF
1: ENGLISH
2: FRENCH
3: SPANISH
OFF
1 8 ( 3 4 )
1 2 ( 2 7 )
T 1 : 3 2 : 5 5
DVD VIDEO
PLAY
Select: Cancel:
SUBTITLE
ENTER
RETURN
Currently playing chapter number
**
Playing time
Total number of chapters
**
Currently playing title number
*
Options
Current setting
Total number of titles
*
Playback status
(
N
Playback,
X
Pause,
x
Stop, etc.)
Function name of
selected Control
Menu item
Operation message
Selected item
Control
Menu items
Type of disc
being played
13
List of Control Menu Items
Item
Item Name, Function, Relevant Disc Type
TITLE (page 40)/SCENE (page 40)/TRACK (page 40)
Selects the title, scene, or track to be played.
CHAPTER (page 40)/INDEX (page 40)
Selects the chapter or index to be played.
ALBUM (page 33)
Selects the album to be played.
TRACK (page 40)
Selects the track to be played.
INDEX (page 40)
Selects the index to be played.
TIME/TEXT (page 40)
Checks the elapsed time and the remaining playback time.
Input the time code for picture and music searching.
Displays the DVD/CD text or the DATA CD’s track name.
AUDIO (page 50)
Changes the audio setting.
SUBTITLE (page 53)
Displays the subtitles.
Changes the subtitle language.
ANGLE (page 53)
Changes the angle.
TVS (TV Virtual Surround) (page 51)
Selects the surround functions.
ADVANCED (page 48)
Displays the information (bit rate or layer) of the disc currently playing.
PARENTAL CONTROL (page 58)
Set to prohibit playback on this player.
SETUP (page 64)
QUICK Setup (page 25)
Use Quick Setup to choose the desired language of the on-screen display, the aspect
ratio of the TV and the audio output.
CUSTOM Setup
In addition to the Quick Setup setting, you can adjust other various settings.
RESET
Returns the settings in “ SETUP” to the default setting.
PROGRAM (page 35)
Selects the title, chapter, or track to play in the order you want.
SHUFFLE (page 37)
Plays the title, chapter, or track in random order.
REPEAT (page 38)
Plays the entire disc (all titles/all tracks/all albums) repeatedly or one title/chapter/
track/album repeatedly.
A-B REPEAT (page 39)
Specifies the parts you want to play repeatedly.
,
continued
14
z
Hint
The Control Menu icon indicator lights up in green
BNR (page 54)
Adjusts the picture quality by reducing the “ block noise” or mosaic like patterns that
appear on your TV screen.
CUSTOM PICTURE MODE (page 55)
Adjusts the video signal from the player. You can select the picture quality that best
suits the programme you are watching.
DIGITAL VIDEO ENHANCER (page 56)
Exaggerates the outline of the image to produce a sharper picture.
PICTURE NAVIGATION (page 41)
Divides the screen into 9 subscreens to help you find the scene you want quickly.
t
15
S
imp
le
S
ta
rt
Gu
id
e
Simple Start Guide
Quick Overview
A quick overview presented in this guide will
give you enough information to start using the
player for your enjoyment. To use the
surround sound features of this player, refer
to “ Hookups” on page 18.
Notes
• You cannot connect this player to a TV that does
not have a video input jack.
• Be sure to disconnect the power cord (mains lead)
of each component before connecting.
Step 1: Unpacking
Check that you have the following items:
• Audio/video cord (pinplug
×
3
y
pinplug
×
3) (1)
• Remote commander (remote) (1)
• Size R6 (AA) batteries (2)
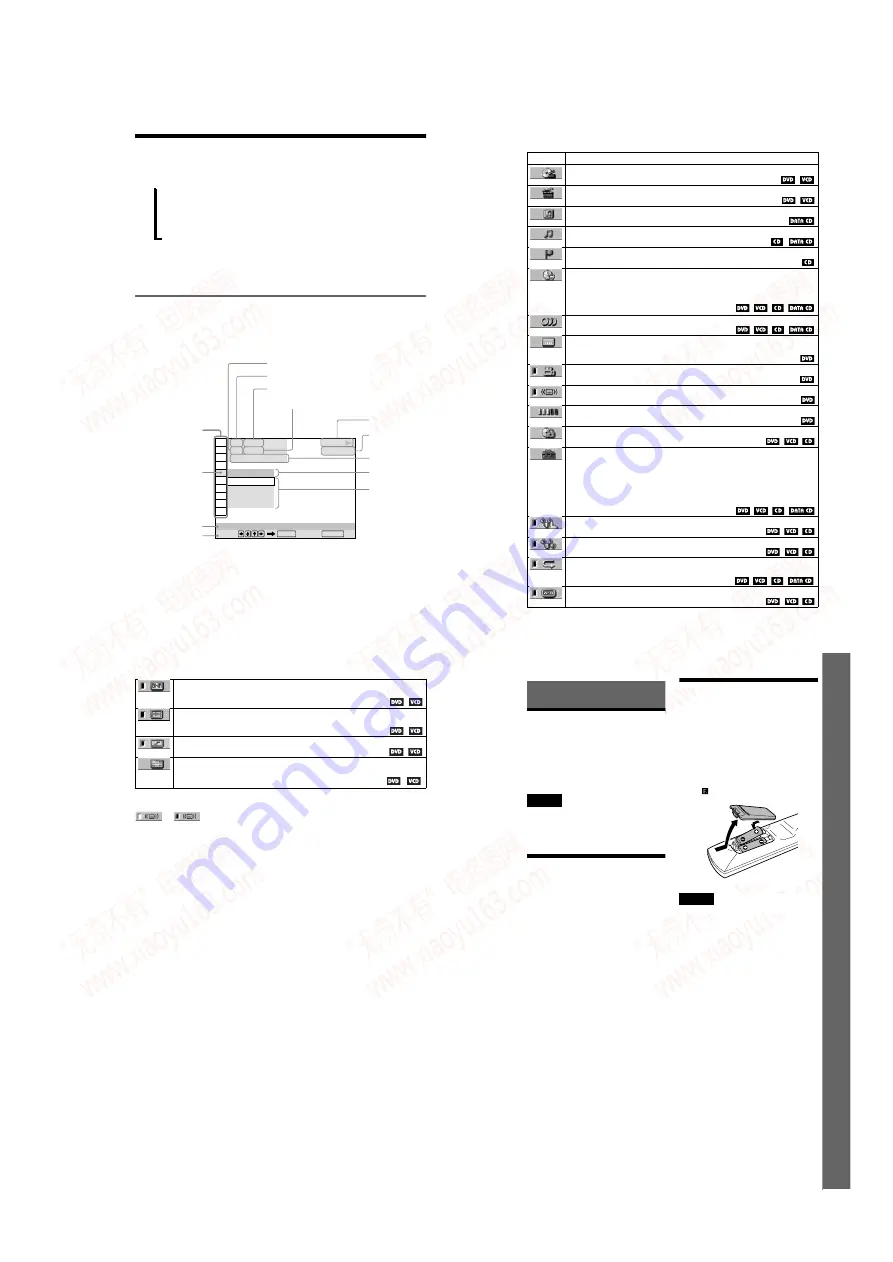
Step 2: Inserting
Batteries into the
Remote
You can control the player using the supplied
remote. Insert two size R6 (AA) batteries by
matching the
3
and
#
ends on the batteries
to the markings inside the compartment.
When using the remote, point it at the remote
sensor
on the player.
Notes
• Do not leave the remote in an extremely hot or
humid place.
• Do not drop any foreign object into the remote
casing, particularly when replacing the batteries.
• Do not expose the remote sensor to direct light
from the sun or a lighting apparatus. Doing so
may cause a malfunction.
• If you do not use the remote for an extended
period of time, remove the batteries to avoid
possible damage from battery leakage and
corrosion.
www. xiaoyu163. com
QQ 376315150
9
9
2
8
9
4
2
9
8
TEL 13942296513
9
9
2
8
9
4
2
9
8
0
5
1
5
1
3
6
7
3
Q
Q
TEL 13942296513 QQ 376315150 892498299
TEL 13942296513 QQ 376315150 892498299