72
Changing Menu Settings
Cha
p
te
r 6
Men
u
Set
tin
g
Changing Menu Settings
This section explains how to change menu settings.
Buttons Used to Change Settings
Use the following buttons in the menu control section to
change the menu settings.
Changing the Settings of Basic
Items
The factory default setting is to display only the basic
items. To change the settings of basic items proceed as
follows.
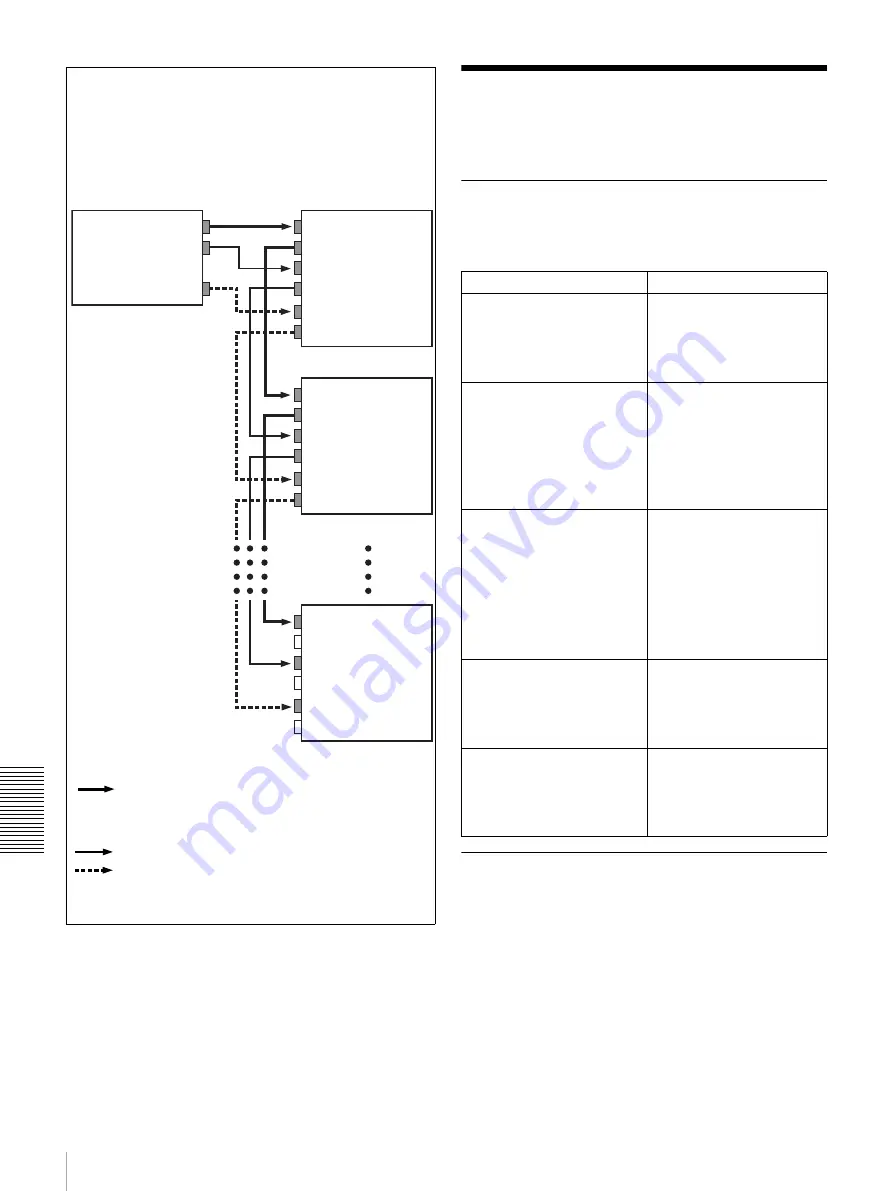
VIDEO IN
VIDEO OUT
AUDIO OUT
TIME CODE OUT
VIDEO OUT
AUDIO IN
AUDIO OUT
TIME CODE IN
TIME CODE OUT
VIDEO IN
VIDEO OUT
AUDIO IN
AUDIO OUT
TIME CODE IN
TIME CODE OUT
VIDEO IN
VIDEO OUT
AUDIO IN
AUDIO OUT
TIME CODE IN
TIME CODE OUT
• Composite video signal
• S-video signal
• Analog component signal
• SDI (video and audio) signal
Audio signal
Time code signal
Output device
(VCR, camera, etc.)
DSR-DR1000A/DR1000AP
(1st unit)
DSR-DR1000A/DR1000AP
(2nd unit)
DSR-DR1000A/DR1000AP
(nth unit)
VIDEO OUTPUT PHASE mode
The time code output signal is synchronized with the output
video signal.
This mode is appropriate when outputting signals from a
single device to a number of recorders using separate cables
for video, audio, and time code.
In this mode, the same time code is recorded on all of the
recorders 1 to n.
Menu control buttons
Functions
MENU button
• Opens the menu and
launches menu control
mode.
• Closes the menu and exits
menu control mode.
J
(CUE) and
j
buttons
These buttons move the
highlighted cursor up and
down within the current level
to select an item or setting.
Hold down one of these
buttons to make the
highlighted cursor move
continuously.
K
(IN) and
k
(OUT)
buttons
• Press the
k
(IN) button
to go up one level.
• Press the
K
(OUT)
button to go down one
level.
Hold down one of these
buttons to make the
highlighted cursor move
continuously.
RESET button
• Returns the setting to the
factory default setting.
• Sends a negative
response to prompts on
the monitor screen.
SET button
• Saves the new setting in
memory.
• Sends a positive response
to prompts on the monitor
screen.


