background image

77

S

till ima

g

e

 p

rin

tin

g

 (P
ic

tB
rid
g

e

 p

rin

te

r)

You cannot print movies.

If an error message is sent from the connected 
printer during the connection, 

 flashes for 

about five seconds. In such cases, check the 
printer.

On the single screen

a

Display the image you want to 
print with 

b

/

B

.

b

Press MENU.

The menu appears.

c

Select  

(Print) 

with 

b

/

B

, then 

press 

z

.

d

Select [This image] with 

v

/

V

then press 

z

.

The Print screen appears.

Setting items not available for a particular 
printer are not displayed.

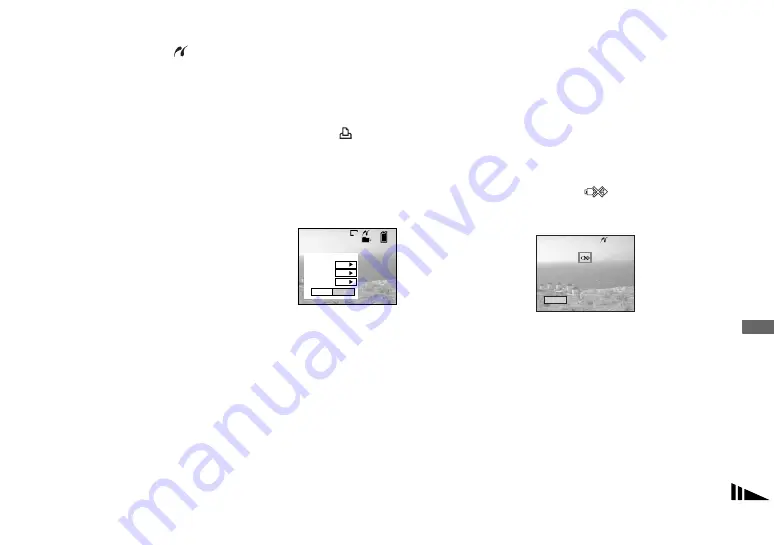
e

Select [Index] with 

v

 , select 

[On] with 

b

/

B

.

f

Select [Quantity] with 

v

/

V

select the number of images 
laid side-by-side with 

b

/

B

.

You can select the number up to 20.
You can lay the specified number of 
images side-by-side.

g

Select [OK] with 

V

/

B

, then 

press 

z

.

The image is printed.
Do not disconnect the USB multi cable 
while the 

 (Not disconnect USB 

multi cable) mark is indicated on the 
LCD screen.

To cancel printing

In Step 

4

, select [Cancel] or in Step 

7

select [Exit].

To print other images

After Step 

7

, select another image, then 

select [Print] with 

v

 . Then repeat from 

Step 

4

.

101

2/9

1M

Exit

OK

1

Off

Off

Index

Date

Quantity

Print

Exit

Printing Index

1/1

Summary of Contents for DSC-F88 - Cyber-shot Digital Still Camera

Page 1: ...Sony Corporation Getting started________________________ Shooting still images__________________ Viewing still images___________________ Deleting still images __________________ Before advanced operations_____________ Advanced still image shooting ___________ Advanced still image viewing ____________ Still image editing ______________________ Still image printing _____________________ PictBridge p...

Page 2: ...he interference by one or more of the following measures Reorient or relocate the receiving antenna Increase the separation between the equipment and receiver Connect the equipment into an outlet on a circuit different from that to which the receiver is connected Consult the dealer or an experienced radio TV technician for help The supplied interface cable must be used with the equipment in order ...

Page 3: ...tion This product has been tested and found compliant with the limits sets out in the EMC Directive for using connection cables shorter than 3 meters 9 8 feet Attention The electromagnetic field at the specific frequencies may influence the picture and sound of this camera Notice If static electricity or electromagnetism causes data transfer to discontinue midway fail restart the application or di...

Page 4: ...ear on the LCD screen and the LCD finder These points are normal in the manufacturing process and do not affect the recording in any way Be careful when placing the camera near a window or outdoors Exposing the LCD screen the finder or the lens to direct sunlight for long periods may cause malfunctions Do not press the LCD screen hardly The screen may be uneven and that may cause a malfunction Ima...

Page 5: ...are either registered trademarks or trademarks of Microsoft Corporation in the United States and or other countries Macintosh Mac OS QuickTime iMac iBook PowerBook Power Mac and eMac are trademarks or registered trademarks of Apple Computer Inc Macromedia and Flash are trademarks or registered trademarks of Macromedia Inc in the United States and or other countries Intel MMX and Pentium are tradem...

Page 6: ...eting images 42 Formatting a Memory Stick 44 How to setup and operate your camera 46 Changing menu settings 46 Changing items in the SET UP screen 47 Deciding the still image quality 47 Creating or selecting a folder 48 Creating a new folder 48 Selecting the recording folder 48 Choosing an auto focus method 49 Choosing a focus range finder frame AF range finder 49 Choosing a focus operation AF Mod...

Page 7: ...g the USB driver 86 Connecting the camera to your computer 87 Copying images 88 Viewing the images on your computer 90 Image file storage destinations and file names 91 Viewing an image previously copied to a computer 93 Installing Picture Package 93 Copying images using Picture Package 95 Using Picture Package 96 Copying images to your computer For Macintosh users 97 Using ImageMixer VCD2 98 Trou...

Page 8: ...nger screws and may damage the camera Identifying the parts See the pages in parentheses for details of operation A Shutter button 24 B Flash 29 C Multi connector bottom surface D Tripod receptacle bottom surface E Finder window F Self timer lamp 28 AF illuminator 31 117 G Lens H Microphone I DC IN jack cover 11 14 J DC IN jack 11 14 5 6 7 8 9 q qa 1 2 3 4 ...

Page 9: ...ndex button 39 H POWER lamp 15 I Mode dial 10 114 J POWER button 15 K Battery Memory Stick cover L Access lamp 19 M RESET button 100 N Battery eject lever 11 O Hook for wrist strap 7 8 9 q qa qs qd qf qg 1 2 3 4 5 6 Attaching the wrist strap A Control button Menu on v V b B z 16 Menu off 7 29 28 25 27 Mode dial M Shutter speed aperture value 52 B Finder 32 Self timer recording lamp red 28 24 AE AF...

Page 10: ... functions using the menu pages 46 and 114 M Manual exposure shooting You can manually adjust the shutter speed and the aperture value page 52 In addition you can set the desired shooting functions using menus pages 46 and 114 SCN Scene Selection You can easily shoot an effective photo based on the scene conditions in the scene page 34 In addition you can set the desired shooting functions using m...

Page 11: ...of the battery pack face the tip of the v mark on the battery insertion slot The battery pack is easily inserted by pushing the battery eject lever at the front of the battery compartment toward the front of the camera Open the DC IN jack cover and connect the AC Adaptor supplied to the DC IN jack of your camera Open the cover in the arrow direction as illustrated above Connect the DC plug with th...

Page 12: ...dicator The battery remaining indicator on the LCD screen shows the remaining shooting or viewing time When you switch the LCD screen on off it takes about one minute for the correct battery remaining time to appear The displayed time remaining may not be correct under certain circumstances or conditions Charging time Approximate time to charge a completely discharged battery pack using the AC Ada...

Page 13: ...ns on and off once every ten times AF Mode is set to Single in the SET UP settings The measurement method is based on CIPA standard CIPA Camera Imaging Products Association Viewing still images2 2 Viewing single images in order at about three second intervals Shooting movies3 3 Shooting movies continuously with the image size 160 The number of images and the battery life that can be recorded viewe...

Page 14: ...tor and to a wall outlet wall socket When you have finished using the AC Adaptor disconnect it from the DC IN jack of the camera and from a wall outlet wall socket The set is not disconnected from the AC power source mains as long as it is connected to the wall outlet wall socket even if the unit itself has been turned off 2 2To a wall outlet wall socket Power cord mains lead 1 Using your camera a...

Page 15: ...the arrow direction turns on the camera To turn off the power rotate it back The Auto Power Off function If no tasks are performed for about three minutes when shooting viewing images or setting up the camera while using the battery pack power is automatically shut off to preserve battery power However in the following circumstances even if the battery pack is being used to power the camera the Au...

Page 16: ...n setting up the menu press v V b B to select the item or the setting and make the setting When setting up the SET UP press v V b B to select the item or the setting and press z to make the setting 2 1 Camera AF Mode Digital Zoom Date Time Red Eye Reduction AF Illuminator Auto Review Single Smart Off Off Auto Off SELECT Cancel OK Setup 2 File Number USB Connect Video Out Clock Set 1 ...

Page 17: ...lect from Y M D year month day M D Y and D M Y If the rechargeable button battery which provides the power for saving the time data is ever fully discharged page 120 the Clock Set screen will appear again When this happens reset the date and time by starting from Step 3 above To set the time and the date again set the mode dial to SET UP select Clock Set in Setup 2 pages 47 and 118 then proceed fr...

Page 18: ...d 5 until all of the items have been set If you select D M Y in Step 3 set the time on a 24 hour cycle 12 00 AM stands for midnight and 12 00 PM stands for noon Select OK with B on the control button then press z The date and time are set and the clock will start to keep time To cancel the setting process select Cancel then press z 4 2004 1 1 12 00 AM OK Cancel Clock Set D M Y M D Y Y M D 5 2005 1...

Page 19: ...Memory Stick push it as far as it can go If you do not insert it correctly a proper recording or playback may not be carried out Close the battery Memory Stick cover To remove the Memory Stick Open the battery Memory Stick cover then push the Memory Stick to pop it out Whenever the access lamp is lit the camera is recording or reading out an image Never open the battery Memory Stick cover or turn ...

Page 20: ... setup item appears For more information about the image size see page 21 Select the desired image size with v V on the control button The image size is set After the setting is completed press Image Size The Image Size setup item disappears from the LCD screen This setting is maintained even when the power is turned off 1 Mode dial 2 VGA E Mail 1M 3M 3 2 5M 5M Image Size 3 VGA E Mail 1M 3M 3 2 5M...

Page 21: ...n image size and quality level appropriate to the kind of images you want to shoot by checking the table below 1 The default setting is 5M This size can give the highest image quality using the camera 2 This option records images in a horizontal to vertical proportion of 3 2 to match the size of the print paper used or postcards Short description of the image size The following illustration shows ...

Page 22: ...354 384 723 3 2 6 11 12 23 25 48 51 96 92 174 188 354 384 723 3M 10 18 20 37 41 74 82 149 148 264 302 537 617 1097 1M 24 46 50 93 101 187 202 376 357 649 726 1320 1482 2694 VGA E Mail 97 243 196 491 394 985 790 1975 1428 3571 2904 7261 5928 14821 Low compression looks better High compression normal When the images recorded using other Sony devices are played back the image size indication may be d...

Page 23: ...ens portion to turn on your camera You can create a new folder in the Memory Stick and select the folder for storing images page 48 Hold the camera steadily with both hands and position a subject in the center of the focus frame The minimum focal distance to a subject is approx 50 cm 19 3 4 inches To shoot subjects at distances closer than this use the macro mode page 27 The frame indicated on the...

Page 24: ...s When you try to shoot a subject that is hard to focus on the AE AF lock indicator will change to flashing slowly and the AE lock beep does not sound The Auto Focus function may be difficult to use with in the following subjects In such cases release the shutter button then try to recompose the shot and focus again The subject is distant from the camera and dark The contrast between the subject a...

Page 25: ...e the zoom scaling while shooting movies page 80 T W T W 60min 60min 101 101 96 VGA S AF 96 VGA 1 1 5 0 S AF W wide angle T telephoto Zoom Your camera is equipped with zoom functions that enlarge the image using optical zoom and two types of digital processing Digital zoom can be selected from smart zoom or precision digital zoom When digital zoom is set the zoom method switches from optical zoom ...

Page 26: ...ollows Smart zoom cannot be used when the image size is set to 5M or 3 2 The default setting of the image size is 5M When using the smart zoom the image on the LCD screen may look rough However this has no effect on the recorded image You cannot use the smart zoom in the Multi Burst mode Precision digital zoom All image sizes are enlarged up to a maximum 6 This function cuts out and enlarges a cer...

Page 27: ...8 cm 3 1 4 inches from the end of the lens When the zoom is set all the way to the T side Approx 25 cm 9 7 8 inches from the end of the lens To shoot at even closer distances than in macro mode use Magnifying glass mode page 34 Set the mode dial to and press B on the control button The macro indicator appears on the LCD screen If the menu is currently displayed press MENU first to make the menu di...

Page 28: ...shoot may be different This is due to the parallax effect When shooting in macro mode the focus range is very narrow and you may not be able to focus on the whole of the subject When shooting in macro mode the focus adjustment becomes slower to accurately focus on a close subject Using the self timer Set the mode dial to and press V on the control button The self timer indicator appears on the LCD...

Page 29: ...he lens portion angle When shooting in mirror mode turn over the lens portion as illustrated above The image on the LCD screen is a mirror image However the image can be normal when recorded Image on the LCD screen Recorded image Selecting a flash mode Set the mode dial to and press v on the control button repeatedly to select a flash mode The flash mode has the following features No indicator Aut...

Page 30: ...ettings page 115 When the mode dial is set to you cannot change the brightness of the flash Because the shutter speed is slower under dark conditions when Slow synchro or No flash is selected it is recommended that you use a tripod While the flash is being charged the CHG lamp flashes After charging is completed the lamp goes out This setting is maintained even when the power is turned off To redu...

Page 31: ...ately 3 0 m 9 feet 10 1 8 inches is recommended Focus is achieved as long as AF illuminator light reaches the subject even if the light is slightly off the center of the subject When the focus preset distance is set page 51 the AF illuminator does not function The AF range finder frame does not appear The or indicator flashes and AF operates with priority on subjects located near the center The AF...

Page 32: ... screen when the AE AF lock lamp of the finder section stops flashing and remains on you can start shooting page 23 When the LCD screen is turned off The digital zoom does not function page 25 AF mode is set to Single page 50 If you press Flash mode Self timer Macro with the LCD screen turned off the image will be displayed on the screen for approximately two seconds so you can check or change the...

Page 33: ... V on the control button then press z Day Time Inserts the date and the time of shooting into the image Date Inserts the year the month and the date of shooting into the image Off Does not insert date time data into the image After the setting has been completed set the mode dial to to shoot your image You can shoot even when the mode dial is set to P M or SCN When you chose Date the date will be ...

Page 34: ...image is enlarged using the digital zoom Twilight mode Under dark lighting conditions you can shoot a distant night view Because the shutter speed is slow it is recommended that you use a tripod Twilight portrait mode Use this mode when shooting people in the foreground at night This mode allows you to shoot images of people in the foreground with distinct outlines without losing the feeling that ...

Page 35: ...blue of the water is clearly recorded High speed shutter mode Use this mode to shoot moving subjects outdoors or in other bright places The shutter speed becomes faster so images shot in dark places become darker Fireworks mode You can record fireworks in all their splendor The focus distance is set to infinity and the shutter speed becomes slower so using a tripod is recommended You can change th...

Page 36: ...ppears Select SCN Scene with b on the control button then select the desired mode with v V To return to normal mode Set the mode dial to a different mode The setting is maintained even when the power is turned off 1 WB ISO SCN Scene MENU WB ISO SCN Scene 2 ...

Page 37: ... a a a a a a a Auto a a a a a a a a a a a a a a a a a a a a a a a a Center AF 0 5m 1 0m 3 0m 7 0m SL NR slow shutter The NR slow shutter function reduces noise from recorded images providing clear images When the shutter speed is set to 1 6 second or slower the NR slow shutter function automatically works and NR is indicated next to the shutter speed indicator Press the shutter button fully down T...

Page 38: ...n the screen For details on the movies see page 81 For a detailed description of the LCD screen indicators see page 126 BACK NEXT VOLUME VGA 60min 10 30PM 2005 1 1 101 0008 8 9 101 SINGLE DISPLAY Single screen Index screen Viewing on the single image screen Set the mode dial to and turn on the camera The newest image in the selected recording folder page 63 is displayed The image may appear rough ...

Page 39: ... index screen Press index The display switches to the Index screen To display the next previous index screen Press v V b B on the control button to move the yellow frame up down left right SINGLE DISPLAY 1 Press v V b B on the control button to select an image The image in the yellow frame is selected To return to the single image screen Press the zoom T button or press z on the control button 2 S...

Page 40: ... the TV before connecting the camera and the TV with the A V multi cable Turn on the TV and set the TV Video switch to Video The name and location of this switch may differ depending on your TV For details refer to the operating instructions supplied with the TV Set the mode dial to and turn on the camera Press b B on the control button to select the desired image When using the camera abroad it m...

Page 41: ...da Central America Chile Colombia Ecuador Jamaica Japan Korea Mexico Peru Surinam Taiwan the Philippines the U S A Venezuela etc PAL system Australia Austria Belgium China Czech Republic Denmark Finland Germany Holland Hong Kong Hungary Italy Kuwait Malaysia New Zealand Norway Poland Portugal Singapore Slovak Republic Spain Sweden Switzerland Thailand United Kingdom etc PAL M system Brazil PAL N s...

Page 42: ...v on the control button then press z Access appears on the LCD screen and the image will be deleted To delete other images continuously Select the image you want to delete with b B on the control button Next select Delete with v on the control button then press z To cancel the deletion Select Exit with V on the control button then press z 1 BACK NEXT 10 30PM 2005 1 1 101 0002 2 9 VOLUME VGA 60min ...

Page 43: ...ge you want to delete with v V b B on the control button then press z The delete mark is indicated on the selected image The image has not yet been deleted at this point Put the mark on all of the images you want to delete To cancel your selection select images you want to cancel and press z on the control button again The mark disappears 1 Delete Select Exit All In This Folder 2 Delete Select Exi...

Page 44: ...ct OK then press z All of the unprotected images in the folder are deleted To cancel the deletion select Cancel then press z Formatting a Memory Stick Insert the Memory Stick you want to format into the camera The term formatting means preparing a Memory Stick to record images this process is also called initialization The supplied Memory Stick and those available commercially are already formatte...

Page 45: ...v on the control button then press z To cancel the formatting Select Cancel with V on the control button then press z Select OK with v on the control button then press z The Formatting message appears on the LCD screen When this message disappears the format is complete 2 3 2 1 Memory Stick Tool Format Create REC folder Change REC folder OK Cancel 4 Format All data will be erased 60min Ready OK Ca...

Page 46: ...set to press z on the control button after you select a setting d Select the desired setting with v V on the control button The frame of the selected setting is scaled up and the setting is entered When the v mark is indicated above the item or the V mark is indicated below the item All of the available items are not displayed Pressing v V on the control button displays the hidden items To turn of...

Page 47: ...any position other than SET UP For details on the SET UP items see page 117 Deciding the still image quality You can select the still image quality from Fine or Standard a Set the mode dial to P M or SCN b Press MENU The menu appears c Select P Quality with b B then select the desired image quality with v V 2 1 SELECT Camera AF Mode Digital Zoom Date Time Red Eye Reduction AF Illuminator Auto Revi...

Page 48: ... To cancel folder creation In Step 2 or 3 select Cancel Once you create a new folder you cannot delete the new folder with the camera Images are recorded in the newly created folder until a different folder is created or selected Selecting the recording folder a Set the mode dial to SET UP b Select Memory Stick Tool with v V Change REC Folder with B V and OK with B v then press z The recording fol...

Page 49: ...us on the subject because it is not in the center of the frame You can check the position where the focus was adjusted using the green frame The default setting is Multipoint AF Center AF The AF range finder is only the center of the frame You can shoot in desired image composition using the AF lock method a Set the mode dial to P M SCN or b Press MENU The menu appears c Select 9 Focus with b B th...

Page 50: ... AF This mode is useful for shooting stationary subjects The focus is not adjusted before you press and hold the shutter button halfway down After you press and hold the shutter button halfway down and AF lock is complete the focus is locked The default setting is Single AF Monitoring AF This shortens the time needed for focusing The camera automatically adjusts the focus before you press and hold...

Page 51: ...ter button fully down When you are using AF lock you can capture an image with the correct focus even if the subject is at the edge of the frame You can carry out the AF lock adjustment process before you press the shutter button fully down VGA 60min FINE 98 101 S AF P F3 5 30 F3 5 30 VGA 60min FINE 98 P 101 S AF m AF range finder frame AE AF lock indicator Setting the distance to the subject Focu...

Page 52: ...ference between the set value and the appropriate exposure determined by the camera is displayed on the LCD screen as the EV value page 55 0EV indicates the most suitable value set by the camera a Set the mode dial to M b Press z Set indicated on the lower left corner of the LCD screen changes to Return and the camera enters the manual exposure setup mode c Select a shutter speed with v V A shutte...

Page 53: ...press z to cancel the manual exposure setup mode Return changes to Set To cancel the manual exposure mode Set the mode dial to other than M When the shutter speed is set to one second or slower is indicated after the value e g 1 If the proper exposure is not obtained after making the settings the EV value on the LCD screen flashes when the shutter button is pressed halfway down You can shoot in th...

Page 54: ... exposure Aperture Aperture is the opening in the diaphragm of the lens part which adjusts the amount of light entering the camera The aperture setting value is called the aperture value F value Open smaller F value Close larger F value Adjustment by shutter speed Shutter speed adjusts the time during which light enters the camera Faster Slower When setting a slower shutter speed it is recommended...

Page 55: ...de dial to P SCN or b Press MENU The menu appears c Select EV with b The value of the exposure adjustment is displayed d Select the desired exposure adjustment value with v V Make your adjustment while confirming the brightness of the background of the subject on the LCD screen To cancel the EV adjustment In Step 4 return the exposure adjustment value to 0EV When the subject is extremely bright or...

Page 56: ...during Quick Review page 25 The histogram does not appear in the following cases When the menu is displayed When using playback zoom When shooting or playing back movies appears and the histogram does not appear in the following cases When recording in the digital zoom area When the image size is 3 2 When playing back Multi Burst mode images When a still image is rotated The histogram before recor...

Page 57: ... to overexpose or underexpose your subject giving a whitish or darkish image You can try to adjust the exposure to suit your taste m Adjust in the direction m Adjust in the direction Selecting the metering mode You can select a metering mode to determine the exposure depending on what part of the subject is used to measure Multi pattern metering No indicator The image is split up into multiple zon...

Page 58: ...uations The color of the subject that you see will be captured according to the lighting conditions When you want to fix the conditions under which the image is captured or when the color of the entire image seems to be a bit unnatural it is recommended that you adjust the white balance Auto No indicator The white balance is adjusted automatically The default setting is Auto Daylight Used when sho...

Page 59: ...tomatic settings In Step 3 select Auto Under fluorescent lights that flicker even if you choose the white balance may not be properly adjusted When the flash strobes the manual setting is canceled and the image is recorded in Auto mode The white balance selection is limited according to the Scene Selection mode page 37 Adjusting the flash level Flash Level You can adjust the amout of flash light a...

Page 60: ...ecording stops even if you press and hold the shutter button a Set the mode dial to P M or SCN b Press MENU The menu appears c Select Mode REC Mode with b B then select Burst with v V d Shoot the image You can shoot images until the maximum number of images are shot when you press and hold the shutter button The recording stops if you release the shutter button in the midst of the shooting You can...

Page 61: ...Interval with b B then select the desired between frame interval with v V You can choose from 1 7 5 1 15 1 30 e Shoot the image 16 frames in a row will be recorded in a single image image size 1M If you rotate the lens portion during shooting the shot image may be upside down The following functions cannot be used in Multi Burst mode Smart zoom Shooting with the flash Inserting the date and time W...

Page 62: ... the camera in the Cyber shot Station not supplied This lets you easily charge the camera so that it is ready for use at any time The remote controller supplied with the Cyber shot Station lets you enjoy image playback on a TV from a remote location In addition when a PictBridge compliant printer is connected images can be printed by simple remote controller operations For more detailed informatio...

Page 63: ...eated in the Memory Stick When the first or last image in the folder is displayed the following icons are indicated on the LCD screen Moves to the previous folder Moves to the next folder Moves to both the previous and next folders On the single screen On the Index screen When no images are stored in the folder No file in this folder appears Mode dial Control button MENU BACK NEXT Select Folder Ca...

Page 64: ... with playback zoom To cancel enlarged viewing Press z You cannot use Playback zoom with movies or images recorded in Multi Burst mode If you press playback zoom when you are viewing images that have not been enlarged the Index screen will appear page 38 The images displayed in Quick Review page 25 can be enlarged using the procedures outlined in Steps 3 to 5 Mode dial Control button MENU Press v ...

Page 65: ...ck successive images Slide show You can play back recorded images in succession one after another This is useful for checking your images or for giving a presentation a Set the mode dial to b Press MENU The menu appears c Select Slide with b B then press z Set the following items with v V b B Interval settings 3 sec 5 sec 10 sec 30 sec 1 min Image Folder Plays back all the images in the selected f...

Page 66: ...d display the image you want to rotate b Press MENU The menu appears c Select Rotate with b B then press z d Select with v and rotate the image with b B e Select OK with v V then press z To cancel the rotation In Step 4 or 5 select Cancel You cannot rotate protected images movies and Multi Burst images You may not be able to rotate images shot with other cameras When viewing images on a computer t...

Page 67: ...e playback press z again The playback starts from the frame displayed on the LCD screen Playing back frame by frame a Set the mode dial to b Select the Multi Burst image with b B The selected Multi Burst image is played back continuously c Press z when the desired frame is displayed Step appears d Advance the frame with b B B The next frame is displayed When you press B and hold it the frame advan...

Page 68: ... mode you cannot delete only certain frames When you delete images all 16 of the frames are deleted at the same time 1 Display the Multi Burst image you want to delete 2 Press delete 3 Select Delete then press z All of the frames are deleted ...

Page 69: ...ed is now protected and the Protect mark is indicated on the screen e To protect other images display the image you want to protect with b B then press z To cancel the protection In Step 4 or 5 press z again The mark disappears On the Index screen a Set the mode dial to press index to switch to the Index screen b Press MENU The menu appears c Select Protect with b B then press z d Select Select wi...

Page 70: ...select Off and press z Changing image size Resize You can change the image size of a recorded image and save it as a new file You can resize to the following sizes 5M 3M 1M VGA The original image is retained even after resizing a Set the mode dial to b Display the image you want to resize with b B c Press MENU The menu appears d Select Resize with b B then press z e Select the new size with v V th...

Page 71: ... with b B c Press MENU The menu appears d Select DPOF with b B then press z The mark is indicated on this image e To mark other images display the image you want to mark with b B then press z To delete the mark In Step 4 or 5 press z again The mark disappears On the Index screen a Set the mode dial to and press index to switch to the Index screen b Press MENU The menu appears c Select DPOF with b ...

Page 72: ...o delete the mark In Step 5 select the image you want to delete the mark with v V b B and press z To delete all the marks from the images in the folder In Step 4 select All In This Folder then press z Next select Off then press z To cancel the marking In Step 4 select Cancel or in Step 8 select Exit ...

Page 73: ...ng off Preparing the camera Set the USB mode on the camera to connect the camera with a printer a Set the mode dial to SET UP b Select Setup 2 with V then select USB Connect with B v V c Select PictBridge with B v then press z The USB mode is set Connecting the camera to the printer Connect the multi connector on the camera and the USB connector on the printer using a USB multi cable and turn on t...

Page 74: ...error message is sent from the connected printer during the connection flashes for about five seconds In such cases check the printer On the single screen a Display the image you want to print with b B b Press MENU The menu appears c Select Print with b B then press z d Select This image with v V then press z The Print screen appears Setting items not available for a particular printer are not dis...

Page 75: ...pecified number regardless of the image displayed To insert the date and time on images In Step 5 select Date then select the date format with b B You can select from Day Time or Date When you chose Date the date will be inserted in the order set in Setting the date and time page 17 However this function may not be provided depending on the printer On the Index screen a Press index to switch to th...

Page 76: ...In This Folder then press z To insert the date and time on images In Step 8 select Date then select the date format with b B You can select from Day Time or Date When you chose Date the date will be inserted in the order set in Setting the date and time page 17 However this function may not be provided depending on the printer Printing index images You can print some images side by side We refer t...

Page 77: ...nter are not displayed e Select Index with v select On with b B f Select Quantity with v V select the number of images laid side by side with b B You can select the number up to 20 You can lay the specified number of images side by side g Select OK with V B then press z The image is printed Do not disconnect the USB multi cable while the Not disconnect USB multi cable mark is indicated on the LCD ...

Page 78: ...images On the Index screen a Press index to switch to the Index screen b Press MENU The menu appears c Select Print with B then press z d Select Select with b B then press z e Select the desired image with v V b B then press z The mark is indicated on the selected image f To print other images repeat Step 5 g Press MENU h Select Index with v then select On with b B i Select Quantity with v V selec...

Page 79: ...isplayed To print all the images in the folder In Step 4 select All In This Folder then press z To insert the date and time on images In Step 9 select Date then select the date format with b B You can select from Day Time or Date When you chose Date the date will be inserted in the order set in Setting the date and time page 17 However this function may not be provided depending on the printer ...

Page 80: ...are not recorded Each time you press the status of the LCD screen changes as follows Indicators off t LCD screen off t Indicators on A histogram is not displayed See page 125 for a detailed description of the indicated items To shoot close ups Macro Set the mode dial to and follow the procedure on page 27 To shoot with a self timer Set the mode dial to and follow the procedure on page 28 Be carefu...

Page 81: ... forward rewind Press B next or b previous while playing back a movie To return to normal playback press z Indicators on the LCD screen while you are viewing movies Each time you press the status of the LCD screen changes as follows Indicators off t LCD screen off t Indicators on A histogram is not displayed See page 127 for a detailed description of the indicated items The procedure for viewing m...

Page 82: ...vies display the movie you want to delete with b B then repeat Step 4 To cancel the deletion In Step 4 or 5 select Exit On the Index screen a Set the mode dial to and press index to switch to the Index screen b Press delete c Select Select with b B then press z d Select the movies you want to delete with v V b B then press z The delete mark is indicated on the selected movie The movie has not yet ...

Page 83: ...ch movies to your e mail messages Note that the original movie is deleted after you cut it The file numbers assigned when movies are cut The cut movies are assigned new numbers and recorded as the newest files in the recording folder The original movie is deleted and its file number is skipped Example Cutting the movie numbered 101_0002 1 2 101_0002 101_0003 3 101_0001 1 2 3 A B 101_0002 101_0004 ...

Page 84: ...e the cutting point select Cancel The playback of the movie starts again f When you have decided on a cutting point select OK with v V and press z g Select OK with v then press z The movie is cut To cancel cutting In Step 5 or 7 select Exit The movie appears on the LCD screen again You cannot cut the following images Still images Movies not long enough to cut Protected movies You cannot restore mo...

Page 85: ...a computer Normal and PTP modes The default setting is the Normal mode This section describes the Normal mode as an example Compatible only with Windows XP When connected to a computer only the data in the folder selected by the camera is copied to the computer To select the folder follow the procedure on page 63 Communication with your computer When your computer resumes from the suspend or sleep...

Page 86: ...lick Picture Package The USB driver will be installed when Picture Package is installed page 93 When the computer is in use shut down all application software currently running before you install the USB driver b Click USB Driver on the title screen The InstallShield Wizard screen appears c Click Next The USB driver installation starts When the installation is completed the screen informs you of c...

Page 87: ...e camera Rotate the lens portion back to the original position and place the camera with the LCD screen facing upwards e Connect the USB multi cable to your computer When using a desktop computer connect the USB multi cable to the USB connector on the rear panel When using Windows XP the AutoPlay wizard automatically appears on the desktop Proceed to page 89 USB Mode Normal appears on the LCD scre...

Page 88: ...he Removable Disk icon is not shown see page 89 When using Windows XP see page 89 b Double click DCIM then double click the folder that the image files you want to copy are stored c Right click the image file to display the menu then select Copy from the menu d Double click the My Documents folder and right click on the My Documents window to display the menu then select Paste from the menu The im...

Page 89: ...ge 87 Click Copy pictures to a folder on my computer using Microsoft Scanner and Camera Wizard then click OK The Scanner and Camera Wizard screen appears b Click Next The images stored on the Memory Stick are displayed c Click the checkbox of images that you do not want to copy to your computer to remove the checkmark then click Next The Picture Name and Destination screen appears d Select a name ...

Page 90: ...uments The My Documents folder contents are displayed This section describes the procedure for viewing copied images in the My Documents folder When not using Windows XP double click My Documents on the desktop b Double click the desired image file The image is displayed ...

Page 91: ...he images in these folders are available only for viewing For more information about the folder see pages 48 and 63 Folder containing image data which was recorded using the camera not equipped with the folder creating function Folder containing image data which was recorded using your camera When not creating any folders there is only the 101MSDCF folder Folder containing movie data etc which was...

Page 92: ...in movie mode and its corresponding index image file are the same Folder File name File meaning 101MSDCF to 999MSDCF DSC0ssss JPG Still image files shot in Normal mode page 23 Burst mode page 60 Multi Burst mode page 61 MOV0ssss MPG Movie files page 80 MOV0ssss THM Index image files recorded in movie mode page 80 ...

Page 93: ... MPG Do not change the extension b Copy the image file to a folder on the Memory Stick 1 Right click the image file then click Copy 2 Select and double click the DCIM folder from Removable Disk or Sony MemoryStick in My Computer 3 Right click the sssMSDCF folder in the DCIM folder then click Paste sss stands for any number within the range from 100 to 999 Installing Picture Package Picture Package...

Page 94: ...have not yet installed the USB driver page 86 do not connect the camera to the computer before you install the Picture Package software except Windows XP b Click Picture Package The Choose Setup Language screen appears c Select the desired language then click Next This section describes the English screen d Click Next The License Agreement screen appears Read the agreement carefully If you accept ...

Page 95: ...he camera and your computer with the USB multi cable Picture Package starts up automatically and the images in the Memory Stick are copied to the computer automatically After the images are copied Picture Package Viewer starts up and the images copied are displayed Normally Picture Package and Date folders are created inside the My Documents folder and all of the image files recorded with the came...

Page 96: ... viewing images appears Saving images on a CD R Click Save the images on CD R on the left side of the screen Click Save the images on CD R in the lower right corner of the screen The screen used for saving images on a CD R appears A CD R drive is required to save images on a CD R For further information on compatible drives see the following home page of the Pixela User Support Center http www ppa...

Page 97: ...your computer resumes from the suspend or sleep mode communication between your camera and your computer may not recover at the same time When a USB connector is not provided on your computer When neither a USB connector nor a Memory Stick slot is provided you can copy images using an additional device See the Sony Website for details http www sony net a Connecting your camera to your computer For...

Page 98: ...io not supplied When the computer is in use shut down all other application software currently running before you install ImageMixer VCD2 Required computer environment OS Mac OS X v10 1 5 or later The above OS must be installed at the factory CPU iMac eMac iBook PowerBook Power Mac G3 G4 series Memory 128 MB or more 256 MB or more is recomended Hard Disk Disk space required for installation approx...

Page 99: ...plication 2 Click ImageMixer VCD2 3 Click Video CD The video disc mode starts up You cannot create a DVD Video 4 Select the folder in which the desired images are stored 1 Select the desired folder on the left frame then click Add The selected folder moves to the right frame 2 Click Next 5 Set up the menu background buttons titles and so on then click Next Confirm the set up according to your pref...

Page 100: ...nnot charge the battery pack The camera is turned on p Turn the camera off page 15 The battery pack cannot be installed The battery pack is not installed correctly p Install the battery pack while pushing the battery eject lever toward the front of the camera using the front edge of the battery pack page 11 p Install the battery pack correctly page 11 The CHG lamp flashes when charging a battery p...

Page 101: ...ly page 12 p Install a charged battery pack page 11 p Replace the battery pack with a new one The battery pack runs down too quickly You are using in an extremely cold location The DC plug is dirty so the battery pack is not charged enough The battery pack is dead page 121 p See page 121 p Clean the pins of the DC plug with a cotton swab etc and charge the battery pack page 11 p Replace the batter...

Page 102: ...d distance page 34 p Set it to other modes than Magnifying glass mode Twilight mode Landscape mode or Fireworks mode page 37 p Set to the auto focus mode page 51 Optical zoom does not function You cannot change the zoom scaling while shooting a movie Magnifying glass mode is selected for the Scene Selection function when shooting still images p Set it to other modes than Magnifying glass mode page...

Page 103: ... is not a malfunction When looking at the LCD screen in a dark place some noise may show up on the LCD screen The camera temporarily brightens the LCD screen to allow you to check the image being displayed while you are using the camera in a dark place p This will have no effect on the image you shoot You cannot shoot images No Memory Stick is inserted The capacity of the Memory Stick is full The ...

Page 104: ...dscape mode Fireworks mode or Candle mode is selected for the Scene Selection function when shooting still images p Select other modes than Magnifying glass mode Twilight mode Landscape mode Fireworks mode or Candle mode page 34 You cannot shoot images in succession The capacity of the Memory Stick is full The battery level is low and you can shoot only one image p Delete unnecessary images saved ...

Page 105: ...p Check the connection page 40 The images cannot be played back on a computer p See page 106 Symptom Cause Solution Your camera cannot delete an image The image is protected The write protect switch on the Memory Stick is set to the LOCK position p Cancel the protection page 69 p Set it to the recording position page 120 You have deleted the image by mistake Once you have deleted an image you cann...

Page 106: ...15 p Use the AC Adaptor page 14 p Use the supplied USB multi cable page 87 p Disconnect the USB multi cable and securely connect it again Make sure that USB Mode is displayed on the LCD screen page 87 p Set it to Normal page 118 p Disconnect the USB cables except for those connected to the keyboard and the mouse page 85 p Directly connect the camera and your computer without using a USB hub page 8...

Page 107: ...g folder p Copy them to an available folder such as 101MSDCF page 91 Symptom Cause Solution You cannot insert a Memory Stick You are inserting it backwards p Insert it from the right side page 19 You cannot record on a Memory Stick The write protect switch on the Memory Stick is set to the LOCK position The Memory Stick is full p Set it to the recording position page 120 p Delete unnecessary image...

Page 108: ...ges shot using other than this camera may not be able to be printed p Check that the camera and the printer are properly connected using the USB multi cable p Turn on the printer For further information refer to the operating instructions supplied with it p Disconnect and connect the USB multi cable again If you cannot print still disconnect the USB multi cable turn off and on the printer then con...

Page 109: ...ra does not work The internal system is not working properly p Disconnect and then after one minute reconnect all power sources and turn on the camera If this does not work press the RESET button located inside the battery Memory Stick cover with a pointed object then turn the power on again This will clear the date and time settings etc You cannot identify the indicator on the LCD screen p Check ...

Page 110: ...u cannot record images Delete unnecessary images or data pages 42 and 82 Read only memory You cannot record or delete images on the Memory Stick with this camera No file in this folder No images have been recorded in this folder Folder error A folder with the same first three digits number already exists on the Memory Stick For example 123MSDCF and 123ABCDE Select other folders or create a new fol...

Page 111: ...ances the connection may not be established Disconnect and connect the USB multi cable again If an error message is indicated on the printer refer to the operating instructions supplied with the printer Connect to device You tried to print images before the printer connection was established Connect to a PictBridge compliant printer No printable image You tried to execute DPOF image without checki...

Page 112: ...measure a couple of times the camera may need to be repaired Contact your Sony dealer or local authorized Sony service facility Code Cause Countermeasure C 32 ss There is trouble with your camera s hardware Turn the power off and on again page 15 C 13 ss The camera cannot read or write data on the Memory Stick Re insert the Memory Stick several times An unformatted Memory Stick is inserted Format ...

Page 113: ... conditions For normal shooting times and numbers of images that can be saved see page 22 When the remaining number of images recordable is more than 9 999 9999 is indicated Multi Burst Units images Movie The numbers indicate the recording time For example 1 31 33 indicates 1 hour 31 minutes 33 seconds The image size is as follows 640 Standard 640 480 160 160 112 16MB 32MB 64MB 128MB MSX 256 MSX 5...

Page 114: ...page 61 Records images in succession page 60 Records an image using the normal recording mode Item Setting Description SCN 1 x Sets the Scene Selection mode page 34 EV 2 2 0EV 1 7EV 1 3EV 1 0EV 0 7EV 0 3EV x0EV 0 3EV 0 7EV 1 0EV 1 3EV 1 7EV 2 0EV Adjusts the exposure page 55 9 Focus 7 0m 3 0m 1 0m 0 5m Center AF x Multi AF Chooses the auto focus method page 49 or sets the focus preset distance pag...

Page 115: ... Standard Records images with fine image quality mode Records images in the standard image quality mode page 47 Mode REC Mode Multi Burst Burst xNormal Records a continuous burst of 16 frames within a single still image page 61 Records images in succession page 60 Records an image using the normal recording mode Interval 3 1 7 5 1 15 x1 30 Selects the Multi Burst between frame shutter interval Onl...

Page 116: ... the images you want to play back page 63 Protect Protects unprotects images against accidental erasure page 69 DPOF Selects still images you want to attach cancel the print DPOF mark page 71 Print Prints images using a PictBridge compliant printer page 73 Slide Interval Image Repeat Start Cancel Sets the slide show interval page 65 For single image screen only x3 sec 5 sec 10 sec 30 sec 1 min Sel...

Page 117: ...hen using a flash page 30 AF Illuminator xAuto Off Selects whether to emit an AF fill light in the dark Helps when it is hard to focus on the subject under dark lighting page 31 Auto Review On xOff When shooting still images selects whether to display the image just after you shoot a still image Setting this to On displays the recorded images for about two seconds During this time you cannot shoot...

Page 118: ...nd Language Displays the menu items warnings and messages in selected language Item Setting Description File Number x Series Reset Assigns numbers to files in sequence even if the Memory Stick is changed or the recording folder is changed Resets the file numbering and starts from 0001 each time the folder is changed When the recording folder contains a file a number one higher than the largest num...

Page 119: ... the casing Thinner benzine alcohol disposable cloth or chemical such as insecticide Touch the camera with the above on your hand Contact with rubber or vinyl for a long time Note on operating temperature The camera is designed for use within a temperature range of 0 C to 40 C 32 F to 104 F Shooting in extremely cold or hot locations that exceed this range is not recommended On moisture condensati...

Page 120: ...to the Memory Stick Duo Adaptor 2 MagicGate Memory Stick and Memory Stick PRO are equipped with the MagicGate copyright protection technology MagicGate is copyright protection technology that uses encryption technology However because your camera does not support the MagicGate standards data recorded with your camera is not subject to MagicGate copyright protection 3 Supports high speed data trans...

Page 121: ...that you are inserting the Memory Stick Duo Adaptor in the proper direction when inserting it into the camera Inserting it in the wrong direction may cause a malfunction Do not insert a Memory Stick Duo that is not inserted into a Memory Stick Duo Adaptor into a Memory Stick compatible unit This may cause a malfunction of the unit When formatting the Memory Stick Duo insert the Memory Stick Duo in...

Page 122: ...ur camera then store it in a dry cool place This is to maintain the battery pack s functions To use the battery pack up on your camera leave the POWER button to on in slide show playback mode page 65 until the power goes off Always carry and store the battery pack in the battery case to prevent the battery terminals from becoming dirty or short circuited Battery life The battery life is limited Ba...

Page 123: ...amic speaker Exif Print Compatible PRINT Image Matching II Compatible PictBridge Compatible x AC LS5 LS5B AC Adaptor Input rating 100 V to 240 V AC 50 60 Hz 11 W 0 16 A to 0 09 A Output rating 4 2 V DC 1 5 A Operating temperature range 0 to 40 C 32 to 104 F Storage temperature range 20 to 60 C 4 to 140 F Dimensions excluding projecting parts Approx 48 29 81 mm 1 15 16 1 3 16 3 1 4 inches W H D Mas...

Page 124: ...qs qd ql w wa wf ws wg wd J Macro 27 K AF mode 50 AF range finder frame indicator 49 Focus preset value 51 L Spot metering cross hair 57 M NR slow shutter indicator 37 Shutter speed indicator 52 N Multi Burst between frame interval indicator 61 O Image quality indicator 47 P Recording folder indicator 48 Q Remaining number of recordable images indicator 22 R Remaining Memory Stick capacity indicat...

Page 125: ...mage size indicator 80 J Recording time Maximum recordable time indicator 80 K Recording folder indicator 48 L Remaining Memory Stick capacity indicator M Self diagnosis display 112 N Self timer indicator 28 O Menu guide menu 46 P EV adjustment indicator 55 Q AF range finder frame 49 Pressing the MENU button switches the menu guide menu on off 101 00 28 25 00 00 00 STBY 60min STD 6 4 0 C 32 00 1 2...

Page 126: ... Recording folder indicator 48 M Remaining Memory Stick capacity indicator N Image number Number of images recorded in the playback folder O Self diagnosis display 112 P Metering mode indicator 57 Flash indicator White balance indicator 58 101 C 32 00 2 0EV F3 5 500 12 12 VGA 60min 101 1 3 VOLUME BACK NEXT M 1 2 3 4 7 6 5 8 9 q qa qs qd qg qf qh qj qk ql Q Shutter speed indicator 52 Aperture value...

Page 127: ... H Recording folder indicator 48 I Number of images recorded in the playback folder J Remaining Memory Stick capacity indicator K Counter 81 L Playback screen 81 M Playback bar 81 N Menu guide menu 46 Pressing the MENU button switches the menu guide menu on off 00 00 12 60min 8 8 101 160 DPOF 1 2 3 4 5 6 VOL 101 7 8 9 0 qa qs qd qf The page numbers in parentheses indicate the location of additiona...

Page 128: ...g movies 83 Cyber shot Station 62 D Daylight 58 DC plug 11 14 Deleting movies 82 Deleting still images 42 Digital zoom 25 Divide 83 DPOF 71 E EV adjustment 55 F File names 91 File storage destinations 91 Finder 32 Fireworks 35 Flash 29 Flash Level 59 Fluorescent 58 Focus preset 51 Folder 48 63 Format 44 H High speed shutter 35 Histogram 56 I Image quality 47 Image size 20 21 ImageMixer VCD2 98 Inc...

Page 129: ...me 12 113 RESET button 100 Resize 70 Rotate 66 S Saturation 115 Scene Selection 34 Screen display 124 125 126 127 Self diagnosis display 112 Self timer 28 Sepia 62 SET UP 47 117 Sharpness 115 Shooting movies 80 Shooting still images 23 Shutter speed 52 Single AF 50 Single screen 38 Slide show 65 Smart zoom 26 Snow 35 Soft snap 35 Spot metering 57 T Trimming 65 TV color system 41 Twilight 34 Twilig...

Page 130: ......

Page 131: ......

Page 132: ...n Japan Printed on 100 recycled paper using VOC Volatile Organic Compound free vegetable oil based ink Additional information on this product and answers to frequently asked questions can be found at our Customer Support Website ...

Reviews: