background image

48

GB

Using only the front speaker 
and subwoofer (2 CHANNEL 
STEREO)

This mode outputs the sound from the front left 
and right speakers and subwoofer. Standard two 
channel (stereo) sources completely bypass the 
sound field processing. Multi channel surround 
formats are downmixed to two channels.
This allows you to play any source using only 
the front left and right speakers and subwoofer.

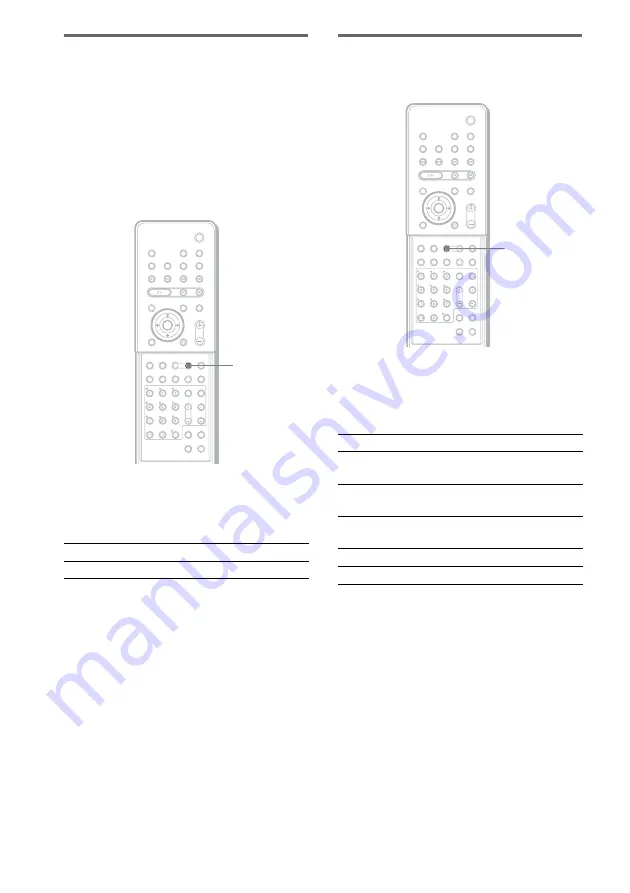
Press MODE repeatedly until “2CH 
STEREO” appears in the front panel 
display.

Selecting a sound field (AUTO 
FORMAT DIRECT button)

Press AUTO FORMAT DIRECT repeatedly 
until the sound field you want appears in 
the front panel display.

x

AUTO FORMAT DIRECT PRO LOGIC

Dolby Pro Logic produces five output channels 
from two-channel sources. This mode performs 
Pro Logic decoding to the input signal and 
output to front, center, and surround speakers. 
Meanwhile, the surround channel becomes 
monaural.

Sound field

Display

2 CHANNEL STEREO

2CH STEREO

MODE

With cover opened.

Sound field

Display

AUTO FORMAT DIRECT 
PRO LOGIC

DOLBY PL

AUTO FORMAT DIRECT 
PRO LOGIC II MOVIE

PLII MOVIE

AUTO FORMAT DIRECT 
PRO LOGIC II MUSIC

PLII MUSIC

Neo:6 CINEMA

NEO:6 CIN

Neo:6 MUSIC

NEO:6 MUS

AUTO FORMAT
DIRECT

With cover opened.

Summary of Contents for DAV-SR2

Page 1: ... 2004 Sony Corporation 4 255 438 11 1 DVD Home Theatre System Operating Instructions DAV SR2 ...

Page 2: ...itself has been turned off Unplug the unit from the wall outlet if you do not intend to use it for an extended period of time To disconnect the cord pull it out by the plug never by the cord Installing Allow adequate air circulation to prevent internal heat buildup Do not place the unit on surfaces rugs blankets etc or near materials curtains draperies that may block the ventilation slots Do not i...

Page 3: ... indicator lights up To turn off the system completely remove the AC power cord mains lead from the wall outlet mains On adjusting volume Do not turn up the volume while listening to a section with very low level inputs or no audio signals If you do the speakers may be damaged when a peak level section is suddenly played On cleaning Clean the cabinet panel and controls with a soft cloth slightly m...

Page 4: ... Particular Point on a Disc 38 Scan Slow motion Play Searching for a Title Chapter Track Index Album File 39 Viewing Disc Information 41 Sound Adjustments Changing the Sound 45 Enjoying Surround Sound 47 Selecting the Surround Back Decoding Mode 51 Using the Sound Effect 53 Using Various Additional Functions Changing the Angles 54 Displaying Subtitles 55 Locking Discs 56 CUSTOM PARENTAL CONTROL PA...

Page 5: ...al Information Troubleshooting 82 Specifications 85 Glossary 87 Index to Parts and Controls 90 Language Code List 95 DVD Setup Menu List 96 AMP Menu List 98 Index 99 Quick Reference for Remote Commander Back cover ...

Page 6: ... music piece on a VIDEO CD Super Audio CD CD or MP3 Index Super Audio CD CD Video Index VIDEO CD A number that divides a track into sections to easily locate the point you want on a VIDEO CD Super Audio CD or CD Depending on the disc no indexes may be recorded Scene On a VIDEO CD with PBC functions page 29 the menu screens moving pictures and still pictures are divided into sections called scenes ...

Page 7: ...hat the system cannot play The system cannot play the following discs CD ROMs except for extension MP3 JPG or JPEG CD Rs CD RWs other than those recorded in the following formats audio CD format video CD format MP3 JPEG format that conforms to ISO9660 Level 1 Level 2 or its extended format Joliet Data part of CD Extras DVD ROMs DVD Audio discs DVD RAMs DVD RWs in VR Video Recording mode Progressiv...

Page 8: ...ted by U S patents and other intellectual property rights Use of this copyright protection technology must be authorized by Macrovision and is intended for home and other limited viewing uses only unless otherwise authorized by Macrovision Reverse engineering or disassembly is prohibited This system incorporates with Dolby Digital and Dolby Pro Logic II adaptive matrix surround decoder and the DTS...

Page 9: ...plays the index and selects the index Super Audio CD to be played TIME page 40 Checks the elapsed time and the remaining playback time Inputs the time code for picture and music searching AUDIO DVD VIDEO CD Super Audio CD CD MP3 only page 45 Changes the audio setting SUBTITLE DVD only page 55 Displays the subtitles Changes the subtitle language ALBUM JPEG only page 32 Selects the album JPEG to be ...

Page 10: ...s are recorded on the disc FILE JPEG only page 32 Selects the file JPEG to be played DATE JPEG only page 44 Displays the date information ANGLE DVD only page 54 Changes the angle PLAYMODE VIDEO CD Super Audio CD CD MP3 JPEG only page 36 Selects the play mode REPEAT page 37 Plays the entire disc all titles all tracks one title chapter track album or contents of program repeatedly CUSTOM PARENTAL CO...

Page 11: ...he markings inside the compartment When using the remote point it at the remote sensor on the system Notes Do not leave the remote in an extremely hot or humid place Do not use a new battery with an old one Do not drop any foreign object into the remote casing particularly when replacing the batteries Do not expose the remote sensor to direct light from the sun or lighting apparatus Doing so may c...

Page 12: ...ct any speakers other than those supplied with this system To obtain the best possible surround sound specify the speaker parameters distance level etc on page 25 Required cords Speaker cords The connector and the color tube of the speaker cords are the same color as the label of the jacks to be connected Step 1 Speaker System Hookup color tube ...

Page 13: ...SPEAKER CENTER green jack Subwoofer SPEAKER WOOFER purple jacks AUDIO IN VIDEO SURROUND BACK SAT SPEAKER AUDIO IN R L R L CENTER FRONT L FRONT R SURR L WOOFER WOOFER SURR R COMPOMEMT VIDEO OUT MONITOR OUT S VIDEO DVD ONLY VIDEO Y PB CB PR CR Front speaker R Center speaker Front speaker L Surround speaker R Subwoofer Surround speaker L Bottom of the front speaker Bottom of the front speaker continu...

Page 14: ...speakers or speaker stands not supplied that are attached with the surround speakers on a specially treated waxed oiled polished etc floor as staining or discoloration may result Do not lean or hang on the speaker as the speaker may fall down Note Do not catch the speaker cable insulation in the SPEAKER jack Tip Connect the speaker cable after bending the speaker wire at the end of the insulation ...

Page 15: ... correctly For details on outputting a test tone see page 78 If no sound is heard from a speaker while outputting a test tone or a test tone is output from a speaker other than the one currently displayed in the front panel display the speaker may be short circuited If this happens check the speaker connection again Notes Be sure to match the speaker cord to the appropriate terminal on the compone...

Page 16: ...ou use desk etc when attaching detaching the speaker cords When using the subwoofer cord note that the two outside black cords or the cords marked with letters are negative If you connect the subwoofer cord incorrectly or turn up the volume in a state of a short circuit PROTECT appears in the front panel display and the system enters standby mode In this case disconnect and then reconnect the AC p...

Page 17: ...horizontal as possible Tip When you connect the supplied AM loop antenna aerial the cord A and the cord B can be connected in either terminal Step 2 Antenna aerial Hookups Connect the To the AM loop antenna aerial AM terminals FM wire antenna aerial FM 75ΩCOAXIAL jack AUDIO IN VIDEO SURROUND BACK SAT SAT SPEAKER AUDIO IN OPTICAL DIGITAL IN R L R L CENTER FRONT L FRONT R SURR L WOOFER WOOFER SURR R...

Page 18: ...18GB Tip If you have poor FM reception use a 75 ohms coaxial cable not supplied to connect the system to an outdoor FM antenna aerial as shown below COAXIAL AM FM 75 Outdoor FM antenna aerial System ...

Page 19: ...EO SAT jacks of this system change the function to VIDEO or SAT page 65 Tips When using the S video jack instead of the video jacks your TV monitor must also be connected via an S video jack S video signals are on a separate bus from the video signals and will not be output through the video jacks When using the COMPONENT VIDEO OUT jacks Y PB CB PR CR instead of the video jacks your TV monitor mus...

Page 20: ...essed after 2 seconds If you connect a digital satellite receiver without an OPTICAL OUT jack Connect the digital satellite receiver to the SAT AUDIO IN L R jacks only of the system To listen to the game machine e g PlayStation 2 sound by using the system Connect the audio output jacks of the game machine to the SAT AUDIO IN L R jacks of the system with the audio cords not supplied R AUDIO OUT L O...

Page 21: ...tion above to set the system to NTSC from PAL When connecting to a standard 4 3 screen TV Depending on the disc the image may not fit your TV screen If you want to change the aspect ratio please refer to page 72 Does your TV accept progressive signals Progressive is the method for displaying TV images which reduces flickering and sharpens the image To display using this method you need to connect ...

Page 22: ...ct VIDEO Note Be sure to make the connections securely to avoid hum and noise If using the VIDEO jack distorts the sound reconnect the TV or VCR to SAT Tip When you want to output the TV sound or stereo sound of a 2 channel source from the 6 speakers select any sound field other than AUTO FORMAT DIRECT AUTO or 2 CHANNEL STEREO page 47 AUDIO IN VIDEO SURROUND BACK SAT SAT SPEAKER AUDIO IN OPTICAL D...

Page 23: ...in the system the guide message does not appear on the TV screen 5 Press ENTER LANGUAGE SETUP appears Notes The selectable language is different depending on the area The language you select in LANGUAGE SETUP is also used for OSD DVD MENU and SUBTITLE page 72 Depending on the area Others t appears on the language list In this case you can select the desired language for DVD MENU and SUBTITLE from ...

Page 24: ...he system If you make a mistake Press O RETURN then select the item again To quit the Quick Setup Press DVD SETUP in any Step Notes When you press CLEAR in guide message the message disappears When you need to change settings select QUICK from SETUP in Setup Display page 81 When you select 4 3 in TV TYPE 4 3 LETTER BOX is selected page 72 The distance and level of each speaker will be set automati...

Page 25: ...hielded to prevent magnetic leakage However some leakage may occur as a high strength magnet is employed If the subwoofer is used with a CRT based TV or projector install the subwoofer at least 0 3 meter from the TV set If it is installed too close color irregularity may occur on the screen If color irregularity occurs turn off the TV set once then turn it on after 15 to 30 minutes If color irregu...

Page 26: ...y and READING appears in the front panel display 5 Press H on the remote or on the system The system starts playback continuous play Adjust the volume on the system After following Step 5 Depending on the disc a menu may appear on the TV screen You can play the disc interactively by following the instructions on the menu DVD page 29 VIDEO CD page 29 To remove the disc Press Z Remove the disc after...

Page 27: ...e is no disc in the system NO DISC appears on the front panel display If DVD playback is paused for approximately one hour the system automatically turns off Tip If a DVD has more than two titles you cannot go to the next title or go back to the preceding title by pressing or These buttons work only within a single title If you want to go to the next title or go back to preceding title press DVD T...

Page 28: ...d the disc If RESUME does not appear Resume Play is not available 2 Press H The system starts playback from the point where you stopped the disc in Step 1 Notes You cannot perform Resume Play during Shuffle Play or Program Play Depending on where you stop the disc the system may not resume playback from exactly the same point The point where you stopped playing is cleared if you change the play mo...

Page 29: ...ayback for approximately one hour the system automatically turns off With PBC Playback Control functions you can enjoy simple interactive operations search functions and other such operations PBC playback allows you to play VIDEO CDs interactively by following the menu on the TV screen 1 Start playing a VIDEO CD with PBC functions The menu for your selection appears 2 Select the item number you wa...

Page 30: ...upplied for details on the recording format 1 Load a data disc recorded in MP3 into the system 2 Press H The system starts to play the first MP3 audio track in the first album on the disc Notes The system can play MP3 MPEG1 Audio Layer3 audio The system cannot play audio tracks in MP3PRO format This system can play Multi Session CDs when an MP3 audio track is located in the first session Any subse...

Page 31: ...ay Press DVD DISPLAY Notes Only alphabetical letters and numbers can be used for album or track names Anything else is displayed as If the MP3 file you play back has an ID3 tag the ID3 tag information is displayed as a track name ID3 tag applies only to version 1 If an MP3 file of VBR variable bit rate is played indicated elapsed time may be different from the actual time Until playing the disc or...

Page 32: ...th ratio cannot be displayed Some CD Rs or CD RWs cannot be played on this system depending on file format The system can play to a depth of 8 directories including a root directory Progressive JPEG image files cannot be played on this system Maximum number of albums on a disc 99 The maximum number of JPEG image files that can be contained on an album is 250 Tip When you go to the next file or to ...

Page 33: ...Until playing the disc or selecting an album in step 2 album name is displayed as Album refers to a number in the Control Menu after which the album name is displayed Tip When a JPEG data disc is inserted you can select an album using the DVD MENU ALBUM or DVD TOP MENU ALBUM on the remote Enjoying Slide show on a JPEG data disc 1 Press M while displaying a JPEG image Slide show starts from the cur...

Page 34: ...n play the contents of a disc in the order you want by arranging the order of the tracks on the disc to create your own program You can program up to 25 tracks 1 In stop mode press PLAY MODE repeatedly until PGM appears in the front panel display The Program Menu appears on the TV screen For example select a track on an MP3 disc C c H Creating Your Own Program Program Play Number buttons CLEAR PLA...

Page 35: ...am ends you can restart the same program again by pressing H To return to normal play In stop mode press PLAY MODE repeatedly until PGM disappears from the front panel display Other Operations Notes Program Play function is not available for DVDs and JPEG When you remove the disc Program Play is cancelled and the program you created is cleared When you program MP3 tracks is displayed as the total ...

Page 36: ...ffle mode in the Control Menu You can select either normal shuffle or album shuffle MP3 only 1 Press DVD DISPLAY The Control Menu appears 2 Press X x to select PLAY MODE then press ENTER or c 3 Select SHUFFLE or SHUFFLE ALBUM using X x and press ENTER SHUFFLE Plays tracks on the disc in random order SHUFFLE ALBUM Plays tracks from selected album in random order 4 Press H The selected Shuffle Play ...

Page 37: ...epeats the current album only when CONTINUE ALBUM or SHUFFLE ALBUM in the play mode is selected TRACK repeats the current track x When playing a JPEG OFF does not play repeatedly ALL repeats all the files on the disc when CONTINUE is selected in the play mode or repeats the current album when CONTINUE ALBUM is selected in the play mode x When Program Play is set to ON OFF does not play repeatedly ...

Page 38: ...g scan the playback speed changes Two speeds are available With each press the indication changes as follows The 2M 2m playback speed is faster than 1M 1m Watching frame by frame Slow motion Play DVD VIDEO CD only Press or when the system is in the pause mode To return to normal speed press H To change the speed of Slow motion Play Each time you press or during Slow motion Play the playback speed ...

Page 39: ...TRACK x When playing a CD TRACK x When playing an MP3 ALBUM or TRACK x When displaying a JPEG file ALBUM or FILE Example when you select TRACK The list of tracks contained in the disc appears When the list of all tracks or albums cannot be displayed on the window the jump bar appears Press c to select the jump bar icon and then scroll the jump bar to display the rest of the list using X x Press C ...

Page 40: ...is turned off To search for a particular point using the time code TIME SEARCH Example If you search for the playing time of the current title on a DVD 1 In Step 2 select TIME T playing time of the current title is selected 2 Press ENTER or c T appears above T 3 Input the time code using the number buttons then press ENTER For example to find a desired point at 2 hours 10 minutes and 20 seconds af...

Page 41: ...panel display page 91 Press DISPLAY Each time you press DISPLAY while playing the disc the display changes as shown in the charts When playing back a DVD Viewing Disc Information DISPLAY TITLE CHAP CHAP CHAP TITLE CHAP Playing time and number of the current title Remaining time and number of the current title Playing time and number of the current chapter Remaining time and number of the current c...

Page 42: ...nd current track number Remaining time and current track number Playing time of the disc Remaining time of the disc Track name Current sound field TRK TRK Playing time and current track number Remaining time of the current track Track file name Album folder name Current sound field Current file number File name Album folder name Current sound field ...

Page 43: ...r disc will also appear on your TV screen See the following section Checking the Playing Time and Remaining Time for details on how to read this information Checking the Playing Time and Remaining Time You can check the playing time and remaining time of the current title chapter or track and the total playing time or remaining time of the disc You can also check the DVD CD Super Audio CD text and...

Page 44: ... numbers can be displayed Depending on the type of disc being played the system can only display a limited number of characters Also depending on the disc not all text characters will be displayed Checking the date information JPEG only You can check the date information during playback when the Exif tag is recorded in the JPEG image data Press DVD DISPLAY during playback The Control Menu appears ...

Page 45: ...When playing a DVD Depending on the DVD the choice of language varies When 4 digits are displayed they represent the language code Refer to the language code list on page 95 to see which language the code represents When the same language is displayed two or more times the DVD is recorded in multiple audio formats x When playing a VIDEO CD CD or MP3 The default setting is underlined STEREO The sta...

Page 46: ...L the channels in the playing track are displayed numerically as follows For Dolby Digital 5 1 ch The display examples are as follows PCM stereo Dolby Surround Dolby Digital 5 1ch DTS Tips When the signal contains surround signal components such as LS RS or S the surround effect is enhanced If you play MPEG AUDIO sound tracks the system outputs PCM stereo signals Even though the audio stream conta...

Page 47: ... AUTO or 2 CHANNEL STEREO Automatic decoding of the audio input signal AUTO FORMAT DIRECT AUTO The auto decoding function automatically detects the type of audio signal being input Dolby Digital DTS or standard 2 channel stereo and performs the proper decoding if necessary This mode presents the sound as it was recorded encoded without adding any effects e g reverberation However if there are no l...

Page 48: ...ORMAT DIRECT button Press AUTO FORMAT DIRECT repeatedly until the sound field you want appears in the front panel display x AUTO FORMAT DIRECT PRO LOGIC Dolby Pro Logic produces five output channels from two channel sources This mode performs Pro Logic decoding to the input signal and output to front center and surround speakers Meanwhile the surround channel becomes monaural Sound field Display 2...

Page 49: ...DTS 96 24 decoding function When you play the DTS 96 24 disc the system plays it as a normal disc Selecting a sound field MODE button Press MODE repeatedly until the sound field you want appears in the front panel display For movie Use DCS Technology About DCS Digital Cinema Sound In collaboration with Sony Pictures Entertainment Sony measured the sound environment of their studios and integrated ...

Page 50: ...een Cinema Studio Reverberation Reproduces the reverberations peculiar to a movie theater Cinema Studio EX is the integrated mode which operates these elements simultaneously Notes The virtual speaker effect may cause increased noise in the playback signal When listening with sound fields that employ virtual speakers you will not be able to hear any sound coming directly from the surround speakers...

Page 51: ...u listen to DVD with HALL as the sound field then change to another function and then return to DVD HALL will be applied again With the tuner sound fields are memorized separately for all preset stations You can identify the encoding format of program software by looking at its packaging Dolby Digital discs are labeled with the logo DTS ES encoded programs are marked with DTS ES Dolby Surround enc...

Page 52: ...d Software encoded with both 5 1 channel signals and an extension stream designed for returning those signals to 6 1 discrete channels Discrete 6 1 channel signals are DVD specific signals not used in movie theaters Notes You can select the surround back decoding only when AUTO FORMAT DIRECT AUTO mode is selected page 47 In other sound fields this function is bypassed internally Some discs have no...

Page 53: ...It is useful for watching movies at night x DSGX With DSGX on bass frequencies are effectively reinforced To turn off the sound effect Press NIGHT MODE or DSGX again Notes The NIGHT MODE function is activated only when the input stream is Dolby Digital format When you connect headphones to the system the DSGX function does not work These two types of sound effect cannot be activated at the same ti...

Page 54: ...reen when angles are recorded on the disc 3 Press ENTER or c The angle number changes to 4 Select the angle number using the number buttons or X x then press ENTER The angle is changed to the selected angle To turn off the Control Menu Press DVD DISPLAY repeatedly until the Control Menu is turned off Note Depending on the DVD you may not be able to change the angles even if multi angles are record...

Page 55: ...ct the language Depending on the DVD the choice of language varies When 4 digits are displayed they indicate the language code Refer to the language code list on page 95 to see which language the code represents 4 Press ENTER To cancel the SUBTITLE setting Select OFF in Step 3 To turn off the Control Menu Press DVD DISPLAY repeatedly until the Control Menu is turned off Note Depending on the DVD y...

Page 56: ...ng press x to stop playback 2 In stop mode press DVD DISPLAY The Control Menu appears 3 Press X x to select CUSTOM PARENTAL CONTROL then press ENTER or c CUSTOM PARENTAL CONTROL is selected 4 Press X x to select ON t then press ENTER x If you have not entered a password yet The display for registering a new password appears Enter a 4 digit password by using the number buttons then press ENTER The ...

Page 57: ... a new 4 digit password using the number buttons then press ENTER 4 To confirm your password re enter it using the number buttons then press ENTER Playing the disc for which Custom Parental Control is set 1 Insert the disc for which Custom Parental Control is set The CUSTOM PARENTAL CONTROL display appears 2 Enter your 4 digit password using the number buttons then press ENTER The system is ready ...

Page 58: ...g a new password appears Enter a 4 digit password using the number buttons then press ENTER The display for confirming the password appears x When you have already registered a password The display for entering the password appears 4 Enter your password using the number buttons then press ENTER The display for setting the playback limitation level and changing the password appears Number buttons D...

Page 59: ...lower the value the more strict the limitation If you make a mistake Press O RETURN or C to go back to the previous screen To turn off the Setup Display Press DVD SETUP repeatedly until the Setup Display is turned off To turn off the Parental Control function and play the DVD after entering your password Set LEVEL to OFF in Step 8 To change the password 1 In Step 5 select CHANGE PASSWORD t using x...

Page 60: ...o 3 of Limiting playback for children When you are asked to enter your password enter 199703 using the number buttons then press ENTER The display will ask you to enter a new 4 digit password After you enter a new 4 digit password in Step 3 replace the disc in the system and press H When the PARENTAL CONTROL display appears enter your new password Area Code Standard Code number Argentina 2044 Aust...

Page 61: ... If more than one code number is listed try entering them one at a time until you find the one that works with your TV TV Other Operations Controlling TV with the Supplied Remote TV CH TV VIDEO Number buttons TV VOL TV 1 TV button With cover opened Manufacturer Code number SONY 001 Admiral 012 016 039 AIWA 001 007 008 AKAI 002 010 027 AOC 002 Bell Howell 016 039 Bestar 027 Blaupunkt 052 053 Blue s...

Page 62: ...049 Portland 002 Provision 027 PYE 027 QUASAR 039 049 Radio 027 RADIO SHACK 002 012 022 Radiola 034 RCA PROSCAN 002 012 032 033 SABA 035 041 042 043 045 SAMSUNG 002 013 020 027 028 036 037 038 SANYO 009 010 011 Schneider 027 SCOTT 002 SHARP 020 039 040 SIEMENS 052 Signature 016 039 040 Sinudyne 027 Supertech 027 Supervision 027 Manufacturer Code number SYLVANIA 002 034 TaTung 027 TEAC 027 Techimag...

Page 63: ... 10 then the number For example for channel 25 press 10 then 2 and 5 SONY TV DIRECT allows you to turn on your SONY TV and this system change the system mode to DVD and then switch the TV s input source you set with one button push Preparation Register the TV s input source connected to this system Press and hold TV VIDEO while entering the code for the TV s input source to connect this system see...

Page 64: ...is selected If you successfully set the transmit time code the TV button flashes twice slowly If the setting is unsuccessful the TV button flashes five times quickly Notes This function is only for SONY TV series If distance between TV and this system is too far this function may not work Install the system near the TV Keep the remote pointed in the direction of the TV and this system while the TV...

Page 65: ... broadcast signal Note To receive the AC 3 signal you need to connect a digital satellite tuner to the system with an OPTICAL cable page 20 and set the digital output mode of the digital satellite tuner to AAC 1 Press AMP MENU 2 Press x X repeatedly until CUSTOMIZE appears in the front panel display then press ENTER or c The system enters the Customize Menu mode 3 Press x X repeatedly until DUAL M...

Page 66: ...e tuning make sure to turn down the volume to minimum 1 Press TUNER BAND repeatedly until the band you want appears in the front panel display Each time you press TUNER BAND the band toggles between AM and FM 2 Press and hold TUNING or until scanning starts then release Scanning stops when the system tunes in a station TUNED and ST for stereo program appear in the front panel display 3 Press TUNER...

Page 67: ...ess 1 on the system to turn on the power If you change the interval AM preset stations will be erased To reset the interval repeat the same procedure Listening to the Radio Preset radio stations in the system s memory first see Presetting Radio Stations on page 66 1 Press FUNCTION repeatedly until FM or AM appears in the front panel display The last received station is tuned in 2 Press PRESET or r...

Page 68: ...name of the station This is displayed if you have entered a name for a preset station page 68 Naming Preset Stations You can enter a name of up to 8 characters for preset stations These names for example XYZ appear in the system s front panel display when a station is selected Note that no more than one name can be entered for each preset station 1 Press FUNCTION repeatedly until FM or AM appears ...

Page 69: ...es decrements Press SLEEP Each time you press this button the minutes display the remaining time changes as follows When you choose AUTO The system turns off when the current disc finishes playback up to 240 minutes The system turns off if you manually stop playing a disc AUTO mode works only with functions such as DVD that is selected before setting to AUTO To check the remaining time Press SLEEP...

Page 70: ... display then press ENTER or c 4 Press x X to select the brightness of the front panel display 5 Press AMP MENU Turns off the AMP menu You can return the system parameters such as speaker settings and preset stations to the default settings Press or Z on the system at the same time COLD RESET appears in the front panel display and the default settings are returned Changing the Brightness of the Fr...

Page 71: ...x then press ENTER or c The options for the selected item appear Example TV TYPE Press C or O RETURN to return to setup items 4 Select a setting using X x then press ENTER The setting is selected and setup is complete Example 4 3 PAN SCAN To turn off the Setup Display Press DVD SETUP repeatedly until the Setup Display is turned off Settings and Adjustments Using the Setup Display DVD SETUP C X x c...

Page 72: ...s page 95 After you have made a selection the language code 4 digits is displayed the next time you select OTHERS t Choose settings according to the TV to be connected Select SCREEN SETUP in the Setup Display For details on using the display see Using the Setup Display page 71 The default settings are underlined x TV TYPE DVD only Selects the aspect ratio of the connected TV 4 3 standard or wide T...

Page 73: ... using X x then press ENTER 2 Select PROGRESSIVE using X x then press ENTER The display for confirming appears 3 Select YES using X x then press ENTER The type of output signal changes to progressive format ON Turns on the screen saver OFF Turns off the screen saver JACKET PICTURE The jacket picture still picture appears in the background but only if a jacket picture is already recorded on the dis...

Page 74: ...e underlined x VCD COLOR SYSTEM Asian Australian and Saudi Arabian models only Select the color system when you play a VIDEO CD Notes You cannot change the color system of the disc itself On Asian and Australian models you can change the color system of this unit according to the connected TV page 21 x PARENTAL CONTROL t DVD only Sets a password and playback limitation level for DVDs with playback...

Page 75: ...ge of the sound track Useful for watching movies at low volume late at night Dynamic Range Compression Note AUDIO DRC only applies to Dolby Digital sources x DATA CD PRIORITY MP3 JPEG only Set priority data you want to play when you play a DATA CD CD ROM CD R CD RW containing MP3 audio tracks and JPEG image files x JPEG DATE Change the date information order of a JPEG image in the Control Menu YYY...

Page 76: ...et SURROUND BACK to YES Notes When you select an item the sound cuts off for a moment Depending on the settings of other speakers subwoofer may be excessive x DISTANCE The default distance setting for the speakers in relation to the listening position is shown below When you set the distance using the Quick Setup page 23 the settings is automatically displayed Settings for the Speakers SPEAKER SET...

Page 77: ...peaker distance can be moved up to 1 6 meters closer to the listening position from the front speaker distance in 0 2 meter increments SURROUND 1 6 m appearsexcept when you set SURROUND to NONE in the SIZE setting Surround speaker distance can be moved up to 4 6 meters closer to the listening position from the front speaker distance in 0 2 meter increments SURROUND BACK 1 6 m appears when you set ...

Page 78: ...y When selecting LEVEL the test tone is emitted from only the speaker which you are adjusting 6 Press ENTER when you have finished making adjustments 7 Press X x repeatedly to select TEST TONE then press ENTER 8 Press X x repeatedly to select OFF then press ENTER Notes When you adjust the speaker settings the sound cuts off for a moment The surround back speaker level can be also adjusted on the a...

Page 79: ...or AMP MENU You can set the following items The default settings are underlined SP SETUP CENTER SP SURR SP F DIST CEN DISTb CENTER Y 1 0 m 7 0 m SURR Y LEVEL TESTTONE F BALANCE T TONE ON T TONE OFF 6 steps left or right CEN LEVELb 6 dB 6 dB SL LEVELb 6 dB 6 dB SR LEVELb 6 dB 6 dB DRC OFF DRC ON SURR DISTb AUDIO DRC SURR N CENTER N SB LEVELb 10 dB 10 dB SURR B SPa SURR B N SURR B Y SB DISTb SP POSb...

Page 80: ...d back distance 1 6mb Surround back speaker distance can be moved up to 4 6 meters closer to the listening position from the front speaker distance in 0 2 meter increments SP POSc surround speakers position SP BEHIND Select this if surround speakers are located in the back area of the listening position SP SIDE Select this if surround speakers are located in the side area of the listening position...

Page 81: ...t the system After you select RESET and press ENTER select YES to reset the settings it takes a few seconds to complete Select NO and press ENTER to cancel Do not press 1 when resetting the system Notes When you select RESET all the settings return to the default When you turn the system on after resetting the guide message appears on the TV screen To perform the Quick Setup page 23 press ENTER to...

Page 82: ... affected when you set COMPONENT OUT to PROGRESSIVE In this case set COMPONENT OUT to INTERLACE page 73 When PROGRESSIVE is selected in SCREEN SETUP no signal is output from the MONITOR OUT or S VIDEO OUT jacks Picture noise appears The disc is dirty or flawed If the picture output from your system goes through your VCR to get to your TV the copy protection signal applied to some DVD programs coul...

Page 83: ...epending on the source the effect of the surround speakers may be less noticeable Operation Radio stations cannot be tuned in Check that the antennas aerials are connected securely Adjust the antennas aerials or connect an external antenna aerial if necessary The signal strength of the stations is too weak when tuning in with automatic tuning Use direct tuning No stations have been preset or the p...

Page 84: ... on the TV screen The system starts playing the disc automatically The DVD features an auto playback function Playback stops automatically Some discs may contain an auto pause signal While playing such a disc the system stops playback at the auto pause signal The system turns off during DVD playback If approximately one hour passes with DVD playback paused or with the DVD top menu or a DVD menu di...

Page 85: ...d mode Front 100 W 100 W reference with SS TS21 music power output Center 100 W with SS CT33 Surround 100 W 100W with SS TS20 Subwoofer 100 W 2 with SS WS12 Depending on the sound field settings and the source there may be no sound output Inputs VIDEO SAT Sensitivity 250 mV 450 mV Impedance 50 kilohms Output SURROUND BACK Voltage 2V Impedance 1 kilohms Phones Accepts low and high impedance headpho...

Page 86: ...unit 70 mm dia cone type 25 mm dia balance dome type tweeter Rated impedance 4 ohms Dimensions approx 255 1112 255 mm w h d Mass approx 4 1 kg Center Speaker system Two way Bass reflex Speaker unit 70 mm dia cone type 25 mm dia balance dome type tweeter Rated impedance 4 ohms Dimensions approx 356 92 76 mm w h d Mass approx 0 95 kg Surround Speaker system Bass reflex Speaker unit 70 mm dia cone ty...

Page 87: ...s done using an advanced high purity matrix surround decoder that extracts the spatial properties of the original recording without adding any new sounds or tonal colorations x Movie mode The Movie mode is for use with stereo television shows and all programs encoded in Dolby Surround The result is enhanced sound field directionality that approaches the quality of discrete 5 1 channel sound x Musi...

Page 88: ... for displaying TV images at 30 frames per second Each frame is scanned twice alternately between the even numbered scanning lines and then odd numbered scanning lines at 60 times per second Multi angle function Various angles of a scene or viewpoints of the video camera are recorded on some DVDs Multilingual function Several languages for the sound or subtitles in a picture are recorded on some D...

Page 89: ... side only you do not have to turn the disc over during playback Super Audio CD CD Hybrid disc This disc consists of an HD layer and a CD layer Also as the dual layers are on one side only you do not have to turn the disc over during playback You can play this CD layer using a conventional CD player 2 channel Multi channel Super Audio CD This disc consists of a 2 channel playback area and a multi ...

Page 90: ...ses Front Panel A 1 power switch STANDBY indicator 26 B Disc slot 26 C remote sensor 11 D Front panel display 91 E PHONES on the side of the system jack 26 F VOLUME 26 78 G 27 29 H x stop 27 I play pause 26 J FUNCTION 26 65 67 K Z eject 26 Index to Parts and Controls ...

Page 91: ...sound Current mode TITLE REP 1 NIGHT DSGX DTS ES PL D EX CHAP MP3 SA CD MULTI PBC SHUF REP 1 PGM NIGHT DSGX DTS NEO 6 ES PL TRK Current sound CD VIDEO CD or MP3 only Lights up during PBC playback VIDEO CD only Playing time Current mode Playing status Current track number Current sound effect Lights up during MULTI channel playback area Super Audio CD only TUNED MONO NIGHT DSGX kHz MHz ST Preset nu...

Page 92: ...92GB When playing back a JPEG file JPEG Currentfile number Playing status ...

Page 93: ...PTICAL DIGITAL IN jack 20 F AM terminals 17 G FM 75Ω COAXIAL jack 17 H MONITOR OUT VIDEO S VIDEO jacks 19 I SAT AUDIO IN L R jacks 19 AUDIO IN VIDEO SURROUND BACK SAT SAT SPEAKER AUDIO IN OPTICAL DIGITAL IN R L R L CENTER FRONT L FRONT R SURR L WOOFER WOOFER SURR R COAXIAL AM FM 75 COMPOMEMT VIDEO OUT MONITOR OUT S VIDEO DVD ONLY VIDEO Y PB CB PR CR ...

Page 94: ...CT 47 48 J DSGX 53 K DVD SETUP 23 58 71 L SUBTITLE 55 M AUDIO 45 N ANGLE 54 O Number buttons 23 29 29 34 39 54 56 58 61 63 P ENTER Q TUNER MENU 66 68 R TV 1 on standby 61 S 1 standby 23 26 67 T SONY TV DIRECT 63 U TUNER BAND 66 67 68 V FUNCTION 26 65 67 68 W m M SLOW TUNING 33 38 66 67 X x stop 27 28 29 56 67 Y X pause 27 Z MUTING 27 wj DVD MENU ALBUM 29 31 32 wk VOL 27 67 wl O RETURN 23 29 31 32 ...

Page 95: ...russian 1059 Bulgarian 1060 Bihari 1061 Bislama 1066 Bengali Bangla 1067 Tibetan 1070 Breton 1079 Catalan 1093 Corsican 1097 Czech 1103 Welsh 1105 Danish 1109 German 1130 Bhutani 1142 Greek 1144 English 1145 Esperanto 1149 Spanish 1150 Estonian 1151 Basque 1157 Persian 1165 Finnish 1166 Fiji 1171 Faroese 1174 French 1181 Frisian 1183 Irish 1186 Scots Gaelic 1194 Galician 1196 Guarani 1203 Gujarati...

Page 96: ...ou want to use from the displayed language list SCREEN SETUP TV TYPE SCREEN SAVER BACKGROUND COMPONENT OUT 16 9 4 3 LETTER 4 3 PAN SCAN ON OFF PICTURE GRAPHICS 1 BLUE BLACK JACKET INTERLACE PROGRESSIVE BOX GRAPHICS 2 GRAPHICS 3 GRAPHICS 4 GRAPHICS 5 YES NO CUSTOM SETUP VCD COLOR SYSTEM PARENTAL CONTROL TRACK SELECTION AUTO PAL NTSC OFF 8 7 NC17 STANDARD 6 R 5 4 PG13 3 PG 2 1 G USA OTHERSt CHANGE P...

Page 97: ... SURROUND 1 0m 7 0m LEVEL CENTER SURROUND RIGHT 6 dB 6 dB 6 dB 6 dB SUBWOOFER 6 dB 6 dB BALANCE FRONT 6 steps left or right TEST TONE OFF ON SETUP QUICK SURROUND LEFT 6 dB 6 dB RESET SIDE NONE SURROUND BACK NONE YES 1 0m 7 0m SURROUND BACK SURROUND BACK 10 dB 10 dB YES NO The setting range changes depending on the front speaker setting page 76 ...

Page 98: ...t CEN LEVEL 6 dB 6 dB SL LEVEL 6 dB 6 dB SR LEVEL 6 dB 6 dB DRC OFF DRC ON SURR DIST AUDIO DRC SURR N CENTER N SB LEVEL 10 dB 10 dB SURR B SP SURR B N SURR B Y SB DIST SP POS SP SIDE SP BEHIND SW LEVEL 6 dB 6 dB 1 0m 7 0m 1 0m 7 0m 1 0m 7 0m CUSTOMIZE DIMMER DIM OFF DIM ON DUAL MONO MAIN SUB MAIN SUB SB DEC SB MATRIX SB AUTO SB OFF MAIN SUB The setting range changes depending on the front speaker ...

Page 99: ...88 J JPEG 32 JPEG DATE 75 L LANGUAGE SETUP 72 LEVEL 77 Listening to the Radio 67 M MP3 30 Multi angle function 54 88 Multilingual function 45 88 MUTING 27 N Neo 6 88 NIGHT MODE 53 O On screen display Control Menu display 9 OSD 72 P PARENTAL CONTROL 58 74 88 PBC Playback 29 88 PLAY MODE 34 36 Preset Station 66 Program Play 34 PROGRESSIVE 88 R Radio 67 Rear Panel 93 Region Code 7 89 Remote 61 94 REP...

Page 100: ...he name function R Turns the TV on and off S Turns on and off the power of the system T Turns the SONY TV and the system on and changes the TV s input source U Selects AM or FM band V Selects the component you want to use W m M SCAN Locate a point while monitoring the picture while playing a disc SLOW Play a disc in slow motion in the pause mode TUNING Scan all available radio stations X Stops pla...

Reviews: