background image

24

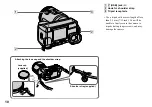
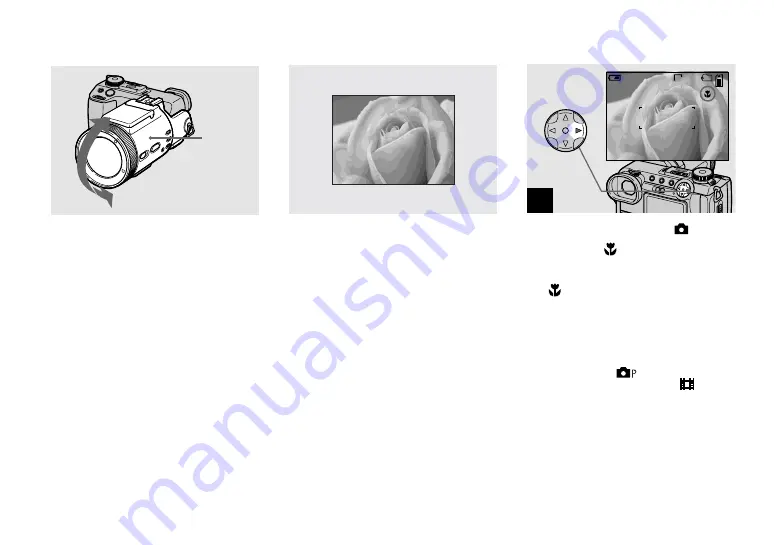
Changing the lens 
orientation

You can adjust the angle by turning the lens 
part upward up to 77 degrees and downward 
up to 36 degrees.

Lens 
part

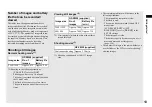
Shooting close-ups — Macro

The macro recording mode is used when 
zooming up a small subject, such as flowers 
or insects. You can shoot close-ups of 
subjects up to the distances specified below.

When the zoom is set all the way to 
the W side: 

Approx. 2 cm (13/16 inches) from the lens 
surface 

When the zoom is set all the way to 
the T side: 

Approx. 90 cm (35 1/2 inches) from the lens 
surface

,

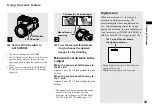
Set the mode dial to 

, and 

press 

B

 (

) on the control 

button.

The 

 (macro) indicator appears on the 

screen.

If the menu is currently displayed, press MENU 
first so that the menu disappears. 

You can also carry out this operation when the 
mode dial is set to 

S, A, M, SCN (other 

than landscape mode, page 29) or 

.

1

640

88

101

60min

Summary of Contents for CYBER-SHOT DSC-F717

Page 1: ...duct Model No DSC F717 Serial No DSC F717 2002 Sony Corporation Getting started________________________ Shooting still images__________________ Viewing still images___________________ Deleting still images __________________ Before advanced operations_____________ Advanced still image shooting ___________ Advanced still image viewing ____________ Still image editing ______________________ Enjoying...

Page 2: ...on which can be determined by turning the equipment off and on the user is encouraged to try to correct the interference by one or more of the following measures Reorient or relocate the receiving antenna Increase the separation between the equipment and receiver Connect the equipment into an outlet on a circuit different from that to which the receiver is connected Consult the dealer or an experi...

Page 3: ...k must be used If the plug supplied with this equipment has a detachable fuse cover be sure to attach the fuse cover after you change the fuse Never use the plug without the fuse cover If you should lose the fuse cover please contact your nearest Sony service station This product has been tested and found compliant with the limits sets out in the EMC Directive for using connection cables shorter t...

Page 4: ...of images recorded with your camera on other equipment and playback of images recorded or edited with other equipment on your camera are not guaranteed Precaution on copyright Television programs films video tapes and other materials may be copyrighted Unauthorized recording of such materials may be contrary to the provision of the copyright laws Do not shake or strike the camera In addition to ma...

Page 5: ...emarks of Sony Corporation InfoLITHIUM is a trademark of Sony Corporation Microsoft and Windows are registered trademarks of the U S Microsoft Corporation in the United States and other countries Macintosh Mac OS QuickTime iBook and Power Mac are trademarks or registered trademarks of Apple Computer Inc Pentium is a trademark or a registered trademark of Intel Corporation In addition system and pr...

Page 6: ...a TV screen 35 Deleting images 37 Formatting a Memory Stick 40 How to setup and operate your camera 42 Changing the menu settings 42 Changing the items in the SET UP screen 42 How to use the jog dial 43 Shooting with the manual adjustments 44 Shutter speed priority mode 44 Aperture priority mode 45 Manual exposure mode 45 Choosing a focus method 46 Shooting with AF lock 47 Focusing manually 48 Adj...

Page 7: ...ng images to print Print DPOF mark 72 Shooting movies 75 Viewing movies on the screen 76 Deleting movies Delete 77 Editing movies 79 Cutting movies 79 Deleting unnecessary portions of movies 80 Copying images to your computer For Windows users 81 Copying images to your computer For Macintosh users 90 Troubleshooting 92 Warnings and messages 101 Self diagnosis display 103 Number of images that can ...

Page 8: ...To set the SET UP items To shoot movies Clip Motion images or Multi Burst mode images To view or edit images 2 1 4 3 8 7 6 5 0 9 qs qa qk qj qh qf qg qd B exposure button 49 C Jog dial 43 D Shutter button 20 E Manual focus zoom ring 23 48 F Infrared ray emitter 55 G Lens H Hologram AF emitter 27 110 I Flash emitter 26 J NIGHTSHOT NIGHTFRAMING switch 55 K Speaker L Hot shoe 63 111 M AE LOCK button ...

Page 9: ...n microphone M POWER lamp 15 N POWER switch 15 O Battery eject lever 12 P Battery Memory Stick cover 18 Q Access lamp 18 R RESET button 92 S Control button Menu on v V b B z 15 Menu off 7 21 24 26 T CHG charge lamp 12 U LCD screen Audio output is monaural Do not touch the built in microphone while recording Use ACC jack to connect an external flash or the remote control tripod 2 1 4 3 9 8 7 6 5 qa...

Page 10: ...der strap supplied Lens cap supplied A USB jack 84 B Hook for shoulder strap C Tripod receptacle Use a tripod with a screw length of less than 5 5 mm 7 32 inch You will be unable to firmly secure the camera to tripods having longer screws and may damage the camera ...

Page 11: ...ery pack with the b mark facing toward the battery compartment as illustrated Make sure the battery pack is firmly inserted all the way then close the cover The battery pack is easily inserted by pushing the battery eject lever at the front of the battery compartment up Open the jack cover and connect the AC L10A L10B AC power adaptor supplied to the DC IN jack of your camera Connect the plug with...

Page 12: ...ery pack when removing it Battery remaining indicator The battery remaining indicator on the screen shows the remaining shooting or viewing time The displayed remaining time may not be correct under certain circumstances or conditions When you switch the FINDER LCD switch it takes about one minute for the correct battery remaining time to appear Charging time Approximate time to charge a completel...

Page 13: ...times The power turns on and off once every ten times Viewing still images 2 2 Viewing single images in order at about three second intervals Shooting movies 3 3 Shooting continuously at 160 112 image size The remaining indicator will decrease in the following situations The surrounding temperature is low The flash is used The camera has been turned ON and OFF many times LCD BACKLIGHT or EVF BACKL...

Page 14: ... from the DC IN jack of the camera The set is not disconnected from the AC power source mains as long as it is connected to the wall outlet wall socket even if the unit itself has been turned off To use power from an automobile use the Sony Car Battery Adapter not supplied If you insert or remove the DC plug while you are using the battery the power may shut off 1 Jack cover AC power adaptor DC pl...

Page 15: ...automatically to prevent wearing down the battery The auto power off function only operates when the camera is operating using a battery pack The auto power off function also will not operate in the following circumstances When viewing movies When playing back a slide show When a connector is plugged into the USB jack or the A V OUT MONO jack POWER switch POWER lamp How to use the control button T...

Page 16: ...CLOCK SET screen appears on the screen Select the desired date display format with v V on the control button then press z Select from Y M D year month day M D Y month day year or D M Y day month year If the rechargeable button battery which provides the power for saving the time data is ever fully discharged page 113 the CLOCK SET screen will appear again When this happens reset the date and time ...

Page 17: ... step until all of the items are set If you selected D M Y in step 3 set the time on a 24 hour cycle Select OK with B on the control button then press z The date and time are entered and the clock starts to keep time To cancel the date and time setting select CANCEL with v V b B on the control button then press z 4 D M Y OK CANCEL M D Y Y M D CLOCK SET 2002 1 1 12 00 AM OK 5 D M Y OK CANCEL M D Y ...

Page 18: ...he way in so that it is securely seated in the connector If the Memory Stick is not inserted correctly you may not be able to record or display images with the Memory Stick Close the battery Memory Stick cover To remove a Memory Stick Open the battery Memory Stick cover then push the Memory Stick to pop it out Whenever the access lamp is lit the camera is recording or reading an image Never remove...

Page 19: ... IMAGE SIZE with b B on the control button then select the desired image size with v V The image size is set When the setting is complete press MENU so that the menu disappears from the screen The image size selected here is maintained even when the power is turned off 1 MODE 640 480 1280 960 2048 1536 2560 3 2 2560 1920 2560 IMAGE SIZE MENU 2 MODE 640 480 1280 960 2048 1536 2560 3 2 2560 1920 256...

Page 20: ... subject in the center of the focus frame Do not cover the lens or flash with your fingers The picture quality is set to FINE The frame appearing on the screen shows the focus adjustment range Press and hold the shutter button halfway down The beep sounds but the image is not yet recorded When the AE AF lock indicator changes from flashing to steadily lit the camera is ready for shooting The flash...

Page 21: ...r button then recompose the shot and focus again The subject is distant from the camera and dark The contrast between the subject and its background is poor The subject is seen through glass such as a window A fast moving subject The subject reflects or has a lustrous finish such as a mirror or a luminous body A flashing subject 4 640 60min 96 101 Checking the last image you shot Quick Review Pres...

Page 22: ...dicators see page 118 Indicators on the screen during shooting Each time you press DISPLAY the display changes in the following order For a detailed description of the indicators see page 118 Indicators on the screen are not recorded Indicators on r Histogram on A histogram of the image is displayed in the lower left corner of the screen page 50 Finder adjustment dial FINDER LCD switch DISPLAY 89 ...

Page 23: ...the way to the T side Approx 90 cm 35 1 2 inches from the lens surface The manual focus zoom ring directions noted above are the factory settings The ring directions can be changed by ZOOM RING SETUP in the SET UP settings page 111 Digital zoom When zoom exceeds 5 the image is enlarged by digital processing The maximum digital zoom magnification is 10 Digital zooming causes the image quality to de...

Page 24: ...es specified below When the zoom is set all the way to the W side Approx 2 cm 13 16 inches from the lens surface When the zoom is set all the way to the T side Approx 90 cm 35 1 2 inches from the lens surface Set the mode dial to and press B on the control button The macro indicator appears on the screen If the menu is currently displayed press MENU first so that the menu disappears You can also c...

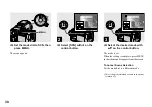
Page 25: ...t the menu disappears You can also carry out this operation when the mode dial is set to S A M SCN or Center the subject in the frame and press the shutter button fully down The self timer lamp page 9 flashes and a beep sounds after you press the shutter button until the shutter is released approximately 10 seconds To cancel the self timer in the middle of the operation Press V on the control butt...

Page 26: ...o 177 1 4 inches When it is not set to AUTO the flash may be ineffective even if the flash level is changed When using the Auto or Forced flash mode you may notice some noise in the image when you look at the screen in a dark place but this will have no effect on the shot image While charging the flash the CHG lamp flashes After the charging is complete the lamp goes out When you press the shutter...

Page 27: ...ase wipe the hologram AF emitter with a dry cloth The hologram AF emitter emits very bright light Although there are no problems with safety directly looking into the hologram AF emitter at close range is not recommended as you may see residual spots for several minutes afterwards such as after looking into a flashlight Do not block the hologram AF emitter during recording Attaching an optional fi...

Page 28: ...ng with v V on the control button then press z DAY TIME Superimposes the date hour and minute onto the image DATE Superimposes the year month and day onto the image OFF Does not superimpose the date and time onto the image After the setting has been completed set the mode dial to and shoot the image You can also shoot images with the mode dial set to S A M or SCN This setting is maintained even wh...

Page 29: ...it Twilight portrait mode Suitable for shooting portraits in dark places The shutter speed becomes slower so we recommend that you use a tripod to prevent shaking Allows you to shoot sharp images of people in dark places without losing the dark atmosphere of the surroundings The flash strobes regardless of the surrounding brightness Landscape mode Focuses only on a distant subject to shoot landsca...

Page 30: ...ect the desired mode with v V on the control button The mode is set When the setting is complete press MENU so that the menu disappears from the screen To cancel Scene Selection Set the mode dial to a different mode This setting is maintained even when the power is turned off 1 MENU 2 SCN MODE 3 SCN MODE ...

Page 31: ...t P QUALITY with b B on the control button then select the desired image quality with v V The image quality is set When the setting is complete press MENU so that the menu disappears from the screen You can select the image quality from either FINE or STANDARD The image quality value selected here is maintained even when the power is turned off 1 MODE 200 100 AUTO 400 800 MENU 2 MODE ISO FINE P QU...

Page 32: ...60 1920 Very fine prints 2560 3 2 3 2 prints 2048 1536 Printing A4 size images 1280 960 Printing postcard size images 640 480 Creating home pages The number of images that can be saved in a Memory Stick The number of images that can be saved in FINE STANDARD mode are shown below Units number of images When REC MODE is set to NORMAL For the number of images that can be saved in other modes see page...

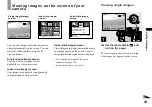
Page 33: ...d simultaneously in separate panels on the screen Various image information items are also displayed For a detailed description of the screen indicators see page 120 For details on movies see page 76 BACK NEXT VOLUME 10 30PM 2003 7 4 101 0009 640 60min 9 9 101 SINGLE DISPLAY MOVE SINGLE DISPLAY APERTURE VALUE SHUTTER SPEED EXPOSURE VALUE ISO F5 6 1 30 0 0 100 10 30PM 2003 7 4 101 0002 Single singl...

Page 34: ... previous index screen Press v V b B on the control button to move the yellow frame up down left right You can view the next previous screen by turning the jog dial Press The display switches to the Index triple image screen Press v V on the control button to display the remaining image information To display the next previous index screen Press b B on the control button To return to the single im...

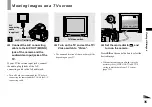
Page 35: ...ng the camera and the TV with the A V connecting cable Turn on the TV and set the TV Video switch to Video The name and location of this switch may differ depending on your TV Set the mode dial to and turn on the camera Press b B on the control button to select the desired image When using your camera abroad it may be necessary to set VIDEO OUT in SET UP setting to match that of your TV system pag...

Page 36: ...al America Chile Colombia Ecuador Jamaica Japan Korea Mexico Peru Surinam Taiwan the Philippines the U S A Venezuela etc PAL system Australia Austria Belgium China Czech Republic Denmark Finland Germany Holland Hong Kong Italy Kuwait Malaysia New Zealand Norway Portugal Singapore Slovak Republic Spain Sweden Switzerland Thailand United Kingdom etc PAL M system Brazil PAL N system Argentina Paragua...

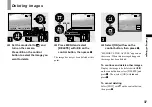
Page 37: ...n the control button then press z MEMORY STICK ACCESS appears on the screen When this message disappears the image has been deleted To continue and delete other images Display the image to be deleted with b B on the control button select DELETE and press z Then select OK with v and press z To cancel deleting Select EXIT with V on the control button then press z 1 BACK NEXT VOLUME 10 30PM 2003 7 4 ...

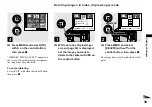
Page 38: ...e control button then press z Select OK then press z To cancel deleting select EXIT then press z Select an image you want to delete with v V b B on the control button then press z The green indicator appears on the selected image At this point the image has not yet been deleted Repeat this step for all of the images you want to delete To cancel a selection press z again so that the indicator disap...

Page 39: ...K Deleting images in index triple image mode While an index triple image screen page 34 is displayed set the image you want to delete to the center with b B on the control button Press MENU and select DELETE with v V on the control button then press z The image has not yet been deleted at this point 1 SINGLE DISPLAY APERTURE VALUE SHUTTER SPEED EXPOSURE VALUE ISO F5 6 1 30 0 0 100 10 30PM 2003 7 4...

Page 40: ...he term formatting means preparing a Memory Stick to record images this process is also called initialization The Memory Stick provided with this camera and those available commercially are already formatted and can be used immediately When you format a Memory Stick be aware that all data in the Memory Stick will be permanently erased Select MEMORY STICK TOOL with v V on the control button Select ...

Page 41: ...leting still images Select OK with v on the control button then press z The FORMATTING message appears When this message disappears the format is complete 3 OK READY FORMAT ALL DATA WILL BE ERASED CANCEL O K ...

Page 42: ...ms in the SET UP screen a Set the mode dial to SET UP The SET UP screen appears b Press v V b B on the control button to select the item you want to set The frame of the selected item turns yellow c Press z on the control button to enter the setting To turn off the SET UP screen display Set the mode dial to anything other than SET UP Mode dial Control button MENU Jog dial ISO MODE AUTO 100 200 400...

Page 43: ... The adjustable values appear on the right side of the screen b Turn the jog dial to select the item you want to adjust Move the yellow indication b to select the item c Press the jog dial The value turns yellow d Turn the jog dial to select the value you want to set The displayed value is set e To set other items press the jog dial then repeat steps 2 to 4 Jog dial Select Set Mode dial 640 F5 6 0...

Page 44: ...a Set the mode dial to S b Select a shutter speed Select a shutter speed with the jog dial page 43 The shutter speed can be selected from 1 1000 to 30 seconds If you select a shutter speed of 1 25 second or slower NR is displayed before the shutter speed and the NR slow shutter mode is automatically activated Shutter speeds of one second or longer are indicated with after the value such as 1 Mode ...

Page 45: ...layed on the screen as the EV value page 49 0EV indicates that the most suitable value has been set by the camera a Set the mode dial to M b Select the shutter speed value indication Select the shutter speed value indication with the jog dial page 43 c Select the aperture value indication Select the aperture value indication with the jog dial page 43 NR slow shutter The NR slow shutter function re...

Page 46: ...sing the auto focus function without worrying about the image composition This is useful when it is difficult to focus on the subject because it is not in the center of the frame The Multipoint AF is the factory setting a Set the mode dial to S A M SCN or b Set FOCUS switch to AUTO ZOOM c Select the desired AF range Select the AF range with the jog dial page 43 You can select the AF range from Mul...

Page 47: ...h a gap between them the camera may focus on the background visible through the gap In these cases use AF lock to ensure the subjects are in correct focus AF lock lets you capture an image with the correct focus even if the subject is at the edge of the frame a Set the mode dial to S A M SCN or Clip Motion Multi Burst b Set FOCUS switch to AUTO ZOOM c Compose the shot so that the subject is center...

Page 48: ...a sharp focus is achieved the image returns to normal and the 9 manual focus indicator changes from yellow to white When recording a movie MPEG MOVIE or EXPANDED FOCUS is set to OFF the image is not zoomed You can adjust the focus distance from 2 cm 13 16 inches to infinite When using digital zoom the image is zoomed 1 to 2 depending on the digital zoom magnification To reactivate auto focusing Se...

Page 49: ...to 0EV If a subject is being shot in extremely bright or dark conditions or the flash is used the exposure adjustment may not be effective Mode dial Jog dial 1 0EV 4 640 101 60min Shooting techniques Normally the camera automatically adjusts the exposure If the image is too dark or too bright as shown below we recommend that you adjust the exposure manually When shooting a back lit subject or a su...
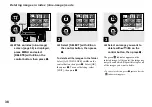
Page 50: ... histogram does not appear in the following cases When the mode dial is set to SET UP or When the menu is displayed During Quick Review of an image recorded in Exposure Bracket mode When using playback zoom appears in the following cases When recording in the digital zoom range During recording or playback in 2560 3 2 size When rotating a still image The histogram before recording represents the h...

Page 51: ...region where the subject is located This lets you adjust the exposure to the subject even when the subject is backlit or there is strong contrast between the subject and the background Position the spot metering cross hair on one point of the subject you want to shoot To focus on the same spot as used for metering we recommend using the Focus range select function Center page 46 You cannot set the...

Page 52: ...ired exposure value then press AE LOCK The exposure is fixed and the AE L indicator appears c Target the subject you want to shoot and press and hold the shutter button halfway down The focus is automatically adjusted d Press the shutter button fully down To release AE LOCK Carry out one of the followings Press AE LOCK again after step 2 Release your finger from the shutter button after step 3 Pre...

Page 53: ...e dial to SET UP The SET UP screen appears b Select 2 CAMERA 2 with v V and BRACKET STEP with B v V then press B c Select the desired bracket step value with v V then press z 1 0EV Shifts the exposure value by plus or minus 1 0EV 0 7EV Shifts the exposure value by plus or minus 0 7EV 0 3EV Shifts the exposure value by plus or minus 0 3EV d Set the mode dial to S A M or SCN e Press MENU The menu ap...

Page 54: ...ding with automatic adjustments the white balance is automatically set to AUTO and the overall color balance is adjusted according to the shooting conditions However when you shoot under fixed conditions or special lighting conditions you can manually adjust the white balance AUTO no display Adjusts the white balance automatically ONE PUSH For adjusting the white balance depending on the light sou...

Page 55: ... when you press record in automatic white balance mode When you select the one push white balance mode the screen momentarily turns blue You cannot adjust the white balance when using the NightShot and NightFraming functions Shooting in the dark Mode dial Filters not supplied may block the infrared ray The recommended recording distance for the NightShot or NightFraming function is from approx 0 3...

Page 56: ...s difficult with the auto focus mode when using the NightShot function adjust focus manually page 48 The focus distance value does not appear If you press an invalid key while using the NightShot function the indicator flashes and the NIGHT SHOT indicator lights for about 5 seconds However if you select the flash mode in Bracket Multi Burst or BURST 3 mode the BRK indicator flashes NightFraming Th...

Page 57: ...nsecutive still images GIF animation The GIF format has a small file size making it convenient for creating home pages or attaching images to e mail Due to the limitations of the GIF format the number of colors for Clip Motion images is reduced to 256 colors or less Therefore the image quality may deteriorate for some images NORMAL 160 120 Clip Motion of up to 10 frames can be recorded This is sui...

Page 58: ... 2 each time you repeat steps 1 through 3 the last frame you shot is deleted Before carrying out step 6 the images are saved temporarily in the camera memory These images are not recorded on the Memory Stick yet The date and time are not superimposed onto Clip Motion images When viewing an image recorded in Clip Motion on the index screen the image may appear different from the actual image GIF fi...

Page 59: ... you play back images recorded with this camera in Multi Burst mode the 16 frames will be played back in order at a fixed interval When the images are played back on a computer all 16 frames will be displayed at the same time as part of one image When Multi Burst images are played back on a camera without the Multi Burst feature all 16 frames will be displayed at the same time as part of one image...

Page 60: ...de records an image without compression so the image quality does not deteriorate Images recorded in this mode are suitable for printing with a high quality image A JPEG compressed format image is also recorded at the same time a Set the mode dial to S A M or SCN b Press MENU The menu appears c Select MODE REC MODE with b B then select TIFF with V d Shoot the image When the RECORDING indication di...

Page 61: ...DING indication disappears you can shoot the next image To return to normal mode Select NORMAL in step 3 For instructions on how to attach images to an e mail message consult the User s Manual for your e mail software For the number of images you can record in E mail mode see page 104 Shooting still images with audio files Voice Mode dial S A M SCN In Voice mode an audio track is also recorded at ...

Page 62: ... of images you can record in Voice mode see page 104 Adding special effects Picture Effect Mode dial S A M SCN You can digitally process images to obtain special effects a Set the mode dial to S A M SCN or b Press MENU The menu appears c Select PFX P EFFECT with b B then select the desired mode with v V To cancel Picture Effects Select OFF in step 3 SOLARIZE The light contrast is clearer and the p...

Page 63: ...ernal flash on the hot shoe b Plug the flash into the ACC jack c Turn on the HVL F1000 d Set the mode dial to S A M SCN or Clip Motion e Shoot the image The built in flash does not strobe When using a Sony optional external flash set HOT SHOE to OFF in the SET UP settings Using a commercially available external flash You can mount a commercially available external flash that supports hot shoe a Mo...

Page 64: ...ng the built in flash to its original position Selecting a folder Mode dial SET UP Your camera can create multiple folders within a Memory Stick Creating multiple folders makes it easy to find images during playback The 101MSDCF folder is set as the recording folder at the factory You can create folders up to 999MSDCF Up to 4000 images can be stored in one folder When the folder capacity is exceed...

Page 65: ...press z The recording folder selection screen appears d Select the desired folder with b B and OK with v then press z To cancel changing the recording folder Select CANCEL in steps 3 or 4 Images recorded using a camera without the folder creation function are stored in the 100MSDCF folder You cannot select 100MSDCF as the recording folder with this camera MEMORY STICK TOOL PAGE SELECT 1 2 OK OK 10...

Page 66: ... folder You can move to both the previous and the next folders You can also select the playback folder at the index nine image or triple image screen You can also select the playback folder using CHANGE REC FOLDER in the SET UP settings page 65 If there are no images in the folder the message NO FILE IN THIS FOLDER appears on the screen Enlarging a portion of a still image Mode dial You can enlarg...

Page 67: ... Press MENU after playback zoom b Select TRIMMING with B then press z c Select the image size with v V then press z The recording folder appears at the upper right of the screen The image is recorded and the image on the screen returns to the normal size after recording The trimmed image is recorded as the newest file in the selected recording folder and the original image is retained The quality ...

Page 68: ...s back all images stored in the Memory Stick REPEAT ON Plays back images in a continuous loop OFF After all the images have been played back the slide show ends d Select START with V B then press z The slide show begins To cancel the slide show setting Select CANCEL in step 3 To stop slide show playback Press z select EXIT with B then press z again To skip to the next previous image during the sli...

Page 69: ...en press z d Select with v V then rotate the image with b B e Select OK with v V then press z The rotated image is written over the original image To cancel rotation Select CANCEL in step 4 then press z You cannot rotate protected images and images recorded as movies MPEG MOVIE Clip Motion and Multi Burst images You may not be able to rotate images shot with other cameras When viewing images on a ...

Page 70: ...e e To continue and protect other images select the desired image with b B and select PROTECT with v then press z To cancel the protection Press z again in step 4 or 5 The indicator disappears In index nine image mode a Set the mode dial to then press to display the index nine image screen b Press MENU The menu appears c Select PROTECT with b B then press z d Select SELECT with b B then press z e ...

Page 71: ...s z To cancel all protection in the folder Select ALL IN FOLDER in step 4 and press z Select OFF then press z In index triple image mode a Set the mode dial to then press twice to display the index triple image screen b Display the image you want to protect in the center position with b B c Press MENU The menu appears d Select PROTECT with v V then press z The center image is protected The indicat...

Page 72: ...image is recorded as the newest file in the selected recording folder and the original image is retained You cannot change the size of movies MPEG MOVIE Clip Motion Multi Burst or TIFF images When you change from a small size to a large size the image quality deteriorates You cannot resize to an image size of 3 2 When you resize a 3 2 image the upper and lower black portions will be displayed on t...

Page 73: ... Press MENU The menu appears d Select DPOF with b B then press z The mark is marked on the displayed image e To continue and print other images select the desired image with b B and select DPOF with v then press z To unmark the mark Press z again in step 4 The mark disappears In index nine image mode a Set the mode dial to then press to display the index nine image screen b Press MENU The menu app...

Page 74: ...ess z Select OFF then press z In index triple image mode a Set the mode dial to then press twice to display the index triple image screen b Display the image you want to print in the center position with b B c Press MENU The menu appears d Select DPOF with v then press z The mark is marked on the center image e To print other images display the image you want to print in the center position with b...

Page 75: ...hooting The screen indicators are not recorded For a detailed description of the indicators see page 119 A histogram is not displayed Shooting close ups Macro Set the mode dial to and follow the procedure on page 24 Using the self timer Set the mode dial to and follow the procedure on page 25 The flash does not function when shooting movies The date and time are not superimposed onto movies When s...

Page 76: ...ing playback To return to the normal playback press z High quality movies 320 HQX Movies are displayed over the entire screen Indicators during viewing movies Each time you press DISPLAY the status of the screen changes as follows Indicators off t All indicators on For a detailed description of the indicators see page 120 A histogram is not displayed The procedure for viewing movies on a TV is the...

Page 77: ...r images display the image to be deleted with b B and press z Then select OK with v and press z To cancel deletion Select EXIT in step 5 or 6 then press z In index nine image mode a Set the mode dial to then press to display an index nine image screen b Press MENU The menu appears c Select DELETE with b B then press z d Select SELECT with b B then press z e Select the image you want to delete with...

Page 78: ...he mode dial to then press twice to display an index triple image screen b Display the image you want to delete in the center position with b B c Press MENU The menu appears d Select DELETE with v V then press z The image has not yet been deleted at this point e Select OK with v then press z MEMORY STICK ACCESS appears on the screen When the message disappears the middle positioned image has been ...

Page 79: ...eleted and that number is skipped Example Cutting a file numbered 101_0002 Cutting movies a Set the mode dial to b Select the movie you want to cut using b B c Press MENU The menu appears d Select DIVIDE with B then press z Next select OK with v then press z The playback of the movie starts 1 2 101_0002 101_0003 3 101_0001 1 2 3 A B 101_0002 101_0004 1 2 3 B A 101_0005 1 3 2 101_0006 101_0004 101_...

Page 80: ...ppears on the screen again The cut movie are recorded as the newest files in the selected recording folder You cannot cut the following files Clip Motion files Multi Burst files Still image files MPEG movie files not long enough to cut Protected MPEG movie files You cannot restore files once you cut them The original file is deleted when you cut it Deleting unnecessary portions of movies a Cut an ...

Page 81: ...s the NORMAL mode Compatible only with Windows XP When connected to a computer only the data in the folder selected by the camera is copied to the computer To select a folder perform the procedure from step 2 on page 66 Communication with your computer When your computer resumes from the suspend or sleep mode communication between your camera and your computer may not recover at the same time When...

Page 82: ...n screen appears click Next The USB driver installation starts When the installation is completed the screen informs you of completion d Click Yes I want to restart my computer now then click Finish Your computer restarts Installing Image Transfer You can use the Image Transfer software to copy images to your computer automatically when you connect the camera to your computer with the supplied USB...

Page 83: ...program folder then click Next e Confirm if the checkbox is checked on the Image Transfer Settings screen then click Next When the installation is completed the screen informs you of completion f Click Finish The InstallShield Wizard screen closes The USB driver is needed in order to use Image Transfer If the necessary driver is not already installed on your computer a screen that asks if you want...

Page 84: ...mplete the Read Me text appears Read the text then close the window by clicking in the upper right corner of the screen After that click Finish on the install screen to close the install screen If DirectX8 0a or a later version is not installed in your computer the Information screen appears Follow the procedure on the screen d Remove the CD ROM Connecting your camera to your computer a Insert the...

Page 85: ...ws 2000 Me or XP users 1 Double click on the tasktray 2 Click Sony DSC then click Stop 3 Confirm the device on the confirmation screen then click OK 4 Click OK This step is unnecessary for Windows XP users 5 Disconnect the USB cable remove the Memory Stick or turn off the power For Windows 98 or 98SE users Perform only step 5 above Copying images using Image Transfer Windows 98 98SE 2000 Me When y...

Page 86: ... If you select Settings when starting up Image Transfer you can only change Basic To return to the standard settings click Restore defaults Copying images without using Image Transfer Windows 98 98SE 2000 Me If you do not set to launch Image Transfer automatically you can copy images as following procedure a Double click My Computer then double click Removable Disk The contents of the Memory Stick...

Page 87: ...ndows XP copy wizard a Click Copy pictures to a folder on my computer using Microsoft Scanner and Camera Wizard then click OK The Scanner and Camera Wizard screen appears b Click Next The images stored on the Memory Stick are displayed c Click the checkbox of images that you do not want to copy to your computer and remove the checkmark then click Next The Picture Name and Destination screen appear...

Page 88: ...inations and file names Image files recorded with your camera are grouped as folders in the Memory Stick by recording modes Example For Windows Me users Data in the 100MSDCF or MSSONY folders is data recorded using a camera without the folder creation function These folders are for playback only and your camera cannot record images in these folders Folder containing image files recorded using a ca...

Page 89: ... 101MSDCF up to 999MSDCF DSC0ssss JPG Still image files shot in Normal mode Exposure Bracket mode page 53 BURST 3 mode page 59 Multi Burst mode page 58 Still image files recorded simultaneously in TIFF mode page 60 E MAIL mode page 61 VOICE mode page 61 DSC0ssss JPE Small size image files shot in E MAIL mode page 61 DSC0ssss MPG Audio files shot in VOICE mode page 61 DSC0ssss TIF Uncompressed imag...

Page 90: ...ter To select a folder perform the procedure from step 2 on page 66 Communication with your computer When your computer resumes from the suspend or sleep mode communication between your camera and your computer may not recover at the same time When a USB connector is not provided on your computer When neither a USB connector nor a Memory Stick slot is provided you can copy images using an addition...

Page 91: ...OM for details about the installation method or see the software s help files for the operation method PIXELA ImageMixer is not compatible with Mac OS X For Mac OS X users If the There is no application available to open the document DSC0ssss JPE screen appears when you click an E mail mode image file make the following setting The screen display may differ depending on the version 1 Click Choose ...

Page 92: ...om Cause Solution You cannot charge the battery pack The camera is turned on p Turn the camera off page 15 The battery pack cannot be installed The battery pack is not installed correctly p Install the battery pack while pushing the battery eject lever up using the front edge of the battery pack page 11 The CHG lamp flashes The battery pack is not installed correctly The battery pack has malfuncti...

Page 93: ...oting viewing images in an extremely cold location The battery pack is not charged enough The battery pack is dead page 115 p Charge the battery pack page 11 p Replace the battery pack with a new one You cannot turn on the camera The battery pack is not installed correctly The AC power adaptor is disconnected p Install the battery pack correctly page 11 p Properly connect the AC power adaptor page...

Page 94: ...2 and 110 Zoom does not work CONVERSION LENS in the SET UP settings is set to ON FOCUS switch is set to MANUAL p Set it to OFF pages 42 and 110 p Set the FOCUS switch to AUTO ZOOM page 23 Digital zoom does not function The digital zoom cannot be used when shooting a movie MPEG MOVIE DIGITAL ZOOM in the SET UP settings is set to OFF p Set it to ON pages 42 and 110 The image is too dark You are shoo...

Page 95: ... Set it to other modes Recording takes a long time NR slow shutter is activated p Set to a faster shutter speed than 1 25 second page 44 A sound is made if the NIGHTSHOT NIGHTFRAMING switch is changed The sound is made by the lens in operation The image colors are not correct NIGHTSHOT or NIGHTFRAMING is set p Set to z The lens makes a noise inside if the shutter button is lightly pressed while NI...

Page 96: ...to no indicator or forced flash page 26 p Cancel the setting page 29 p Set the flash to forced flash page 26 p Set it to other settings p Set it to OFF pages 42 and 111 p Set NIGHTSHOT NIGHTFRAMING to z or NIGHTFRAMING The macro function does not work The Landscape mode is selected for the Scene Selection function CONVERSION LENS in the SET UP settings is set to ON p Cancel the setting page 29 p S...

Page 97: ... computer p See page 98 Unknown beeps are heard from the camera while viewing a movie These beeps are heard when the auto focus is working p This is not a malfunction Set FOCUS switch to MANUAL page 48 The picture is noisy Your camera is placed near a TV or other equipment with a strong magnetic field p Move your camera away from the TV etc Symptom Cause Solution Your camera cannot delete an image...

Page 98: ...ra The USB driver is not installed p Turn on the camera page 15 p Use the AC power adaptor page 14 p Use the supplied USB cable page 84 p Disconnect the USB cable and connect it again firmly Make sure that USB MODE is displayed on the screen page 84 p Set it to NORMAL page 112 p Disconnect the USB cables except for the ones connected to the keyboard the mouse and your camera p Install the USB driv...

Page 99: ...lors or more Macintosh 800 600 dots or more 32 000 color or more Symptom Cause Solution Symptom Cause Solution You cannot insert a Memory Stick You are inserting it backwards p Insert it from the right side page 18 You cannot record on a Memory Stick The write protect switch on the Memory Stick is set to the LOCK position The Memory Stick is full p Set it to the recording position page 114 p Delet...

Page 100: ... Remove the battery pack then install it again after about one minute and turn on the camera If the functions still do not work press the RESET button located inside the battery Memory Stick cover with a fine tipped object then turn the power on again When you press the RESET button all settings including the date and time are cleared You cannot identify an indicator on the screen p Check the indi...

Page 101: ...PACE The capacity of the Memory Stick is insufficient You cannot record images Delete unnecessary images page 37 CANNOT CREATE MORE FOLDERS You have reached the maximum number of folders that can be created page 64 CANNOT RECORD The camera cannot record images in the selected folder Select a different folder page 65 NO FILE IN THIS FOLDER No images have been recorded in this folder You inserted a ...

Page 102: ...wise secure the camera in place NIGHT SHOT An operation that is not valid while NIGHTSHOT is set is attempted NIGHT FRAMING An operation that is not valid while NIGHTFRAMING is set is attempted NIGHT SHOT IS INVALID The mode dial is set to a position other than or while NIGHTSHOT is set CONVERSION LENS in the SET UP settings is set to ON NIGHT FRAMING IS INVALID The mode dial is set to a position ...

Page 103: ...ve actions a few times contact your Sony dealer or local authorized Sony service facility and inform them of the 5 digit code Example E 61 10 Code Cause Countermeasure C 32 ss There is trouble with your camera s hardware Turn the power off and on again page 15 C 13 ss The camera cannot read or write data on the Memory Stick Re insert the Memory Stick several times An unformatted Memory Stick is in...

Page 104: ...2560 1920 6 11 12 23 25 47 51 95 91 170 186 345 380 705 2560 3 2 6 11 12 23 25 47 51 95 91 170 186 345 380 705 2048 1536 10 18 20 36 40 73 81 146 145 255 296 518 604 1058 1280 960 24 44 49 89 98 179 197 359 340 595 691 1210 1411 2470 640 480 88 194 178 392 358 788 718 1580 1190 2381 2420 4841 4940 9881 16MB 32MB 64MB 128MB MSX 256 MSX 512 MSX 1G 2560 1920 0 0 1 1 3 4 7 8 13 14 27 29 56 60 2560 3 2...

Page 105: ...B 128MB MSX 256 MSX 512 MSX 1G NORMAL 88 178 358 718 1190 2420 4940 MOBILE 486 982 1971 3951 3571 7261 14821 16MB 32MB 64MB 128MB MSX 256 MSX 512 MSX 1G 320 HQX 42 87 176 354 641 1304 2663 320 240 174 352 708 1419 2567 5221 10657 160 112 673 1363 2740 5494 9935 20203 41239 16MB 32MB 64MB 128MB MSX 256 MSX 512 MSX 1G 1280 960 24 46 50 93 101 187 202 376 357 649 726 1320 1482 2694 ...

Page 106: ...ects the image size when shooting still images page 19 MODE REC MODE TIFF VOICE E MAIL EXP BRKTG BURST 3 xNORMAL Records a TIFF uncompressed file in addition to the JPEG file page 60 Records an audio file with a still image in addition to the JPEG file page 61 Records a small size 320 240 JPEG file in addition to the selected image size page 61 Records three images with the exposure value of each ...

Page 107: ...image quality page 31 MODE REC MODE TIFF VOICE E MAIL EXP BRKTG BURST 3 xNORMAL Records a TIFF uncompressed file in addition to the JPEG file page 60 Records an audio file with a still image in addition to the JPEG file page 61 Records a small size 320 240 JPEG file in addition to the selected image size page 61 Records three images with the exposure value of each image slightly shifted page 53 Re...

Page 108: ...h level higher than normal Normal setting Makes the flash level lower than normal PFX P EFFECT SOLARIZE SEPIA NEG ART xOFF Sets the image special effects page 62 SHARPNESS 2 1 x0 1 2 Adjusts the sharpness of the image The indicator appears except when the setting is 0 Item Setting Description INTERVAL 1 7 5 1 15 x1 30 NTSC 1 6 3 1 12 5 x1 25 PAL Selects the Multi Burst shutter interval in NTSC mod...

Page 109: ...ERVAL IMAGE REPEAT START CANCEL Sets the slide show interval page 68 Only in single image mode x3 sec 5 sec 10 sec 30 sec 1 min Sets the range of the playback images xFOLDER ALL Plays back images repeatedly xON OFF Starts the slide show Cancels the slide show RESIZE 2560 1920 2048 1536 1280 960 640 480 CANCEL Changes the recorded still image size page 72 Only in single image mode ROTATE counter cl...

Page 110: ...ted in movie MPEG MOVIE Clip Motion or Multi Burst mode Also the date and time appear only during playback and do not appear during recording DIGITAL ZOOM xON OFF Selects whether to use the digital zoom page 23 RED EYE REDUCTION ON xOFF Reduces the red eye phenomenon when using a flash page 26 HOLOGRAM AF xAUTO OFF Selects whether to emit hologram AF light Used when it is difficult to focus on the...

Page 111: ...F Sets when using a commercially available external flash page 63 ZOOM RING SETUP W T xT W Sets the direction in which the ring turns when you use the zoom function with the manual focus zoom ring page 23 Item Setting Description FORMAT OK CANCEL Formats the Memory Stick Note that formatting erases all the data recorded on a Memory Stick including even erasure protected images page 40 CREATE REC F...

Page 112: ...other bright locations but also uses up the battery charge faster BEEP SHUTTER xON OFF Turns on the shutter sound The shutter sound is heard when you press the shutter button Turns on the beep shutter sound when you press the control button shutter button Turns off the beep shutter sound Item Setting Description FILE NUMBER xSERIES RESET Assigns numbers to files in sequence even if the recording f...

Page 113: ...ki slope into a warmly heated room The camera is taken from an air conditioned room or car interior to the hot outdoors etc How to prevent moisture condensation When bringing the camera from a cold place to a warm place seal the camera in a plastic bag and allow it to adapt to conditions at the new location over a period of time about an hour If moisture condensation occurs Turn off the camera and...

Page 114: ... while reading or writing data Data may be corrupted in the following cases When the Memory Stick is removed or the camera is turned off during read or write operation When the Memory Stick is used in locations subject to static electricity or electrical noise We recommend backing up important data Do not attach any other material than the supplied label on the labeling position Attach the label i...

Page 115: ...6 F You may not be able to efficiently charge the battery pack outside of this temperature range Effective use of the battery pack Battery performance decreases in low temperature surroundings So the time that the battery pack can be used is shorter in cold places We recommend the following to ensure longer battery pack use Put the battery pack in a pocket close to your body to warm it up and inse...

Page 116: ... to a 35 mm still camera F2 0 2 4 Filter diameter 58 mm 2 3 8 inches Exposure control Automatic exposure Shutter speed priority Aperture priority Manual exposure Scene selection 4 modes White balance Automatic Daylight Cloudy Fluorescent Incandescent One push Data format DCF compliant Still images Exif Ver 2 2 JPEG compliant GIF for Clip Motion TIFF DPOF compatible Audio with still image MPEG1 com...

Page 117: ...g maximum protrusions Mass Approx 280 g 10 oz NP FM50 battery pack Used battery Lithium ion battery Maximum voltage DC 8 4 V Nominal voltage DC 7 2 V Capacity 8 5 Wh 1 180 mAh Operating temperature 0 C to 40 C 32 F to 104 F Dimensions Approx 38 2 20 5 55 6 mm 1 9 16 13 16 2 1 4 inches w h d Mass Approx 76 g 3 oz Accessories AC L10A L10B AC power adaptor Power cord mains lead USB cable NP FM50 batt...

Page 118: ...or 55 I Focus distance indicator 48 J Histogram indicator 50 K Low battery warning indicator 12 L AF range finder 46 M Spot metering cross hair 51 N Image size indicator 19 MODE ISO 2560 20 min SOLARIZE 101 30 1 2 3 4 5 6 7 8 9 0 qa qs qd qf qg qh qj qk ql w wa ws wf wd wh wg O Image quality indicator 31 P Recording folder indicator 64 Q Remaining number of recordable images indicator 32 104 Self ...

Page 119: ...1 J Image size indicator 75 K Recording time maximum recordable time indicator Self diagnosis display 103 L Recording folder indicator 64 M Remaining Memory Stick capacity indicator N Focus range indicator 46 O EV level indicator 49 P Macro indicator 24 Q Self timer indicator 25 R AF range finder 46 S Menu Guide menu 42 Pressing MENU switches the menu on off PFX IMAGE SIZE min SOLARIZE 60 STBY 00 ...

Page 120: ...Guide menu 42 When playing back moving images L Image size indicator 76 M Recording mode indicator 76 N Volume indicator 76 Playback indicator 76 O Playback bar 76 P Change folder indicator Playback folder indicator 66 Q Recording folder indicator 80 R Image number Number of images recorded in selected folder S Remaining Memory Stick capacity indicator T Counter 76 U Playback image 76 V Menu Guide...

Page 121: ... 82 ImageMixer 84 USB cable 84 USB driver 82 Control button 9 15 42 Conversion lens 110 Copying images 85 86 91 D Deleting images 37 77 Digital zoom 23 DISPLAY 22 DIVIDE 79 DPOF 72 E Editing still images Print DPOF mark 72 Protect 70 Resize 72 E mail 61 Enlarging an image 66 EV adjustment 49 EXPANDED FOCUS 48 111 Exposure bracket 53 F File file names 88 image file storage destinations 88 Flash ext...

Page 122: ...es that can be saved or shooting time 13 104 shooting images 75 viewing images on a screen 76 viewing images on your computer 88 MPEG MOVIE 75 MPG 89 Multi Burst 58 N NightFraming 56 NightShot 56 NR slow shutter 45 NTSC system 36 112 P PAL system 36 112 Picture effect 62 Power AC power adaptor 14 battery pack 11 on off 15 Precautions 113 Print DPOF mark 72 Protect 70 Q Quick Review 21 R Red eye re...

Page 123: ...l image viewing delete 37 index screen 34 playback zoom 67 rotate 69 single image screen 33 slide show 68 viewing images on a screen 33 viewing images on a TV screen 35 viewing images on your computer 88 Superimposing the date and time 28 T TIFF 60 Trimming 67 TV color system 35 U USB 81 85 Using your camera abroad 14 V Viewing images on a screen 33 76 Viewing images on your computer 88 Voice 61 W...

Page 124: ...pan 307804514 Printed on 100 recycled paper using VOC Volatile Organic Compound free vegetable oil based ink Additional information on this product and answers to frequent asked questions can be found at our Customer Support Website ...

Reviews: