13-GB
Printing still images
Even if you do not have a computer, you can
easily print still images by connecting your
camera via the Cyber-shot Station to a
PictBridge compliant printer.
• Refer to the operating instructions supplied
with the camera for details on the printer
settings, such as the number of printing
images, paper size, and USB setting.
• The available print functions may differ
depending on the printer.
1
Turn on your camera.
2
Set the USB mode on your camera.
– For further details, refer to the operating
instructions supplied with the camera.
3
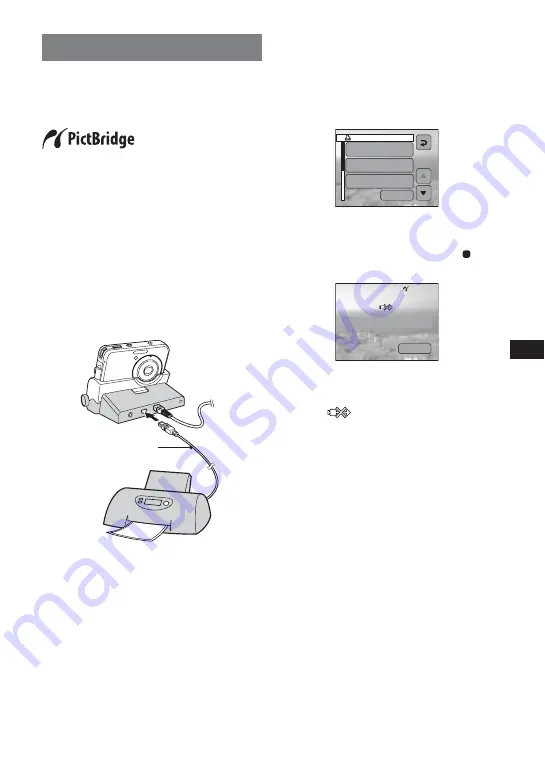
Connect the Cyber-shot Station to your
printer by using the supplied USB cable.
After the connection is established, the
image select screen appears.
*
About the image select, refer to the
operating instructions supplied with the
camera.
When the Cyber-shot Station is
communicating with your printer using the
USB cable, do not remove the camera from
the Cyber-shot Station. Removing the
camera may damage the image data.
For further details, refer to the operating
instructions supplied with the camera.
4
Press the PRINT button.
The print setting screen appears.
*
If you are using the DSC-N1, the image
select screen disappears at this point.
Press the Print button again.
*
The setting screen images shown below
are from the DSC-N1.
– Setting items that the printer does not
support cannot be displayed.
5
Select [OK] with
V
/
B
, then press .
The image is printed.
– When printing is completed, the screen
returns to the previous screen.
– Do not disconnect the USB cable while
the
(Not disconnect USB cable)
indicator is displayed on the screen.
To cancel printing
Select [Exit] in step 5.
USB cable
Quantity
1
Date
Off
Size
Default
OK
Printing
Exit


