Managing pictures on a Windows computer
20
9
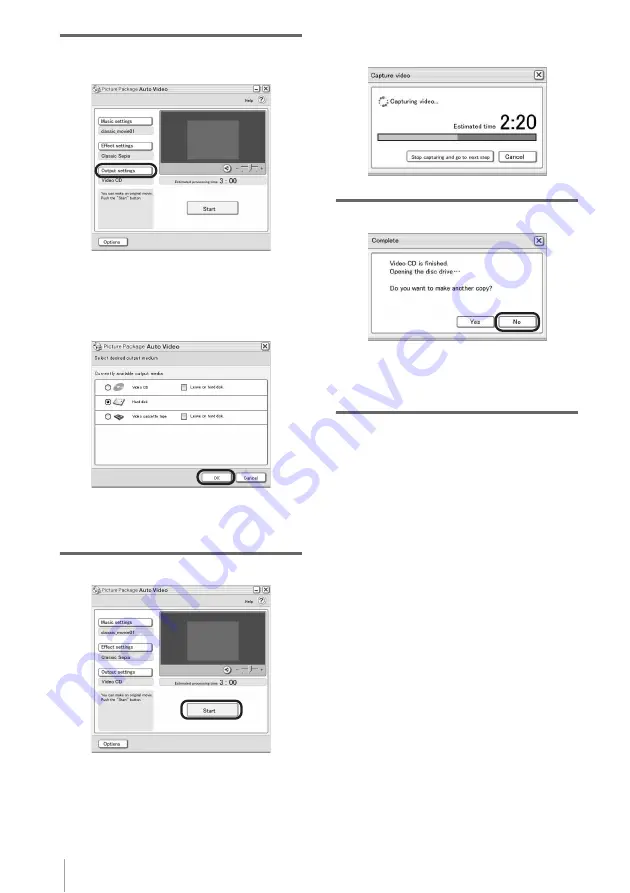
Click [Output settings], then select
where to store the images.
When you select [Video CD] for where to
store the images, place a new CD-R in the
disc drive. Select where to save images,
then click [OK].
.
b
Note
• CD-RWs cannot be used.
10
Click [Start].
The movie is automatically copied from
your camcorder and is edited with selected
music and effects. The remaining time
appears on the computer screen.
.
11
Click [No] when you want to finish.
.
To create another copy with the same
content, click [Yes], then place a new CD-
R in the disc drive.
b
Notes
• Any and all third party musical contents you may
acquire from CDs, the Internet or other sources are
the copyrighted work of the respective owners
thereof, and except to the extent protected by
applicable laws, you are not permitted to use any of
the third party musical contents. Please refer to “On
Copyrights” of “Read this first” above-mentioned
(p. 3) for further note on your use of such third party
musical contents.
• When you select a music file longer than 10 minutes,
the playback fades out automatically.
z
Tips
• When the recorded time of the movie on the tape is
longer than the selected music file, the movie is
edited automatically according to the length of the
music file.
• If you want to rewind to the beginning of a tape and
copy, click [Options] and check [Rewind the tape to
the beginning, then capture].
• If you saved a created movie on the hard disk, you
can view it with [Picture Package Viewer].
• If you select CD-R for where to save, you can view
the created video as a video CD. For details on
playback of video CDs, see page 26.


