background image

33

Other Features

Other Features

Generating a more
dynamic sound

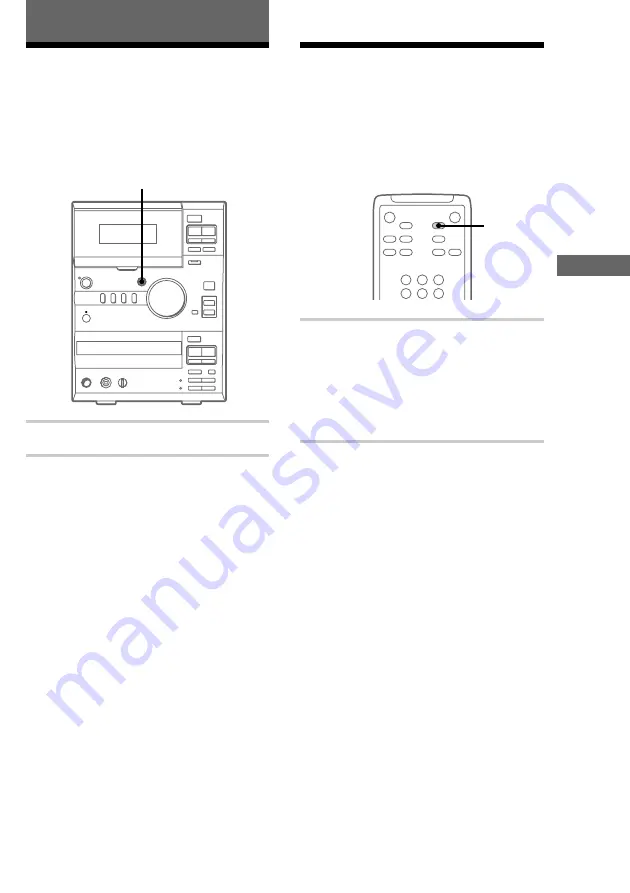
The Dynamic Sound Generator (DSG)
automatically enhances your music to produce a
more powerful sound.

Z

bB

x

m

M

X

z

Z

u

x

.

>

m

M

+

?/1

DSG

,

Press DSG.

To cancel the DSG

Press DSG again.

The Tape Deck/Other Features

Falling asleep to music

— Sleep Timer

The Sleep Timer function lets you specify a sleep
time, after which the system stops playing and
turns off automatically.  You can thus fall asleep
to music.

+

+

?/1

SLEEP

,

Press SLEEP.

Each time you press this button, the sleep
time changes as follows:

AUTO 

t

 90min 

t

 80min 

t

 70min

R

r

OFF

T

 10min ....

T

60min

When you choose “AUTO”

The system turns off after the current CD or tape
finishes playing (up to 100 minutes). The system
also turns off when you manually stop the CD or
tape.

To check the remaining sleep
time

Press SLEEP once.

To change the sleep time

Press SLEEP repeatedly until the time you want
appears.

To cancel the Sleep Timer
function

Press SLEEP repeatedly until “OFF” appears.

Summary of Contents for CMT-VP1

Page 1: ...Operating Instructions Micro HiFi Component System 3 867 409 12 1 1999 by Sony Corporation CMT VP1 ...

Page 2: ...censing Corporation This system can play the following discs VIDEO CDs Audio CDs Disc logo Contents Audio Video moving pictures Audio Disc size 12 cm 8 cm 12 cm 8 cm Play time 74 min 20 min 74 min 20 min Note on VIDEO CDs This system conforms to VIDEO CDs without PBC functions Ver 1 1 and VIDEO CDs with PBC functions Ver 2 0 of VIDEO CD standards You can enjoy two kinds of playback according to th...

Page 3: ...emaining playing time 23 Using the on screen display 24 Resuming VIDEO CD playback from the point last stopped at Resume Play 27 Playing CD tracks repeatedly Repeat Play 28 Playing CD tracks in random order Shuffle Play 28 Playing CD tracks in a favorite order Program Play 29 The Tape Deck Recording to a tape manually 30 Recording your favorite CD tracks to a tape Program Edit 31 Other Features Ge...

Page 4: ...shown below 3 L R 3 Note Keep the speaker cords away from the antennas to prevent noise 1 6 5 4 2 3 Getting Started Step 1 Hooking up the system Follow steps 1 through 6 of the procedure below to hook up your system using the supplied cords and accessories AM loop antenna FM antenna Right speaker Left speaker Red 3 Black Insert this portion AM loop antenna Extend the FM wire antenna horizontally ...

Page 5: ...our TV is NTSC Set SYSTEM SELECT to NTSC When this system is selected video images recorded in the PAL system will be stretched vertically and the upper and lower parts of the picture will be cut off If the color system of your TV is PAL Set SYSTEM SELECT to PAL When this system is selected video images recorded in the NTSC system will be stretched horizontally and the upper and lower parts of the...

Page 6: ... to prevent possible damage from battery leakage and corrosion Do not use a battery that is leaking If a battery has leaked clean the battery compartment and replace all the batteries Do not place the remote in an extremely hot or humid place Do not expose the remote sensor to direct sunlight or lighting apparatuses Doing so may cause a malfunction Using the remote You can use the shaded buttons s...

Page 7: ...TER The minute indication flashes AM1100 4 Press repeatedly to set the minute AM1110 5 Press ENTER The clock will begin operating To reset the system clock You can reset the system clock even when the system is on or off To reset the time while the system is on do the following 1 Press TIMER SET 2 Press repeatedly until SET CLOCK appears then press ENTER 3 Repeat step 2 to 5 in Step 2 Setting the ...

Page 8: ... flashes 1FM1005 STEREO TUNED MHz PRESET 6 Press l L on the remote repeatedly to select the preset number that you want 3FM1005 STEREO TUNED MHz PRESET 7 Press ENTER on the remote The station is stored to the selected preset number 8 Repeat steps 2 through 7 to preset other stations Step 3 Presetting radio stations Preset The system can store a total of 30 preset stations 20 for FM and 10 for AM T...

Page 9: ... system Pressing TUNING down turn the system back on When you change the interval all the AM preset stations are erased To change back to the original interval repeat the same procedure Connecting optional components This section explains how to connect a variety of components to your system in order to enhance it Refer to the instructions included with each component for details Connecting audio ...

Page 10: ...ting a VCR You can connect a VCR to the system with a commercially available audio cord Be sure to match the color coded pins to the appropriate jacks To listen to the VCR after connecting it press MD VIDEO until VIDEO appears By connecting the audio output jacks on your VCR to the VIDEO IN jacks using an optional audio cord you can enjoy powerful stereo sound with the video playback Moreover if y...

Page 11: ...able external FM antenna to the FM ANTENNA terminals as shown below You may also connect a TV antenna for the same purpose AM U FM75Ω U ANTENNA AM antenna For the AM antenna use a 6 to 15 meter 20 to 50 foot horizontally extended insulated wire with one end connected to the AM ANTENNA terminals as shown below Leave the supplied AM loop antenna connected AM U FM75Ω U ANTENNA IEC standard socket con...

Page 12: ...e the disc tray 4 Press CD CD appears 5 Press CD u Playback starts 5 041 Basic Operations Playing a VIDEO CD You can play both VIDEO CDs without PBC functions Ver 1 1 and VIDEO CDs with PBC functions Ver 2 0 You can enjoy two kinds of playback according to the disc type To turn on the system press 1 Z bB x m M X z Z u x m M 1 CD x PREV NEXT CD m M 5 4 2 3 VOLUME 2 O 1 H S s hH l L z j J 6 TV 1 SLO...

Page 13: ... point in a track or scene 2 Lock Search function During playback press CD m or CD M down until the system starts searching 1 Press once to start searching 2 Press again to increase the search speed Each time you press the button the search speed changes as follows 1 slow t 2 normal t 3 high t 1 slow 3 Press CD u to stop searching at the desired point Remove or replace the VIDEO CD Press CD EJECT ...

Page 14: ...use press CD to go back or CD to go forward repeatedly until you find the desired track Locate a desired point in a track Lock Search function During playback press CD m or CD M down until the system starts searching Press CD u to stop searching at the desired point Remove or replace the CD Press CD EJECT Z Adjust the volume Turn VOLUME Tips If you press CD u when the power is off the system autom...

Page 15: ... stands by for recording and the CD VIDEO CD stands by for playback and appear and the CD SYNC indicator lights up 6 Press DIR MODE on the remote repeatedly to select to record on one side of the tape or or to record on both sides 7 Press TAPE X Recording starts To stop recording Press TAPE x Tips To record with the Dolby NR system on press DOLBY NR on the remote before step 7 appears To start rec...

Page 16: ...Press TUNER TUNER appears 2 Press TUNER BAND to select FM or AM 3 Press TUNING MODE repeatedly until PRESET appears 4 Press TUNING repeatedly to display the preset number of the desired station 3FM1005 STEREO TUNED MHz PRESET Preset number Frequency To Do this Turn off the radio Press 1 Adjust the volume Turn VOLUME To tune in a non preset radio station In step 3 press TUNING MODE repeatedly until...

Page 17: ...s on and tunes in the station last received One Touch Play To switch to the radio while listening to another source press TUNER BAND Automatic Source Selection If there is static during an FM broadcast press STEREO MONO on the remote until MONO appears After MONO scrolls across the display the frequency will appear The broadcast will no longer be in stereo but the reception will improve Press this...

Page 18: ... CD TAPE REC CD SYNC BAND TUNING VOLUME STANDBY DSG 6 Press REC z The tape stands by for recording and appear 7 Press DIR MODE on the remote repeatedly to select to record on one side of the tape or or to record on both sides 8 Press TAPE X Recording starts To stop recording Press TAPE x Tips To record from a non preset station press TUNING MODE repeatedly in step 3 until AUTO and PRESET disappear...

Page 19: ...and insert a recorded tape into the cassette holder With the side you want to play facing towards you A bB x m M X z 1 EJECT MD VIDEO TUNER CD TAPE REC CD SYNC BAND TUNING VOLUME STANDBY DSG 2 Press TAPE TAPE appears 3 Press DIR MODE on the remote repeatedly to select to play one side of the tape to play both sides or to play both sides repeatedly The tape automatically stops after playing back fi...

Page 20: ...laying the tape if there is a tape in the holder One Touch Play To switch to the tape while listening to another source press TAPE nN while the tape is stopped The tape will automatically start playing Automatic Source Selection To play a tape recorded with the Dolby NR system press DOLBY NR on the remote before step 4 appears Turn VOLUME Pause Press TAPE X Press again to resume playback Fast forw...

Page 21: ...e volume by turning MIC VOL When using VIDEO CDs Turn on your TV and switch it to the appropriate video input Refer to the operating instructions supplied with your TV for details When you are done Turn MIC VOL to 0 and disconnect the microphone from MIC IN then press K PON MPX on the remote repeatedly so that STEREO appears Note With some songs the volume of vocals may not be suppressed when you ...

Page 22: ... VIDEO CD PBC Lights up during PBC playback of a PBC compatible VIDEO CD Ver 2 0 When the PBC functions are not used see below PBC goes off 2 Press CD repeatedly to select the number that you want from the menu then press SELECT 3 Follow the menu instructions to enjoy interactive playback To Do this Stop playback Press CD x See the rest of a menu Press NEXT Go back to the top of a menu Press PREV ...

Page 23: ...ing playing time of the track r Remaining playing time of the entire CD VIDEO CD r Clock display VIDEO CD with PBC functions Ver 2 0 Elapsed playing time of the current track Y Clock display This may not appear when displaying still images etc Tips When appears on the TV screen you have pressed an invalid button Press a button indicated by the instructions on the menu screen When you press NEXT wh...

Page 24: ...tion of the disc by superimposing a display on top of the TV image 1 ON SCREEN Press ON SCREEN Each time you press this button the on screen display changes as follows ON SCREEN ON Y ON SCREEN OFF ON SCREEN display information During playback of an audio CD except during Program Play 3 1 2 6 C D P L A Y C O N T I N U E 3 4 5 6 7 8 9 R E P E A T 1 2 1 4 3 1 Current track number and elapsed playing ...

Page 25: ...e or no display 5 Karaoke mode or no display 6 KEY CONTROL 2 8 0 8 While a VIDEO CD is stopped except during Program Play 9 2 9 4 8 V C D S T O P C O N T I N U E R E S U M E 1 2 3 4 5 6 7 8 9 P B C O F F R E P E A T 1 2 1 6 4 3 5 1 Total number of tracks and total playing time of disc 2 Play mode 3 PBC OFF 4 REPEAT mode or no display 5 RESUME or no display 6 Music calendar When the PBC functions a...

Page 26: ... a VIDEO CD with PBC functions While a VIDEO CD with PBC functions is stopped 9 4 9 1 2 V C D S T O P C O N T I N U E P B C O N 2 1 3 1 Total number of tracks and total playing time of disc 2 Play mode 3 PBC ON PBC ON is displayed for a VIDEO CD with PBC functions ON SCREEN OFF No display Notes Normally select the display mode set to ON SCREEN ON When you select ON SCREEN OFF you cannot check the ...

Page 27: ...creen If RESUME does not appear Resume Play is not available 2 Press CD u Playback starts from the point you stopped the VIDEO CD in step 1 To view from the beginning of the VIDEO CD When RESUME appears in the display press CD x then press CD u Notes Resume Play is not available in Shuffle or Program Play or during PBC playback of a VIDEO CD with PBC functions Ver 2 0 Depending on where you stoppe...

Page 28: ...eatedly until REPEAT 1 appears To cancel Repeat Play Press REPEAT repeatedly until REPEAT and REPEAT 1 disappear Playing CD tracks in random order Shuffle Play You can use this function to playback all the tracks on a CD in random order Z bB x m M X z Z u x m M 1 CD 2 1 3 1 Press CD CD appears 2 Press PLAY MODE repeatedly until SHUFFLE appears 3 Press CD u Shuffle Play starts appears while the nex...

Page 29: ...ogrammed 5 To program additional tracks repeat steps 3 and 4 6 Press CD u Program Play starts The tracks play in the order that they were programmed To cancel Program Play Press PLAY MODE repeatedly until PGM disappears To Do this Selected track number Total playing time Add a track to the end of the program Do steps 3 and 4 with Program Play stopped Erase the entire program Press CD x with Progra...

Page 30: ...nt to record from CD To record from the CD VIDEO CD TUNER To record from the radio MD VIDEO To record from optional component 3 Press REC z The tape stands by for recording and appear 4 Press DIR MODE on the remote repeatedly to select to record on one side of the tape or or to record on both sides 5 Press TAPE X Recording starts 6 Start playing the source you want to record from To Press Stop rec...

Page 31: ...re disabled during Program Play Z bB x m M X z Z u x m M 1 5 7 6 3 11 9 4 1 2 TAPE x 2 O H S s hH l L z j J 6 10 DOLBY NR 1 Press CD EJECT Z and place a CD 2 Press CD EJECT Z again to close the disc tray 3 Press TAPE EJECT Z and insert a recordable tape 4 Press CD CD appears 5 Press PLAY MODE repeatedly until PGM appears 6 Press CD or CD repeatedly until the desired track number appears 3 243 PGM ...

Page 32: ...e repeatedly to select to record on one side of the tape or or to record on both sides 11 Press TAPE X Recording starts To stop recording Press TAPE x To cancel Program Edit Press PLAY MODE repeatedly until PGM disappears Tips To record with the Dolby NR system on press DOLBY NR on the remote before step 11 appears To start recording on the side facing away from you after doing step 9 press TAPE n...

Page 33: ...s playing and turns off automatically You can thus fall asleep to music 1 SLEEP Press SLEEP Each time you press this button the sleep time changes as follows AUTO t 90min t 80min t 70min R r OFF T 10min T 60min When you choose AUTO The system turns off after the current CD or tape finishes playing up to 100 minutes The system also turns off when you manually stop the CD or tape To check the remain...

Page 34: ... want appears Each time you press the button the display changes as follows t TUNER Tt CD T t TAPE T Waking up to music Daily Timer By setting the Daily Timer you can make the system automatically turn on and off at specified times To use this function make sure that you have set the system clock correctly see Step 2 Setting the time on page 7 2 O 1 H S s hH l L z j J 6 5 6 7 9 2 10 3 TIMER SELECT...

Page 35: ...s Press TIMER SELECT repeatedly until c DAILY and c REC disappear then press TIMER SELECT repeatedly until c DAILY appears again The preset items appear in turn To turn off the Daily Timer Press TIMER SELECT repeatedly until c DAILY disappears To turn the timer on again press TIMER SELECT repeatedly until c DAILY appears then press 1 to turn off the system Tip Once you set the Daily Timer the time...

Page 36: ...LECT repeatedly until c REC appears again The preset items appear in turn To turn off the REC Timer Press TIMER SELECT repeatedly until c REC disappears To turn the timer on again press TIMER SELECT repeatedly until c REC appears then press 1 to turn off the system Tip Once you set the REC Timer the time settings will remain in the system s memory until you change them even when you turn the syste...

Page 37: ...r the system will not operate properly Remove the CD and leave the system turned on for about an hour until the moisture evaporates When moving the unit remove any disc that may be on the disc tray If you have any questions or problems concerning your system please consult your nearest Sony dealer Notes on CDs Before playing a CD clean the CD surface with a cleaning cloth Wipe the CD from the cent...

Page 38: ... entangled in the tape deck s playing mechanism Cleaning the tape heads Clean the tape heads after every 10 hours of use When the tape heads become dirty the sound becomes distorted the sound level decreases the sound drops out the tape does not erase completely the tape does not record Make sure to clean the tape heads before making an important recording or after playing an old tape Use a commer...

Page 39: ... unit You are not pointing the remote in the direction of the system s sensor The batteries in the remote have run down Replace the batteries Make sure that the batteries are inserted correctly Speakers Sound comes from only one channel or the left and right volumes are unbalanced Check the speaker connections and placement VIDEO CD CD Player There is no picture Check that the system is connected ...

Page 40: ...s RMS power output reference 25 25 W 6 ohms at 1 kHz 10 THD The following measured at 220 V AC 60 Hz DIN power output rated 18 18 W 6 ohms at 1 kHz DIN Continuous RMS power output reference 23 23 W 6 ohms at 1 kHz 10 THD Inputs MD IN phono jacks Sensitivity 500 mV impedance 47 kilohms VIDEO IN phono jacks Sensitivity 250 mV impedance 47 kilohms MIC phone jack sensitivity 1 mV impedance 10 kilohms ...

Page 41: ... with the tuning interval set at 10 kHz 531 1 602 kHz with the tuning interval set at 9 kHz Antenna AM loop antenna external antenna terminal Intermediate frequency 450 kHz Speakers Speaker system Two way bass reflex system magnetically shielded type Speaker units 12 cm dia cone type woofer 2 5 cm dia semi dome type tweeter Rated impedance 6 ohms Dimensions w h d Approx 150 252 252 mm Mass Approx ...

Page 42: ...d on VIDEO CDs with PBC functions you can enjoy playing simple interactive software software with search functions and so on When you select a VIDEO CD with PBC functions on this system the PBC indicator lights up Track Sections of a picture or a music piece on disc Each track is assigned with a track number to help you locate the track you want VIDEO CD A compact disc which contains moving pictur...

Page 43: ...Starts playback Each time you press this button the tape reverses direction s Stops playback S Pauses playback j J Fast forwards or rewinds z Records to tapes DISPLAY VIDEO CD CD Changes the front panel display TAPE DIR MODE Selects or DOLBY NR Turns on or off the Dolby NR system Remote Button s TIMER Remote Button s Function SLEEP Selects a sleep time TIMER SET Sets the time Daily Timer or REC Ti...

Page 44: ... CD 12 tracks in random order Shuffle Play 28 tracks in the desired order Program Play 29 tracks repeatedly Repeat Play 28 Presetting radio stations 8 Preset Tuning 16 Program Edit 31 Program Play 29 Protecting recordings 37 R Radio stations presetting 8 tuning in 16 Recording a CD VIDEO CD 14 a radio program 17 a tape manually 30 CDs by specifying the track order 31 timer activated recording 35 R...

Reviews: