– 4 –
SECTION 2
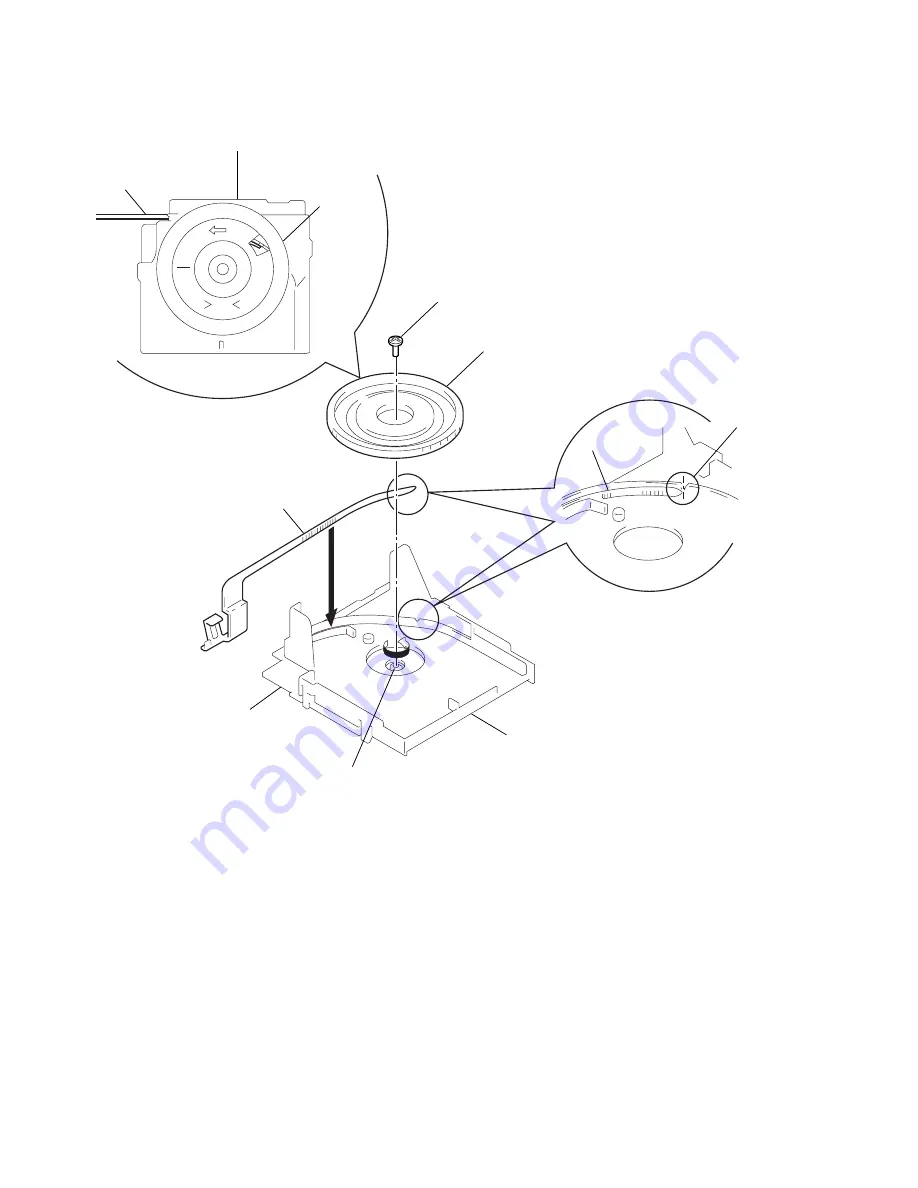
DIAL POINTER INSTALLATION
Note :
Follow the installation procedure in the numerical order given.
MIN
PS
5
Screw (+P 2.6x6)
4
Knob (tune)
3
Pointer
2
1
Notch
Chassis
Chassis
PVC shaft
Tuner board
Pointer
(Fig-1)
(Fig-2)
Knob (tune)
Pointer
1
Turn the PVC shaft fully counterclockwise.
2
Place the pointer in the chassis groove.
3
Line up the tip of the pointer with the notch in the chassis.
(Fig-1)
4
Attach so that the knob (Tune) is at the position show in Fig-2.
5
Fasten the knob (tune) to the PVC shaft with the screw.
Summary of Contents for CFS-K1066
Page 3: ... 3 SECTION 1 GENERAL LOCATION OF CONTROLS This section is extracted from instruction manual ...
Page 12: ......
Page 13: ......


