background image

8

CDX-S2010

2-348-403-11 (1)

H:\Data Disk\2348403111\234840311CDXS2010U\01US02CD-U.fm

masterpage:Left

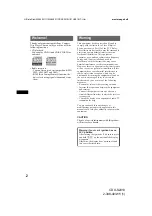
• Before playing, clean the 

discs with a commercially 
available cleaning cloth. Wipe 
each disc from the center out. 
Do not use solvents such as 
benzine, thinner, 
commercially available 
cleaners, or antistatic spray 
intended for analog discs.

Notes on CD-R/CD-RW discs

• Some CD-Rs/CD-RWs (depending on the 

equipment used for its recording or the 
condition of the disc) may not play on this unit.

• You cannot play a CD-R/a CD-RW that is not 

finalized.

If you have any questions or problems 
concerning your unit that are not covered in this 
manual, consult your nearest Sony dealer.

Maintenance

Fuse replacement

When replacing the fuse, be 
sure to use one matching the 
amperage rating stated on the 
original fuse. If the fuse 
blows, check the power 
connection and replace the 
fuse. If the fuse blows again 
after replacement, there may 
be an internal malfunction. In 
such a case, consult your 
nearest Sony dealer.

Cleaning the connectors

The unit may not function properly if the 
connectors between the unit and the front panel 
are not clean. In order to prevent this, detach the 
front panel (page 4) and clean the connectors 
with a cotton swab dipped in alcohol. Do not 
apply too much force. Otherwise, the connectors 
may be damaged.

Notes
• For safety, turn off the ignition before cleaning the 

connectors, and remove the key from the ignition 
switch.

• Never touch the connectors directly with your fingers 

or with any metal device.

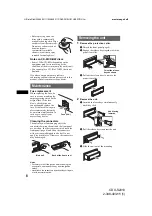
Removing the unit

1

Remove the protection collar.

1

Detach the front panel (page 4).

2

Engage the release keys together with the 
protection collar.

3

Pull out the release keys to remove the 
protection collar.

2

Remove the unit.

1

Insert both release keys simultaneously 
until they click.

2

Pull the release keys to unseat the unit.

3

Slide the unit out of the mounting.

Fuse (10A)

Main unit

Back of the front panel

Orient the release 
keys as shown.

Hook facing 
inwards.

Summary of Contents for CDX-S2010 - Fm/am Compact Disc Player

Page 1: ...henever you call upon your Sony dealer regarding this product Model No CDX S2010 Serial No CDX S2010 For installation and connections see the supplied installation connections manual En ce qui concerne l installation et les connexions consulter le manuel d installation raccordement fourni 2005 Sony Corporation CDX S2010 2 348 403 11 1 H Data Disk 2348403111 234840311CDXS2010U 00US 00COV U fm US FR...

Page 2: ...o radio communications However there is no guarantee that interference will not occur in a particular installation If this equipment does cause harmful interference to radio or television reception which can be determined by turning the equipment off and on the user is encouraged to try to correct the interference by one or more of the following measures Reorient or relocate the receiving antenna ...

Page 3: ...sic operations Main unit 5 Radio Storing and receiving stations 6 Storing automatically BTM 6 Storing manually 6 Receiving the stored stations 6 Tuning automatically 6 Other functions Changing the sound settings 6 Adjusting the sound characteristics BAL FAD SUB 6 Adjusting the equalizer curve EQ3 6 Adjusting setup items SET 7 Additional Information Precautions 7 Notes on discs 7 Maintenance 8 Remo...

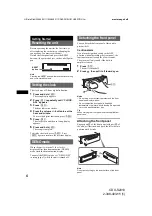
Page 4: ...he previous display DEMO mode When the unit is turned off the clock is displayed first then demonstration DEMO mode starts the demonstration display To cancel the DEMO mode set DEMO OFF in setup page 7 while the unit is turned off Detaching the front panel You can detach the front panel of this unit to prevent theft Caution alarm If you turn the ignition switch to the OFF position without detachin...

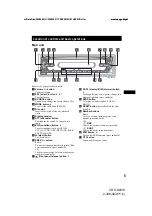
Page 5: ...GE ROCK CUSTOM or OFF i Z eject button To eject the disc j SEEK button Radio To tune in stations automatically press find a station manually press and hold CD To skip tracks press fast forward reverse a track press and hold k front panel release button 4 l DSPL display DIM dimmer button 4 To change display items press change the display brightness press and hold m SENS button To improve weak recep...

Page 6: ...SEEK to locate the approximate frequency then press SEEK repeatedly to fine adjust to the desired frequency manual tuning Other functions Changing the sound settings Adjusting the sound characteristics BAL FAD SUB You can adjust the balance fader and subwoofer volume 1 Press SEL repeatedly until BAL FAD or SUB appears The item changes as follows LOW 1 t MID 1 t HI 1 t BAL left right t FAD front re...

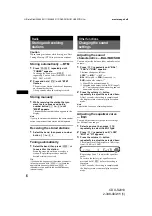
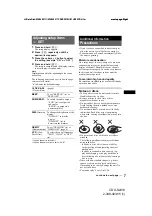
Page 7: ...to splash juice or other soft drinks onto the unit or discs Notes on discs To keep a disc clean do not touch its surface Handle the disc by its edge Keep your discs in their cases or disc magazines when not in use Do not subject discs to heat high temperature Avoid leaving them in a parked car or on a dashboard rear tray Do not attach labels or use discs with sticky ink residue Such discs may stop...

Page 8: ...blows again after replacement there may be an internal malfunction In such a case consult your nearest Sony dealer Cleaning the connectors The unit may not function properly if the connectors between the unit and the front panel are not clean In order to prevent this detach the front panel page 4 and clean the connectors with a cotton swab dipped in alcohol Do not apply too much force Otherwise th...

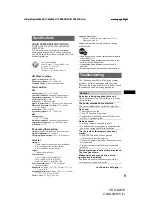
Page 9: ...soldering certain parts more than 80 Halogenated flame retardants are not used in the certain printed wiring boards Halogenated flame retardants are not used in cabinets Packaging cushions do not use polystyrene foam Troubleshooting The following checklist will help you remedy problems you may encounter with your unit Before going through the checklist below check the connection and operating proc...

Page 10: ...of the car antenna The auto antenna will not go up tCheck the connection of the power antenna control lead Check the frequency Preset tuning is not possible Store the correct frequency in the memory The broadcast signal is too weak Automatic tuning is not possible Setting of the local seek mode is not correct tTuning stops too frequently Press SENS until LOCAL ON appears tTuning does not stop at a...

Page 11: ...CDX S2010 2 348 403 11 1 masterpage None H Data Disk 2348403111 234840311CDXS2010U 01US02CD U fm ...

Page 12: ...dio Réception radio Vous pouvez mémoriser jusqu à 6 stations par bande de fréquences FM1 FM2 FM3 AM1 et AM2 Fonction BTM Best Tuning Memory mémorisation des meilleurs accords l appareil sélectionne des stations émettant un signal fort et les mémorise Avertissement si le contact de votre véhicule ne comporte pas de position ACC Après avoir coupé le moteur n oubliez pas de maintenir la touche OFF en...

Page 13: ...t mémorisation des stations 7 Mémorisation automatique des stations BTM 7 Mémorisation manuelle 7 Réception des stations mémorisées 7 Syntonisation automatique 7 Autres fonctions Modification des réglages du son 8 Réglage des caractéristiques du son BAL FAD SUB 8 Réglage de la courbe de l égaliseur EQ3 8 Réglage des paramètres de configuration SET 8 Informations complémentaires Précautions 9 Remar...

Page 14: ...che SEL et maintenez la enfoncée La configuration est terminée Appuyez sur DSPL pour afficher l horloge Appuyez de nouveau sur DSPL pour revenir à l écran précédant Mode DEMO Lorsque l appareil est hors tension l horloge est affichée en premier puis l écran du mode de démonstration DEMO apparaît Pour annuler le mode DEMO réglez DEMO OFF en cours de réglage page 9 lors de la mise hors tension de l ...

Page 15: ...sk 2348403111 234840311CDXS2010U 02FR02CD U fm masterpage Right Installation de la façade Insérez la partie A de la façade dans la partie B de l appareil tel qu illustré puis poussez sur le côté gauche jusqu au déclic indiquant qu elle est en position Remarque Ne posez rien sur la face interne de la façade B A ...

Page 16: ...nt en appuyant ou de trouver une station manuellement en appuyant et en maintenant la touche enfoncée CD Saut de plages en appuyant avance ou retour rapide dans une plage en appuyant et en maintenant la touche enfoncée k Touche déverrouillage de la façade 4 l Touche DSPL affichage DIM régulateur de luminosité 4 Modification des rubriques d affichage en appuyant et de la luminosité de l affichage e...

Page 17: ...e réglage est mémorisé Mémorisation manuelle 1 Lorsque vous recevez la station que vous souhaitez mémoriser appuyez sur une touche numérique et maintenez la enfoncée 1 à 6 jusqu à ce que l indication MEM s affiche Le numéro de la touche apparaît dans la fenêtre d affichage Remarque Si vous essayez de mémoriser une autre station sur la même touche numérique la station mémorisée précédemment est rem...

Page 18: ...urs fois sur SEL jusqu à ce que LOW MID ou HI apparaisse 3 Appuyez plusieurs fois sur la touche de volume pour régler le paramètre sélectionné Le niveau du volume peut être réglé par incréments de 1 dB de 10 dB à 10 dB Répétez les étapes 2 et 3 pour régler la courbe de l égaliseur Pour restaurer la courbe par défaut de l égaliseur appuyez sur la touche SEL et maintenez la enfoncée avant la fin du ...

Page 19: ... touchez pas sa surface Saisissez le par les bords Rangez vos disques dans leur boîtier ou dans un chargeur lorsque vous ne vous en servez pas N exposez pas les disques à des températures élevées Évitez de les laisser dans un véhicule en stationnement ou sur le tableau de bord ou la plage arrière Ne collez pas d étiquettes sur les disques et n utilisez pas de disques rendus collants par de l encre...

Page 20: ...z des questions ou des problèmes concernant cet appareil qui ne sont pas abordés dans ce mode d emploi contactez votre détaillant Sony Entretien Remplacement du fusible Lorsque vous remplacez le fusible veillez à utiliser un fusible dont la capacité en ampères correspond à la valeur indiquée sur l ancien fusible Si le fusible fond vérifiez le branchement de l alimentation et remplacez le fusible S...

Page 21: ...tation caisson arrière de graves Borne de commande de relais d antenne électrique Borne de commande d amplificateur de puissance Entrée Borne d entrée de l antenne Commandes de tonalité Graves 10 dB à 60 Hz XPLOD Médiums 10 dB à 1 kHz XPLOD Aigus 10 dB à 10 kHz XPLOD Alimentation requise Batterie de véhicule 12 V CC masse négative Dimensions Environ 178 50 178 mm 7 1 8 2 7 1 8 po l h p Dimensions ...

Page 22: ... est défectueux ou sale Les CD R ou CD RW ne sont pas destinés à un usage audio page 10 Le son saute L appareil est mal installé tInstallez l appareil suivant un angle de moins de 45 dans un endroit stable du véhicule Le disque est défectueux ou sale Les touches de commande ne fonctionnent pas Impossible d éjecter le disque Appuyez sur la touche RESET page 4 Réception radio Impossible de capter de...

Page 23: ...ne peut pas être lu en raison de certains problèmes t Insérez un autre disque FAILURE Le raccordement des haut parleurs ou de l amplificateur est incorrect tReportez vous au guide Installation Connexions fourni avec cet appareil et vérifiez les raccordements L SEEK Le mode de recherche locale est activé en cours de recherche automatique des fréquences OFFSET Il se peut que l appareil soit défectue...

Page 24: ...03US 03BCO U fm masterpage Right CDX S2010 2 348 403 11 1 Sony Corporation Printed in China ...

Reviews: